
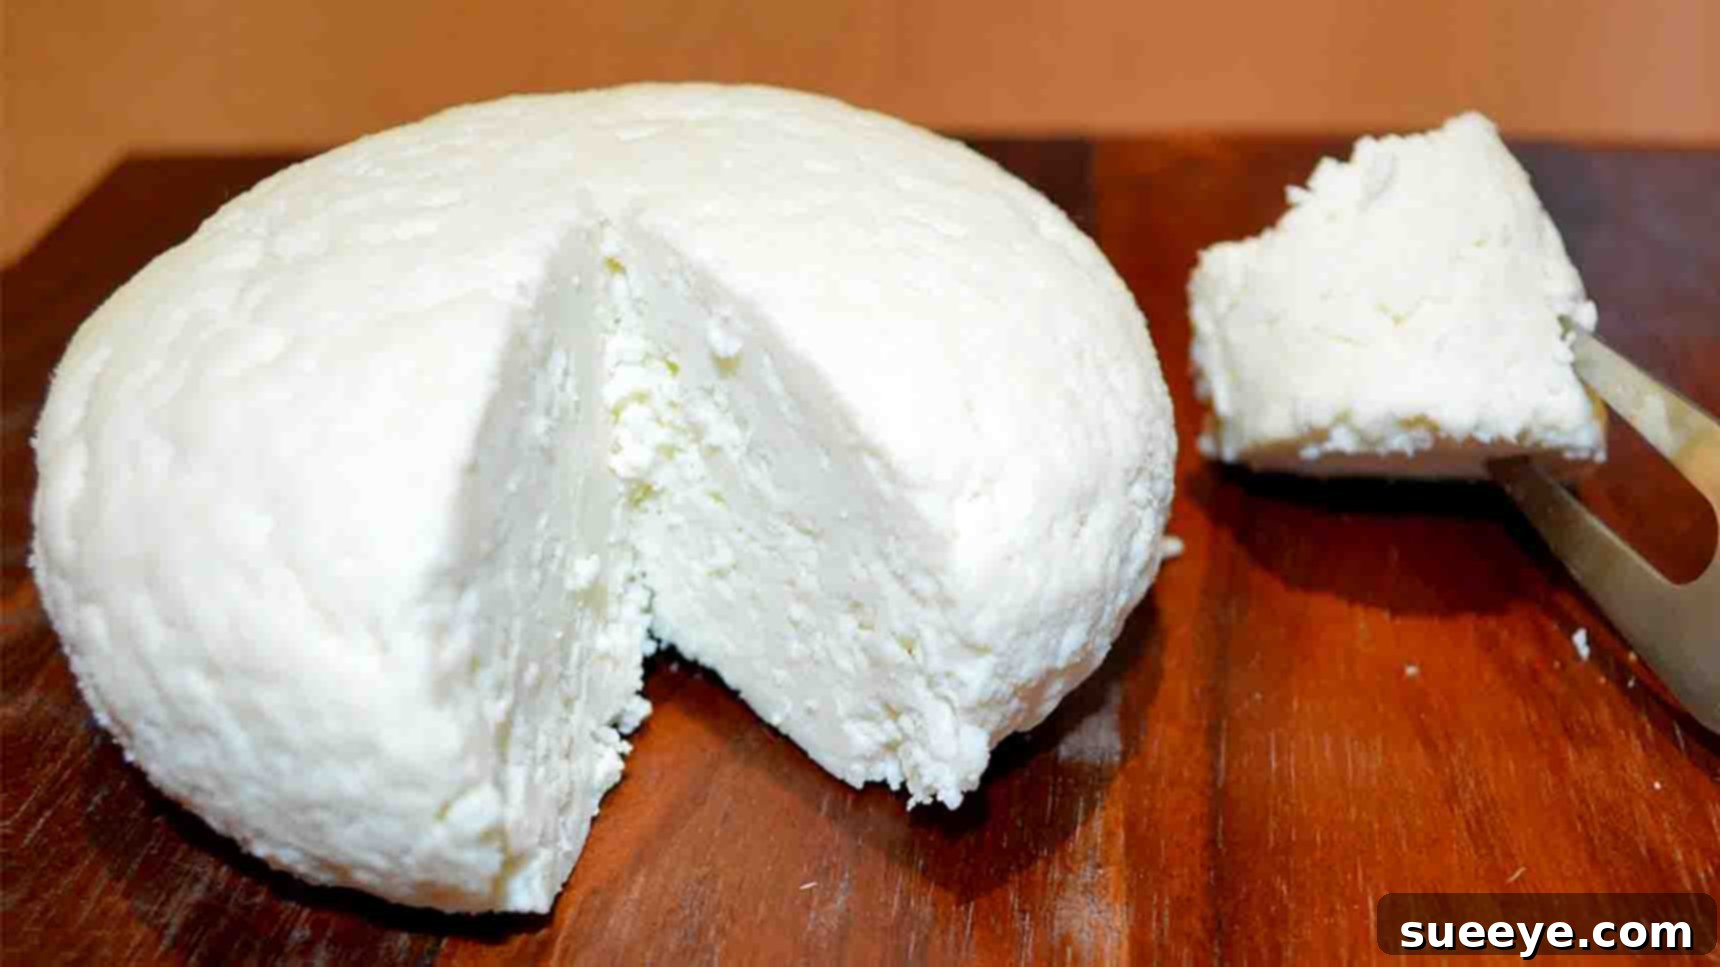
Master the Art of Homemade Cheese: An Easy 2-Ingredient Recipe
Have you ever dreamed of crafting your own fresh, delicious cheese right in your kitchen? The idea of homemade cheese might sound daunting, but with this incredibly simple recipe, it’s not only possible but also surprisingly easy! We’re thrilled to share a fantastic method from fixitsamo on YouTube that requires just two humble ingredients to create a batch of delightful, fresh cheese. This recipe isn’t just about making cheese; it’s about experiencing the magic of culinary transformation with minimal effort. Whether you plan to savor it immediately or store it for up to a week, this quick, simple, and utterly delicious cheese will undoubtedly become a staple in your home. Get ready to impress your taste buds and embrace the satisfaction of DIY cheesemaking!
The Simplicity of Two Ingredients: Why This Recipe Works
The beauty of this cheese recipe lies in its elegant simplicity. By combining fresh whole milk with a common acidic agent like white vinegar (or lemon/lime juice), we initiate a natural process called coagulation. The acid causes the casein proteins in the milk to clump together, separating into solid curds and liquid whey. This foundational technique has been used for centuries across various cultures to produce fresh cheeses like paneer, ricotta, and queso fresco. What you get is a pure, unadulterated cheese, free from the additives and preservatives often found in store-bought varieties. It’s a fantastic entry point into the world of cheesemaking, proving that you don’t need fancy equipment or complex procedures to create something truly special.
Ingredients You’ll Need
Gathering your ingredients for this homemade cheese recipe couldn’t be easier. You likely already have these staples in your pantry and refrigerator, making an impromptu cheese-making session entirely possible. The quality of your ingredients, especially the milk, will significantly impact the final texture and flavor of your cheese. Opt for the freshest whole milk you can find for the best results.
- 8 cups of Whole Milk: Whole milk is crucial here. Its higher fat content contributes to a richer, creamier cheese. Avoid skim or low-fat milk, as they will yield a tougher, less flavorful product due to insufficient casein and fat.
- 6 tablespoons of White Vinegar (or fresh lemon or lime juice): This is your acidic agent. White vinegar is excellent for a neutral flavor profile. However, fresh lemon juice or lime juice can also be used, imparting a subtle citrusy tang to your cheese, which can be a delightful variation. Choose what you prefer based on the desired flavor.
Essential Equipment for Homemade Cheese
While the ingredients are minimal, having the right kitchen tools will ensure a smooth and successful cheesemaking process. Most of these items are standard in any well-equipped kitchen, so you won’t need to invest in specialized gear.
- Large, Heavy-Bottomed Pot: A pot with a thick base is ideal for heating milk evenly and preventing scorching, which can ruin the flavor of your cheese. Choose one large enough to comfortably hold 8 cups of milk without boiling over.
- Long-Handled Spoon or Spatula: Essential for stirring the milk constantly to prevent it from sticking to the bottom of the pot and burning.
- Colander: Used to hold the cheesecloth and curds during the draining process.
- Cheesecloth: This is indispensable for separating the curds from the whey and for forming the cheese. A double layer provides extra filtration and strength. If you don’t have traditional cheesecloth, a clean, tightly woven linen cloth or even a fine mesh nut milk bag can work in a pinch.
- Measuring Cups and Spoons: For accurate measurement of milk and acid.
- Heat-Resistant Bowl: To collect the whey as it drains from the curds. This can be placed under the colander.
- Optional: Kitchen Thermometer: While not strictly necessary for this recipe, a thermometer can help you achieve precise temperatures, which is beneficial for consistent results in cheesemaking. Aim for around 180-190°F (82-88°C) before adding the acid.
Step-by-Step Directions: Crafting Your Cheese
Follow these instructions carefully to ensure a perfect batch of homemade cheese. Each step is designed to guide you through the transformation of simple milk into delectable cheese.
Step 1: Heating the Milk and Initiating Coagulation
In your large, heavy-bottomed pot, pour in the 8 cups of whole milk. Place the pot over medium-high heat. The goal here is to bring the milk to a gentle simmer, just before it reaches a rolling boil. During this heating process, it is absolutely crucial to stir the milk constantly. This continuous stirring prevents the milk proteins from scorching and sticking to the bottom of the pot, which can impart an unpleasant burnt flavor to your cheese. Keep an eye on the milk; you’ll know it’s simmering when small bubbles begin to form around the edges of the pot, and a delicate steam rises from the surface. Do not allow it to boil vigorously.
Once the milk reaches a simmer, reduce the heat to medium. Now, it’s time to add your chosen acidic agent. Slowly add the 6 tablespoons of white vinegar (or lemon/lime juice) a few tablespoons at a time, gently stirring as you pour. This gradual addition allows the acid to disperse evenly and initiate the separation process effectively. You will almost immediately notice a magical transformation: the milk will begin to separate into solid white clumps, known as curds, and a translucent, yellowish liquid, which is the whey. Continue stirring gently until all the vinegar has been incorporated and the separation is clearly visible.
After you have finished adding the white vinegar and the curds and whey have distinctly separated, remove the pot from the heat. Allow the mixture to sit undisturbed for approximately 15 minutes. This resting period is vital, as it gives the coagulation process ample time to complete, ensuring maximum curd formation and a cleaner separation from the whey. Patience at this stage will reward you with more cheese and a clearer whey.
Step 2: Draining and Forming Your Fresh Cheese
Prepare your draining station: place a colander over a large, heat-resistant bowl to catch the whey. Line the colander with a double layer of cheesecloth. Using a double layer ensures that even the smallest curds are captured and provides extra strength for pressing.
Carefully scoop out the separated curds from the pot using a slotted spoon and transfer them onto the prepared cheesecloth in the colander. Allow the curds to drain naturally for a few minutes, letting gravity do its initial work in separating the whey. Once the initial rapid draining slows, gently gather the corners of the cheesecloth to form a pouch around the curds. Begin to press the cheesecloth, applying moderate pressure to squeeze out the excess whey. Be firm but gentle to avoid forcing curds through the cloth. The more whey you remove, the firmer your final cheese will be.
After the initial pressing, you have a choice to make regarding your cheese’s texture. You can either hang the cheesecloth pouch to continue draining, or simply let it rest in the colander, pressing occasionally. Let it rest for a minimum of 1 hour, or until your cheese reaches your preferred texture. For a softer, spreadable cheese (similar to ricotta), an hour might be sufficient. If you prefer a firmer, more crumbly cheese (like paneer or queso fresco), you may need to let it drain and press for several hours, or even place a weighted plate on top of the cheesecloth-wrapped curds. Remember, the longer you wait and the more pressure you apply, the firmer and drier your cheese will become.
Once your cheese has achieved its desired texture, carefully unwrap it from the cheesecloth. At this point, you can immediately enjoy your fresh homemade cheese. It can be seasoned with a pinch of salt to enhance its flavor, or mixed with fresh herbs for an aromatic touch. If you’re not consuming it right away, transfer it to an airtight container and refrigerate it. It will keep well for up to 1 week.
Tips for Homemade Cheese Success
Achieving perfect homemade cheese is easy, but a few key tips can elevate your results and make the process even more enjoyable:
- Use Fresh, Whole Milk: The fresher the milk, the better the curds will form. Avoid ultra-pasteurized (UHT) milk if possible, as its proteins are altered and may not coagulate as effectively.
- Gentle Heating: Don’t rush the heating process. Medium-high heat with constant stirring is ideal to prevent scorching and ensure even heating.
- Slow Acid Addition: Adding the vinegar gradually allows the milk to react uniformly, promoting better curd formation.
- Don’t Over-Stir After Acid: Once the curds begin to form, minimal stirring is best to avoid breaking them up too much. Gentle stirs are fine.
- Experiment with Acid: While white vinegar offers a neutral flavor, lemon or lime juice can add a pleasant tang. Try different acids to see which flavor profile you prefer.
- Seasoning is Key: A pinch of salt after draining can dramatically enhance the flavor of your fresh cheese. You can also mix in herbs like chives, dill, or parsley, or even a dash of black pepper for extra zest.
- Don’t Waste the Whey: The liquid whey that drains from your curds is not waste! It’s packed with nutrients and can be used in smoothies, for baking (like in bread dough), to water plants, or even as a flavorful broth base.
Storing Your Homemade Cheese
Proper storage is essential to maintain the freshness and quality of your homemade cheese. Once your cheese is formed and has reached your desired texture, transfer it to an airtight container. Store it in the refrigerator. Your fresh cheese will typically remain delicious for up to one week. For best flavor and texture, try to consume it within 3-5 days. If you notice any off-smell or discoloration, it’s best to discard it.
Delicious Ways to Enjoy Your Fresh Cheese
The versatility of fresh homemade cheese is truly remarkable. Its mild, creamy flavor makes it a perfect addition to a wide array of dishes. Here are some inspiring ideas to savor your culinary creation:
- Simple Spreads: Spread it on warm toast, crackers, or bagels for a quick and satisfying snack. A drizzle of honey or a sprinkle of everything bagel seasoning can elevate the experience.
- Salad Topping: Crumble or cube your cheese over fresh green salads, pasta salads, or grain bowls for an added protein boost and creamy texture.
- Savory Fillings: Incorporate it into sandwiches, wraps, or even omelets and scrambled eggs. It melts beautifully and adds a lovely richness.
- Herb-Infused Delight: Mix your fresh cheese with finely chopped fresh herbs like chives, parsley, dill, or a blend of your favorites. Add a touch of garlic powder for an extra layer of flavor.
- Sweet Pairings: For a delightful dessert, serve it alongside fresh fruits like berries, melon, or figs. A sprinkle of cinnamon or a drizzle of maple syrup can turn it into a light, sweet treat.
- Indian and Mexican Inspired Dishes: If pressed firmly, your cheese will resemble paneer or queso fresco, making it excellent for curries, stir-fries, or crumbling over tacos and enchiladas.
Troubleshooting Common Issues
While this recipe is straightforward, sometimes things don’t go exactly as planned. Here are a couple of common issues and how to address them:
- Curds Not Forming: If your milk isn’t separating properly, it’s usually due to two main reasons: the milk wasn’t hot enough when the acid was added, or not enough acid was used. Bring the milk back to a gentle simmer and gradually add another tablespoon or two of vinegar or lemon juice, stirring gently, until separation occurs. Ensure you are using whole milk, as low-fat milk can struggle to form robust curds.
- Cheese is Too Soft/Too Firm: This comes down to draining time and pressure. If it’s too soft, you need to drain it longer and/or apply more pressure. If it’s too firm, you likely drained it for too long or pressed it too aggressively. For future batches, adjust your draining time to achieve your preferred consistency.