
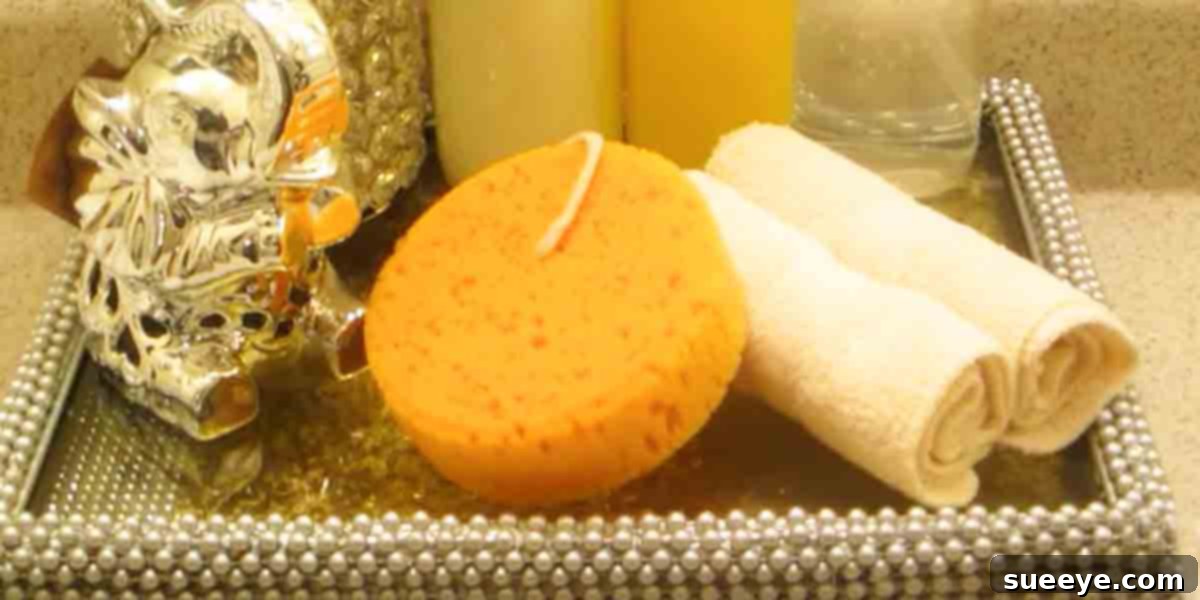
Craft Your Own Elegance: The Ultimate Guide to DIY Decorative Trays
Embark on a delightful journey of creativity with a DIY decorative tray project that promises to bring years of joy and functional beauty to your home. These charming trays are incredibly versatile, allowing for endless customization thanks to the vast array of amazing trims, beads, and materials available today. Whether you’re an experienced crafter or just starting, this easy project is perfect for adding a personal touch to your living space or creating thoughtful gifts.
Unleash Your Creativity with a Simple Project
A Touch of Personalized Chic for Any Space
Imagine a beautifully crafted tray, perfectly suited to your aesthetic, gracing your vanity, dresser, or coffee table. These trays are more than just functional; they are statements of personal style, transforming ordinary items like perfumes, jewelry, or remote controls into elegantly displayed collections. The beauty of a DIY project lies in its ability to reflect your unique taste, allowing you to choose every element from the base material to the intricate embellishments. Unlike mass-produced items, your handmade tray will possess a unique character and a story, making it a truly special addition to your home decor.
The Allure of DIY: Why Make Your Own?
Creating your own decorative tray offers a multitude of benefits beyond just saving money. Firstly, it provides an immense sense of accomplishment and the satisfaction of bringing a vision to life with your own hands. Secondly, it allows for unparalleled personalization. You can match your tray precisely to an existing color scheme, incorporate cherished materials, or design it to fit a specific purpose. Furthermore, DIY projects are wonderful stress-relievers, offering a creative outlet that can be both meditative and rewarding. It’s an opportunity to experiment, learn new techniques, and express yourself without limitations. This particular project is noted for its ease and quick turnaround, making it accessible even for those with limited crafting experience or time.
Discovering Endless Possibilities: Materials and Customization
The magic of a DIY decorative tray truly shines in the selection of materials. The base concept is often a simple one, like repurposing a picture frame, but the customization options are limitless. Let’s explore the components that come together to create these stunning pieces.
The Foundation: Choosing Your Base
The most common and straightforward base for this type of decorative tray is a simple picture frame. Various sizes and styles of frames can be used, from small 5×7 inch frames perfect for a single perfume bottle, to larger 8×10 or even 11×14 frames suitable for a collection of items. Consider frames made of wood, metal, or even sturdy plastic. You can spray paint the frame any color you desire to match your chosen aesthetic – be it a classic gold, a modern silver, a bold black, or a soft pastel. Beyond picture frames, other creative bases can include small wooden boxes with removed lids, mirror tiles, or even sturdy pieces of acrylic cut to size. The key is to select a base that provides a flat, stable surface for your tray’s contents.
Sparkling Surfaces: Decorating the Interior
Once you have your base, the interior surface is where you can truly let your personality sparkle. The original inspiration for this project used a silver rhinestone paper under the picture frame glass, creating a dazzling and luxurious effect. However, the options are vast:
- Rhinestone Paper or Fabric: Available in many colors and patterns, these add immediate glamour and texture.
- Patterned Paper: Scrapbook paper, decorative cardstock, or even wallpaper samples can introduce vibrant designs, subtle textures, or themed motifs.
- Mirrored Glass: Replacing the picture frame glass with a custom-cut mirror provides an elegant, reflective surface that enhances light and makes items pop.
- Glitter: For a truly sparkling effect, apply a layer of glitter with adhesive, then seal it to prevent shedding.
- Paint or Decoupage: Paint the inside of the glass or the backboard, or use decoupage techniques to adhere fabric swatches, lace, or magazine cutouts for a unique collage effect.
- Decorative Contact Paper: An easy and mess-free option that comes in various finishes like marble, wood grain, or metallic.
When working with a picture frame, you can place your chosen material directly onto the backboard, or for an added layer of protection and depth, place it underneath the existing glass, as was done in the inspired project.
Elevate Your Tray: Adding Feet and Handles
To give your tray a finished, elevated look, adding feet is essential. This not only makes the tray easier to pick up but also adds to its decorative appeal. Small beads, like the affordable ones sourced from a dollar store and then spray-painted silver, are an excellent choice. Other options include:
- Small Wooden Balls: Easily painted or stained to match your design.
- Furniture Knobs or Drawer Pulls: These offer a more substantial and often ornate foot, available in a wide range of styles and finishes.
- Rubber or Silicone Feet: For a more practical, non-slip solution, though less decorative.
- Small Plastic Caps or Beads: Can be found cheaply and customized with paint.
For attaching these feet, a strong adhesive like a hot glue gun or E6000 glue is usually sufficient. Place them strategically at the four corners of your tray for stability. While handles are less common for vanity-style trays, if you desire a tray that will be moved frequently, small decorative handles can be added to the sides, transforming it into a serving or carrying tray.
The Finishing Touch: Embellishments and Trims
The final layer of customization comes with trims and embellishments, which truly elevate your tray from simple craft to elegant decor. The edges of your tray are prime real estate for these decorative elements:
- Rhinestone Trims: From delicate single strands to wide, multi-row designs, rhinestone trims add instant sparkle and glamour.
- Pearl Strands: For a classic, elegant, and timeless look.
- Lace or Ribbon: Can add a soft, romantic, or vintage touch.
- Braided Cords or Rope: For a more rustic, bohemian, or nautical theme.
- Small Charms or Appliques: To add unique decorative details.
These trims are typically adhered along the outer edge of the frame using a strong craft glue or hot glue. Take your time to ensure clean lines and secure attachment, as these details significantly contribute to the overall finished quality of your DIY decorative tray.
Step-by-Step: Crafting Your Bespoke Vanity Tray
Inspiration from Experts: Learning and Adapting
Many fantastic resources, like Kira’s tutorial from StyleMyyKurves, offer visual, step-by-step guidance. While these tutorials provide an excellent roadmap, remember that they are starting points. The real fun comes from adapting the techniques and material suggestions to fit your personal style and needs. Don’t be afraid to experiment with different colors, textures, and embellishments to make the project truly your own.
What You’ll Need: A Comprehensive Material List
To recreate a beautiful decorative tray, similar to the one inspired by Kira’s tutorial, you’ll want to gather the following:
- A sturdy picture frame (any size, 8×10 or larger often works well for vanities)
- Silver rhinestone paper, patterned paper, or mirrored adhesive film for the interior surface
- Small decorative beads (at least 4 for feet), or small furniture knobs
- Silver spray paint (if your frame or beads aren’t already silver)
- Rhinestone trim, pearl trim, or decorative ribbon for the edges
- Strong craft adhesive (like E6000) or a hot glue gun with glue sticks
- Scissors or a craft knife
- Ruler or measuring tape
- Protective surface for painting (old newspaper or cardboard)
- Rubbing alcohol and a cloth (for cleaning surfaces)
The Creative Process: A General Guide
1. Prepare Your Base
Start by disassembling your picture frame. Remove the glass, matting (if any), and backboard. Clean the frame thoroughly with rubbing alcohol, especially if you plan to paint it, to ensure good adhesion. If desired, spray paint the frame. Apply thin, even coats in a well-ventilated area, allowing adequate drying time between coats. If you’re using beads for feet and they aren’t the desired color, spray paint them at this stage as well. Once completely dry, reassemble the frame without the backboard and glass for now.
2. Design the Interior
Measure the inside dimensions of your picture frame where the glass normally sits. Cut your chosen decorative paper (e.g., silver rhinestone paper) to these precise measurements. Carefully place the paper inside the frame opening. If you’re using the original glass, clean both sides thoroughly. Then, place the glass over the decorative paper. Secure the backboard into the frame, ensuring everything is snug. If you’re using adhesive film directly onto the backboard, apply it smoothly, avoiding air bubbles, and then secure the backboard back into the frame.
3. Attach the Supports
Turn your tray upside down. Apply a strong adhesive to the top of each bead or furniture knob you’ve selected for feet. Carefully position one foot at each corner of the tray’s underside, ensuring they are evenly spaced and aligned. Press firmly and hold for a few moments. Allow the glue to cure completely according to the manufacturer’s instructions before moving on to the next step, as this ensures stability.
4. Embellish and Refine
With the feet securely in place, turn your tray right side up. Now it’s time to add the decorative trim. Measure the perimeter of your tray’s frame. Cut your rhinestone trim, pearl strand, or ribbon to this length, plus a small overlap. Apply a thin line of adhesive along the outer edge of the frame, working in small sections. Carefully press the trim onto the glue, ensuring it’s straight and firmly adhered. Take care at the corners to create neat joins. Once the trim is fully applied, allow the adhesive to dry completely. Your stunning, personalized decorative tray is now ready to grace your space!
The Perfect Present: Gifting a Handmade Treasure
Thoughtful Touches for Every Occasion
Handmade decorative trays make truly exceptional gifts, perfect for a wide array of occasions. Their customizability allows you to tailor them specifically to the recipient’s taste and the event. Consider them for:
- Birthdays: A personal touch for a loved one.
- Valentine’s Day: A romantic and thoughtful gesture for a partner or dear friend.
- Mother’s Day: A beautiful and practical gift for mom.
- Housewarming Parties: A unique item to help a new homeowner organize and decorate their space.
- Bridesmaid Gifts: A coordinated set for your wedding party.
- Christmas or Holiday Gifts: A festive and elegant present.
- Thank You Gifts: A heartfelt token of appreciation.
The fact that you crafted it yourself adds immense value, conveying a level of care and thoughtfulness that store-bought items simply cannot replicate. Plus, because they can be “whipped out pretty quickly,” as noted in the original inspiration, they’re a fantastic option for last-minute gift ideas that still feel incredibly personal and special.
Personalization: Making It Uniquely Theirs
When creating a tray as a gift, consider the recipient’s favorite colors, their home decor style, or even specific hobbies. For instance, a tray for a friend who loves vintage items could incorporate lace and an antique-style frame. For a minimalist friend, a sleek, monochromatic design would be ideal. You can even include a small, personalized tag with a message, or present the tray with a few small items already arranged on it, like a lovely scented candle or a delicate piece of jewelry, to complete the gift package.
Beyond the Vanity: Versatile Uses for Your Decorative Tray
While often associated with perfumes and jewelry, the utility of these chic decorative trays extends far beyond the vanity or dresser. Indeed, few women wouldn’t appreciate such an elegant item, but its functionality is surprisingly broad, making it a valuable addition to almost any room in the house.
From Perfume Display to Practical Organizer
Initially, these trays shine as elegant organizers for personal items. They provide a designated, stylish space for:
- Perfume Collections: Displaying bottles beautifully and keeping them from cluttering the counter.
- Jewelry: Preventing tangles and keeping favorite pieces accessible on a nightstand or dresser.
- Cosmetics and Skincare: Grouping daily essentials for easy access.
- Hair Accessories: Tidying up hair ties, clips, and brushes.
However, their potential doesn’t stop there. Think about their role in other areas of your home:
- Entryway Organizer: A perfect spot for keys, mail, and sunglasses, preventing clutter on your console table.
- Coffee Table Accent: Holding remote controls, coasters, or a small decorative plant, bringing cohesion to your living room.
- Bathroom Counter: Organizing hand soaps, lotions, and small towels, creating a spa-like feel.
- Home Office: Keeping pens, paper clips, and small stationery items neatly contained on a desk.
- Guest Room: Providing a thoughtful spot for guest toiletries or a welcome note.
The elegance and functionality make these trays an indispensable home accessory, proving that a DIY project can be both beautiful and incredibly practical. It’s truly such a chic-looking item, no matter where it’s placed.
Conclusion: A Project That Keeps on Giving
Creating your own decorative tray is an incredibly rewarding experience. It’s a project that combines ease, affordability, and immense creative potential, resulting in a piece that is both functional and aesthetically pleasing. Whether you’re making one for yourself to organize your cherished items or crafting a thoughtful, personalized gift for a loved one, the journey of bringing these elegant trays to life is sure to be enjoyable. So, gather your materials, let your imagination guide you, and get busy making your own stunning decorative tray today!