
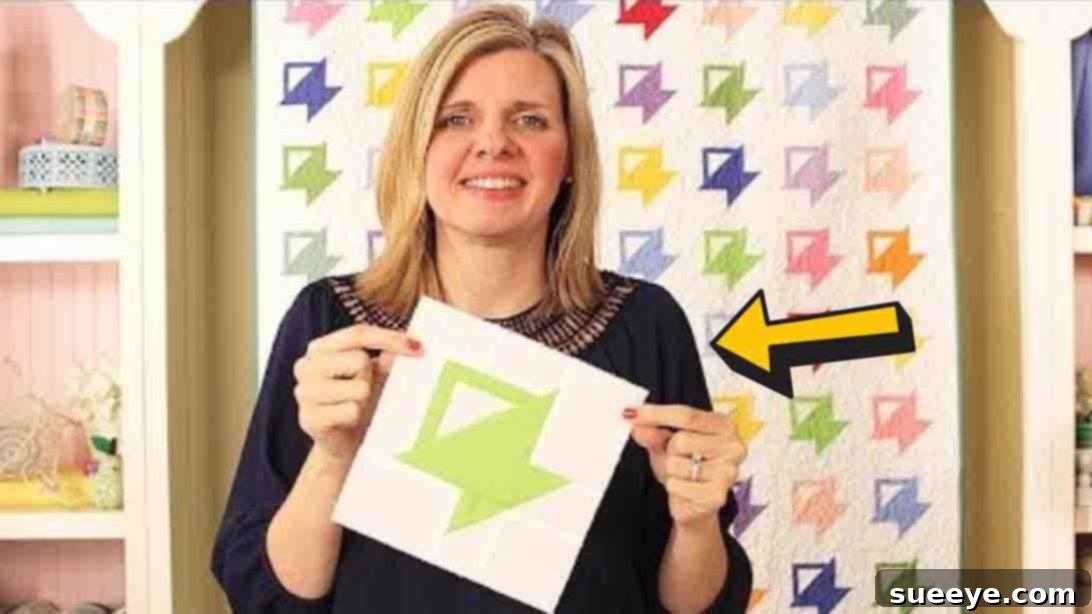
Master the Adorable A Tisket, A Tasket Basket Quilt: A Beginner-Friendly Tutorial
Are you searching for your next delightful quilting adventure? Look no further! This comprehensive guide will walk you through creating the charming A Tisket, A Tasket Basket Quilt block, a beloved pattern brought to life by the experts at Fat Quarter Shop. This design is undoubtedly one of the most endearing patterns you’ll encounter, combining classic appeal with surprising simplicity. While it might appear intricate at first glance, this project is remarkably beginner-friendly and quick to assemble, making it an instant favorite for quilters of all skill levels. Get ready to add a timeless piece to your collection of cherished quilt patterns!
The beauty of the A Tisket, A Tasket quilt lies in its versatility and its nostalgic charm. Basket quilts evoke a sense of warmth, tradition, and home, making them a perfect addition to any space. Whether you’re making a throw, a wall hanging, or a full-sized quilt, these delightful blocks create a captivating visual story. Even if you’re new to quilting, the clear, step-by-step instructions provided by Fat Quarter Shop ensure a smooth and enjoyable crafting experience. You’ll be amazed at how easily you can bring this beautiful design to fruition.
Why Choose the A Tisket, A Tasket Quilt for Your Next Project?
There are countless quilt patterns available, but the A Tisket, A Tasket Basket Quilt stands out for several compelling reasons. Its classic basket motif is universally appealing, lending itself beautifully to a wide range of fabric choices and color palettes. From vibrant, modern prints to subdued, traditional florals, this pattern can adapt to your personal style. Furthermore, the design is structured in a way that simplifies the construction process, making it ideal for those who are just starting their quilting journey or seasoned quilters looking for a quick and satisfying project.
This particular pattern, generously shared by Fat Quarter Shop, comes with a free downloadable pattern and a detailed video tutorial. This combination of resources is invaluable, allowing you to follow along visually and at your own pace. The visual guidance in the video helps clarify any steps, while the written pattern ensures you have all the precise measurements and assembly diagrams at your fingertips. This robust support system minimizes frustration and maximizes your chances of a successful and enjoyable quilting experience.
RELATED: May Day Baskets Quilt Tutorial
Essential Materials You’ll Need
Before diving into the sewing, gathering all your materials is crucial for a seamless quilting process. Precision in cutting is key to achieving accurate blocks, so make sure your rotary cutter has a sharp blade and your cutting mat is in good condition. A good quilting ruler will also be your best friend for precise measurements. For this project, you’ll need a selection of fabrics for both the background and the basket elements. Consider contrasting colors and prints to make your basket motif truly pop!
For your convenience, Fat Quarter Shop has made a free quilt pattern available for this project. This pattern includes detailed cutting diagrams and assembly instructions, ensuring you have everything you need to get started. Be sure to download it and have it handy as you prepare your fabrics. You can click here to access the free pattern directly.
Here’s a detailed list of the fabric cuts you’ll need for one A Tisket, A Tasket quilt block:
Background Fabrics:
- 2 – 2 3/4″ x 3 3/4″ rectangles (Fabric A)
- 1 – 3 1/2″ square (Fabric B)
- 1 – 2 3/4″ square (Fabric C)
- 2 – 2″ x 2 3/4″ rectangles (Fabric D)
- 1 – 1 3/4″ x 5 1/4″ rectangle (Fabric E)
- 1 – 1 3/4″ x 4″ rectangle (Fabric F)
Basket Fabrics:
- 1 – 4 1/2″ square (Fabric G)
- 2 – 2″ squares (Fabric H)
- 1 – 1″ x 4″ rectangle (Fabric I)
- 1 – 1″ x 3 1/2″ rectangle (Fabric J)
In addition to your fabrics, ensure you have your basic quilting toolkit ready: a sewing machine, coordinating thread, an iron and ironing board, pins or wonder clips, and fabric scissors.
Step-by-Step Guide to Crafting Your Basket Quilt Block
Now that you have all your materials prepared, let’s embark on the exciting journey of assembling your A Tisket, A Tasket quilt block. Remember, accuracy in cutting and a consistent 1/4-inch seam allowance are your keys to success for beautiful, professional-looking results. Take your time with each step, and don’t hesitate to refer back to the video tutorial if anything is unclear.
Step 1: Preparing Your Fabrics and Assembling the Main Basket Unit
To begin, meticulously cut all your fabric requirements according to the provided list and the free pattern. It’s highly recommended to label each fabric piece (A, B, C, etc.) immediately after cutting to avoid confusion. This organization will streamline the entire process.
Once your fabrics are cut, let’s start with the central basket handle and body. Take one Fabric J rectangle and one Fabric B square. With right sides together, carefully align their edges. Stitch them together using a precise 1/4″ seam allowance. After sewing, press the seam open or towards the darker fabric (Fabric J, typically) for a flat, crisp finish. Next, add Fabric I to the opposite side of the Fabric B piece, again aligning right sides together, sewing with a 1/4″ seam allowance, and pressing the seam. This forms the initial core of your basket.
Continue building the basket body by attaching Fabric F to the left side of the newly assembled unit. Sew with a 1/4″ seam and press. Then, attach Fabric E to the top of the entire unit, using the same 1/4″ seam allowance and pressing method. This creates the main frame of the basket. Now, for the distinctive basket corner: take one Fabric G square. On the wrong side of Fabric G, draw a diagonal line from one corner to the opposite corner. Position this Fabric G square on the bottom right corner of your assembled unit, ensuring the drawn line aligns correctly. Sew directly along this drawn line from point to point. Once sewn, carefully cut a 1/4″ seam allowance away from the stitch line, on the side of the original square that will be discarded. Press the remaining triangle (which forms your basket corner) towards the basket fabric (Fabric G). This technique, often called “stitch and flip,” creates a neat and professional-looking corner.
Step 2: Constructing the Basket Bases and Final Block Assembly
With the main basket unit complete, it’s time to create the crucial basket bases that will give your quilt block its distinctive shape. Take your two Fabric H squares. On the wrong side of each square, draw a diagonal line from corner to corner, just as you did with Fabric G. Now, place each Fabric H square onto one corner of a Fabric D rectangle, aligning the raw edges. Sew directly on the drawn line. After sewing, trim 1/4″ away from the seam line, then press the fabric H triangle outwards, towards the basket fabric. Repeat this process for both Fabric H squares and Fabric D rectangles to create two identical basket base units.
Next, you’ll create the basket side unit. Take one of your Fabric A rectangles and stitch it to one of the basket base units you just created. Ensure right sides are together and sew with a 1/4″ seam allowance. Press the seam for a crisp finish. This piece will form one side of your basket block.
Finally, let’s assemble the basket bottom unit. This unit consists of the remaining Fabric A rectangle, Fabric C square, and the second basket base unit you made. Arrange these three pieces with Fabric C in the middle, flanked by the Fabric A and the basket base unit. Sew them together with a 1/4″ seam allowance, ensuring your seams are pressed consistently. This completes the foundational elements of your basket block.
With all individual components ready, the final step is to assemble the entire block. Refer to the free pattern provided by Fat Quarter Shop for the precise layout and order of assembly. Carefully stitch all units together, paying close attention to matching seams and points. Using pins to align edges before sewing can significantly improve accuracy. Once all pieces are sewn, give your finished block a final press. Congratulations, your beautiful A Tisket, A Tasket quilt block is now complete!
Tips for Quilting Success with Your Basket Quilt
Achieving a beautiful quilt block is all about attention to detail. Here are some extra tips to ensure your A Tisket, A Tasket quilt blocks turn out perfectly:
- Accurate Cutting: This cannot be stressed enough. Even a tiny variation in your fabric cuts can lead to misaligned seams and distorted blocks. Always use a sharp rotary blade, a non-slip ruler, and a self-healing mat.
- Consistent Seam Allowance: A perfect 1/4-inch seam is crucial. If your machine doesn’t have a specific 1/4-inch foot, practice on scraps until you achieve consistency.
- Pressing Matters: Pressing after each seam helps your block lie flat and square. Decide whether to press seams open or to one side (typically the darker fabric to prevent shadowing) and be consistent throughout your project. Avoid “ironing,” which involves pushing the iron back and forth; instead, “press” by lifting and placing the iron.
- Chain Piecing: If you’re making multiple blocks, consider chain piecing. Sew one seam, then without lifting your presser foot, feed the next identical set of pieces under the needle. This saves time and thread.
- Test Block: If you’re unsure about the pattern or your fabric choices, make one test block first. This allows you to work out any kinks before committing to all your fabric.
- Utilize the Video Tutorial: The Fat Quarter Shop video is an invaluable resource. Watch sections multiple times if needed, and pause to work at your own pace.
Beyond the Block: Designing Your Full Basket Quilt
Once you’ve mastered making a single A Tisket, A Tasket quilt block, you’re ready to think bigger! These individual blocks can be combined in myriad ways to create a stunning full quilt. Consider making multiple blocks in a variety of coordinating fabrics for a truly dynamic design. You might create a checkerboard pattern with solid blocks in between your basket blocks, or simply arrange them in rows and columns.
To join your blocks, you’ll typically use sashing – fabric strips sewn between blocks and rows to create definition and visual breaks. Sashing can be a solid color to highlight your blocks, or a subtle print to add texture. Don’t forget borders around the entire quilt top to frame your design beautifully. Finally, choose a soft batting and a complementary backing fabric, then quilt it as desired – either by hand or machine – and finish with a neatly bound edge. The possibilities are endless for creating a truly unique and personalized basket quilt!
Start Your A Tisket, A Tasket Quilt Block Journey Today!
The A Tisket, A Tasket Basket Quilt block is more than just a sewing project; it’s an opportunity to create something beautiful and enduring with your own hands. Its delightful design and beginner-friendly instructions make it an ideal choice for anyone looking to expand their quilting skills or simply enjoy a relaxing and rewarding craft. The comprehensive resources provided by Fat Quarter Shop, including the free pattern and video tutorial, ensure that you have all the support you need to succeed.
Imagine the joy of presenting this charming quilt as a handmade gift or cozying up with it on a chilly evening. The satisfaction of seeing your fabric pieces transform into a cohesive and adorable basket design is truly unparalleled. Don’t wait any longer to embark on this fantastic quilting adventure. Download your free pattern, gather your beautiful fabrics, watch the inspiring tutorial from Fat Quarter Shop, and start creating your very own A Tisket, A Tasket Basket Quilt today!