
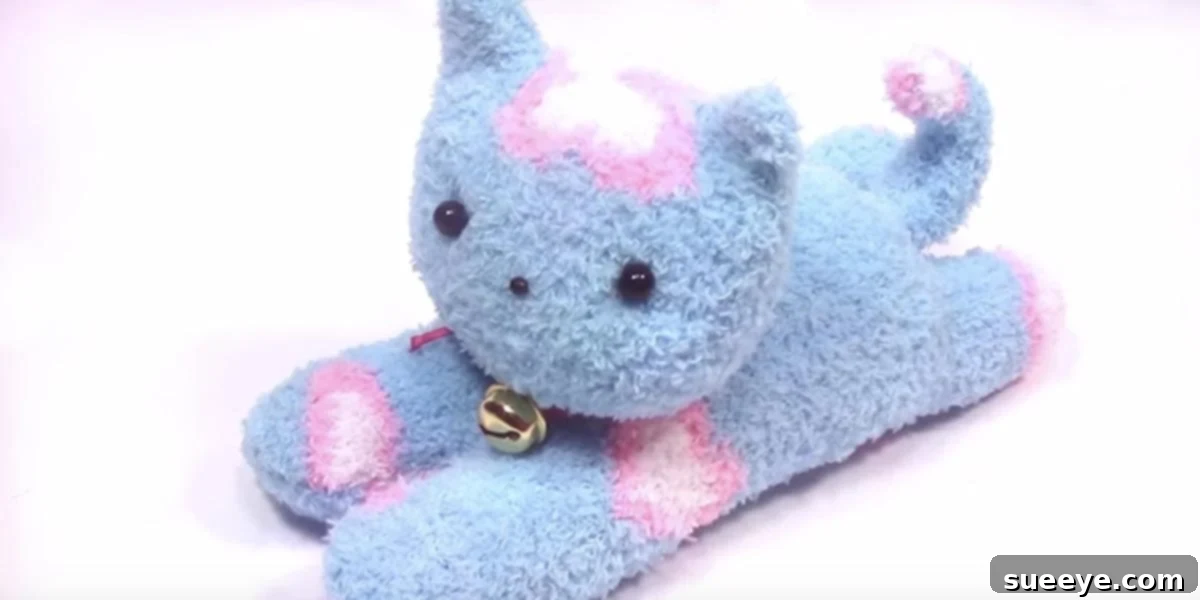
How to Craft Adorable Sock Kittens: A Comprehensive DIY Guide
Are you a devoted cat enthusiast, a savvy crafter, or a parent looking for a delightful, budget-friendly activity to share with your children? If so, you’ve stumbled upon the purr-fect project! This guide will walk you through creating the most adorable, cuddly sock kittens imaginable. Whether you’re making them for yourself, as charming decorations, or as heartfelt gifts for little ones, these handmade feline friends are guaranteed to bring smiles and warmth. This ingenious craft is a fantastic way to repurpose old socks, transforming forgotten textiles into cherished keepsakes. Forget expensive store-bought toys; with a few simple materials and a dash of creativity, you can conjure up irresistible kittens that are as fun to make as they are to hug. Imagine the joy your children or grandchildren will experience crafting their own unique companions – it’s an ideal rainy-day activity that fosters creativity, fine motor skills, and a sense of accomplishment.
Why Embark on a Sock Kitten Adventure?
Creating sock kittens isn’t just a craft; it’s a multi-faceted activity brimming with benefits. Beyond the sheer delight of seeing your creation come to life, there are numerous reasons why this project stands out:
- Eco-Friendly Repurposing: Give new life to orphaned or worn-out socks, diverting them from landfills. It’s a wonderful lesson in sustainability and upcycling for all ages.
- Budget-Friendly Fun: Most materials are likely already in your home, making this an incredibly inexpensive craft. Say goodbye to costly craft store hauls and hello to resourceful creativity.
- Boosts Creativity and Imagination: Each sock kitten can be unique! From choosing different sock patterns to customizing facial features and accessories, the possibilities for personalization are endless, encouraging imaginative play and design.
- Develops Fine Motor Skills: The process of drawing, cutting, sewing, and stuffing helps children and adults alike refine their hand-eye coordination and dexterity.
- Promotes Patience and Focus: While simple, the step-by-step nature of the project teaches patience and the rewards of seeing a task through to completion.
- A Heartwarming Gift: A handmade sock kitten is more than just a toy; it’s a tangible expression of love and effort, making it a truly special gift for birthdays, holidays, or just because.
- Therapeutic and Relaxing: Crafting offers a calming escape, allowing you to de-stress and engage in a satisfying, tactile activity.
Gathering Your Essential Materials
One of the beauties of this craft lies in its simplicity. You won’t need an elaborate craft kit; many of these items are probably already in your home. Here’s a detailed list of what you’ll need to create your adorable sock kitten:
- Socks: The star of the show! Choose clean, unused, or freshly washed socks. Crew socks, knee-highs, or even ankle socks can work, depending on the size of kitten you envision. Patterns and colors can add personality. Consider slightly thicker socks for durability and ease of stuffing.
- Needle and Thread: A basic sewing needle and strong thread (polyester or cotton blend) are essential. Choose a thread color that blends well with your sock or provides a subtle contrast for decorative stitching.
- Scissors: A sharp pair of fabric scissors will make cutting through the sock material much easier and cleaner.
- Paint Pen or Fabric Marker: For drawing the kitten’s outline and facial features onto the sock. A washable fabric marker can be helpful for initial sketching, or a permanent fabric pen for lasting details.
- Round Black Buttons: Small black buttons are perfect for the kitten’s eyes. Have a few sizes on hand to experiment with. For younger children or pets, consider embroidering eyes with black thread or using felt circles for safety, as small buttons can be a choking hazard.
- Smaller Black Button or Bead: For the kitten’s nose. A tiny black bead or a very small button will work wonderfully. Again, ensure safety for young children by opting for embroidery if needed.
- Batting or Stuffing Material: Polyester fiberfill (like what you find in pillows) is ideal for stuffing your kitten, giving it a soft, plump form. You can also repurpose old pillow stuffing or even use clean fabric scraps for a firmer, more eco-friendly fill.
- Ribbon and Small Bell (Optional): To create a charming collar for your finished kitten. Choose a ribbon that complements your sock’s color and a small, lightweight bell for that classic cat sound.
Step-by-Step Guide to Crafting Your Sock Kitten
Now that you have all your materials, let’s dive into the fun part: bringing your sock kitten to life! Follow these detailed steps for a smooth and enjoyable crafting experience.
Step 1: Preparing Your Sock Canvas
Begin by selecting the perfect sock. Lay it flat and smooth out any wrinkles. If using an older sock, ensure it’s clean and free of holes (unless you plan to patch them creatively!). The cuff and heel of the sock will be utilized for different parts of your kitten, so visualize how the sock’s natural shape will contribute to the kitten’s form.
Step 2: Designing Your Kitten’s Body Outline
With your sock laid flat, use a fabric marker or paint pen to carefully draw the outline of your kitten’s body directly onto the sock. This outline should include the main body shape, leaving space at the top for the head and ears later. Ensure your drawing is clear and leaves enough room around the edges for sewing. A common approach is to draw a rounded, elongated shape, making sure the sock is stretched slightly as you draw to account for stuffing.
Step 3: Sewing the Body Contour
Once you’re happy with the body outline, it’s time to sew. Using your needle and thread, carefully sew along the line you’ve drawn. A simple running stitch or backstitch will work well. Remember to leave approximately 1/8 inch (about 3-4 mm) of fabric around your sewn line, as this will be your seam allowance. Sew securely to prevent stuffing from escaping. If you’re using a sewing machine, this step will be quicker, but hand-sewing provides a more intimate connection with your craft.
Step 4: Precision Cutting and Turning Inside Out
After sewing, carefully cut out the kitten body shape. Make sure to cut approximately 1/8 inch *outside* your sewn line, preserving that seam allowance. Next, cut a small slit, approximately 1 inch long, in the underside of the kitten body. This slit should be on the side that will become the bottom of your kitten, where it won’t be easily visible. This opening is crucial for turning the fabric right side out and for stuffing. Once the slit is made, gently turn the entire sock kitten body inside out, so the sewn seams are now on the inside, and the clean side of the fabric is facing outwards.
Step 5: Stuffing the Body and Sealing the Opening
Now for the fun part: stuffing! Begin to carefully fill the kitten’s body with your chosen batting or fiberfill. Use small tufts of stuffing to ensure an even distribution, avoiding lumps. Stuff firmly but not excessively, aiming for a cuddly, squeezable consistency. Once the body is plump and shaped to your liking, use your needle and thread to sew up the 1-inch slit you created. A ladder stitch or invisible stitch works best here to create a neat, almost unnoticeable closure.
Step 6: Crafting the Head and Ears
Take another section of your sock (often the cuff or a leftover piece from the body cut-out) and flatten it. Draw the shape of the kitten’s head, including distinct ear shapes at the top. Sew around this drawing, leaving a small opening (about 1/2 inch) at the base of the neck for stuffing. Cut out the head shape with a seam allowance, turn it inside out, and stuff it lightly. Sew the opening closed using the same neat stitch as before.
Step 7: Creating the Tail
The heel of a sock is often perfect for a naturally curved tail shape. Flatten a section of the sock heel and draw a tail shape. It can be long and slender or short and bushy. Sew around your drawing, leaving a small opening at the base where it will attach to the body. Cut out the tail, turn it inside out, and stuff it lightly. Sew the opening closed.
Step 8: Assembling Your Kitten: Attaching Head and Tail
Now, it’s time to bring all the pieces together. Position the stuffed head onto the top of the kitten’s body. Use your needle and thread to securely attach the head to the body. Use small, strong stitches, going back and forth several times to ensure it’s firmly connected. Next, position the tail onto the kitten’s backside. Sew it securely in place, making sure it stands out nicely.
Step 9: Bringing Your Kitten to Life with Facial Features
This is where your kitten truly gets its personality!
- Eyes: Decide on the placement for the eyes. Using your needle and thread, securely sew two small black buttons onto the face for the eyes. If crafting for young children, embroider the eyes with black thread or use felt circles glued on with fabric glue for safety.
- Nose: Position a smaller black button or bead for the nose, just below the eyes. Sew it firmly into place. Alternatively, embroider a small triangular nose.
- Mouth and Whiskers (Optional): You can use black embroidery floss to stitch a small “Y” shape for the mouth or add a few straight stitches on either side for whiskers. A fine-tipped fabric marker can also be used for these details.
Step 10: The Finishing Touch – A Stylish Collar
For an extra touch of charm, take a piece of ribbon and tie it gently around your kitten’s neck to form a collar. If desired, thread a small bell onto the ribbon before tying it, giving your kitten a subtle jingle. Ensure the collar is not too tight and can be easily removed if it’s for a very young child.
Tips for Success and Creative Variations
- Patience is Key: Don’t rush the process, especially when sewing and stuffing. Enjoy each step!
- Child Involvement: Let children choose socks, draw outlines (you can refine them), help stuff, and select buttons (with supervision).
- Safety First: If making for infants or toddlers, always embroider eyes and noses instead of using small buttons or beads, which can be choking hazards. Ensure all stitches are secure.
- Experiment with Socks: Use different colored, patterned, or textured socks to create a whole family of unique kittens. Striped socks make for interesting patterns!
- Add Accessories: Beyond collars, consider adding tiny bows, fabric flower embellishments, or even a mini felt scarf for extra personality.
- Embroidered Details: Use embroidery floss to add paw pads, stripes, or other decorative elements to your kitten’s body.
- Other Animals: Once you master the kitten, try adapting the technique to make bunnies, bears, or other whimsical creatures!
Caring for Your Handmade Sock Kitten
To ensure your beloved sock kitten remains a cherished companion for years to come, proper care is important. Most sock kittens can be gently hand-washed in cool water with a mild detergent. Avoid harsh scrubbing, especially on stitched details. Rinse thoroughly and allow it to air dry completely to prevent mildew. If machine washing is necessary, place the kitten inside a mesh laundry bag on a delicate cycle, then air dry. Always inspect for loose stitches or buttons after washing and repair as needed.
Conclusion: Embrace the Joy of Handmade
Congratulations! You’ve successfully transformed a simple sock into an adorable, huggable kitten. This project isn’t just about creating a toy; it’s about the joy of crafting, the satisfaction of repurposing, and the warmth of giving a handmade gift. These sock kittens are a testament to the fact that beauty and fun can be found in the most unexpected places, right in your own home. So gather your materials, unleash your inner crafter, and start creating your own precious litter of sock kittens today. Your children and grandchildren will undoubtedly adore these soft, personalized companions, and you’ll cherish the memories made during the crafting process. Happy sewing!