
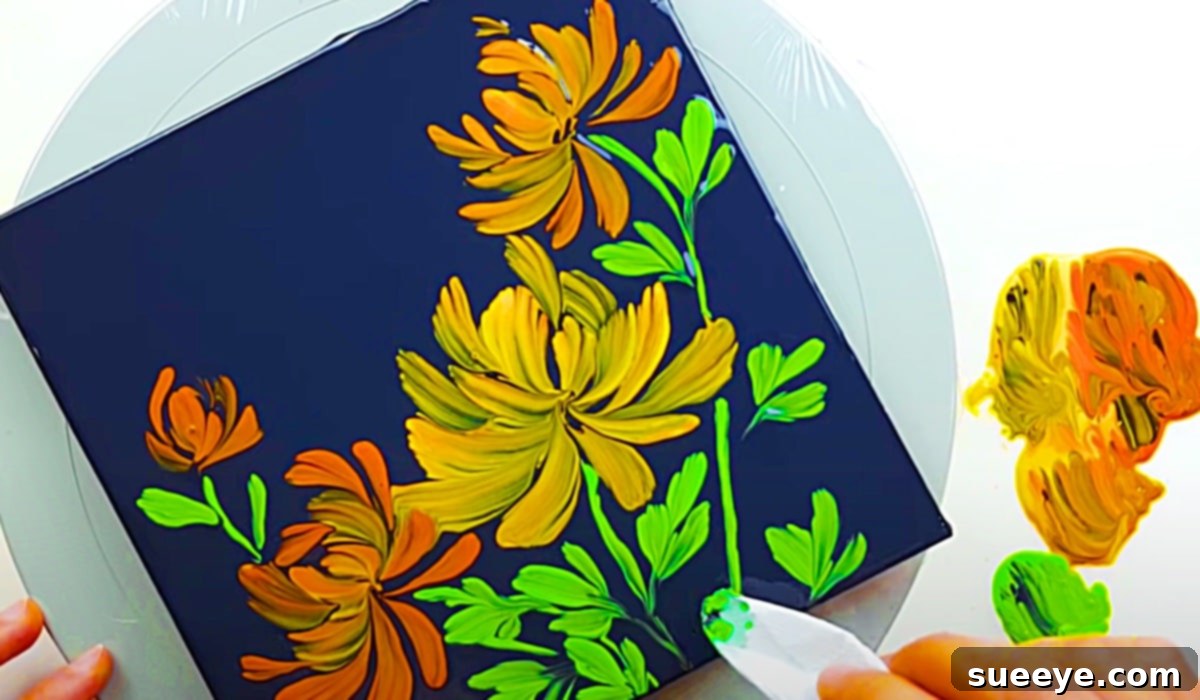
Easy DIY: How to Paint Whimsical Chrysanthemums with Tissue Paper
Embark on a delightful artistic journey that proves you don’t need a professional art studio or years of training to create stunning, personalized artwork for your home. We recently stumbled upon an absolutely ingenious method for painting beautiful chrysanthemums using nothing more than humble tissue paper and a splash of craft paint, inspired by the creative genius of Designer Gemma 77 on YouTube. This technique immediately captivated us with its simplicity, elegance, and the fact that most of the required materials were already lying around in our craft stash.
Chrysanthemums, with their intricate layers and vibrant presence, are undoubtedly one of the most beloved flowers. What makes this painting method truly exceptional is its ability to produce whimsical, often asymmetrical chrysanthemum designs with just a few passes, mimicking the organic beauty of nature. The result is art that feels both sophisticated and effortlessly charming. We experimented with crisp white paint against a rich red background, and the finished piece transformed our kitchen with its perfect blend of boldness and delicate artistry. For that extra touch of rustic charm, we decided to frame our chrysanthemum poster. A quick trip to Home Depot yielded free paint-stirring sticks, which we easily secured with our trusty hot glue gun, completing an adorably cohesive and handcrafted look.
This article will guide you through this innovative painting technique, from gathering your basic supplies to adding those final, personalized touches. Prepare to unlock your inner artist and adorn your living space with unique, handmade decor that’s sure to impress!
Why Choose Tissue Paper for Painting Chrysanthemums?
You might be wondering why tissue paper, or specifically toilet paper, is the star of this painting technique. The answer lies in its unique properties that traditional brushes simply can’t replicate. Unlike the smooth, controlled strokes of a paintbrush, crumpled tissue paper offers:
- **Organic Texture:** It naturally creates a beautifully textured, almost three-dimensional effect that perfectly captures the delicate, ruffled petals of chrysanthemums.
- **Whimsical Imperfection:** The imprecise nature of tissue paper dabbing lends itself to a lovely, organic, and slightly abstract aesthetic, moving away from rigid perfection towards expressive art.
- **Ease of Use:** There’s no need to master complex brushstrokes. If you can dab and twist, you can create stunning floral designs.
- **Cost-Effectiveness:** Toilet paper is incredibly inexpensive and readily available, making this a highly accessible art form for everyone.
- **Quick Cleanup:** Disposable “brushes” mean less time cleaning up and more time enjoying your creative process.
This method is not just about painting; it’s about embracing simplicity and finding beauty in unconventional tools, leading to truly unique artistic expressions.
Essential Materials for Your Tissue Paper Chrysanthemum Painting
One of the many joys of this craft is its minimal material requirement. You’ll likely find most of these items already at home, making it an excellent spontaneous creative outlet. Here’s what you’ll need to gather:
- **A Canvas:** While any sturdy surface works, a stretched canvas, canvas board, or even thick watercolor paper provides an ideal foundation. Consider the size that best fits your desired display area – small canvases for intimate spaces or larger ones for a statement piece. The texture of a canvas also adds to the overall artistic feel.
- **Craft Paint:** Acrylic craft paints are highly recommended due to their quick drying time, vibrant colors, and ease of use. You’ll need at least two colors: one for your background and one or more for your chrysanthemums. Don’t shy away from experimenting with various shades of a single color for added depth, or contrasting colors for a dramatic effect. Remember, quality craft paint offers better coverage and longevity.
- **A Roll of Toilet Paper (or similar tissue paper):** This is your primary “brush.” Choose unscented, plain white toilet paper for the best results. The multi-ply varieties tend to hold their shape better when crumpled, but single-ply can also work, perhaps requiring more layers when folding. Avoid overly textured or patterned toilet paper as it might transfer unwanted designs.
- **Optional: Paint-Stirring Sticks (for framing):** If you loved our framing idea, grab a few free paint-stirring sticks from your local hardware store. They provide a rustic, natural frame that beautifully complements the handmade aesthetic of the painting.
- **Optional: Hot Glue Gun and Glue Sticks:** Essential for quickly and securely attaching your frame elements, or for any other embellishments you might consider adding.
- **Optional: A Palette:** An old plate, a piece of cardboard, or even waxed paper works perfectly for holding and mixing your paints.
- **Optional: Water Container and Paper Towels:** Useful for thinning paint slightly (though often not needed for this technique) and for general cleanup.
Step-by-Step Directions to Create Your Tissue Paper Chrysanthemum Art
Creating these beautiful chrysanthemums is a wonderfully straightforward process, making it enjoyable for artists of all skill levels. Follow these detailed steps, and you’ll soon have your own stunning artwork.
Step 1: Preparing Your Canvas with a Solid Background
The foundation of any great painting is a well-prepared background. Begin by selecting a solid color for your canvas that will provide a striking contrast or a harmonious backdrop for your chrysanthemums. For instance, a deep red or navy blue can make white or yellow flowers truly pop, while a soft pastel green might create a more subtle, natural feel. Apply your chosen background color evenly across the entire canvas using a regular paintbrush or a foam roller. Ensure you apply enough coats to achieve opaque, consistent coverage. Allow the background to dry completely before proceeding; this is crucial to prevent colors from mixing unintentionally and ensure crisp results. Acrylic paints typically dry quickly, but refer to the manufacturer’s instructions for optimal drying times.
Step 2: Crafting Your Unique Tissue Paper Brush
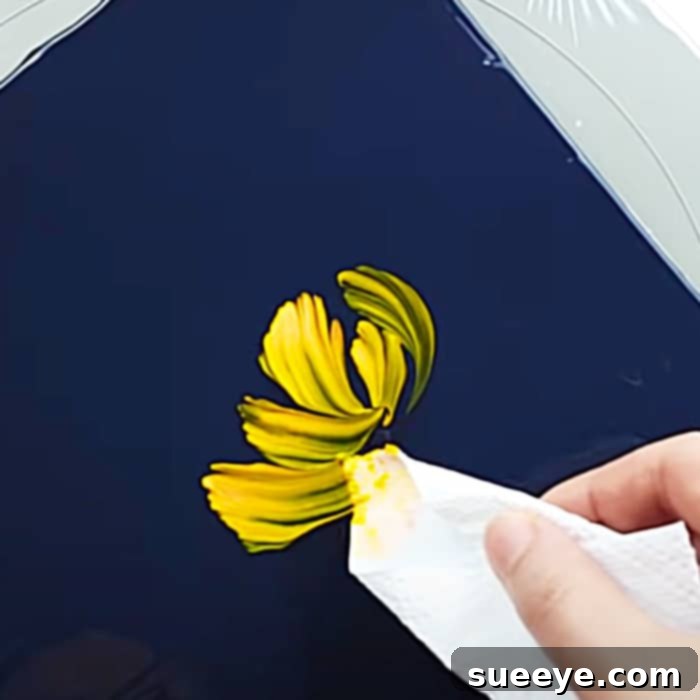
This is where the magic begins! Tear off a generous piece of toilet paper from the roll – approximately 12-18 inches should suffice, depending on how large you want your flower “brush” to be. The goal is to create a compact, slightly irregular pad. Gently crumple and fold the tissue paper, shaping it into a small, relatively firm ball or pad that fits comfortably in your hand. You want it to be dense enough to hold paint but still soft enough to create textural dabs. Experiment with different levels of crumpling; a looser wad might create a softer, more ethereal petal, while a tighter one could produce a more defined, compact flower shape. This handmade “brush” is key to achieving the distinctive look of these tissue paper chrysanthemums.
Step 3: Bringing Chrysanthemums to Life – Painting the Flowers
Now, it’s time to paint! Dip one side of your tissue paper “brush” lightly into your chosen chrysanthemum paint color. Avoid saturating it; a moderate amount of paint is best to start. Begin by dabbing the center of where you want your chrysanthemum to be. Use a gentle pressing and twisting motion, gradually working outwards in a circular pattern to build the layers of petals. Think about how a chrysanthemum’s petals radiate from the center, overlapping and forming a dense bloom. You can vary the pressure and angle of your dabs to create petals of different sizes and textures. For a more dynamic effect, you might use two closely related shades of your flower color, dabbing one first and then layering the second slightly over it to create depth and highlight variations.
Step 4: Adding Greenery – Painting the Leaves
Once your flowers are in place and the paint is still wet (or slightly tacky, for better blending), it’s time to add the foliage. Take another fresh piece of toilet paper and shape it into a more elongated, pointed “brush” suitable for leaves. Dip it into a green paint color. Position your leaf “brush” around the base or peeking out from behind your chrysanthemums. Press gently and drag slightly to create varied leaf shapes. You can add a deeper shade of green for shadow or a lighter one for highlights to give your leaves more dimension. Don’t feel obligated to paint highly detailed leaves; even simple, irregular green shapes will beautifully complement your whimsical flowers. Allow your entire painting to dry completely, which might take a few hours depending on paint thickness and humidity.
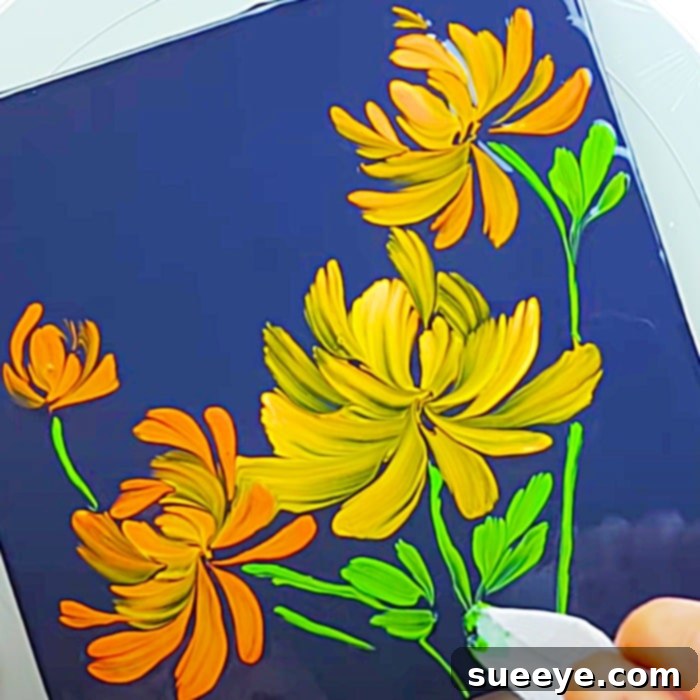
This method of painting, while incredibly easy and accessible, yields results that are surprisingly impressive and professional-looking. The texture achieved by the tissue paper creates a tactile visual appeal that adds character and uniqueness to your artwork.
Personalizing Your Chrysanthemum Masterpiece
Once your painting is dry, you have the exciting opportunity to personalize it even further. This is where your creativity truly shines, making your piece one-of-a-kind.
Choosing Your Color Palette
Beyond the classic white on red, consider a spectrum of color combinations. For example:
- **Autumnal Tones:** Golds, oranges, and deep reds against a cream or forest green background.
- **Cool Hues:** Shades of lavender, periwinkle, or icy blue against a charcoal grey or silver background.
- **Monochromatic Elegance:** Different shades of a single color – perhaps varying pinks or purples – for a subtle yet sophisticated look.
- **Vibrant & Bold:** Hot pink, electric blue, or sunny yellow chrysanthemums on a contrasting black or teal background.
Experiment with your chosen colors on a scrap piece of paper first to see how they interact before applying them to your canvas.
Adding a Custom Frame
A frame can elevate a simple painting into a gallery-worthy piece. Our suggestion of using paint-stirring sticks offers a fantastic rustic aesthetic:
- **Measure and Cut:** Measure the sides of your canvas or poster board. Carefully cut the paint-stirring sticks to fit, creating a border. For mitered corners (diagonal cuts), you’ll need a miter box and saw, but simple straight cuts for overlapping corners work just as well for a casual look.
- **Stain or Paint (Optional):** You can leave the sticks natural for a raw, earthy feel, or stain them a darker wood tone. Alternatively, paint them a color that complements your artwork – perhaps a metallic gold for elegance or a soft green to match the leaves.
- **Attach with Hot Glue:** Once dry, arrange the sticks around the edges of your painting. Apply hot glue to the back of the sticks and firmly press them onto the canvas or poster board, ensuring they are straight and aligned. Hold each piece in place for a few seconds until the glue sets.
Other framing alternatives include using decorative adhesive tape, creating a border with stenciled designs, or even upcycling an old photo frame that you can repaint to match your new art.
Displaying Your Artwork
Consider where your beautiful new piece will live. A vibrant chrysanthemum painting can brighten up a kitchen, add a touch of color to a bedroom, or bring a sense of handmade warmth to a living room or entryway. It also makes for a thoughtful and unique homemade gift for friends and family, showcasing your personal touch and creativity.
Tips for Success and Troubleshooting
Even with simple techniques, a few tips can enhance your experience and results:
- **Less is More with Paint:** When dipping your tissue paper, start with a small amount of paint. You can always add more, but too much can lead to a blobby texture rather than distinct petals.
- **Embrace Imperfection:** The charm of this technique lies in its organic and slightly abstract nature. Don’t strive for photographic realism; instead, celebrate the unique textures and shapes created by the tissue paper.
- **Layering for Depth:** To create a fuller, more dynamic chrysanthemum, allow the first layer of petals to dry slightly before adding a second layer. This builds dimension and prevents colors from muddying.
- **Practice on Scrap Paper:** If you’re new to this method, do a quick practice run on a piece of scrap paper or cardboard. This allows you to get a feel for how the tissue paper interacts with the paint and how much pressure to apply.
- **Quick Fixes:** If you make a mistake, especially if the paint is still wet, you can often gently blot it with a clean piece of tissue paper or carefully paint over it once dry.
- **Secure Your Workspace:** Lay down old newspapers, cardboard, or a plastic sheet to protect your work surface from paint spills.
Unleash Your Inner Artist Today!
This tissue paper painting technique for chrysanthemums is more than just a craft; it’s an invitation to explore your creative side with minimal fuss and maximum satisfaction. It demystifies the art of painting, proving that beautiful results are within reach for everyone, regardless of prior experience.
The organic textures, vibrant colors, and whimsical charm of these tissue paper chrysanthemums will undoubtedly bring a personalized touch of handmade beauty to your home. So, gather your simple materials, find a quiet moment, and allow yourself to enjoy the therapeutic process of creating something truly unique. We encourage you to share your beautiful creations and inspire others to discover the joy of this wonderfully easy and impressive art form!