
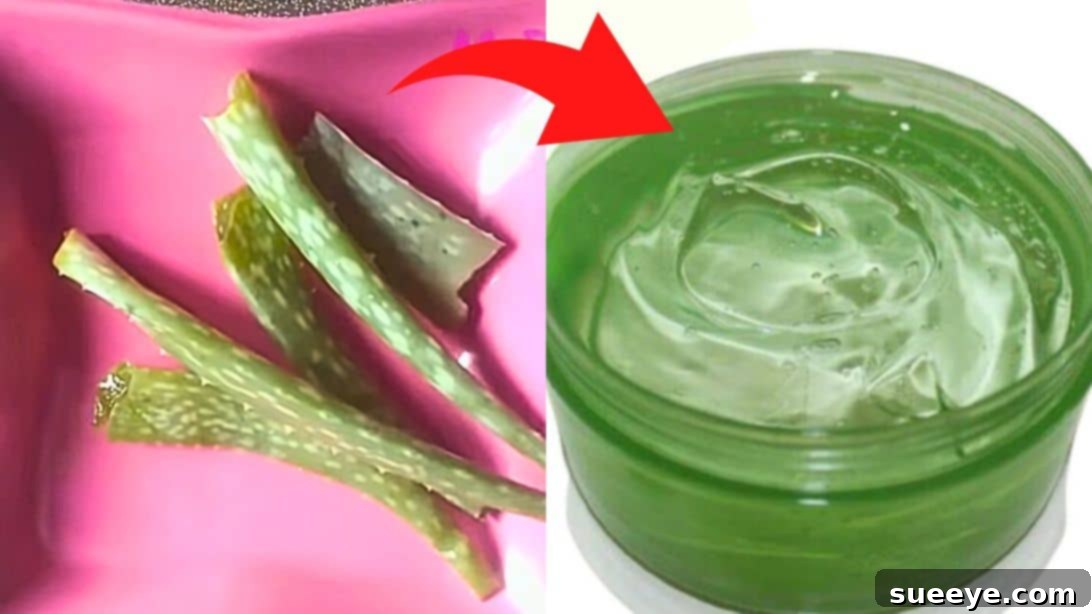
In the realm of natural remedies and holistic skincare, few plants command as much respect and admiration as Aloe Vera. Renowned globally for its extraordinary healing and soothing properties, this succulent plant has been a cornerstone of traditional medicine for centuries. From ancient Egyptian queens who used it in their beauty regimens to modern-day dermatologists recommending it for various skin ailments, aloe vera continues to prove its efficacy. It’s a natural wonder that can accelerate wound healing, calm irritated skin, deeply moisturize, and even provide relief for a myriad of common skin and hair concerns. With its increasing popularity, a vast array of commercial products, from lotions and shampoos to health drinks, now feature this incredible ingredient. However, what many people don’t realize is just how simple and rewarding it is to create your very own fresh aloe vera gel right in the comfort of your home. Not only is it a cost-effective alternative to store-bought varieties, but it also guarantees a product free from preservatives, artificial fragrances, and unnecessary chemicals. This comprehensive guide will walk you through two distinct methods for preparing aloe vera gel, ensuring you can harness its pure power for your beauty and wellness needs. Learn the secrets to making your own potent, natural aloe vera gel through this detailed tutorial, drawing inspiration from insightful guides like the one by M beauty Zone on Youtube.
How to Make Your Own Fresh & Pure Aloe Vera Gel at Home: A Comprehensive Guide
The Remarkable Benefits of Aloe Vera: Nature’s Miraculous Plant
Before diving into the “how-to,” it’s worth understanding the extensive benefits that make aloe vera a true powerhouse in natural health and beauty. Its thick, clear gel is packed with an impressive array of vitamins (A, C, E, B12, folic acid), enzymes, minerals, sugars, lignin, saponins, and amino acids. These components work synergistically to deliver outstanding results.
For Skin Health: A Soothing Elixir
- Intense Hydration: Aloe vera gel is over 95% water, making it an exceptional natural moisturizer. It hydrates the skin without leaving a greasy residue, perfect for all skin types, including oily and acne-prone skin.
- Soothing Sunburn and Irritation: Its anti-inflammatory properties provide immediate relief for sunburn, rashes, and other minor skin irritations. It helps to cool the skin and accelerate the healing process.
- Acne Treatment: With its antibacterial and anti-inflammatory compounds, aloe vera can help reduce acne breakouts, calm existing blemishes, and minimize scarring.
- Anti-Aging Properties: Aloe stimulates fibroblast cells which produce collagen and elastin, helping to improve skin elasticity and reduce the appearance of fine lines and wrinkles.
- Minor Wound Healing: It can aid in the healing of minor cuts, scrapes, and burns by promoting cell regeneration and reducing inflammation.
For Hair Care: Nourishment from Root to Tip
- Scalp Health: Aloe vera’s enzymes help to remove dead skin cells and promote healthy hair growth. Its anti-inflammatory properties can also soothe an itchy scalp and reduce dandruff.
- Hair Conditioning: It acts as a natural conditioner, leaving hair shiny, soft, and more manageable without weighing it down.
- Hair Growth: By improving blood circulation to the scalp and providing essential nutrients, aloe vera can support healthier and potentially faster hair growth.
Crafting Pure & Simple Fresh Aloe Vera Gel: The Most Natural Approach
This method focuses on extracting the purest form of aloe vera gel, perfect for those who want an unadulterated product with minimal processing. It’s incredibly straightforward and yields a potent gel ready for immediate use.
Materials You’ll Need:
- Fresh aloe vera leaves (ideally from a mature plant)
- A clean container (preferably glass)
- A sharp knife or vegetable peeler
- A clean cotton cloth (like cheesecloth or muslin)
- A bowl for collecting the gel
- A fork or whisk for mixing
Step-by-Step Instructions:
Step 1: Preparing the Leaves and Draining the Aloin
Begin by carefully cutting a few mature leaves from your aloe vera plant, choosing the plumpest ones from the outer sections of the plant. Once harvested, immediately place the cut end of each leaf downwards in a clean container or glass. Allow them to stand in this position for approximately 15-30 minutes. This crucial step allows the yellowish, bitter liquid known as aloin (a latex) to drain out. Aloin can be a skin irritant for some people and has a laxative effect if ingested, so it’s best to remove as much as possible for topical applications. You’ll observe a yellowish-orange liquid accumulating in your container; this is what you want to get rid of.
Step 2: Extracting the Pure Gel
After the aloin has fully drained, thoroughly rinse the leaves under cool running water to remove any residual latex. Next, carefully cut off the thorny edges along both sides of each leaf using your sharp knife. Then, slice the leaves in half lengthwise, opening them up to expose the clear, mucilaginous gel inside. Using a spoon or the edge of your knife, gently scoop out the translucent gel and transfer it into a clean bowl. Be meticulous to avoid scraping too much of the green outer skin, as this can introduce impurities and a bitter taste (if intended for internal use, though this recipe is for topical).
Step 3: Achieving a Smooth Consistency and Final Filtration
Once you have extracted all the gel into your bowl, use a clean fork or a small whisk to thoroughly mix the gel. You’ll notice it might have a somewhat lumpy, stringy texture. Mixing helps break down these lumps and create a more uniform consistency. For an even smoother, purer gel, place a clean cotton cloth (such as cheesecloth or a thin tea towel) over another clean bowl and pour the mixed gel onto the cloth. Gently gather the edges of the cloth and squeeze firmly, straining the gel through the fabric. This process will effectively remove any remaining green leaf particles or larger fibrous bits, leaving you with a silky-smooth, clear aloe vera gel. If the gel seems too thick or you want to ensure maximum extraction, you can add a tiny splash of distilled water to the pulp in the cloth and squeeze again. Your fresh, pure aloe vera gel is now ready to be used as is, offering immediate natural benefits.
Achieving Store-Bought Consistency: Stabilized Aloe Vera Gel
While the pure fresh gel is wonderful, some prefer the thicker, more homogeneous texture often found in commercial aloe vera gels. This can be achieved by incorporating a natural thickening agent like cornflour (cornstarch). This method also subtly enhances the gel’s stability and shelf life, making it more akin to what you might purchase from a health store.
Materials for Stabilized Gel:
- Freshly prepared aloe vera gel (from the previous method)
- A small non-stick pan
- 1/2 teaspoon of cornflour (cornstarch) per batch (adjust based on quantity)
- A whisk or spoon for mixing
- An airtight container for storage
Step-by-Step Instructions:
Step 1: Heating and Thickening the Gel
Carefully pour your freshly extracted and strained aloe vera gel into a small non-stick pan. Place the pan over a very low heat setting on your stovetop. As the gel begins to warm, you’ll notice it might start to bubble gently. This is the perfect moment to introduce your thickening agent. For a standard amount of gel (roughly 1 cup), add about 1/2 teaspoon of cornflour. If you are preparing a larger quantity of gel, you might need to increase the cornflour to 1 full teaspoon or slightly more, depending on your desired consistency. Continuously stir the mixture with a whisk or spoon. It’s crucial to mix everything thoroughly and continuously to ensure the cornflour fully dissolves and to prevent any lumps from forming. The gel will gradually start to thicken, transforming into a more viscous, smooth consistency similar to a light custard or commercial gel.
Step 2: Cooling, Storing, and Shelf Life
Once the aloe vera gel has reached your preferred thickness and all the cornflour has dissolved, immediately turn off the heat. Remove the pan from the burner and allow the gel to cool completely to room temperature. As it cools, it will continue to thicken slightly. Once cooled, transfer your stabilized aloe vera gel into a clean, air-tight container, preferably one made of glass. Proper storage is key to extending its freshness. Keep the container in the refrigerator. When stored correctly, this homemade aloe vera gel can maintain its potency and quality for up to 15 days. Always check for any signs of spoilage, such as a change in color, odor, or texture, before use.
Essential Tips for Maximizing Your Homemade Aloe Vera Gel Experience
To ensure the best results and safely enjoy your DIY aloe vera gel, consider these valuable tips:
Sourcing and Selecting Aloe Vera Leaves
Always opt for fresh, mature aloe vera leaves. If you have your own plant, choose the larger, older leaves from the bottom of the plant, as they contain a higher concentration of gel. If purchasing, look for plump, firm leaves that are free from blemishes or discoloration.
Proper Storage and Shelf Life
Homemade aloe vera gel lacks the preservatives found in commercial products, so its shelf life is shorter. Always store it in an airtight container in the refrigerator. For the pure gel, aim to use it within 7-10 days. The stabilized gel with cornflour may last up to 15 days. If you notice any unusual smell, discoloration, or mold, it’s best to discard the batch. For longer storage, you can freeze small portions in an ice cube tray, which can then be stored in a freezer bag for several months. Thaw as needed.
Customization and Additions (Optional)
To boost the benefits or extend shelf life slightly, you can add natural preservatives or beneficial oils. For example, a few drops of Vitamin E oil (which is an antioxidant) or a small amount of an essential oil like lavender (known for its soothing properties) can be mixed in once the gel has cooled. Always research essential oils for skin safety and proper dilution ratios. Remember that adding ingredients can alter the gel’s stability and shelf life.
Patch Testing for Safety
Even though aloe vera is natural, some individuals may have sensitivities. Before applying your homemade gel generously, always perform a patch test. Apply a small amount to an inconspicuous area of your skin (e.g., inner forearm) and wait 24 hours to check for any redness, irritation, or allergic reactions.
Versatile Applications for Your DIY Aloe Vera Gel
Once you’ve mastered the art of making homemade aloe vera gel, you’ll discover its incredible versatility across various beauty and wellness routines:
- Daily Facial Moisturizer: Apply a thin layer to your face and neck after cleansing for lightweight, non-greasy hydration.
- Soothing Sunburn Relief: Generously apply to sun-exposed skin to cool, hydrate, and calm inflammation.
- Hair Mask or Leave-In Conditioner: Massage into your scalp and hair, leave for 20-30 minutes, then rinse, or use a tiny amount as a leave-in conditioner for frizz control and shine.
- Acne Spot Treatment: Dab a small amount directly onto blemishes to reduce redness and inflammation overnight.
- Shaving Gel Substitute: Its slippery texture makes it an excellent natural alternative to conventional shaving creams, minimizing irritation.
- After-Sun Care: Beyond sunburn, it’s perfect for general after-sun hydration to prevent peeling and keep skin supple.
- Insect Bite Reliever: Apply to mosquito bites or other insect stings for immediate soothing and itch reduction.
- Hand and Body Lotion: Use it all over your body for deep moisturization, especially on dry patches like elbows and knees.
Embracing the simplicity and purity of homemade aloe vera gel is a wonderful step towards a more natural and sustainable beauty regimen. The satisfaction of crafting your own skincare products, free from unnecessary additives, is truly empowering. With these detailed instructions and helpful tips, you are now equipped to create your very own fresh and potent aloe vera gel at home, unlocking a world of natural benefits for your skin and hair. For more inspiring DIY skincare recipes and tutorials that guide you through making your favorite products at home, be sure to visit M Beauty Zone on Youtube. They offer a wealth of knowledge to enhance your natural beauty journey.