
Master the Art of Hot Cocoa Bombs: A Comprehensive DIY Guide
There’s something truly magical about hot cocoa bombs – those enchanting chocolate spheres that melt away to reveal a delicious secret within. If you love surprising friends and family with unique, homemade treats, then crafting these delightful concoctions is an absolute must. Beyond their captivating presentation, hot cocoa bombs offer a personalized touch to a classic warm beverage, transforming a simple mug of hot chocolate into an extraordinary experience. This ultimate guide will walk you through every step of making perfect hot cocoa bombs, ensuring a smooth, glossy finish and an unforgettable explosion of flavor.
The beauty of hot cocoa bombs lies in their versatility. While the basic concept involves a chocolate shell filled with hot cocoa mix and marshmallows, the possibilities for customization are endless. You can experiment with different types of chocolate, add a variety of fillings, and decorate them to suit any occasion or personal taste. Whether you’re making them for a cozy winter evening, a holiday gift, or a special party favor, homemade hot cocoa bombs are sure to impress and bring a smile to anyone’s face. Let’s dive into the world of chocolate, cocoa, and delightful surprises!
Essential Ingredients for Your Hot Cocoa Bombs
The foundation of any great recipe begins with quality ingredients. For hot cocoa bombs, selecting the right chocolate and fillings is crucial for both taste and successful construction. Here’s what you’ll need:
- Chocolate: The star of the show! High-quality melting chocolate wafers or tempered baking chocolate bars (dark, milk, or white) are recommended for a smooth, shiny finish. Regular chocolate chips can work, but they often require tempering to prevent streaking and ensure a good snap.
- Hot Cocoa Mix: Choose your favorite brand of instant hot cocoa powder. You can opt for classic milk chocolate, dark chocolate, or even flavored varieties like peppermint or salted caramel for an extra kick.
- Marshmallows: Mini marshmallows are ideal for fitting inside the bombs. You can also use dehydrated marshmallows or even specialty flavored marshmallows for added flair.
- Non-Dairy Creamer (Powdered): A teaspoon or two of powdered non-dairy creamer adds an extra layer of creaminess to your hot cocoa, enhancing its richness and velvety texture. This also helps prevent clumping of the cocoa mix inside the bomb.
- Sprinkles or Toppings: For decoration! Think festive sprinkles, edible glitter, mini chocolate chips, crushed peppermints, or a drizzle of contrasting chocolate.
Key Supplies You’ll Need
Having the right tools makes the process of crafting hot cocoa bombs much easier and more enjoyable. Here’s a list of essential supplies:
- Chocolate Warmer (Optional but Recommended): A dedicated chocolate warmer helps maintain a consistent temperature for your melted chocolate, making it easier to work with over extended periods. Alternatively, a double boiler or microwave can be used, but require more careful monitoring.
- Silicone or Polycarbonate Molds for Cocoa Bombs: These spherical molds are specifically designed for creating the perfect bomb shape. Silicone molds are flexible and easy to unmold, while polycarbonate molds offer a professional, high-shine finish.
- Small Spoons or Pastry Brush: For applying the melted chocolate evenly into the molds and ensuring thorough coverage.
- Heatproof Spatula: For stirring chocolate and gently handling delicate components.
- Baking Sheet or Tray: To hold your molds steady in the refrigerator and freezer.
- Parchment Paper or Silicone Mat: For placing your chocolate shells on after unmolding, preventing sticking.
- Gloves: Essential for handling the chocolate shells without leaving fingerprints or melting the chocolate with your body heat.
- Small Warm Pan or Plate: For gently melting and smoothing the edges of your chocolate shells to create a seamless seal.
- Cupcake Liners (Optional): Useful for holding the finished bombs before packaging or serving, adding a nice presentation touch.
Step-by-Step Guide to Crafting Hot Cocoa Bombs
Now, let’s get to the exciting part – bringing your hot cocoa bombs to life! Follow these detailed instructions carefully for the best results, transforming simple ingredients into edible works of art.
1. Melting Your Chocolate to Perfection
The first critical step is melting your chocolate correctly. The type of chocolate significantly impacts the final outcome. If using high-quality melting wafers or compound chocolate, simply melt it slowly and gently. For regular chocolate chips or couverture chocolate (true chocolate), tempering is highly recommended for a glossy finish, a satisfying snap, and to prevent “bloom” (the dull, whitish streaks that can appear on untempered chocolate). Tempering involves heating and cooling chocolate to specific temperatures to stabilize the cocoa butter crystals, resulting in a professional-looking product.
Methods for Melting:
- Double Boiler: Place finely chopped chocolate in a heatproof bowl set over a saucepan of simmering water (ensure the bottom of the bowl does not touch the water). Stir continuously with a heatproof spatula until the chocolate is smooth and completely melted. This method provides gentle, even heat.
- Microwave: Place finely chopped chocolate in a microwave-safe bowl. Heat in short bursts (30-second intervals for the first minute, then 15-second intervals), stirring thoroughly after each interval. Continue until the chocolate is mostly melted, then remove from the microwave and stir until completely smooth using the residual heat. Be very careful not to overheat, as this can scorch the chocolate and make it unusable.
- Chocolate Warmer: If you have a dedicated chocolate warmer, follow the manufacturer’s instructions for melting. This is often the easiest method for maintaining the ideal working temperature of the chocolate over time.
Regardless of the method, ensure your chocolate is smooth, lump-free, and at the correct working temperature (typically around 88-92°F or 31-33°C for milk/dark chocolate, and slightly lower for white chocolate).
2. Preparing Your Molds
Before introducing chocolate, properly prepare your molds to ensure a flawless finish. Wash your cocoa bomb molds thoroughly with warm, soapy water, then rinse them completely to remove all soap residue. Immediately dry them with a lint-free paper towel or a clean, soft cloth. This crucial step removes any residual dust, oils, or water spots that could lead to streaks, dullness, or an uneven finish on your chocolate shells. A perfectly clean and dry mold is the secret to achieving a beautifully glossy and professional-looking bomb.
3. Creating the First Chocolate Layer
With your melted chocolate ready, it’s time to coat the molds. Using a small spoon or a clean pastry brush, carefully transfer a generous amount of melted chocolate into each cavity of your mold. Start by coating the perimeter, then gently swirl or brush the chocolate around to ensure the entire surface is evenly covered. Aim for a consistent, medium-thick layer that is thick enough to be sturdy but not overly bulky. If you notice any excess chocolate pooling at the bottom, gently scoop it out. Once each cavity is coated, firmly tap the mold against your clean workspace or press on the back of the mold to release any trapped air bubbles, which can cause imperfections or weak spots in the finished shell. Place the molds in the refrigerator for 5-10 minutes, or until the chocolate is completely solidified and firm to the touch.
4. Reinforcing with a Second Layer
To ensure your cocoa bombs are robust and won’t easily break when handled or filled, a second, reinforcing layer of chocolate is essential, especially around the rim where the two halves will join. Carefully add another thin layer of melted chocolate over the first, focusing on strengthening the edges of each half-sphere. It’s important that this chocolate isn’t excessively hot, as it could melt through and compromise your already set first layer. Once the second layer is applied, return the molds to the refrigerator for another 5-10 minutes. For best results in unmolding and to prevent flat bottoms, consider letting them cool upside down on a piece of parchment paper or a cooling rack if your molds allow for it. Ensure they are completely solid before moving on.
5. Unmolding and Smoothing Edges
Once the chocolate is completely set (typically after another 10-15 minutes in the fridge, or until the molds feel cold and the chocolate easily pulls away), take the molds out. Before unmolding, allow them to sit at room temperature for a minute or two; this helps prevent condensation and makes the chocolate less brittle. Gently flex the silicone molds to release the chocolate halves. If using polycarbonate molds, turn them over and tap firmly on a clean surface until the shells pop out. Handle the delicate chocolate shells with extreme care, ideally wearing gloves.
To create a perfect, seamless seal later, the edges of your chocolate halves need to be smooth and even. Heat a small, non-stick pan or a clean plate on low heat until it’s just warm to the touch (not hot enough to scorch the chocolate). Wearing gloves to avoid fingerprints and prevent the chocolate from melting with your body heat, carefully pick up one chocolate half and briefly press its open edge onto the warm pan or plate. This will slightly melt and smooth the rim, creating an even surface for sealing. Immediately transfer it to a cupcake liner or a piece of parchment paper to cool and retain its shape.
6. Filling Your Cocoa Bombs with Delights
Now for the exciting part: filling your chocolate shells and adding the surprise! Take one smoothed half-sphere and carefully fill it with your desired ingredients. A standard filling includes about half a packet (or 2-3 tablespoons) of your chosen hot cocoa mix, a teaspoon and a half of powdered non-dairy creamer for extra creaminess, and a generous handful of mini marshmallows. But don’t stop there! This is where you can truly customize your bombs:
- Flavor Boosters: Add a pinch of ground cinnamon, a dash of chili powder for a Mexican hot chocolate twist, a few drops of peppermint extract (if your chocolate is already flavored), or a sprinkle of instant coffee for a mocha kick.
- Extra Indulgences: Include mini chocolate chips, caramel bits, crushed peppermints, or even a tiny amount of sprinkles for an added visual surprise inside.
- Marshmallow Mania: Use different colors, shapes, or even homemade marshmallows for an elevated experience.
7. Sealing and Decorating Your Creations
Once your first chocolate half is filled, it’s time to assemble the bomb. Pick up another smoothed chocolate half (the empty one) and gently press its open edge onto the warm pan/plate for a few seconds, just enough to slightly melt the rim. Quickly but carefully, adhere this melted edge to the top of your filled chocolate half, creating a complete sphere. The slightly melted chocolate acts as a natural “glue,” sealing your bomb securely. Hold them together for a few seconds until they begin to set and the chocolate hardens, forming a strong bond.
For the finishing touch, get creative with your decorations! You can drizzle contrasting melted chocolate (white chocolate on dark, or vice versa) over the assembled bombs using a spoon or a piping bag with a fine tip. While the drizzle is still wet, liberally sprinkle with your favorite toppings – festive sprinkles, edible glitter, more mini marshmallows, or even a dusting of cocoa powder. Once decorated, allow your hot cocoa bombs to fully set at room temperature or in the refrigerator for a few minutes. Store them in an airtight container until ready to use.
Pro Tips for Flawless Hot Cocoa Bombs
Achieving picture-perfect hot cocoa bombs takes a little practice, but these expert tips will help you avoid common pitfalls and ensure a dazzling result every time:
- Temperature Control is Key: Chocolate is sensitive to temperature. Ensure it’s not too hot when applying, or it will be too thin and difficult to manage. If it gets too cool and thick, gently rewarm it. Consistent temperature also helps prevent streaking and bloom.
- Work in a Cool Environment: If your kitchen is warm, your chocolate will melt quickly and become challenging to work with. A slightly cooler room temperature (around 68-70°F or 20-21°C) is ideal for chocolate work.
- Don’t Overfill: While tempting to cram in as many marshmallows as possible, overfilling your chocolate shells can make them difficult to seal and prone to breaking. Leave a small margin at the top.
- Patience During Chilling: Rushing the chilling process can lead to brittle shells that crack easily when unmolding. Ensure each layer is fully set before moving to the next step.
- Gloves are Your Best Friend: Seriously! Your body heat can quickly melt the chocolate, and fingerprints can ruin the smooth, glossy finish. Nitrile or latex gloves are indispensable for handling the delicate shells.
- Practice Unmolding: Silicone molds are generally easier, but polycarbonate molds may require a firm tap. Don’t be discouraged if your first few aren’t perfect; practice makes perfect!
- Clean as You Go: Keep your workspace tidy. Spills can quickly lead to sticky messes and chocolate waste. Have extra paper towels on hand.
Unleash Your Creativity: Variations and Customizations
Once you’ve mastered the basic technique, the real fun begins with customization! Hot cocoa bombs are a fantastic canvas for your culinary imagination, offering endless possibilities for flavor and visual appeal:
- Flavor Combinations:
- Peppermint Delight: Use peppermint-flavored chocolate for the shell, fill with peppermint hot cocoa mix, crushed candy canes, and mini marshmallows.
- Salted Caramel Dream: Opt for milk chocolate shells, a spoonful of caramel sauce (sealed well within the mix, perhaps in a mini chocolate cup), salted caramel hot cocoa, and mini marshmallows.
- Spicy Mexican Hot Chocolate: Dark chocolate shells, traditional Mexican hot cocoa mix (with a hint of cinnamon and chili powder), and a sprinkle of mini chocolate chips.
- White Chocolate Raspberry: White chocolate shells, raspberry-flavored hot cocoa mix, and freeze-dried raspberries for a burst of fruitiness.
- Mocha Madness: Dark or milk chocolate shells, regular cocoa mix, a teaspoon of instant coffee granules, and chocolate-covered espresso beans.
- Holiday & Seasonal Themes: Decorate with specific sprinkles for Christmas, Halloween, Valentine’s Day, or birthdays. Use food coloring (oil-based for chocolate) to tint white chocolate shells for vibrant designs. Create shaped bombs if you have specific molds (e.g., pumpkins, hearts).
- Adult Indulgences: For grown-up gatherings, consider adding a tiny miniature bottle of liqueur (like Baileys, Kahlua, or peppermint schnapps) alongside the cocoa mix, or simply a splash of flavoring extract.
- Surprise Fillings: Beyond marshmallows, consider adding tiny gummy candies, sprinkles, mini chocolate chips, or even small edible messages printed on wafer paper inside for an extra element of surprise.
Gifting and Enjoying Your Homemade Treats
Hot cocoa bombs aren’t just a delightful treat for yourself; they make incredible, thoughtful gifts that are sure to impress. Package them individually in clear cellophane bags tied with a festive ribbon, or group a few together in a decorative box with a tag providing heating instructions. They are perfect for:
- Holiday presents and stocking stuffers for friends, family, and colleagues.
- Birthday surprises for kids and adults alike.
- Thank-you gifts for teachers, hosts, or anyone you appreciate.
- Party favors for winter gatherings, bridal showers, or themed events.
- A special treat for movie nights, cozy evenings by the fireplace, or a thoughtful care package.
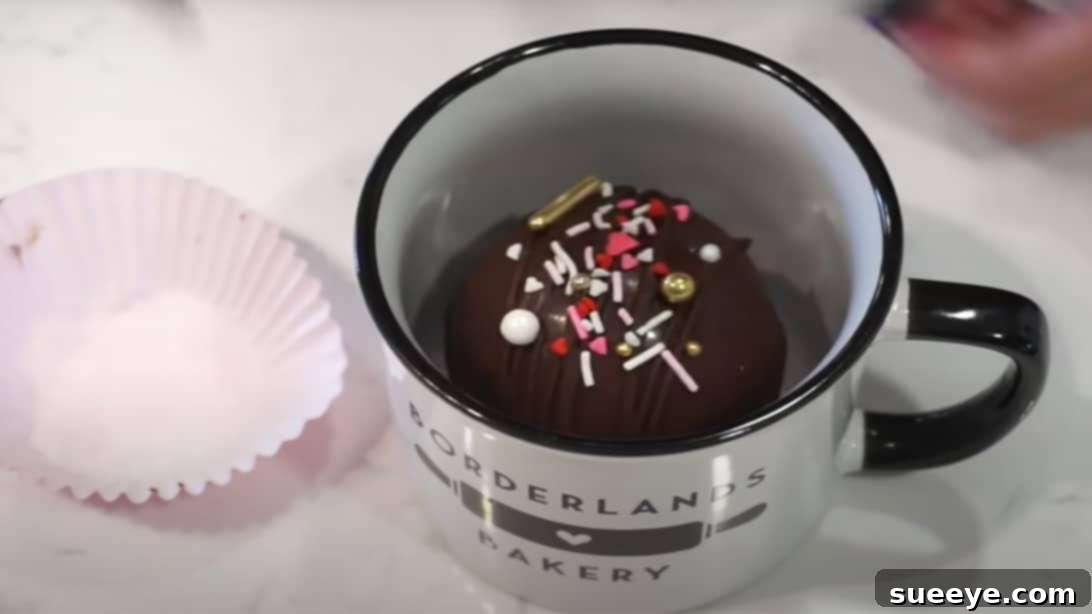
To enjoy, simply place your hot cocoa bomb in a mug, pour 8-10 ounces of hot milk (or your preferred non-dairy alternative) over it, and watch the magic unfold! The chocolate shell will slowly melt, releasing the hot cocoa mix, marshmallows, and any other surprises inside, creating a rich, creamy, and wonderfully decadent cup of hot chocolate. Stir gently to combine all ingredients, and savor every sip of your homemade masterpiece.
Crafting hot cocoa bombs is a rewarding culinary adventure that combines creativity with delicious results. With a little practice and attention to detail, you’ll be making professional-looking and tasting bombs that delight everyone who tries them. So gather your ingredients, clear your workspace, and get ready to spread some chocolatey joy and surprise!