
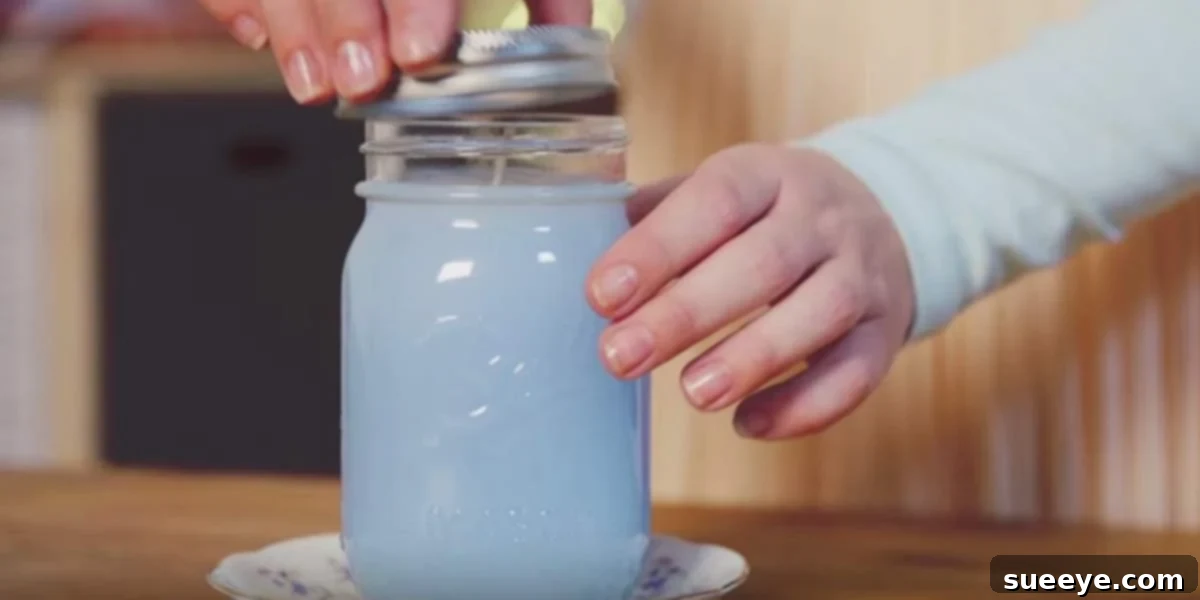
DIY Mason Jar Candles: Crafting Heavenly Scents with Ease
Imagine filling your home with exquisite fragrances, crafted by your own hands. The warmth of a flickering flame, the comforting aroma, and the satisfaction of knowing you’ve created something beautiful and unique – that’s the profound joy of making your own candles. If you’ve ever felt intimidated by the idea of candle making, believing it to be a complex craft reserved for experts, prepare to have those fears melt away. This comprehensive guide will walk you through every simple step to create your own delightful, long-lasting Mason jar candles, perfect for enhancing your living space or gifting to loved ones.
Candles are much more than just sources of light; they are powerful mood setters, ambiance enhancers, and personal expressions. For many, a home that always smells wonderful is a true sanctuary, a place of comfort and relaxation. Homemade candles offer an unparalleled opportunity to customize those aromas, allowing you to infuse your environment with scents that genuinely resonate with you. With an incredible array of essential oils and fragrance oils available on the market today, the possibilities for customization are truly endless. You can craft anything from invigorating citrus blends to calming lavender notes, or even robust, earthy scents that appeal to a traditionally masculine preference. The versatility is astounding! Moreover, handmade candles make incredibly thoughtful and personal gifts that are always appreciated, regardless of the recipient.
Why Choose Soy Wax for Your Homemade Candles?
When embarking on your candle-making journey, the choice of wax is paramount. While various types exist – from traditional paraffin to beeswax and coconut wax – we highly recommend opting for soy candle wax, and for very compelling reasons. Soy wax offers numerous advantages over conventional paraffin wax, making it the preferred choice for eco-conscious crafters and anyone seeking a superior burning experience for their homemade creations.
- Cleaner Burn: Soy wax is a natural, biodegradable product derived from soybeans. Unlike paraffin, which is a petroleum byproduct, soy wax burns significantly cleaner, producing considerably less soot and toxic fumes. This translates to a healthier indoor air quality for your home and lungs, reducing the black residue that often accumulates on jars and nearby surfaces.
- Longer Lasting: Due to its lower melting point, soy wax burns at a slower and cooler rate compared to paraffin wax. This inherent characteristic means your beautifully crafted soy candles will last much longer, providing more hours of delightful fragrance and enjoyment from each candle you create, offering better value for your efforts.
- Excellent Scent Throw: Soy wax is renowned for its ability to hold and gradually release fragrances effectively. This ensures a consistent and pleasant aroma that permeates your space without being overpowering. It creates a robust “cold throw” (scent when unlit) and an impressive “hot throw” (scent when burning).
- Renewable and Sustainable Resource: As soy is a natural, plant-based, and renewable agricultural resource, choosing soy wax supports sustainable farming practices and is a significantly more environmentally friendly option than petroleum-derived alternatives.
- Easy Cleanup: One of the practical benefits of soy wax is its ease of cleanup. Should you spill any wax during the making process, or if you wish to repurpose your candle jars, soy wax can typically be cleaned up easily with just soap and warm water, unlike the stubborn, greasy residue left by paraffin wax.
With these benefits in mind, you’re now equipped to make an informed choice for your candle base. Ready to transform simple ingredients into fragrant treasures? Let’s dive into making your very own Mason jar candles, a project that’s as fulfilling as it is aromatic!
How to Make A Mason Jar Candle: A Comprehensive Step-by-Step Tutorial
Creating your own Mason jar candles is an incredibly rewarding process that combines a touch of science with creative artistry. By following these detailed instructions, you’ll soon be enjoying the serene ambiance and delightful aromas of candles crafted entirely by you.
What You Will Need: Essential Supplies for Candle Making
Before you begin the exciting process of candle crafting, it’s crucial to gather all your necessary materials. Having everything organized and within reach will make the entire process smooth, safe, and enjoyable, preventing any last-minute rushes or interruptions.
- Soy Wax Flakes: Opt for high-quality, natural soy wax flakes, often labeled as “container wax.” These are specifically formulated for container candles, providing good adhesion to the jar and an excellent scent throw. They are easy to melt and work with, making them perfect for beginners.
- Candle Wicks: Choose pre-tabbed cotton wicks with a self-centering metal base. It is absolutely vital to ensure the wick size (diameter) is appropriate for your Mason jar’s diameter. An improperly sized wick can lead to tunneling (where wax is left on the sides) or excessive soot. Consult a wick guide for soy wax based on your jar’s diameter.
- Mason Jars (or other Heat-Safe Containers): Standard Mason jars are an excellent choice due to their proven durability, heat resistance, and classic aesthetic. Alternatively, you can use other heat-safe glass containers, ceramic vessels, or metal tins. Always ensure your chosen containers are impeccably clean and completely dry before use.
- Wick Centering Tool (or Clothespin/Peg): This seemingly simple tool is crucial for success. It helps keep your wick perfectly centered and upright as the liquid wax cools and solidifies, preventing it from leaning or moving. A clothespin or two craft sticks taped together can serve as an effective DIY alternative.
- Essential Oils or Fragrance Oils: This is where the magic of scent happens! Select high-quality, candle-safe oils. Essential oils offer natural aromatherapy benefits but can be more volatile. Fragrance oils provide a wider and more consistent range of scent profiles, specifically formulated for candle making. Always research the proper usage rates (typically 6-10% of wax weight) for optimal scent throw and safety.
- Wick Adhesive (Glue Dots or High-Temperature Tacky Glue): A small, heat-resistant adhesive dot or a drop of specialized tacky glue is used to securely attach the metal wick base to the very bottom center of your jar. This prevents the wick from floating or shifting during pouring and burning.
- Double Boiler Setup: This is a non-negotiable safety item for melting wax. You will need a heat-resistant pouring pitcher or a smaller metal pot that fits comfortably inside a larger pot filled with about 1-2 inches of water. Never melt wax directly over an open flame or high heat, as it is a flammable material.
- Heat-Resistant Thermometer: A crucial tool for monitoring wax temperature. An accurate thermometer (candy or craft thermometer) is essential, as adding fragrance oils and pouring wax at specific temperatures significantly impacts both the scent throw and the finished appearance of your candle.
- Measuring Cup or Digital Scale: For accurately measuring your soy wax (measuring by weight is far more precise than by volume) and your chosen fragrance oil. Precision here ensures consistent results and proper fragrance load.
- Wooden Stirring Utensil: Dedicate a wooden spoon or stir stick solely for candle making to avoid cross-contamination with food.
- Candle Dye (Optional): If you desire colored candles, choose liquid or block dyes specifically designed for wax. These are highly concentrated, so use sparingly to achieve your desired color intensity.
- Kitchen Towels/Paper Towels: Keep these handy for immediate cleanup of any wax spills or drips before they harden.
- Scissors or Wick Trimmer: Essential for trimming wicks to the correct length before the first burn and subsequent uses, ensuring a clean and efficient flame.
Step-by-Step Instructions: Crafting Your Mason Jar Candle
Step 1: Prepare Your Jars and Wicks
Begin by thoroughly cleaning and drying your Mason jars. Any residual dust, debris, or moisture can negatively affect the wax adhesion and overall candle quality. Once clean, apply a small amount of wick adhesive – either a pre-made glue dot or a small drop of high-temperature tacky glue – to the metal tab at the base of your chosen wick. Carefully center and firmly press the wick to the very bottom center of the jar. Position your wick centering tool (or a clothespin) across the rim of the jar, ensuring the wick remains perfectly upright and centered as the wax cools. This alignment is critical for an even burn.
Step 2: Measure Your Soy Wax Flakes
To accurately determine the amount of wax needed, use your empty Mason jar as a guide. Fill your Mason jar to the brim with soy wax flakes. Pour these measured flakes into your dedicated pouring pitcher (or the smaller pot of your double boiler setup). Repeat this step, filling the jar again, but this time only about three-quarters full. Add these additional flakes to your pouring pitcher. This method accounts for the significant density change when solid wax flakes melt into liquid wax; you typically need about 1.5 to 2 times the volume of solid flakes to fill a container with liquid wax.
Step 3: Melt the Soy Wax Safely Using a Double Boiler
Set up your double boiler on the stove. Place your pouring pitcher containing the measured wax flakes into a larger pot filled with approximately 1-2 inches of water. Place the pot on your stove over medium-low heat. As the water heats, it will gently and indirectly melt the wax. Stir the wax gently and continuously with your wooden utensil to ensure even melting and prevent hot spots. Attach your heat-resistant thermometer to the side of the pouring pitcher, ensuring the tip is submerged in the wax but not touching the bottom of the pitcher. Continue melting until the wax is fully liquid and reaches approximately 185°F (85°C). It’s important to avoid overheating the wax beyond this temperature, as it can compromise the wax’s ability to bind with fragrance and affect its final texture.
Step 4: Add Candle Dye (Optional)
If you’ve decided to add a splash of color to your candles, this is the ideal moment. Once the wax has reached its target temperature of 185°F and is completely melted, add a very small amount of wax dye. If using liquid dye, start with just a few drops; for a dye block, a tiny shaving is sufficient. Stir the wax thoroughly and observe the color. Remember that the color will appear much lighter in its liquid state and will typically deepen slightly as it solidifies. You can always add more dye to intensify the color, but you cannot remove it, so start conservatively.
Step 5: Incorporate Your Essential or Fragrance Oils
This is the pivotal step where your candle truly gets its beautiful, signature scent! Carefully remove the melted wax from the heat once it reaches 185°F. Allow the wax to cool slightly to about 180-185°F (82-85°C). This specific temperature range is absolutely crucial for optimal scent throw; adding fragrance oils when the wax is too hot can cause the delicate fragrance molecules to burn off, resulting in a weak scent. Conversely, adding it when the wax is too cool can lead to poor binding and uneven scent distribution. Add your pre-measured essential or fragrance oils (typically 6-10% of the wax’s weight). Stir continuously and thoroughly for at least 2 minutes to ensure the fragrance oil fully binds with the wax, preventing it from sinking to the bottom or evaporating unevenly.
Step 6: Pour the Wax into Your Jars
After adding the fragrance, allow the wax to cool further to its ideal pouring temperature, which for soy wax is typically between 135-145°F (57-63°C). Pouring at this temperature is key to preventing common issues like “wet spots” (where the wax pulls away from the jar, creating translucent patches) and frosting. Carefully and slowly pour the scented wax into your prepared Mason jars, making sure to avoid disturbing the perfectly centered wick. Fill the jar to just below the rim, leaving a small amount of headspace to prevent overflow during burning.
Step 7: Allow Your Candles to Cure
This is perhaps the most important, yet often overlooked, step for achieving a strong-smelling candle with a proper burn. Once poured, leave your candles undisturbed to cool and solidify completely overnight, or for at least 24 hours, at a stable room temperature away from drafts. For an optimal scent throw and a harder, longer-lasting candle, it is highly recommended to “cure” your candles for a minimum of 1-2 weeks. During this crucial curing period, the wax molecules fully bind and integrate with the fragrance oil, resulting in a much richer, more stable, and more potent scent when the candle is finally lit.
Step 8: Trim the Wick and Enjoy!
After the candle has fully cured, carefully remove the wick centering tool. Using sharp scissors or a dedicated wick trimmer, trim the wick to approximately 1/4 inch (about 6mm) above the wax surface. This seemingly small detail is vital; an untrimmed or excessively long wick can cause excessive flickering, create a dangerously large flame, lead to rapid wax consumption, and produce unsightly soot buildup, spoiling your beautiful creation. Your heavenly scented Mason jar candle is now perfectly ready to be lit and enjoyed! Remember to always allow the first burn to create a full melt pool (wax melted to the edges of the jar) to prevent tunneling on subsequent burns.
Important Candle Making Safety Tips
Safety should always be your absolute top priority when working with hot wax and potential open flames. Adhering to these guidelines will ensure a safe and enjoyable crafting experience:
- Never Leave Melting Wax Unattended: Always keep a watchful eye on your double boiler setup. Wax can ignite if it becomes too hot.
- Always Use a Double Boiler: Never melt wax directly over an open flame or high direct heat. This is a significant fire hazard.
- Work in a Well-Ventilated Area: Ensure good airflow in your workspace, especially when melting wax and adding fragrance oils, to dissipate any fumes.
- Keep Flammable Materials Away: Maintain a clear, uncluttered workspace, free from paper, cloth, curtains, or any other combustible items that could easily catch fire.
- Handle Hot Wax Carefully: Always use heat-resistant gloves or oven mitts when handling hot pots, pouring pitchers, and warm candle jars to prevent burns.
- Clean Spills Immediately: Should any wax spill, clean it up promptly. For soy wax, warm soapy water will usually do the trick before it fully hardens.
- Store Essential/Fragrance Oils Safely: Keep all oils in tightly sealed containers, out of reach of children and pets, and away from direct sunlight or heat.
Troubleshooting Common Candle Making Issues
It’s completely normal for your first few candles not to be absolutely perfect. Candle making involves nuances, and encountering common issues is part of the learning curve. Here are some frequent problems and effective ways to address them:
- “Wet Spots” or Pull-Away: These are translucent or dark patches where the wax appears to have pulled away from the interior of the jar. They are typically cosmetic and most often caused by rapid temperature changes during the cooling process, or by pouring wax that is too cool for the ambient temperature. To minimize this, try pouring at a slightly higher temperature (within the recommended 135-145°F range) or gently pre-warming your jars (e.g., with a heat gun or in a warm oven) before pouring. Allowing candles to cool slowly and evenly, away from drafts, can also help.
- Poor Scent Throw (When Lit): If your candle doesn’t smell as strong as you’d like when burning, several factors could be at play. Ensure you are using the correct fragrance load (6-10% by weight, as recommended by your oil supplier). Confirm you are adding the fragrance oil at the correct temperature (180-185°F) and stirring it thoroughly for at least 2 minutes. Most importantly, allow for adequate curing time (1-2 weeks is truly ideal for soy wax to fully bind with the fragrance). An improperly sized wick can also hinder scent throw.
- Tunneling (Wick Burns Down the Middle, Leaving Wax on Sides): This common issue usually indicates that your wick is too small for the diameter of your jar. The wick isn’t generating enough heat to create a full melt pool that reaches the edges of the container. Ensure you select a wick size appropriate for your jar. Additionally, for the very first burn, let the candle burn long enough for the entire surface to melt and reach the container’s edge. This “memory burn” is crucial for subsequent even burns.
- Sinking or Cracks on the Surface: These surface imperfections can occur if the wax cools too quickly, creating tension, or if the pouring temperature was too high. To mitigate this, try pouring at a slightly lower temperature (within the 135-145°F range) and allow the candle to cool slowly at a stable room temperature, away from any drafts or sudden temperature changes. A second “re-pour” layer of hot wax can sometimes fix minor sinking.
Tips for Customization and Gifting Your Handmade Candles
The true beauty of DIY projects lies in the ability to personalize and make each creation uniquely yours! Here are some creative ideas to elevate your handmade candles and make them even more special:
- Creative Labels: Design and print custom labels for your jars. These can be elegant, minimalist, or whimsical. Include important details like the scent name, your “brand” name, a witty quote, or a heartfelt, personalized message if giving as a gift.
- Vary Your Containers: While Mason jars are fantastic and versatile, don’t limit yourself! Explore other heat-safe containers like charming teacups, vintage tins, stylish glass tumblers, or ceramic bowls to achieve different aesthetics and match various home décors.
- Scent Blending: Unleash your inner perfumer by experimenting with combining different essential or fragrance oils to create truly unique signature scents. Start with small amounts and meticulously record your ratios so you can recreate your favorite blends. Think about complementary notes like citrus with floral, or woody with spicy.
- Gift Packaging: Enhance the gifting experience by adding thoughtful packaging. Adorn your candle jars with elegant ribbons, rustic twine, small decorative tags, or place them in charming, custom-fitted gift boxes or bags. A beautifully packaged gift always leaves a lasting impression.
- Embellishments: Consider adding dried flowers, coffee beans, or small crystals to the wax surface (ensure they are non-flammable and won’t interfere with the wick).
Congratulations! You now possess all the comprehensive knowledge and practical steps required to create your own wonderful, custom-scented Mason jar candles. Embrace the rewarding process, experiment with a myriad of scents and colors, and most importantly, savor the serene ambiance and delightful aromas your personal creations bring to your home. Happy crafting, and may your days be filled with beautiful light and fragrance!