
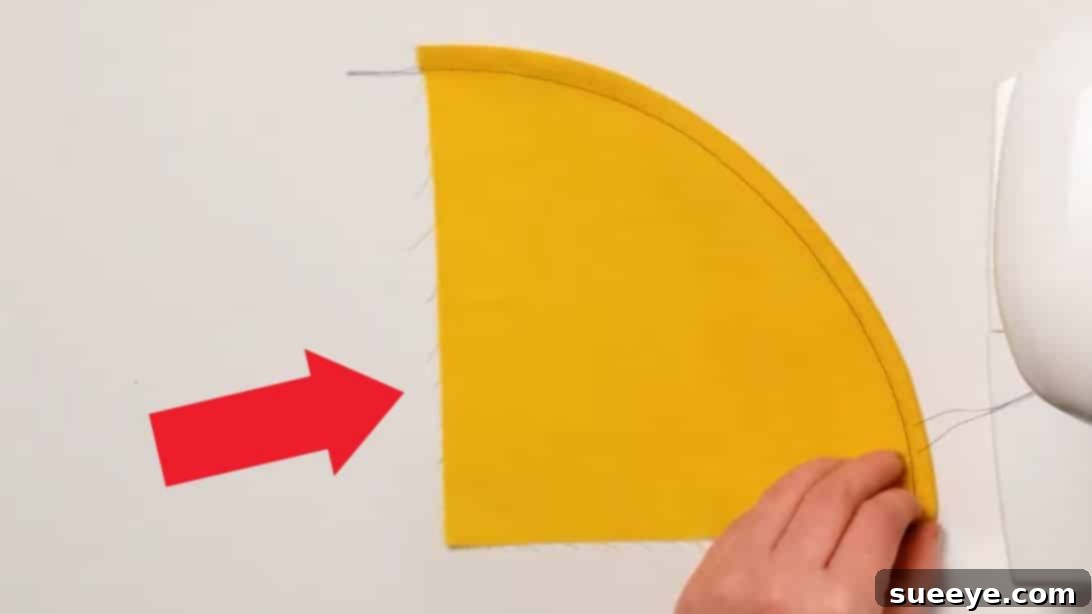
Mastering the Curved Hem: A Comprehensive Guide to Professional Finishes
Achieving a beautifully sewn curved hem can transform a simple garment into a professional-looking piece. Whether you’re working on a flowing dress, a stylish skirt, or a unique apron, a well-executed hem is crucial for preventing fabric edges from fraying and providing a clean, polished finish. While the thought of tackling a curved edge might seem daunting to some, especially beginners, it’s a skill that is incredibly rewarding to master. With a little patience and the right technique, you’ll be creating flawless curved hems in no time.
Many sewers find curved hems challenging due to their tendency to become uneven or puckered. It’s a common hurdle, and encountering a “wonky” hem on your first few attempts is completely normal. The key is to not get discouraged! Sewing, like any craft, requires practice, and mastering curved hems is no exception. With consistent effort, you’ll develop the dexterity and understanding needed to produce smooth, elegant curves consistently.
This comprehensive guide will walk you through three highly effective methods for sewing a curved hem, ensuring you have the tools and knowledge to achieve a perfect finish every time. We’ll explore the delicate rolled hem, the sturdy bias facing, and the decorative bias binding. These techniques are brought to you with insights inspired by experts like JOANN Fabric and Craft Stores, ensuring you receive reliable and practical advice. Dive in and get ready to elevate your sewing projects!
Why a Flawless Curved Hem Matters
A well-sewn hem is more than just a functional element; it’s a mark of quality craftsmanship. For garments with curved edges, such as circle skirts, empire waist dresses, or ruffled sleeves, the hem defines the garment’s flow and silhouette. A neat, even curve enhances the design, making the piece look professionally made rather than homemade. Conversely, a poorly executed curved hem can detract significantly from the overall appearance, drawing attention to imperfections instead of the garment’s beauty. Beyond aesthetics, a hem provides durability, protecting the fabric’s raw edge from unraveling and ensuring your creation stands the test of time.
Overcoming the Curved Hem Challenge
The primary difficulty with curved hems lies in manipulating straight fabric grains into a smooth curve without distortion. As you fold a curved edge, the inner edge is shorter than the outer edge, creating excess fabric that can pucker if not managed correctly. This is where specialized techniques come into play. Instead of fighting the fabric, these methods work with its natural tendencies, allowing you to gradually ease the curve into place. Don’t worry if it feels awkward at first; with each practice piece, you’ll gain a better feel for the fabric and the precision required.
RELATED: Learn How to Sew an Invisible Hem for Straight Edges
Essential Tools for Curved Hem Success
Before diving into the techniques, ensure you have the right tools at hand. While a sewing machine is central, other items will greatly assist your process:
- Sharp Fabric Shears: For clean, precise cuts.
- Measuring Tape/Ruler: Accuracy is key for consistent hem allowances.
- Fabric Chalk or Disappearing Ink Pen: For marking your hemline.
- Plenty of Pins: To hold fabric securely, especially on curves.
- Iron and Ironing Board: Crucial for pressing and setting folds.
- Matching Thread: For a cohesive finish.
- Sewing Machine Needles: Appropriate for your fabric type.
- Optional: Rolled Hem Foot, Bias Tape Maker: These specialized tools can make certain techniques easier, especially the rolled hem and bias binding.
Three Proven Methods for Sewing a Curved Hem
Here are the three popular and effective methods you can employ to achieve a beautiful curved hem. Each offers a distinct finish and may be better suited for different fabric types or project aesthetics.
1. The Elegant Rolled Hem
The rolled hem, also known as a narrow hem, is perfect for lightweight, delicate fabrics like silk, chiffon, or fine cotton, where you desire a very subtle and clean finish. It creates a tiny, self-contained edge that looks incredibly refined and doesn’t add bulk. This technique involves turning the fabric edge twice, essentially rolling it into a narrow tube before stitching. It requires precision but yields a truly professional result.
Step-by-Step Guide to the Rolled Hem:
- Prepare Your Edge with Basting: Begin by sewing a basting line (a long, temporary stitch) 3/8 inch (approximately 1 cm) in from the raw curved edge of your fabric. This initial stitch line acts as a guide and helps to stabilize the fabric.
- Create a Second Basting Line: Sew a second basting line between your first line and the raw edge, roughly 1/8 to 1/4 inch from the edge, depending on how narrow you want your final rolled hem to be.
- Initiate the Roll: Gently pull the bobbin thread from the second basting line. As you pull, the fabric edge will naturally start to gather and curl inwards. This eases the curve and helps prevent puckering.
- Press the First Fold: Carefully press this newly curled edge flat. Use a tailor’s ham or a curved pressing surface if available, which can conform to the fabric’s shape, making pressing easier and more effective.
- Form the Second Roll: Turn the edge inward one more time, enclosing the raw edge completely within the first fold. This creates a neat, double-rolled edge.
- Baste the Final Fold (Optional but Recommended): For added stability, especially on challenging fabrics, run a final basting line along the new, folded edge. Gently pull the thread again to ensure the curve is smooth and even.
- Final Press and Stitch: Press the rolled hem flat one last time to set the folds. Then, using a regular stitch length, sew very close to the inner edge of the roll, securing it permanently. A specialized rolled hem foot on your machine can greatly assist in guiding the fabric for a perfectly even stitch.
- Remove Basting Stitches: Once your permanent stitch is complete, carefully remove all basting stitches.
Tips for a Perfect Rolled Hem:
- Practice on Scraps: Always practice on a scrap piece of your actual fabric first.
- Adjust Stitch Length: A slightly shorter stitch length can create a more secure and even hem.
- Use a Rolled Hem Foot: This attachment makes the process significantly easier and more consistent.
- Press, Press, Press: Ironing between each step is crucial for sharp, clean folds.
- Go Slow: Especially on curves, take your time and guide the fabric gently.
2. The Structured Bias Facing
Bias facing is an excellent method for finishing curved hems, particularly on medium-weight fabrics that require a bit more structure or when you want to create a clean finish that is completely enclosed within the garment. This technique uses a strip of fabric cut on the bias (diagonally across the grain), which gives it exceptional stretch and flexibility, making it ideal for conforming smoothly to curves without bulk or puckering. Bias facing is a favorite for necklines, armholes, and, of course, curved hems on garments like skirts and dresses.
Step-by-Step Guide to Bias Facing:
- Prepare Your Bias Tape: Cut a strip of fabric on the bias (45-degree angle to the selvage) that is approximately 1 inch wide and long enough to go around your entire curved hem. Bias tape can be store-bought or self-made from your main fabric or a coordinating one.
- Press One Edge: Press one long edge of your bias tape in by about 1/4 inch. This will be the edge that is stitched down last, so a neat fold is important.
- Pin to Curved Edge: Align the unfolded raw edge of the bias tape with the raw curved edge of your garment, right sides together. Pin it securely in place. As you pin around the curve, gently stretch the bias tape slightly to help it conform to the curve. This gentle stretching is key to preventing puckers.
- Sew the First Seam: Stitch along the bias tape, about 1/4 inch in from the raw edge. Ensure your seam allowance is consistent for a smooth curve.
- Trim Seam Allowance: Carefully trim the seam allowance along the outside edge (the garment side) down to about 1/8 inch. This reduces bulk. You might also want to clip small V-shapes into the seam allowance on convex curves or notch concave curves, but with bias, minimal trimming is often sufficient due to its flexibility.
- Press the Seam Open: Press the seam allowance open first, then press the bias tape away from the garment fabric. This helps create a crisp edge.
- Flip and Press Again: Flip the bias tape to the inside of the garment, so it completely encloses the raw edge. Press it down one more time, ensuring the folded edge of the bias tape is smooth and even.
- Topstitch the Bias Facing: From the right side of the fabric, topstitch the bias facing down. You can stitch very close to the folded edge of the bias tape (on the inside of the garment) or in the “ditch” of the seam where the garment fabric meets the facing, depending on the desired look. This secures the facing and gives it a clean finish.
Tips for a Perfect Bias Facing:
- Self-Made Bias Tape: Making your own bias tape ensures a perfect match to your fabric in terms of color, weight, and stretch.
- Even Pressure: Maintain even pressure when pinning and sewing to avoid stretching the garment fabric itself.
- Grading Seams: For very bulky fabrics, you might need to “grade” the seam allowance (trim layers to different widths) before pressing to reduce bulk.
3. The Decorative Bias Binding
Bias binding is a fantastic technique when you want to add a contrasting color or a neat, enclosed finish to a curved edge that will be visible. Unlike bias facing, which is hidden inside, bias binding wraps around the edge, creating a decorative border. It’s often used on blankets, placemats, necklines, and, of course, curved hems where a distinct edge is desired. Using double-folded bias tape is the most common approach for this method.
Step-by-Step Guide to Bias Binding:
- Prepare Double-Folded Bias Tape: You’ll need double-folded bias tape. This can be purchased pre-made or created by folding a bias strip in half lengthwise and then folding each raw edge in towards the center fold.
- Attach to the Right Side: Unfold one side of your double-folded bias tape. With right sides together, align the raw edge of this unfolded side of the bias tape with the raw curved edge of your fabric. Pin it carefully in place around the entire curve.
- Sew the First Seam: Stitch along the fold line of the bias tape. This will create your first, very precise seam.
- Wrap the Edge: Once the first seam is sewn, fold the bias tape completely over the raw edge of your fabric, bringing it around to the wrong side of the garment. The folded edge of the bias tape should now cover your first stitch line on the wrong side of the fabric.
- Secure with Stitch in the Ditch: From the right side of the fabric, carefully sew in the “ditch” – the groove created by the seam where the garment fabric meets the bias tape. This stitch will catch the folded edge of the bias tape on the wrong side, securing it invisibly from the right side. Alternatively, you can topstitch from the wrong side, directly on the bias tape, if you prefer that look.
Tips for a Perfect Bias Binding:
- Pre-Pressing: Ensure your bias tape is perfectly pressed before you start, especially if you’re making your own.
- Matching Thread: Use thread that matches your bias binding for the most seamless look.
- Consistent Seam Allowance: Accuracy in your first seam is critical, as it dictates how well the binding wraps around.
Choosing the Right Curved Hem Technique
Deciding which method to use depends on your fabric, the garment’s style, and the desired finish:
- Rolled Hem: Best for lightweight, sheer, or very fine fabrics. Creates a delicate, barely-there finish. Ideal for flowing garments where bulk is undesirable.
- Bias Facing: Excellent for medium-weight fabrics. Provides a clean, enclosed finish that adds a touch of stability without being visible from the outside. Perfect for a tailored look.
- Bias Binding: Suited for all fabric weights, but particularly effective when you want the hem edge to stand out or act as a decorative element. It’s also great for thicker fabrics that are difficult to roll.
General Tips for Sewing Beautiful Curved Hems
Regardless of the method you choose, these universal tips will help you achieve outstanding results:
- Pre-Press Your Hem Line: Mark your desired hemline with chalk and press it gently. This initial crease can serve as a guide.
- Use a Walking Foot: If your fabric is shifty or has multiple layers, a walking foot can help feed the fabric evenly, preventing stretching and puckering.
- Slow and Steady: When sewing curves, reduce your machine’s speed. This gives you more control and allows you to adjust the fabric smoothly.
- Pin Generously: Use more pins than you think you need, especially on tight curves. Place them perpendicular to the seam line so they can be easily removed as you sew.
- Test Your Stitch Length: Before sewing on your garment, test different stitch lengths on a fabric scrap. A slightly shorter stitch can offer more control and a more secure hem on curves.
- Steam, Don’t Iron: When pressing curves, use plenty of steam and a gentle touch. Ironing too forcefully can stretch and distort the fabric.
- Embrace Your Seam Ripper: It’s a tool for learning, not failure. Don’t hesitate to unpick and re-sew if a section isn’t perfect.
Practice Makes Perfect: Your Journey to Hemming Mastery
Sewing a flawless curved hem is a skill that develops with practice. Don’t be discouraged by initial imperfections. Each attempt brings you closer to understanding fabric behavior and refining your technique. Try each of these three methods on scrap fabric first to get a feel for them before applying them to your precious projects. Soon, you’ll be able to confidently tackle any curved hem, adding a professional and beautiful finishing touch to all your creations. Happy sewing!
Here’s a sewing tip for you: 10 Pro Game-Changing Sewing Tips