
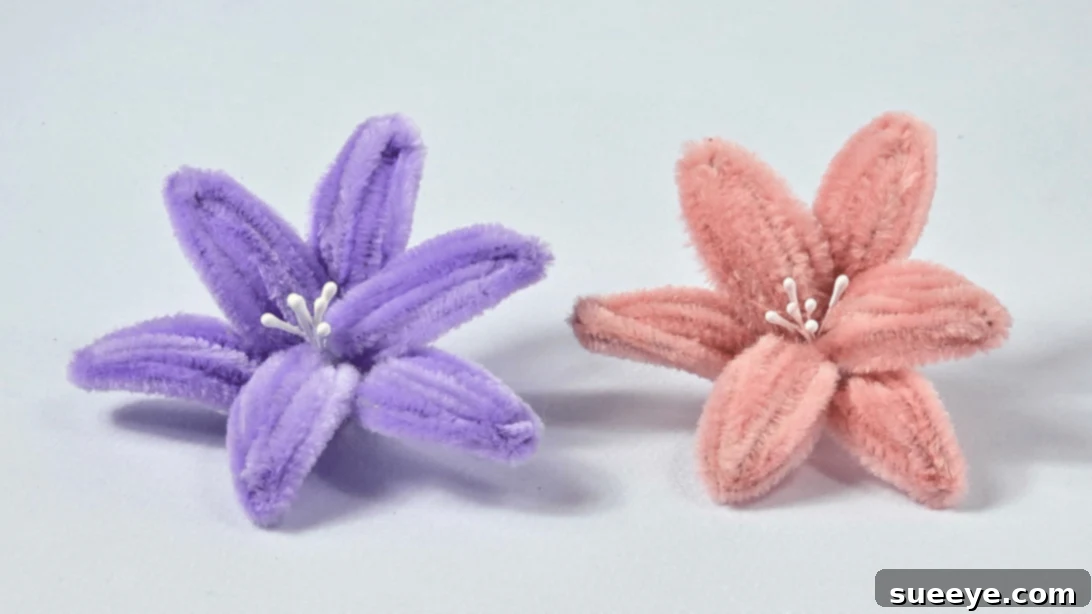
Welcome to the captivating and creative world of pipe cleaner crafting! Ever since I first discovered the magic of transforming simple pipe cleaners into beautiful, lasting blooms, I’ve been utterly hooked. There’s an immense sense of satisfaction and joy that comes from twisting and shaping these versatile, fuzzy wires into delicate petals, gradually assembling them into a vibrant bouquet that rivals fresh flowers in both charm and unique appeal. This engaging activity isn’t just a delightful way to spend an afternoon; it’s a wonderful opportunity to create deeply heartfelt gifts and stunning, personalized home decor pieces.
Imagine the delight on a loved one’s face when you present them with a handcrafted bouquet of elegant lilies for their Birthday, Mother’s Day, an anniversary, or even on an ordinary day just to make them feel extra special. The personal touch of a handmade gift speaks volumes, conveying thoughtfulness and effort in a way store-bought items simply cannot. These DIY pipe cleaner lilies are not only visually appealing but also a lasting testament to your creativity and care.
The Irresistible Charm and Practicality of Pipe Cleaner Flowers
Pipe cleaners are truly a crafter’s best friend, offering a multitude of advantages that make them ideal for floral creations. Firstly, their affordability and widespread availability in almost any craft store make this an incredibly accessible hobby for everyone, regardless of budget. Beyond their economic appeal, their inherent flexibility allows for intricate shaping and detailed petal work, enabling you to capture the delicate forms of real flowers with surprising accuracy. What truly sets pipe cleaner flowers apart is their unique fuzzy texture. This tactile quality adds a delightful and impressively realistic dimension to your blooms, mimicking the soft, velvety feel of natural petals and making them look far more authentic than many other craft materials.
Among the many types of pipe cleaner flowers I’ve had the pleasure of creating, the lily stands out as a particular favorite. Its elegant shape, graceful petals, and striking appearance translate beautifully into pipe cleaner form, yielding a sophisticated bloom that’s a joy to behold. For this specific lily tutorial, I’ve chosen a captivating blend of dark violet, light violet, and pink colors. These harmonious shades not only complement each other perfectly but also enhance the lily’s natural beauty, creating a visually stunning arrangement that truly pops. While photographs can capture some of their allure, they truly don’t do justice to the vibrant colors and delicate, lifelike structure you’ll witness when you hold these handmade masterpieces in person.
RELATED: How to Make Charming Pipe Cleaner Daisies: A Beginner’s Guide
Your Comprehensive Guide to Crafting Exquisite Pipe Cleaner Lilies
If you’ve been eager to learn how to create these absolutely stunning pipe cleaner lilies, then you’ve undoubtedly arrived at the perfect destination! This comprehensive, step-by-step guide is meticulously designed to walk you through every single stage of the crafting process. We’ve broken down each instruction into clear, easy-to-follow directions, making it so straightforward that even complete crafting novices will be able to create beautiful, elegant lilies on their very first attempt. There’s no need for complex tools, advanced artistic skills, or previous crafting experience; just a bit of patience, a willingness to learn, and your inherent creativity.
Dive into this incredibly rewarding DIY project and discover the immense joy of crafting your own elegant floral arrangements. Whether you’re seeking a unique handmade gift, a charming and lasting centerpiece for your home, or simply a delightful new hobby to spark your creative spirit, crafting pipe cleaner lilies offers immense satisfaction. They are durable, long-lasting, and can be endlessly customized with a spectrum of color combinations to perfectly suit any occasion, decor theme, or personal preference. Imagine a vibrant bouquet of these exquisite lilies adorning your living room, bringing a touch of everlasting spring and personalized beauty into your home. This craft is not only exceptionally budget-friendly but also provides a wonderful creative outlet, allowing you to express your artistic side while producing something truly beautiful and enduring. So, gather your supplies now and prepare to transform humble pipe cleaners into a breathtaking and personalized bouquet of lilies!
You might also like this: How to Craft Beautiful Pipe Cleaner Tulips: A Fun DIY Project
Essential Materials for Your Pipe Cleaner Lilies Project
Before you embark on your exciting pipe cleaner lily crafting journey, it’s crucial to ensure you have all the necessary materials at hand. Most of these items are standard craft supplies and can be easily found at your local craft store, general merchandise store, or through various online retailers. Having everything prepared beforehand will make the crafting process flow smoothly, efficiently, and most importantly, enjoyably. Double-check this list before you begin!
- Pipe Cleaners: These are your primary building blocks. Choose a variety of colors for your lily petals (such as the suggested dark violet, light violet, and pink) and ensure you have plenty of green pipe cleaners for the leaves and to reinforce stems. Their fuzzy texture is key to the realistic look.
- Floral Wire: This provides the essential sturdy and malleable base for your flower stems. It allows your completed lilies to be shaped, arranged upright in a vase, and integrated into a beautiful bouquet without drooping.
- Floral Tape: A self-adhesive, stretchy tape specifically designed for floral arrangements. It’s used to wrap and secure the floral wire stem, giving it a neat, natural green finish and seamlessly integrating the leaves onto the stem.
- Stamen: Small, decorative elements that form the delicate center of the lily. These add a crucial touch of realism and fine detail, elevating your handmade flowers. You can find these in various colors to complement or contrast your chosen lily hues.
- Scissors: A good pair of sharp scissors is indispensable for cleanly cutting pipe cleaners, floral wire (though wire cutters might be needed for thicker gauges), and floral tape with precision.
- Hot Glue Gun and Glue Stick: An absolutely indispensable tool for quickly and securely attaching the petals, stamen, and leaves. Hot glue provides a strong, fast bond, which is perfect for assembling your flower components.
Step-by-Step Tutorial: How to Make Beautiful Pipe Cleaner Lilies
Follow these detailed, easy-to-understand instructions carefully to craft your own stunning pipe cleaner lilies. Each step is broken down with clear explanations and tips to ensure clarity and ease of understanding, making the process enjoyable even for those new to crafting.
Step 1: Creating the Lily Petals – The Foundation
Begin your lily creation by taking two pipe cleaners of your chosen petal color. For instance, if you’re making a violet lily, select two dark violet pipe cleaners. Fold both of these pipe cleaners exactly in half, ensuring the crease is sharp. Now, take just one of these folded pipe cleaners and fold it in half *again*. This action creates a smaller, more compact loop at the center of this pipe cleaner. Carefully insert the other pipe cleaner (the one that was folded only once) through the loop of the twice-folded pipe cleaner. This initial interlocked setup forms the fundamental core structure of your elegant lily petal, so take your time to align them properly.
Step 2: Securing the Petal Shape and Structure
With the two pipe cleaners interlocked as meticulously described in Step 1, carefully twist them together firmly twice at the precise point where they meet. This crucial twisting action serves to securely lock the two pipe cleaners in place, effectively forming the distinctive, graceful curve of your lily petal. The tighter the twist, the more stable your petal will be. Next, take both “tails” or the loose ends of the pipe cleaner that extend downwards from the twisted section and fold them firmly down, aligning them parallel to each other. Finally, twist the very bottom of these folded tails together to further secure the base of your petal. This ensures that your individual petal will hold its beautiful, intended shape and contribute to the overall elegance of your lily bloom.
Step 3: Assembling Your Lily Flower Bloom
Now, take one of the remaining tails from the pipe cleaner at the base of your formed petal and wrap it tightly around the entire base. This wrapping not only adds stability to your individual petal but also gives it a clean, finished appearance. Repeat Steps 1 and 2, and this part of Step 3, to create a total of six identical petals. Lilies typically have six petals, so this number will ensure a full and realistic bloom. Once you have all six petals ready, gently gather them together, arranging them carefully to form the open, elegant bloom of a lily. Take your time to position each petal for the most natural and aesthetically pleasing arrangement. Carefully insert the chosen stamen (the small decorative center) into the very center of the assembled petals. Use a small, precise dab of hot glue at the base of the stamen to firmly secure it within the heart of the flower, ensuring it stays perfectly in place and adds that final touch of realism.
Step 4: Crafting the Realistic Lily Leaves
To further enhance the authentic appearance of your pipe cleaner lily and give it a complete, natural look, we’ll now proceed to create the accompanying leaves. Take two green pipe cleaners, specifically chosen to mimic natural foliage. Fold both of these pipe cleaners in half, creating a distinct crease in each. Similar to the initial step for the petals, carefully insert one folded pipe cleaner into the loop created by the other. Once they are interlocked, twist them together firmly twice at the point of intersection. This twisting action forms the central vein and sturdy structure of your leaf, making it durable and easy to manipulate into a graceful leaf shape later on.
Step 5: Shaping and Completing Your Lily Leaves
After securely twisting the intersection of your green pipe cleaners, take both extending sides of the pipe cleaner and gently, but firmly, fold them downwards. This action begins to create the characteristic graceful curve and shape of a lily leaf. Then, twist the very bottom of these folded sections together to lock them firmly in place, forming the clean base of your leaf. This ensures the leaf holds its form. Repeat these exact steps to create a second identical leaf. Most lilies benefit from having at least two well-placed leaves per stem to truly capture their natural elegance and balance the overall appearance of the bloom.
Step 6: Final Assembly and Creating the Sturdy Stem
This is the exciting step where all your individual components come together to form a complete, magnificent lily! Take your beautifully crafted pipe cleaner flower (with its petals and stamen securely in place) and attach it firmly to the top of a floral wire using a small, controlled amount of hot glue. Ensure the bond is strong and stable so that your flower stands proudly upright. Next, carefully position your two handmade leaves onto the floral wire, placing them approximately 10 cm (which is about 4 inches) below the base of the flower. Take a moment to adjust their angle for the most natural and pleasing look. Once you are satisfied with their placement, begin wrapping the entire floral wire stem, including the points where the leaves are attached, with floral tape. Start from just below the flower and work your way down in a continuous spiral motion to the very bottom of the floral wire. The floral tape will not only securely bind all the components together but also give your lily a professional, natural-looking green stem that is both durable and aesthetically pleasing. Once fully wrapped, your elegant, handmade pipe cleaner lily is complete and ready for display!

Pro Tip: Perfecting Your Pipe Cleaner Lily Display
To truly elevate the presentation of your magnificent pipe cleaner lilies, it’s essential to consider how you plan to display them. This small detail can make a significant impact on their overall aesthetic appeal. If your intention is to place your beautiful blooms in a wide-based vase or a short container, carefully cutting the floral wire stems shorter will create a more balanced, aesthetically pleasing, and stable arrangement. Shorter stems prevent the bouquet from looking top-heavy and allow the blooms to sit elegantly. Conversely, if you envision a grander flower bouquet wrapped in decorative paper, perhaps as a gift or a striking centerpiece, keeping the stems longer is absolutely ideal. Longer stems provide more flexibility for bundling, arranging, and create a more dramatic, traditional floral presentation. Don’t hesitate to experiment with different stem lengths and arrangements to find what best suits your creative vision, the specific occasion, and your home decor style.
Expand Your Crafting Horizons: Explore Other Delightful Pipe Cleaner Flowers
Once you’ve mastered the art of crafting pipe cleaner lilies, a whole world of other beautiful blooms awaits your creative touch! Broaden your crafting skills and create a diverse, vibrant collection of everlasting flowers. Each type of flower offers a unique challenge and a beautiful addition to your handmade bouquet.
Crafts
How to Make Pipe Cleaner Flowers – Beautiful Tulips
Add a touch of vibrant spring charm to your collection with elegant pipe cleaner tulips. These iconic blooms are simple to make and perfect for creating a diverse, colorful floral arrangement that evokes the freshness of springtime. Their unique cup-like shape offers a different, yet equally rewarding, crafting challenge and a lovely aesthetic that complements lilies wonderfully.
Crafts
How to Make Pipe Cleaner Flowers – Cheerful Daisies
Discover the delightful simplicity of crafting adorable pipe cleaner daisies. These classic, simple yet incredibly cheerful flowers are fantastic for beginners, offering a quick and satisfying project. Daisies can instantly brighten any space, add a playful touch to a bouquet, or make a sweet accent for a handmade gift. Learn the easy steps to create these timeless, charming blooms.
Crafts
Easy Pipe Cleaner Flowers | Crafting a Handmade Bouquet
Master the art of creating an entire bouquet comprising various types of pipe cleaner flowers. This comprehensive tutorial offers invaluable tips and tricks for effectively combining different flower shapes, colors, and sizes into a cohesive, stunning, and professional-looking handmade arrangement. Perfect for expanding your floral repertoire and creating impactful displays or gifts for any special occasion.
We sincerely hope that this detailed tutorial has thoroughly inspired you to embark on your very own pipe cleaner crafting adventure! Crafting these beautiful, everlasting lilies is an incredibly rewarding experience, yielding stunning results that can bring immense joy to your home or serve as a cherished gift for someone special. Remember, the beauty of DIY lies in customization, so don’t hesitate to experiment with different colors, explore various pipe cleaner types, and create your truly unique variations of these elegant blooms.
For more exciting DIY projects, invaluable crafting tips, and an endless stream of creative inspiration, be sure to visit our official website frequently. You can also stay effortlessly updated with our latest creations, upcoming tutorials, and connect with a vibrant, supportive community of fellow crafters by following our Facebook page. And for comprehensive visual step-by-step guides, engaging demonstrations, and inspiring video tutorials that bring our crafts to life, don’t forget to subscribe to our YouTube channel. Happy crafting and may your creativity flourish!
Watch the Full Video Tutorial: Crafting Pipe Cleaner Lilies with Ease
Sometimes, seeing a craft in action makes all the difference, especially when mastering new techniques. For a comprehensive visual guide that complements this written tutorial perfectly, we invite you to watch our step-by-step video on how to make these gorgeous pipe cleaner lilies. The video offers clear demonstrations of each technique, from folding and twisting to final assembly, ensuring you can follow along with utmost confidence and create your own beautiful floral masterpieces with ease. Press play and let’s craft together!