
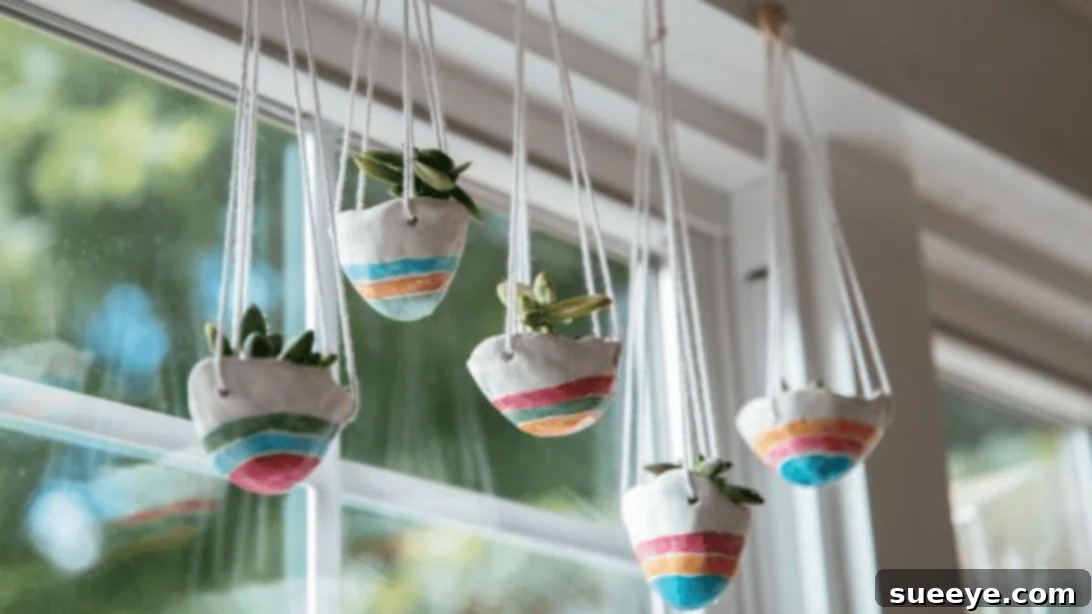
Create Stunning DIY Hanging Pinch Pot Planters: A Beginner’s Guide to Homemade Succulent Decor
Bringing the tranquility of nature indoors has never been easier or more charming than with DIY hanging planters. For a long time, I’ve envisioned my living spaces adorned with delicate greenery suspended gracefully, and the idea of crafting them myself felt incredibly rewarding. My quest for inspiration led me to a fantastic video tutorial by HGTV Handmade on YouTube, which perfectly captured the aesthetic I was hoping to achieve. This discovery sparked a creative journey, culminating in these adorable pinch pot planters.
The allure of these pinch pot planters lies in their unique blend of rustic charm and modern simplicity. They are not just functional containers for your plants; they are miniature works of art that serve as exquisite decor pieces. What makes them particularly special is their suitability for tiny succulents and other small plants, catering perfectly to enthusiasts like myself who adore miniature botanical treasures. Forget bulky, often generic store-bought hanging plants; these handmade alternatives offer a personalized touch, boundless character, and an undeniable cuteness factor that store-bought options rarely achieve. Best of all, they are remarkably simple to create, making them an ideal project for crafters of all skill levels.
RELATED: How To Make Eggshell Planters
Why Choose DIY Pinch Pot Planters?
Beyond their aesthetic appeal, DIY pinch pot planters offer numerous advantages. They allow for complete creative freedom, enabling you to tailor each pot to your specific decor style, color palette, and plant choices. Unlike mass-produced items, each pinch pot carries the unique imprint of its maker, ensuring that no two are exactly alike. This individuality adds a layer of warmth and authenticity to your home. Moreover, crafting these planters is a therapeutic and engaging activity. It’s a chance to disconnect from screens, work with your hands, and experience the satisfaction of bringing a beautiful, functional item into existence from raw materials.
For those living in smaller spaces, hanging planters are a brilliant solution, freeing up valuable shelf and counter space while still allowing you to enjoy lush greenery. Pinch pots, specifically, are ideal for succulents, air plants, or small cuttings, which thrive in compact environments. Their small size makes them perfect for creating a whimsical vertical garden display, either individually or grouped in a charming cluster. The delicate nature of these pots complements the intricate beauty of succulents, making them a match made in botanical heaven.
Materials for DIY Hanging Pinch Pot Planters:
Gathering your materials is the first exciting step in any DIY project. For these charming pinch pot planters, you’ll find that the list is straightforward and accessible. Most items can be easily found at craft stores or online, making this a project you can start with minimal hassle.
- Polymer Oven-Bake Clay: This is the foundation of your planter. Polymer clay is fantastic for beginners because it’s easy to mold, holds its shape well, and cures to a durable finish in a standard oven. You can choose from a wide array of colors, or opt for a neutral tone that you can paint later.
- Rubbing Alcohol: Used to smooth out the surface of the clay, giving your pots a refined, professional look. It helps to dissolve the top layer of clay slightly, making it easier to blend imperfections.
- Paintbrush: Essential for applying the rubbing alcohol and, later, for decorating your baked pots with paint. A soft-bristled brush is ideal for smooth application.
- Wooden Skewer: Perfect for punching clean, precise holes through the clay for your hanging twine. Its pointed tip makes it easy to work with, and it’s readily available.
- Cotton Twine: This natural fiber rope provides a rustic, organic look for hanging your planters. Choose a thickness that complements the size of your pots and can support their weight, along with the plant.
- Small Wooden Ring: Serves as the central anchor point from which your planter will hang, adding a polished and professional finish to the assembly. It also makes hanging easier.
- Scissors: For cutting your twine cleanly and precisely.
- (Optional) Acrylic Paints & Sealant: If you wish to add color or intricate designs to your planters after baking, acrylic paints work wonderfully. A clear sealant can then protect your artwork and give a slight sheen.
- (Optional) Work Surface Protection: A non-stick mat or parchment paper can protect your work surface and make cleanup easier.
How to Make Hanging Pinch Pot Planters: A Detailed Step-by-Step Guide
Step 1: Crafting Your Clay Pot Base
Begin by ensuring your hands are meticulously clean, as well as your work surface. Any debris or dust can easily get incorporated into the clay. Take a small, manageable piece of polymer oven-bake clay. The exact size will depend on how large you want your planter to be, but for a small succulent pot, a piece about the size of a golf ball or a bit larger is usually sufficient. Start conditioning the clay by squeezing and rolling it in your hands. This process warms the clay, making it softer, more pliable, and easier to work with, while also eliminating any air bubbles. Continue until the clay is smooth and malleable.
Once conditioned, roll the clay into a perfect sphere. This ball will form the base of your pinch pot. Now, gently press your thumb into the center of the clay ball, creating a shallow indentation. With your thumb still in the center, begin to pinch the clay between your thumb and fingers, slowly working your way around the edges. Rotate the clay as you pinch, gradually thinning the walls and pulling them upwards to form the shape of a bowl or a pot. The beauty of pinch pots lies in their organic, handmade aesthetic; don’t strive for absolute perfection. Embrace the natural texture, slight unevenness, and unique contours that emerge as you work. These imperfections contribute to the charm and character of your finished planter. Aim for walls that are sturdy enough to hold their shape but not excessively thick, which would add unnecessary weight.
Step 2: Smoothing, Decorating, and Baking
After you’ve achieved the desired pot shape, it’s time to refine the surface. Dip your paintbrush into rubbing alcohol, making sure not to oversaturate it. Gently brush the alcohol over the surface of your clay pot. The alcohol acts as a solvent, slightly softening the clay’s surface and allowing you to smooth out fingerprints, small cracks, and rough edges with your fingers. Work carefully, using light, circular motions until you achieve a more polished finish. This step significantly enhances the overall look of your planter, giving it a more refined appearance.
Next, using your wooden skewer, carefully punch three equally spaced holes around the upper rim of your pot. These holes will be used to thread the hanging twine, so ensure they are large enough for your chosen twine to pass through easily. Try to keep them at a consistent height and distance from the top edge for balanced hanging. Now comes the exciting part: decoration! Before baking, you can add texture using tools, or if you prefer to paint, wait until after baking. If you’re going for a natural clay look, you can skip painting. If using paints, opt for acrylics after the clay has cooled from baking. Once decorated (or left plain), place your pot on a baking sheet lined with parchment paper. Bake the clay according to the manufacturer’s instructions on the polymer clay packaging. Baking times and temperatures can vary depending on the brand and thickness of your clay, so always refer to the specific guidelines to ensure proper curing and durability. Allow the pot to cool completely after baking before proceeding.
Step 3: Assembling Your Hanging Masterpiece
With your beautifully crafted and baked pot cooled, it’s time for assembly. Take your cotton twine and measure it. A good rule of thumb is to measure approximately six times the desired hanging length of your planter. This ensures you have enough length for threading and knotting. Cut three identical pieces of twine. Thread one end of each twine piece through each of the three holes you made on your pot, from the outside in. Bring the two ends of each twine piece together above the pot.
Gather all six ends of the twine (two from each hole) at the top. Take your small wooden ring and thread all six twine ends through it. Ensure the ring sits neatly above the planter. Once all twine ends are through the ring, tie a very secure knot directly above the ring, bringing all six strands together. You might want to tie a double or even a triple knot to ensure maximum security, as this knot will bear the full weight of your planter and plant. Trim any excess twine neatly, leaving a small tail for aesthetics. Finally, gently transfer your tiny succulent or chosen plant into its new handmade home. Carefully arrange the plant and any potting medium within the pot. Your exquisite DIY hanging pinch pot planter is now ready to be displayed! Choose a sturdy hook or a suitable spot near a window, or anywhere you desire to add a touch of charming, handmade greenery.
Nurturing Your Tiny Oasis: Plant Care Tips
Now that you have your beautiful hanging pinch pot planter, it’s crucial to ensure your plant thrives. Small pots, especially unglazed clay, tend to dry out faster. Succulents, known for their drought tolerance, still require mindful watering. Water thoroughly when the soil is completely dry, allowing excess water to drain out. Since these pots typically don’t have drainage holes (to prevent drips indoors), consider adding a thin layer of small pebbles or activated charcoal at the bottom before adding soil to help prevent root rot. Alternatively, you can bottom-water your succulents by placing the pot in a shallow tray of water for 15-20 minutes, allowing the soil to absorb moisture from the bottom up. Ensure your succulents receive ample bright, indirect sunlight to maintain their vibrant colors and compact growth. Rotate your planters occasionally to ensure even light exposure.
Unleash Your Creativity: Customization Ideas
The beauty of DIY projects is the endless potential for personalization. While the basic pinch pot design is endearing on its own, here are a few ideas to make your hanging planters truly unique:
- Color Palette: Experiment with different paint colors. You can use pastel shades for a minimalist look, vibrant hues for a pop of color, or metallic paints for a touch of glam. Consider ombre effects or color blocking.
- Textural Elements: Before baking, use household items to create textures on the clay. A lace doily, a textured fabric, or even a comb can create interesting patterns.
- Glaze or Sealant: After baking and painting (if desired), apply a clear gloss or matte sealant to protect the paint and give your pots a professional finish. This also makes them easier to clean.
- Different Twine Materials: Instead of cotton twine, consider using macrame cord, thin leather strips, or even colorful yarn for a different aesthetic.
- Beads and Charms: Thread decorative beads onto the twine before knotting it to the wooden ring, or attach small charms to the pot itself for added flair.
- Miniature Scenes: Create a tiny succulent garden within your pot, combining different types of small succulents, moss, and decorative pebbles for a miniature landscape.
The Joy of Handmade: Benefits of DIY Decor
Engaging in DIY projects like crafting these hanging pinch pot planters offers more than just a decorative item. It provides a sense of accomplishment and creative fulfillment. There’s an intrinsic satisfaction in knowing that you’ve transformed simple materials into something beautiful and functional with your own hands. Beyond personal gratification, DIY decor can also be a cost-effective alternative to store-bought items, especially when you can repurpose materials or buy in bulk. Furthermore, it’s an excellent way to add unique, conversation-starting pieces to your home that reflect your personal style and creativity, steering clear of generic mass-produced items. It’s also an opportunity to learn new skills, relieve stress, and even connect with others through shared crafting experiences.
*All these images are credited to HGTV Handmade via YouTube. Give their channel a visit and subscribe for more amazing DIY inspiration!
Frequently Asked Questions About DIY Hanging Pinch Pot Planters
- What kind of clay is best for these planters?
- Polymer oven-bake clay is highly recommended for beginners due to its ease of use, ability to hold intricate shapes, and durability once baked. Air-dry clay can also be used, but it might not be as waterproof or durable as baked polymer clay.
- Do these planters need drainage holes?
- For indoor use, especially for hanging planters, many prefer not to have drainage holes to avoid drips. If you omit drainage holes, it’s crucial to water very carefully to prevent overwatering and root rot. Adding a layer of small pebbles or activated charcoal at the bottom can help, or you can consider bottom-watering.
- Can I use these for plants other than succulents?
- Absolutely! While perfect for succulents, these small pinch pots can also house air plants, tiny ferns, small herb cuttings, or even artificial plants if you prefer zero maintenance. Just ensure the plant’s size and watering needs are suitable for a small, potentially non-draining pot.
- How do I make the clay smooth?
- After shaping, a light application of rubbing alcohol with a paintbrush, followed by gentle smoothing with your fingers, can help remove fingerprints and minor imperfections, giving the clay a more refined finish before baking.
- How long do polymer clay planters last?
- When properly baked and cured, polymer clay is quite durable and can last for many years. To ensure longevity, avoid dropping them and protect them from extreme weather conditions if placed outdoors.
Concluding Thoughts: Your Adorable Handmade Planters Await
Embarking on this DIY journey to create your own hanging pinch pot planters is a delightful and rewarding experience. From the tactile pleasure of molding clay to the satisfaction of seeing your finished plant display, every step is infused with personal creativity. These charming, handmade planters offer a unique way to introduce natural beauty and a touch of bespoke elegance into any room. They are not just containers for plants; they are expressions of your craft, adding warmth, character, and a conversation piece to your home. So gather your materials, follow these simple steps, and prepare to elevate your interior decor with these truly adorable and easy-to-make hanging planters. Happy crafting!