
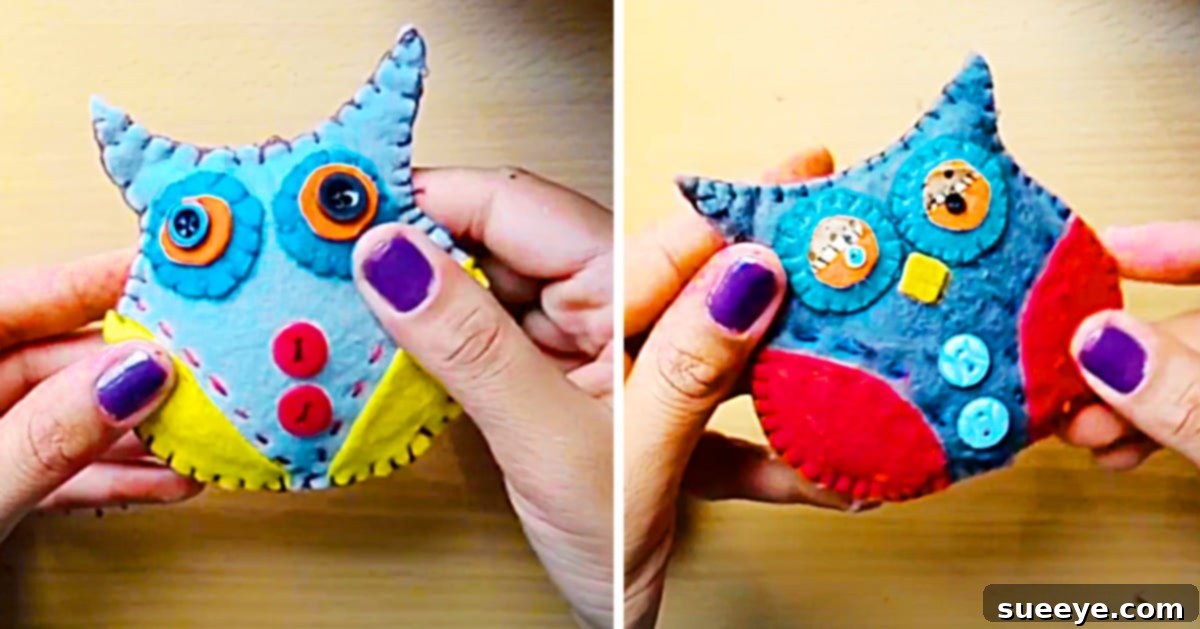
There’s something truly special about a kitchen adorned with unique touches, and nothing adds character quite like a collection of refrigerator magnets. My dearest friend boasts an enchanting array of these tiny treasures, each contributing to her kitchen’s warm and inviting aesthetic. As her birthday approached, I was determined to contribute a handmade piece that would not only complement her beloved collection but also carry a personal touch. My online quest for inspiration led me to a delightful discovery: a charming felt owl fridge magnet video tutorial by Craft Arena, shared on YouTube. From the moment I watched it, I knew this project was destined to be the perfect gift.
What I hadn’t anticipated was the immediate desire to create many more once I completed the first one. These adorable owl magnets are incredibly versatile – they make fantastic stocking stuffers for Christmas, thoughtful birthday presents, charming housewarming gifts, or simply a delightful way to brighten your own home. The beauty of this craft lies in its simplicity, affordability, and undeniable cuteness. It ticks all the boxes for a rewarding DIY endeavor.
Why Choose Felt Owl Magnets for Your Next Craft Project?
Crafting offers a unique blend of relaxation and creative expression, and making felt owl magnets is an excellent way to experience both. Owls, with their whimsical appeal and diverse symbolism (often associated with wisdom and mystery), make for an endlessly charming subject. Felt, as a medium, is incredibly forgiving and easy to work with, even for beginners. It doesn’t fray, comes in a vast array of colors, and holds its shape beautifully. This project isn’t just about making a magnet; it’s about creating a miniature work of art that can bring a smile to anyone’s face.
Moreover, in an era of mass-produced goods, a handmade gift carries an unparalleled sentiment. It speaks volumes about the care and effort you put into celebrating someone special. These felt owls are a testament to that thoughtfulness, offering a personalized touch that store-bought items simply cannot replicate. They are also a fantastic project for crafters of all ages, providing a safe and enjoyable activity that can spark creativity in children and adults alike.
Materials You’ll Need For Your Charming Felt Owls:
Before diving into the creative process, gathering all your supplies is key. Here’s a comprehensive list of what you’ll need to bring your felt owls to life:
- A Piece of Paper: Essential for sketching out your owl pattern. You can use any standard printer paper or cardstock for a more durable template.
- A Pencil: For drawing your design and marking felt pieces. A fabric marker or chalk pencil can also be useful for transferring patterns directly onto felt.
- Felt (in the colors of your choice): This is the star of the show! Opt for good quality craft felt for better durability and a wider color selection. Think about your desired owl’s body color, wing colors, belly, and perhaps a contrasting color for the beak. Scraps of felt are perfect for this project, making it very economical.
- Buttons: These will form the adorable eyes of your owls. Choose buttons that are appropriately sized for your owl and complement your felt colors. You can experiment with different shapes and finishes for varied expressions. Alternatively, small beads or embroidered eyes can also work wonderfully.
- Embroidery Floss: Used for decorative stitching and assembling the felt pieces. Select colors that either match your felt for a seamless look or contrast for a more vibrant, hand-stitched effect. A multi-strand floss will give your stitches more prominence.
- A Needle and Thread: A basic sewing needle (a sharp, medium-sized needle is usually best for felt) and a spool of matching or contrasting all-purpose sewing thread for more secure, less visible stitching where needed.
- Sharp Scissors: Craft scissors or small fabric scissors are ideal for precise cutting of felt pieces, ensuring clean edges for your owl components.
- Stuffing (Optional, but Recommended): A small amount of polyester fiberfill (polyfill) will give your owls a lovely plump, three-dimensional quality, making them even more cuddly and appealing.
- Strong Craft Glue: A good quality fabric glue or super glue is essential for securely attaching the magnet to the back of your finished owl. Make sure it dries clear and provides a strong bond.
- Small Magnets: Disc magnets (ceramic or neodymium) or small magnetic strips are perfect. Choose magnets strong enough to hold your felt owl firmly to the fridge.
Step-by-Step Guide: Crafting Your Own Felt Owl Magnets
Inspired by the clear and concise instructions found in Craft Arena’s YouTube tutorial, we’ll now walk through the process of creating these endearing felt owl magnets. Each step is designed to be straightforward, ensuring a fun and successful crafting experience.
Step 1: Designing Your Owl Pattern
The first step is to create a template for your owl. Begin by drawing your owl design onto a piece of paper. You can start with a simple oval shape for the main body, then add smaller ovular or heart shapes for the wings and a slightly smaller oval for the belly patch. Don’t forget a tiny triangle for the beak! Think about the size you want your finished magnet to be – usually between 3-5 inches tall is ideal for fridge magnets. You can sketch a few variations until you find a design you love. If freehand drawing isn’t your strong suit, feel free to search online for free owl templates that you can print and cut out. Once you’re happy with your drawing, carefully cut out each individual piece of your pattern from the paper. This will be your master template for cutting the felt.
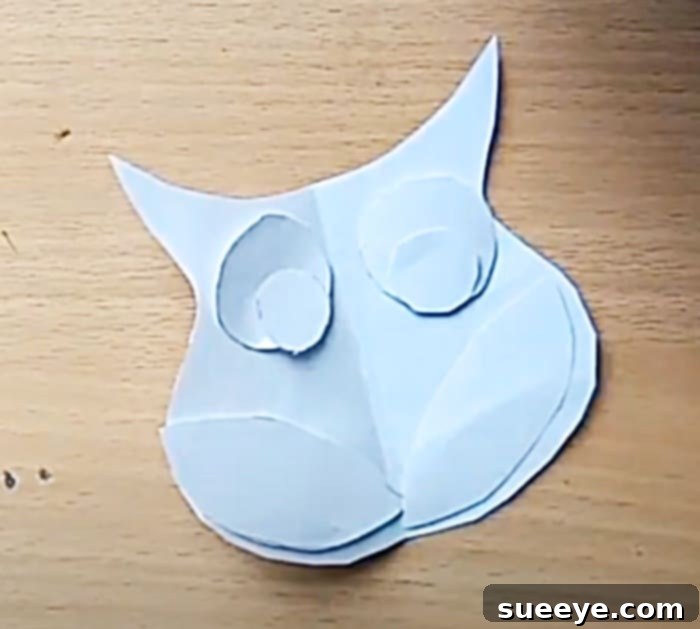
Step 2: Cutting Your Felt Pieces with Precision
Now it’s time to bring your pattern to life in felt! Pin your paper patterns securely onto your chosen felt colors. For the main body, you’ll need two identical pieces of felt. For the wings, belly, and beak, you’ll typically need one piece each, though you could cut two for the wings for a layered effect. Carefully cut around each pattern piece using your sharp scissors. Take your time to ensure clean, smooth edges, as this will contribute significantly to the neatness of your finished owl. Lay out all your felt pieces – two body shapes, wings, belly, and beak – to visualize how your owl will look.
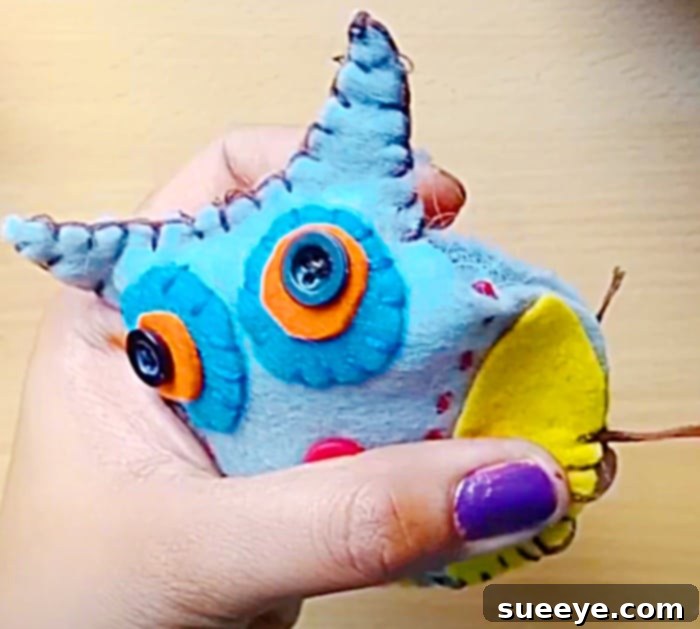
Step 3: Assembling Your Owl’s Features
With all your felt pieces cut, it’s time for assembly. First, take one of your main owl body pieces. Position the belly patch onto the front of this body piece, aligning it nicely. Using your embroidery floss and needle, stitch the belly patch onto the body. A simple running stitch or a neat blanket stitch around the edge will look lovely. Next, position the wings onto the body. You can stitch them down completely or just at the top to allow them to flap slightly. Now, for the eyes! Sew your chosen buttons onto the felt where the eyes should be. Ensure they are securely attached. Finally, either stitch on your felt beak or embroider a small “V” shape with black floss for a charming beak. This step is where your owl truly starts to develop its personality!
Step 4: Bringing Your Owl to Life (Stuffing and Sewing)
Once all the facial features and embellishments are securely attached to the front body piece, it’s time to assemble the two main body pieces. Place the decorated front body piece directly on top of the plain back body piece, making sure all edges align perfectly. Using your embroidery floss (or matching sewing thread for a more subtle finish), begin to stitch the two pieces together around the perimeter. A blanket stitch is particularly popular for felt crafts as it creates a decorative and sturdy edge. Sew almost all the way around, but remember to leave a small opening – about 1 to 1.5 inches – along the bottom or side. Through this opening, gently push small amounts of polyfill stuffing into your owl. Don’t overstuff; you want a pleasing plumpness, not a bursting seams. Once your owl is nicely stuffed to your liking, carefully sew the remaining opening closed with a neat stitch, such as a ladder stitch, to create an almost invisible seam.
Step 5: Attaching the Magnet
The final step is to turn your adorable felt owl into a functional fridge magnet. Take your strong craft glue and apply a generous dot or line to one side of your small magnet. Carefully position the magnet onto the center back of your stuffed felt owl. Press down firmly for a few seconds to ensure good contact. It’s crucial to let the glue dry completely according to the manufacturer’s instructions, which might take several hours. Rushing this step could result in your magnet falling off prematurely. Once dry, your charming felt owl fridge magnet is ready to proudly adorn any metallic surface!
Creative Variations & Personal Touches for Your Felt Owls
The beauty of DIY crafts lies in the freedom to personalize every detail. Don’t feel limited to the initial design! Experiment with different felt color combinations – imagine a vibrant rainbow owl, a sophisticated monochrome owl, or an owl in hues that match your kitchen decor. You can add tiny felt glasses, bow ties, or even miniature hats for seasonal themes like a Santa hat for Christmas or a witch’s hat for Halloween. Instead of buttons, consider embroidering intricate eye designs or using small beads for a different texture. Small pieces of lace, glitter glue, or even fabric paint can add extra flair. Each small alteration allows you to infuse your personality into every owl, making each one truly unique.
Beyond the Fridge: Other Uses for Your Felt Owls
While these owls are perfect as fridge magnets, their charm doesn’t have to be limited to the kitchen. With a few minor adjustments, your felt creations can serve a multitude of purposes. Attach a brooch pin to the back instead of a magnet, and you have an adorable accessory for jackets, bags, or hats. Stitch a small loop to the top, and they become delightful ornaments for a Christmas tree or a decorative garland. They can be sewn onto hair clips for a whimsical hair accessory, or even strung together to create a charming mobile for a nursery. The possibilities are truly endless, transforming a simple magnet into a versatile piece of handmade art.
Caring for Your Handmade Felt Magnets
To ensure your felt owl magnets remain vibrant and charming for years to come, a little care goes a long way. Felt is a durable material, but it can attract dust and lint. If your owl gets a little dusty, gently dab it with a lint roller or a piece of sticky tape. Avoid washing felt items directly, as this can cause shrinkage or damage to the stuffing and glue. If a minor stain occurs, try to spot clean very gently with a damp cloth and mild soap, then allow it to air dry completely. Keep your magnets out of direct, prolonged sunlight to prevent the felt colors from fading over time.
This project is so much fun and incredibly rewarding to make. Whether you’re crafting a single owl or a whole parliament of them, these felt owl magnets are guaranteed to bring joy. Their undeniable cuteness makes them wonderful, heartfelt gifts for any occasion, or simply a charming addition to your own home decor. Dive into the world of felt crafting and discover the simple pleasure of creating something beautiful with your own hands. Happy crafting!
How To Make Felt Owl Fridge Magnets