
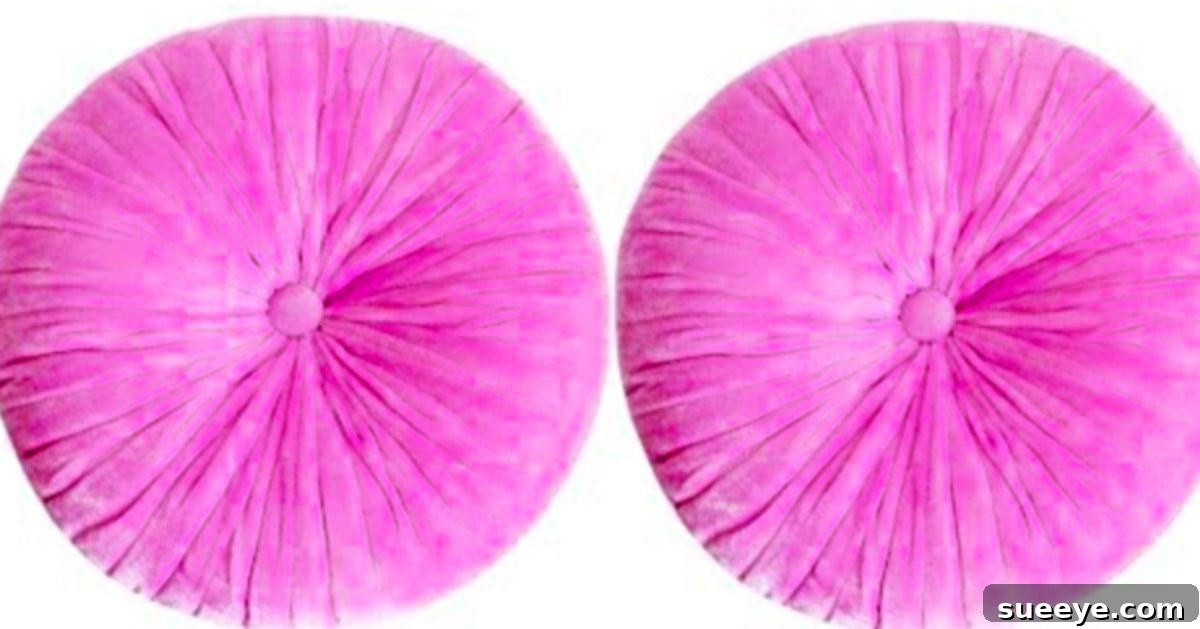
How To Make An Easy Round Velvet Cushion: A DIY Guide for Luxurious Home Decor
Are you searching for an elegant yet simple DIY project to add a touch of luxury to your living space? Look no further! This comprehensive guide will walk you through creating a beautiful round velvet cushion that will effortlessly enhance your bed, sofa, or any cozy nook. When we first discovered this incredibly helpful round velvet cushion video tutorial by Azalia J Designs on YouTube, we instantly recognized it as an exceptional method for crafting a truly plush and elegant accessory. This stunning cushion boasts a lavish appearance, fits seamlessly into any decor style, and is surprisingly simple to make, primarily using an easy hand-stitch that almost anyone can master. Dive into the world of DIY home decor and create a bespoke velvet masterpiece that reflects your unique style.
Why Choose to Create Your Own DIY Velvet Cushion?
Opting for a handmade velvet cushion offers a myriad of benefits beyond just saving money. It’s an opportunity to inject personality and bespoke charm into your home that mass-produced items simply can’t match. Here are compelling reasons to embark on this rewarding DIY journey:
- Unleash Your Creativity: Crafting your own cushion allows for unparalleled customization. You choose the exact shade of velvet to complement your existing decor, select the perfect size to fit your needs, and even decide on the level of plushness. From deep emerald green to rich sapphire blue, or a classic charcoal grey, the possibilities for expressing your personal style are endless.
- Cost-Effective Luxury: High-end velvet cushions can come with a hefty price tag in boutiques and department stores. By making your own, you gain access to the same luxurious aesthetic at a fraction of the cost, making sophisticated home decor more accessible.
- A Sense of Accomplishment: There’s immense satisfaction in creating something beautiful and functional with your own hands. Each time you see your finished velvet cushion gracing your sofa, you’ll feel a sense of pride and accomplishment.
- Therapeutic and Relaxing: Many find the process of crafting to be incredibly meditative and stress-reducing. Focusing on the rhythmic motion of stitching can be a wonderful way to unwind and engage in a fulfilling hobby.
- Perfect for Skill Development: This project is designed to be accessible for beginners, offering a fantastic opportunity to practice basic sewing techniques without overwhelming complexity. Even if you’re new to needle and thread, you’ll find this tutorial incredibly supportive.
Transforming a simple piece of fabric into a decorative statement piece is a rewarding experience that adds both comfort and style to your home. Embrace the joy of handmade elegance!
Essential Materials for Your Luxurious Round Velvet Cushion
Before you begin stitching, gathering the right materials is crucial for a smooth and successful project. The beauty of this cushion lies in its simplicity, requiring only a few key items. Here’s a detailed look at what you’ll need:
- Velvet Fabric: The star of your cushion! The amount of fabric you need will depend on the desired size of your cushion. A good starting point for a standard throw pillow size might be a piece measuring approximately 25-30 inches by 50-60 inches, allowing for generous gathering and seam allowances. Velvet comes in various types, such as crushed velvet for a more textured, vintage look, panne velvet for a lighter drape, or upholstery velvet for greater durability. Choose a fabric that drapes well and feels luxurious to the touch. Remember to consider pre-washing your fabric if you plan to machine wash the finished cushion later, to prevent shrinkage.
- Dacron Stuffing (Poly-fil): This is what gives your cushion its plush, inviting feel. Dacron, often sold as Poly-fil, is a synthetic polyester fiberfill that is lightweight, hypoallergenic, and excellent at retaining its loft and shape over time. The quantity required will depend entirely on the size of your cushion and how firm or soft you want it to be. For a truly plush cushion, err on the side of having more stuffing than you think you’ll need. You can always remove excess.
- An Elastic Band: This is a clever temporary tool to secure one end of your fabric tube while you stuff the cushion. A standard rubber band or a piece of elastic cut to size will work perfectly. It should be strong enough to hold the gathered fabric securely but flexible enough to be easily removed.
- A Needle and Thread: For the primary construction of this cushion, hand-stitching is recommended and makes the process incredibly accessible. Select a strong, durable thread, such as upholstery thread or a heavy-duty polyester thread, to ensure your stitches hold up to the tension of gathering and regular use. While the tutorial focuses on hand-stitching, experienced sewers could adapt parts of this project for a sewing machine for initial seams if preferred, but the gathering and final shaping are best done by hand for precision.
- Additional Essential Tools: Don’t forget a sharp pair of fabric scissors for clean cuts, straight pins to hold fabric in place, and a measuring tape or ruler for accurate dimensions. A fabric marker or chalk can also be useful for marking your cutting lines.
With these materials ready, you’re well on your way to crafting a beautiful, bespoke velvet cushion that will be the envy of your guests.
Step-by-Step Guide to Crafting Your Round Velvet Cushion
Creating this elegant round velvet cushion is a delightful process that combines simple sewing techniques with a touch of ingenuity. Follow these detailed steps to bring your luxurious pillow to life:
Step 1: Preparing Your Fabric and Forming the Tube
Begin by laying your chosen velvet fabric flat. You will need a rectangular piece of fabric; the dimensions will determine the final size of your cushion. For a sizable cushion, aim for a rectangle that is roughly twice as long as it is wide (e.g., 25 inches by 50 inches for a medium-sized pillow). Fold your fabric in half lengthwise, right sides together, ensuring the edges align perfectly. Pin the raw edges together securely. Now, using your needle and strong thread (or a sewing machine if you prefer for this initial seam), sew along this pinned edge to create a fabric tube. A straight stitch with a 1/2-inch to 5/8-inch seam allowance is ideal. Be sure to backstitch at the beginning and end of your seam to secure it.
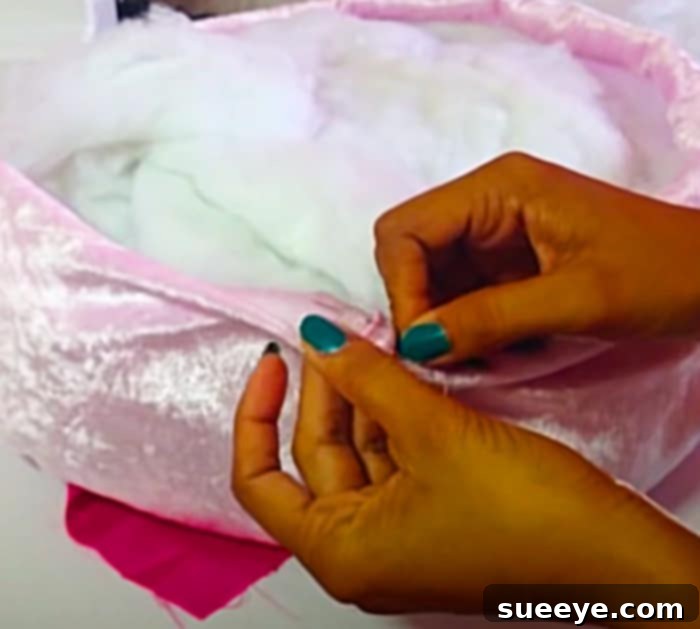
Step 2: Securing One End for Stuffing with an Elastic Band
Once your fabric tube is sewn, turn it right side out. You now have a soft velvet cylinder. Take one end of this tube and gather the raw edges together. This doesn’t need to be perfect; it’s a temporary measure. Once gathered, use your elastic band to temporarily secure this end tightly. This creates a closed-off bottom for your cushion while keeping the other end open for easy access to stuffing. This clever technique ensures that your stuffing stays put while you work on shaping the cushion.
Step 3: Stuffing Your Cushion to Achieved Plushness
Now comes the fun part: stuffing! Begin to fill your velvet tube with the Dacron stuffing. Take small handfuls of stuffing and gently push them into the tube, distributing them evenly. The key is to avoid creating lumps or uneven spots. Continue adding stuffing until your cushion reaches your desired level of plushness. For a truly luxurious and inviting feel, stuff it generously. As you stuff, gently pat and mold the cushion to help it take on a rounded, symmetrical shape. This step significantly impacts the final look and comfort of your pillow.
Step 4: Gathering and Securing the First Side
With your cushion adequately stuffed, it’s time to close the open end and create that distinctive round velvet cushion shape. Remove the temporary elastic band from the side you initially secured (the side without the open end). Gather all the raw edges of this end together, pulling them towards the center. Using your needle and strong thread, make a running stitch or a strong whip stitch all around the gathered edge. Pull the thread tightly to draw all the fabric together into a tight gather in the center. Secure this gathering with several strong knots, making sure it’s very firm. This creates a beautiful, deep dimple in the center of your cushion.
Step 5: Crafting and Attaching the Decorative Bobble
To give your cushion a polished and professional finish, you will create a small decorative bobble to cover the gathered center. Cut a small circle or square of your velvet fabric (about 3-4 inches in diameter/side). Gather the edges of this small piece into a ball, stuffing it with a tiny bit of Dacron if desired to give it more body. Pull the thread tight to form a small, round fabric “button” or “bobble.” Now, firmly stitch this bobble directly over the tightly gathered center of your cushion. This hides the raw edges and adds a beautiful, symmetrical detail, enhancing the cushion’s elegant aesthetic.
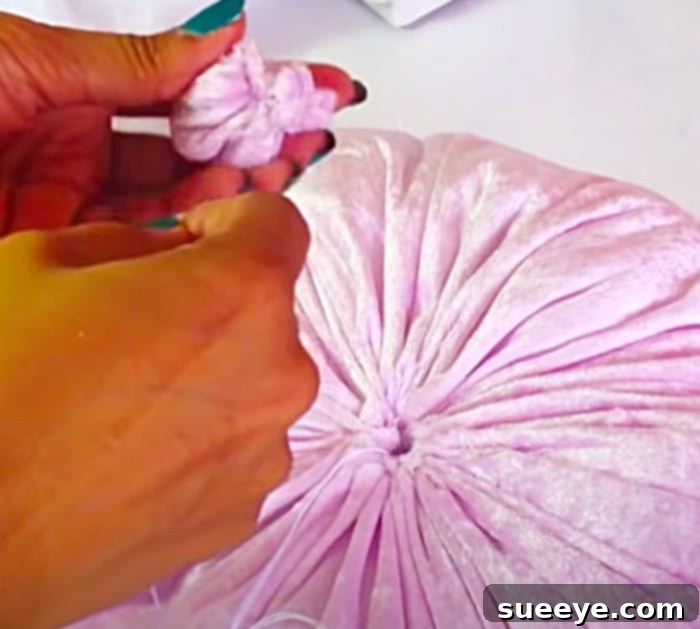
Step 6: Repeating for the Second Side to Complete Your Cushion
Finally, mirror the process on the second side of your cushion. Now that both ends are visible, you will repeat Step 4 (gathering and securing the center) and Step 5 (attaching the decorative bobble) for the remaining open side. Ensure both sides are gathered and bobbled symmetrically to maintain the cushion’s balanced and harmonious appearance. Take your time to pull the stitches tightly and secure the knots for durability. Once both sides are complete, fluff and shape your cushion one last time. This pillow is amazing, and it is so easy – you’ll love it!
Tips for Elevating Your Velvet Cushion Project
To ensure your DIY velvet cushion not only looks fantastic but also lasts for years, consider these expert tips:
- Fabric Preparation is Key: Before cutting, always pre-wash your velvet fabric if you intend to wash the finished cushion. Velvet can shrink, and pre-washing prevents distortion. Iron velvet on a low setting from the back side, or use a steamer, to avoid crushing the pile.
- Precision Cutting: Use sharp fabric scissors or a rotary cutter for clean, straight edges. Velvet can shift, so lay it flat and consider using weights or extra pins when cutting.
- Sewing Velvet: When using a sewing machine for the initial tube seam, a walking foot can be incredibly helpful to prevent the velvet layers from slipping against each other. Adjust your machine’s tension if necessary to prevent puckering. For hand-stitching, maintain even tension on your thread for a neat finish.
- Achieving Perfect Plushness: For an extra firm cushion, you can consider adding a smaller, denser foam core before surrounding it with Dacron. This provides structural support while the Dacron offers soft comfort. Experiment with the amount of stuffing to find your ideal balance of softness and support.
- Custom Embellishments: Elevate your cushion further by adding tassels to the gathered centers, a fringe along the side seam, or even decorative beads stitched around the bobbles. These small details can transform your cushion into a true statement piece.
- Velvet Care and Maintenance: Velvet is a luxurious fabric but requires gentle care. For spot cleaning, dab gently with a damp cloth and mild detergent. If you pre-washed your fabric, a gentle machine wash on a delicate cycle (cold water) might be possible, but hand washing is always safest. Air dry flat to maintain its shape.
Frequently Asked Questions About DIY Velvet Cushions
Here are answers to some common questions you might have as you embark on your velvet cushion crafting journey:
- Q: Can I use a sewing machine for the entire project?
- A: While the tutorial emphasizes hand-stitching, especially for the gathering and bobble attachment for precision and control, you can certainly use a sewing machine for the initial step of sewing the fabric into a tube. For the gathering steps, hand-stitching provides the necessary flexibility to achieve the characteristic dimpled look.
- Q: What other fabrics can I use if I don’t want velvet?
- A: This cushion design works wonderfully with a variety of fabrics! You could try silk for a more delicate sheen, linen for a natural, rustic feel, faux fur for extra coziness, or even a thick cotton blend for durability. Choose a fabric that drapes well and isn’t too stiff to gather effectively.
- Q: How do I adjust the size of the cushion?
- A: The size of your initial rectangular fabric piece determines the final cushion size. A larger rectangle (e.g., 30×60 inches) will yield a larger, more plush cushion, while a smaller rectangle (e.g., 20×40 inches) will create a more compact one. Always ensure your fabric is at least twice as long as its width for the optimal rounded shape.
- Q: Is this project truly suitable for beginners?
- A: Absolutely! The beauty of this project lies in its simplicity. It primarily involves basic straight stitching and gathering, making it an excellent learning opportunity for anyone new to sewing or looking for a quick and rewarding craft.
- Q: Where can I find good quality velvet fabric?
- A: Velvet fabric can be found at local fabric stores, online retailers specializing in upholstery or apparel fabrics, or even repurposed from old velvet curtains or clothing for a sustainable approach. Look for sales and compare prices to find the best deal for your budget.
Conclusion: Your Handmade Velvet Masterpiece Awaits!
There you have it – a complete guide to crafting your very own luxurious round velvet cushion! This project is a testament to how simple techniques can result in truly stunning home decor. Not only will you add a touch of sophisticated elegance to your space, but you’ll also experience the immense satisfaction that comes from creating something beautiful with your own hands. Whether you’re a seasoned crafter or a curious beginner, this tutorial by Azalia J Designs provides an accessible and rewarding path to custom home accents. So gather your materials, set aside some creative time, and prepare to be amazed by the exquisite velvet cushion you’re about to bring to life. Happy crafting!