
DIY Smokeless Fire Pit Build: Transform Your Backyard into an Oasis
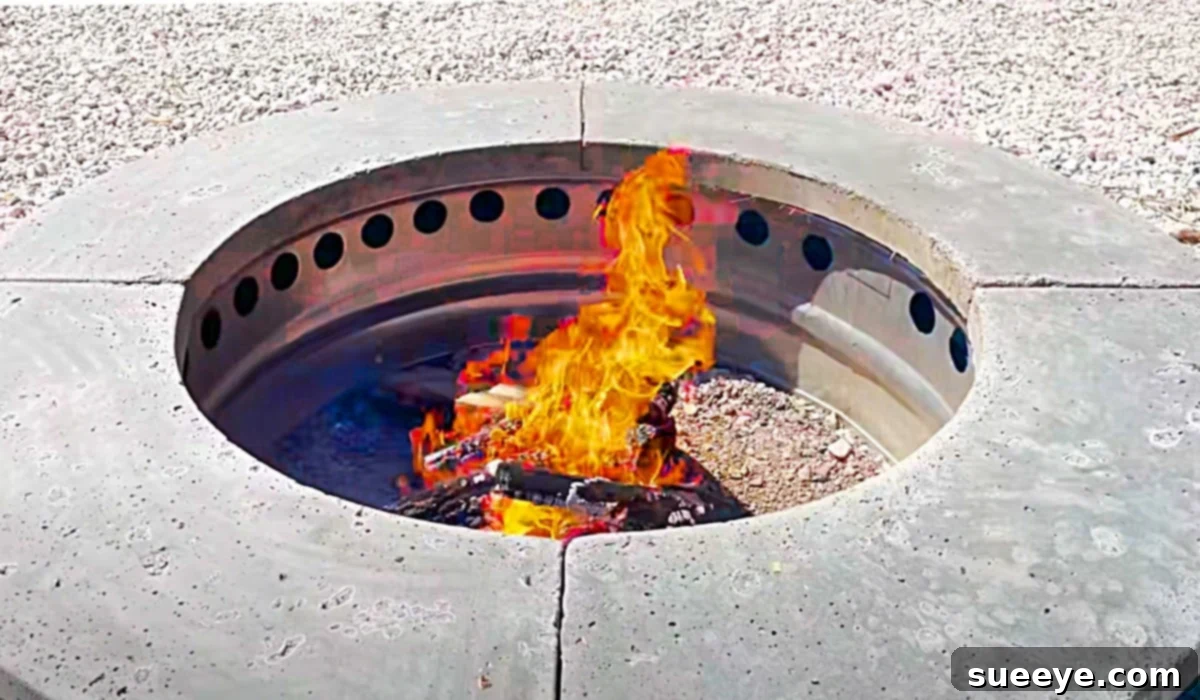
Imagine crisp evenings, the gentle crackle of a fire, and the warmth of good company – all without the stinging eyes and smoky clothes typically associated with traditional fire pits. This dream becomes a reality with a DIY smokeless fire pit, a brilliant addition that promises to elevate your outdoor living space. The moment I discovered the awesome DIY smokeless fire pit build video tutorial by Haxman on YouTube, I was instantly captivated. The vision of this functional and beautiful fire pit gracing my backyard was so vivid, I knew I had to embark on this project immediately.
This DIY endeavor isn’t just about building a structure; it’s about crafting an experience. I could already picture inviting friends over, gathering around my newly constructed galvanized bucket fire pit, sharing stories, and making lasting memories. To enhance the comfort and aesthetic, I even planned to create charming wooden block stools adorned with plush outdoor cushions, completing the perfect setting for relaxation and entertainment. This project is a testament to how simple materials and basic skills can yield incredibly satisfying and stunning results. If you can gather a few essential items from your local tractor supply or hardware store, you absolutely have what it takes to create this magnificent backyard feature. The end result is not just beautiful, but also incredibly rewarding, and I assure you, you won’t be disappointed.
Why Choose a Smokeless Fire Pit for Your Backyard?
The concept of a “smokeless” fire pit might sound too good to be true, but it’s an ingenious design that significantly reduces smoke output, offering a far more enjoyable outdoor experience. Unlike conventional fire pits that often leave you dodging plumes of smoke, a well-designed smokeless fire pit incorporates a dual-wall ventilation system. This system preheats air and feeds it back into the fire, allowing for a more complete combustion of wood. The result is a hotter, more efficient burn with substantially less smoke.
The benefits are manifold: no more constantly shifting seats to escape the smoke, no more lingering bonfire smell on your clothes and hair, and certainly no more irritated eyes. This creates a more pleasant environment for everyone, making it ideal for families with children, sensitive individuals, or anyone who simply wants to relax without the typical inconveniences of a campfire. Furthermore, the enhanced combustion efficiency often means you use less wood, saving you money and contributing to a slightly greener burn.
The Undeniable Appeal of a DIY Fire Pit Project
Embarking on a DIY project, especially one that transforms your outdoor space, carries a unique sense of accomplishment and satisfaction. Building your own smokeless fire pit means you’re not just buying a product; you’re investing your time and effort into creating something truly personal and functional. This hands-on approach often results in significant cost savings compared to purchasing a pre-built, high-end smokeless fire pit from a retail store. The materials needed for this particular design are readily available and generally affordable, making it an accessible project for most budgets.
Beyond the financial benefits, the DIY route offers unparalleled customization. While Haxman’s tutorial provides an excellent blueprint, you have the freedom to adapt the design to fit your specific aesthetic preferences and backyard layout. Perhaps you want to choose different types or colors of bricks, or integrate it into a larger patio design. The creative control is yours. For beginners, this project is particularly appealing because it requires very basic construction skills – no complex masonry or specialized tools are necessary. It’s a fantastic entry point into home improvement, boosting your confidence for future projects while delivering an immediate, tangible enhancement to your home.
Planning Your Perfect Fire Pit Location and Design
Before you even gather your first material, careful planning is crucial for the success and safety of your DIY smokeless fire pit. The first and most critical step is selecting the ideal location in your backyard. Consider areas that are:
- Safe: Ensure the fire pit is a safe distance from your home, fences, trees, shrubs, and any other combustible structures or materials. A minimum of 10-20 feet is often recommended, but always check local fire codes.
- Level: A flat, stable surface is essential for the structural integrity of your fire pit. If your chosen spot isn’t level, you’ll need to prepare the ground accordingly.
- Wind Protected: While smokeless fire pits reduce smoke, extreme wind can still affect the burn and spread embers. Choose a spot that offers some natural windbreak, if possible.
- Accessible: Think about how guests will gather around it. Is there enough space for seating and comfortable movement?
- Convenient: Consider proximity to a water source for safety and ease of access for bringing wood and cleaning.
Additionally, research any local ordinances or homeowner association rules regarding outdoor fire pits. Some areas may require permits or have specific regulations on size, type, or burning hours. Once the location is set, you can visualize the scale of your fire pit and how it will integrate with your existing landscaping or future outdoor design plans.
Essential Materials for Your DIY Smokeless Fire Pit Build
One of the beauties of this DIY smokeless fire pit project is its simplicity, relying on readily available and affordable materials. You won’t need to hunt for exotic components; everything can typically be found at a well-stocked hardware store, home improvement center, or even a farm/tractor supply store. Here’s a breakdown of what you’ll need:
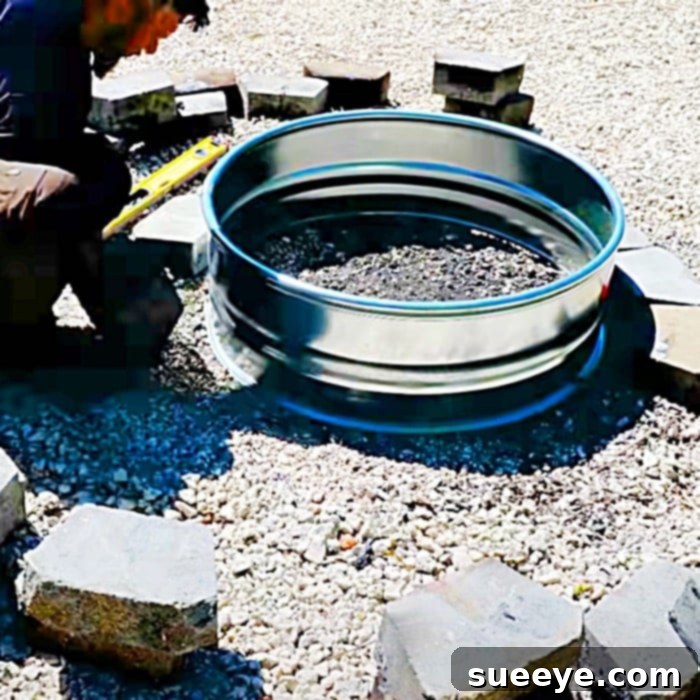
- Galvanized Stock Tank Ring (No Bottom): This is the core of your fire pit. The galvanized steel is durable, heat-resistant, and provides the essential inner ring for the smokeless design. The “no bottom” aspect is key, as it allows for proper drainage and airflow from below. You might find these labeled as stock tank rings or even cattle feed rings, depending on the supplier.
- Gravel (for the bottom): A layer of gravel serves multiple critical functions. It provides a stable, non-combustible base, aids in drainage, and perhaps most importantly, facilitates airflow beneath the fire. This airflow is fundamental to the “smokeless” mechanism, drawing in oxygen to fuel the fire from below and promoting efficient combustion.
- Bricks (for the sides): Bricks will form the protective and decorative outer wall of your fire pit. You have a wide range of choices here, from standard red bricks to more decorative paver bricks or even natural stones. The type you choose will significantly influence the final aesthetic of your fire pit. Ensure they are suitable for high heat applications.
These materials combine to create a robust, functional, and aesthetically pleasing fire pit that will stand the test of time and countless cozy evenings.
Step-by-Step Directions to Build Your Smokeless Fire Pit
With your materials gathered and your site prepared, you’re ready to bring your DIY smokeless fire pit to life. Follow these straightforward steps, drawing inspiration from Haxman’s detailed YouTube tutorial, to construct a beautiful and functional addition to your backyard:
Step 1: Prepare Your Foundation
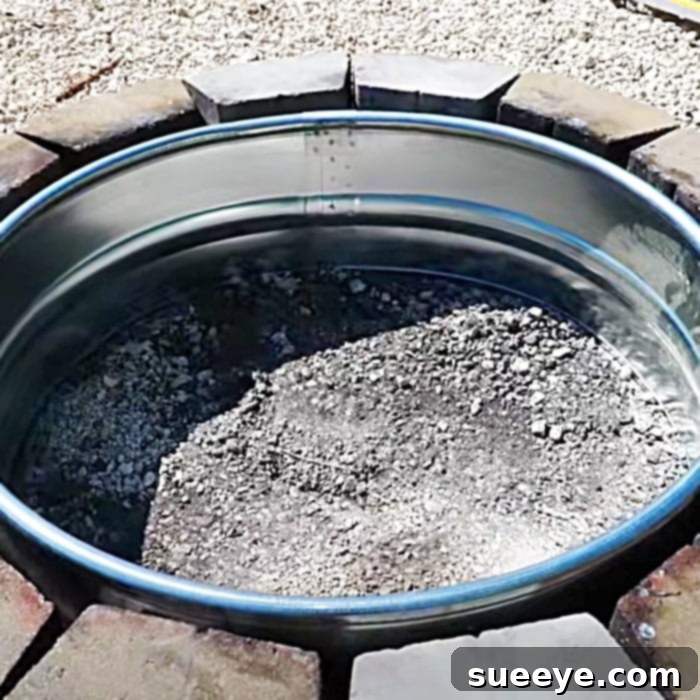
Begin by ensuring your chosen area is completely level. You may need to dig out a shallow circular trench slightly wider than your galvanized stock tank ring. This helps to seat the ring securely and define the area for your brick surround. Once the ground is level, lay down a generous layer of gravel within the prepared circular space. The gravel should be at least 4-6 inches deep, forming a solid, permeable base. This layer is crucial for efficient drainage and, more importantly, for allowing air to flow beneath the fire, a key component of the smokeless design.
Step 2: Position the Galvanized Stock Tank Ring
Carefully place your galvanized stock tank ring directly onto the center of your prepared gravel base. Ensure it sits level and stable. This ring will contain the actual fire, so its proper placement is paramount. The bottomless design means that the fire will rest on the gravel, allowing for optimal air circulation from below and preventing moisture buildup.
Step 3: Construct the Brick Surround
Now, you will begin surrounding the galvanized ring with bricks. This creates the outer structure of your fire pit, providing both insulation and a finished aesthetic.
- First Course: Begin laying your first course of bricks around the exterior of the galvanized ring. You can either dry stack the bricks (without mortar) for a simpler, more rustic look, or use high-heat mortar for a more permanent and robust structure. Ensure the bricks are snugly against the galvanized ring, leaving no significant gaps.
- Subsequent Courses: Continue laying additional courses of bricks, staggering the joints for increased stability and a professional appearance. The height of your fire pit is entirely up to you, but typically 2-3 courses of bricks work well for a comfortable seating height and fire containment. As you build up, check frequently to ensure the walls are level and plumb.
- Ventilation Gaps (Optional but Recommended): For an even more effective smokeless design, consider leaving small gaps (about 1-2 inches wide) between some of the bricks on the lower course. These intentional gaps, often positioned on opposite sides, will draw in cool air, which then travels up between the galvanized ring and the brick surround, preheating before entering the firebox and contributing to the secondary combustion that reduces smoke.
Once your brick surround is complete, allow any mortar to cure fully according to manufacturer instructions before lighting your first fire.
Enhancing Your Fire Pit Experience: Seating, Lighting, and Accessories
Building a fire pit is just the first step; creating an inviting and comfortable area around it transforms your backyard into a true outdoor sanctuary. Consider these ideas to complete your fire pit zone:
- Comfortable Seating: As mentioned, wooden block stools with outdoor cushions offer a rustic yet comfortable option. Alternatively, consider Adirondack chairs, comfortable patio sofas, or even built-in stone or wood benches that complement your fire pit’s design. The key is to ensure ample seating for gatherings.
- Ambient Lighting: Beyond the glow of the fire, subtle lighting can create a magical atmosphere. String lights draped overhead, solar-powered lanterns placed strategically, or even low-voltage landscape lighting can add warmth and functionality to the space after dark.
- Thoughtful Landscaping: Surround your fire pit area with fire-resistant plants or decorative gravel paths. Consider defining the space with pavers or a small retaining wall. This not only enhances aesthetics but also helps to separate the fire area from the rest of your lawn.
- Essential Accessories: Equip your fire pit with practical tools. A sturdy fire poker and log grabber are indispensable for managing the fire. A stylish log holder keeps your firewood dry and easily accessible. Don’t forget a durable fire pit cover to protect your creation from the elements when not in use, extending its lifespan.
- Safety Enhancements: While not strictly an accessory, always keep a bucket of sand or a fire extinguisher nearby for safety. A spark screen cover can also be a wise investment, especially in windy conditions, to prevent embers from escaping.
By adding these elements, you’ll create a fully functional and beautifully curated outdoor living space that will be the envy of your neighborhood.
Safety First: Important Considerations for Your Fire Pit
While a DIY smokeless fire pit is a wonderful addition to any backyard, fire safety must always be your top priority. Adhering to these guidelines will ensure that your outdoor gatherings remain joyous and secure:
- Maintain Clearances: Always ensure your fire pit is a safe distance from any combustible materials, including your home, fences, trees, shrubs, and overhead structures. The general recommendation is at least 10-20 feet.
- Supervise Constantly: Never leave a fire unattended, even for a moment. This is especially crucial when children or pets are present. Designate a responsible adult to oversee the fire at all times.
- Have Water or Sand Nearby: Always keep a garden hose, a bucket of water, or a bucket of sand readily accessible to quickly extinguish any errant sparks or emergencies. A fire extinguisher is also an excellent safety measure.
- Burn Only Dry, Seasoned Wood: Avoid burning green wood, treated lumber, trash, or accelerants. These can create excessive smoke, harmful fumes, and sparks. Dry, seasoned hardwood burns cleaner and produces less smoke, complementing your fire pit’s design.
- Control Fire Size: Keep your fire to a manageable size that stays within the confines of the fire pit. Overfilling can lead to embers escaping and becoming dangerous.
- Mind the Wind: On windy days, exercise extreme caution or consider postponing your fire. Even a smokeless fire pit can have embers carried by strong gusts. A spark screen can offer an additional layer of protection.
- Extinguish Thoroughly: Before leaving the fire pit area, ensure the fire is completely extinguished. Douse it with water and stir the ashes to check for any smoldering embers. Do not cover the fire pit until all embers are cold.
- Educate Guests: Briefly inform guests about fire safety rules, especially children, to ensure everyone understands how to behave safely around an open flame.
By integrating these safety practices into your fire pit enjoyment, you can relax and create wonderful memories with peace of mind.
Maintenance and Longevity of Your DIY Fire Pit
To ensure your DIY smokeless fire pit remains a focal point of your backyard for years to come, a little routine maintenance goes a long way. After each use, allow the fire pit to cool completely before cleaning. Regularly remove ash and debris from the galvanized ring and gravel base. This not only keeps the fire pit tidy but also ensures optimal airflow, which is critical for its smokeless performance. Periodically inspect the bricks for any signs of cracking or loosening, especially if you dry-stacked them. If using mortar, check for any degradation and touch up as needed.
Protecting your fire pit from the elements is also essential for its longevity. Invest in a heavy-duty, waterproof fire pit cover to shield it from rain, snow, and excessive sun exposure when not in use. This will prevent rust on the galvanized metal and help preserve the integrity of the bricks. By dedicating a small amount of time to these maintenance tasks, you can significantly extend the life of your fire pit, ensuring countless more evenings of warmth, ambiance, and enjoyment.
Create Your Own Backyard Retreat
Building your own DIY smokeless fire pit is more than just a home improvement project; it’s an investment in creating memorable outdoor experiences. From the initial inspiration found in Haxman’s tutorial to the final touches of comfortable seating and ambient lighting, every step brings you closer to owning a truly unique and functional backyard feature. The satisfaction of building something with your own hands, combined with the joy of gathering loved ones around a beautiful, smoke-free fire, is an unparalleled reward.
This project proves that you don’t need extensive skills or a massive budget to transform your outdoor space. With simple materials and a clear vision, you can craft an inviting oasis that promises countless evenings of warmth, laughter, and connection. So, roll up your sleeves, embrace the DIY spirit, and get ready to ignite the magic in your own backyard with a stunning smokeless fire pit that will undoubtedly become the favorite spot for everyone to gather.