
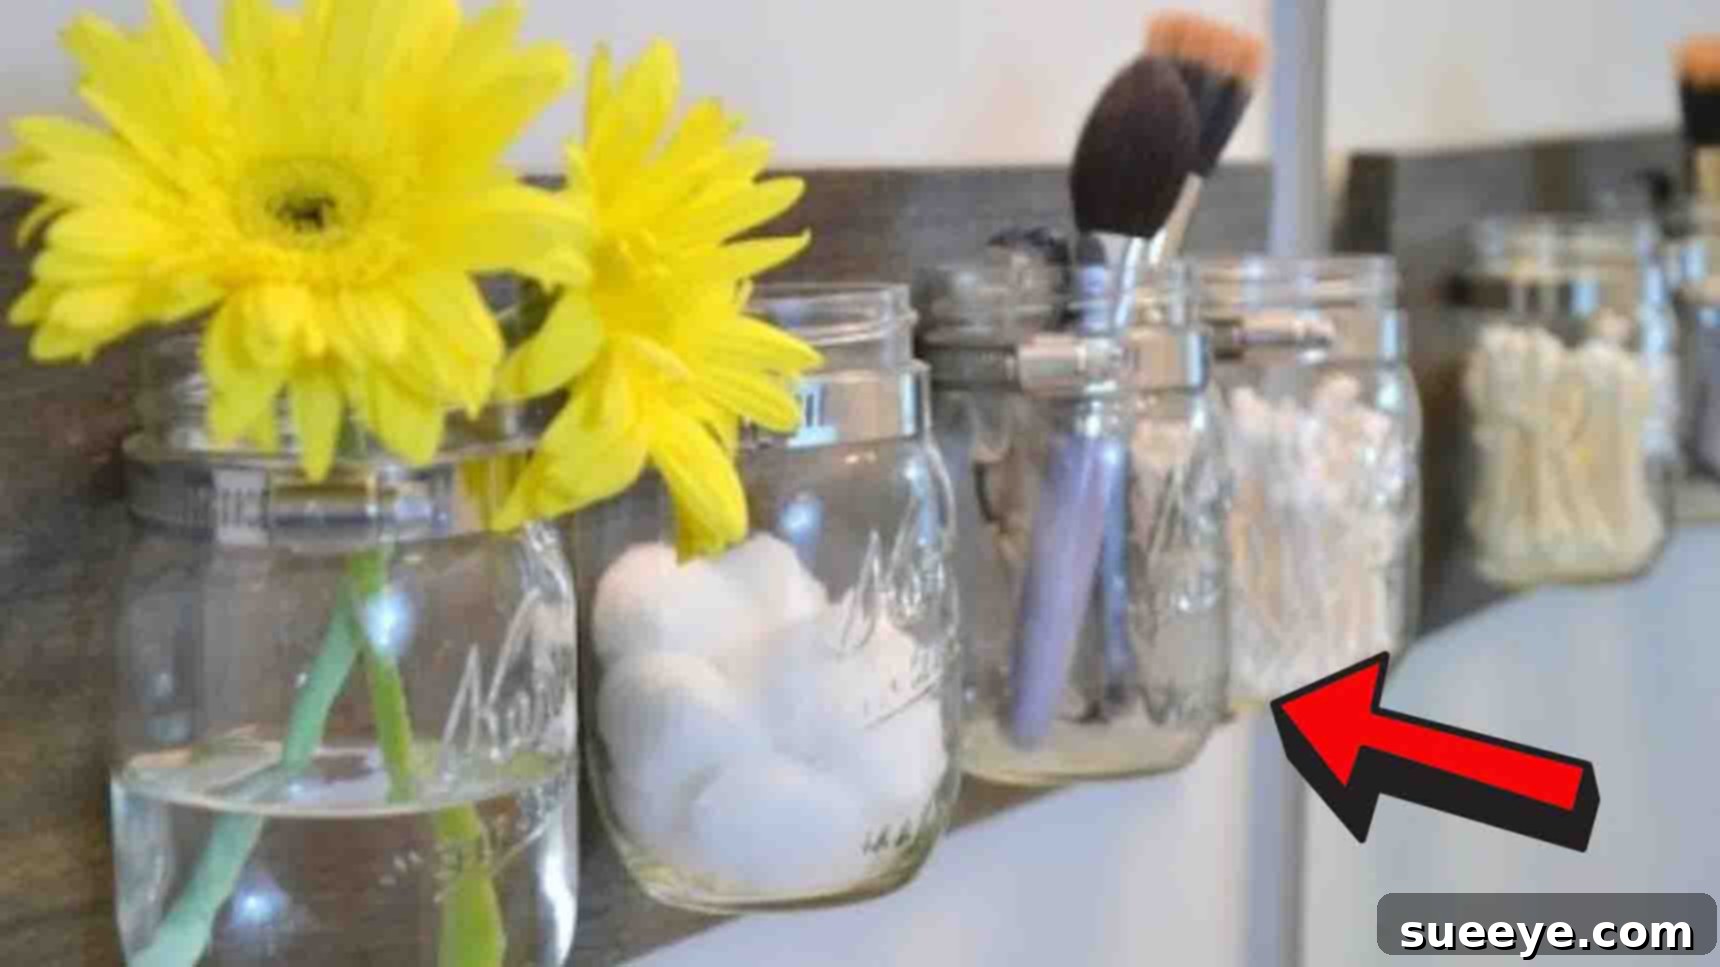
DIY Mason Jar Organizer: Stylish, Simple, and Super Functional Storage Solutions
Are you searching for an engaging and rewarding weekend project that also tackles your home organization challenges? Look no further! This ingenious mason jar organizer, inspired by the creative minds at DIY Playbook on YouTube, offers an incredible blend of aesthetics and utility. It’s an exceptionally quick and easy DIY endeavor, requiring just a handful of readily available materials and basic tools. More than just a storage solution, this charming organizer will undeniably elevate the look and feel of any space, injecting a dose of chic, rustic elegance. Prepare to transform your cluttered corners into beautifully organized displays. Dive into our detailed step-by-step instructions below and embark on your next favorite home improvement project!
Why a Mason Jar Organizer is Your Next Must-Have DIY Project
In the quest for a more organized and aesthetically pleasing home, DIY projects stand out as a fantastic way to personalize your space while staying budget-friendly. A DIY mason jar organizer perfectly embodies this philosophy. Mason jars, with their timeless appeal and incredible versatility, are not just for canning anymore. When repurposed into an organizer, they offer a unique charm that mass-produced storage solutions often lack.
This particular design is a game-changer for several reasons. First, it’s incredibly versatile. Whether you need to tidy up your craft room, organize kitchen utensils, sort office supplies, or even store toiletries in the bathroom, this organizer adapts beautifully. Second, its wall-mounted design frees up valuable counter and drawer space, making even the smallest rooms feel more open and functional. Third, the combination of natural wood and glass creates a stylish, rustic-chic aesthetic that complements a wide range of interior decors, from farmhouse to modern minimalist. Finally, it’s a sustainable choice, repurposing materials and reducing waste. By choosing to build this organizer, you’re not just creating storage; you’re crafting a piece of functional art that reflects your personal style and commitment to an organized life.
Essential Materials for Your DIY Mason Jar Organizer
Before you begin, gather all your supplies. Having everything on hand will make the construction process smooth and enjoyable. Here’s what you’ll need:
- Mason Jars (4 pcs.): You can choose 8oz, 12oz, or 16oz jars depending on what you plan to store and the desired visual impact. Larger jars offer more storage capacity, while smaller ones are perfect for tiny items. Ensure they are standard mouth jars for easy fit with hose clamps.
- Hose Clamps (4 pcs.): These are adjustable metal bands typically used for sealing hoses. Make sure they are wide enough to securely grip your chosen mason jars. Stainless steel clamps are recommended for durability and resistance to rust, especially if used in a bathroom or kitchen.
- Wood Piece (approx. 2 ft x 7″): This will serve as the baseboard for your organizer. A common pine board works well, but you can opt for reclaimed wood for a more rustic look or a harder wood for extra durability. The dimensions provide ample space for four jars to be evenly spaced. You might need to adjust the length if using more or fewer jars.
- Wood Stain or Paint: To protect and beautify your wood. Choose a stain color that complements your home decor, from light natural tones to dark espresso, or a vibrant paint color for a pop of personality.
- Picture Hanging Kit: This kit usually includes D-rings or sawtooth hangers and small nails or screws. Select a kit rated to support the weight of your organizer once fully loaded with jars and their contents. Two hangers are typically recommended for stability.
- Hammer: For attaching the picture hangers securely to the back of the wood.
- Rag or Lint-Free Cloth: Essential for applying wood stain evenly and wiping off excess.
- Drill: A cordless electric drill will make the process much faster and easier for drilling pilot holes and driving screws.
- Titanium Drill Bit Set: You’ll need various sizes. A smaller bit for pilot holes and a larger one (or a countersink bit) suitable for the screws that come with your hose clamps. Titanium bits are durable and ideal for drilling into wood.
- Screws: Ensure you have screws appropriate for attaching the hose clamps to the wood. Often, hose clamps come with suitable screws, but if not, select short wood screws with a flat head that won’t protrude too much.
Step-by-Step Guide to Crafting Your Mason Jar Organizer
With your materials ready, let’s dive into the creation process. Follow these detailed steps to build a sturdy and beautiful mason jar organizer.
Step 1: Preparation is Key – Staining Your Wood Base
Begin by preparing your wood piece. If your wood is rough, a light sanding with fine-grit sandpaper (around 120-220 grit) will create a smoother surface for staining. Wipe off any dust with a damp cloth and let it dry completely. Once clean and dry, it’s time to apply your chosen wood stain or paint. Using a rag or a foam brush, apply the stain evenly across all surfaces of the wood, following the grain. For a deeper color, you might apply a second coat after the first has partially dried. Always refer to the stain manufacturer’s instructions for specific application and drying times. Allow the stained wood to dry thoroughly, typically for a full 24 hours, in a well-ventilated area. Rushing this step can lead to a sticky finish or issues with subsequent steps.
Step 2: Securing Your Organizer – Attaching Picture Hangers
Once your stained wood is completely dry, carefully turn it over to the backside. Measure about 1-2 inches down from the top edge and mark two points, roughly 2-3 inches in from each end. These marks indicate where your picture hangers will be placed. Using your hammer, gently tap the nails or screws from your picture hanging kit into these marked spots, ensuring the hangers are level and securely fastened. These hangers will bear the entire weight of your organizer, so double-check their stability. For heavier loads, consider using D-rings with small screws for extra security.
Step 3: Precision Placement – Marking for Mason Jars
Flip the wood piece back over to the front side. Now, you’ll need to mark the precise locations for your mason jars to ensure they are evenly spaced and aesthetically pleasing. Using a tape measure, find the center of your wood board lengthwise. From this center point, measure outwards to evenly space four jars. For a 2-foot (24-inch) board, you might place marks at 4, 8, 16, and 20 inches from one end, or measure the total length and divide by the number of jars plus one for spacing. Use a pencil to make clear, light marks. These marks will guide where you attach the hose clamps, ensuring a balanced look.
Step 4: Installing the Hose Clamps – The Foundation for Your Jars
This step requires careful drilling. First, select a small titanium drill bit, slightly narrower than the screws you’ll be using for the hose clamps. Place one hose clamp at your first marked position, aligning its screw housing with the mark. Using your drill, create a pilot hole through the clamp’s screw housing and into the wood. Pilot holes prevent the wood from splitting and make driving screws much easier. After drilling the pilot hole, swap your small drill bit for one that matches the head of your screw (or use a screwdriver if preferred). Secure the hose clamp tightly to the wood with a screw. Do not overtighten, as this could strip the wood. Repeat this process for the remaining three hose clamps, ensuring each is firmly attached and aligned with your pencil marks.
Step 5: Mounting Your Mason Jars – Final Assembly
With all four hose clamps securely fastened to the wood, it’s time to add the mason jars! Loosen each hose clamp just enough to allow a mason jar to slide through it comfortably. Carefully position each jar within its respective clamp. Once the jar is in place, hand-tighten the screw on the hose clamp until the jar feels snug and secure. Ensure the jar is held firmly but avoid overtightening, which could crack the glass. Repeat this for all four jars. Once all jars are mounted, give them a gentle tug to confirm they are stable. Your stunning DIY mason jar organizer is now complete and ready for its grand debut! Hang it on your wall using the picture hangers you installed earlier.
Creative Ways to Utilize Your New Mason Jar Organizer
The beauty of this DIY mason jar organizer lies not just in its simple construction but in its incredible versatility. Here are some inspiring ideas for how you can fill and utilize your new storage masterpiece:
- Kitchen Command Center: Store cooking utensils (spatulas, whisks), fresh herbs, dry pasta, or even small recipe cards. It’s perfect for keeping frequently used items within arm’s reach and adding a rustic farm-to-table aesthetic.
- Craft Room Companion: Organize your crafting supplies like paintbrushes, markers, scissors, yarn, buttons, beads, or fabric scraps. No more rummaging through drawers; everything is visible and accessible.
- Bathroom Bliss: Use it to store toothbrushes, toothpaste, cotton balls, Q-tips, hair ties, makeup brushes, or small toiletries. It helps keep your vanity clutter-free and adds a spa-like touch.
- Office Organization: Declutter your workspace by storing pens, pencils, rulers, paper clips, rubber bands, or small notepads. It keeps your desk tidy and professional.
- Gardening Hub: Hold small hand tools, seed packets, plant markers, or gloves in a mudroom or garage.
- Kids’ Art Station: Perfect for crayons, colored pencils, glitter, and other art supplies, making cleanup easier for little ones.
Tips for Success and Customization
- Safety First: Always wear safety glasses when drilling. Be mindful of your fingers when using hammers and drills.
- Measure Twice, Cut/Drill Once: Precision in measuring will ensure your jars are evenly spaced and your organizer hangs straight.
- Customize Your Look: Don’t limit yourself to stain! Paint the wood a vibrant color, distress it for a vintage feel, or even add stenciled designs. You can also paint the mason jars themselves or add decorative labels for contents.
- Alternative Jars: While mason jars are classic, you can experiment with other types of glass jars if they fit within the hose clamps.
- Consider Lighting: If your organizer is in a darker area, consider adding a small LED strip light underneath for extra visibility and ambiance.
- Heavy Items: If you plan to store particularly heavy items, ensure your wall anchors (if used for hanging) and picture hangers are rated for the combined weight of the wood, jars, and contents.
Conclusion: Enjoy Your Beautifully Organized Space!
Congratulations! You’ve successfully crafted a beautiful and functional DIY mason jar organizer. This project is a testament to how simple materials, a little creativity, and a touch of effort can lead to remarkable results. Not only have you added valuable storage to your home, but you’ve also created a charming piece of decor that reflects your personal touch. So go ahead, fill those jars with anything your heart desires, and bask in the satisfaction of a beautifully organized and aesthetically pleasing space. Enjoy the compliments that are sure to come your way!