
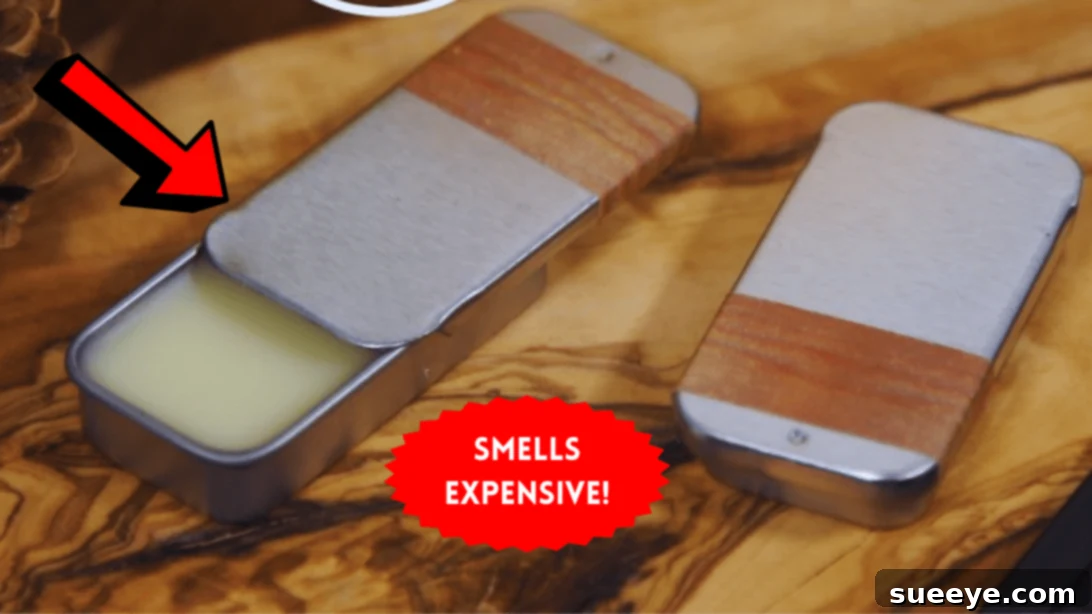
Crafting Your Signature Scent: Easy DIY Wax Cologne for Thoughtful Gifts
The spirit of giving is a cherished tradition, but finding truly unique and heartfelt gifts can often be a source of stress. As holidays or special occasions approach, the quest for that perfect present begins. What if you could create something truly personal, meaningful, and wonderfully fragrant right in your own home? Look no further than this incredible DIY wax cologne project, inspired by the Crafty Lumberjacks via HGTV Home on YouTube. This guide will walk you through creating a bespoke solid perfume that is not only delightfully aromatic but also affordable, easy to make, and incredibly personalizable.
Imagine presenting a loved one with a custom-blended fragrance, knowing every ingredient was chosen with care. This homemade wax cologne offers a fantastic opportunity to express your creativity while crafting a practical and luxurious item. Whether you’re aiming to save money, avoid harsh chemicals found in commercial perfumes, or simply want to give a gift with a personal touch, this DIY endeavor ticks all the boxes. You can even produce these in larger batches, allowing for significant savings and endless possibilities for customizing scents and decorating the charming tin containers. Dive into the world of natural fragrance creation and discover the joy of making something truly special.
Why Choose DIY Wax Cologne: A Gift That Keeps on Giving
In a world saturated with mass-produced items, a handmade gift stands out. DIY wax cologne offers a multitude of benefits that elevate it beyond a simple present. Firstly, it’s remarkably cost-effective. By purchasing raw materials, you can create multiple gifts for a fraction of the price of a single high-end perfume. This makes it an ideal option for those who want to give generously without breaking the bank.
Beyond affordability, the personalization aspect is unparalleled. Unlike liquid perfumes, solid wax colognes are travel-friendly, spill-proof, and discreet. Their compact size makes them perfect for tossing into a bag, pocket, or desk drawer for a quick refresh throughout the day. More importantly, they offer a natural alternative to commercial fragrances, which often contain synthetic ingredients that can be harsh on sensitive skin or cause allergic reactions. By using pure essential oils and natural waxes, you control exactly what goes into your cologne, ensuring a product that is gentle, nourishing, and free from undesirable chemicals.
Furthermore, the act of making a gift instills it with a unique sentimental value. The time, effort, and thought invested in crafting a personalized scent speak volumes. You can tailor the fragrance profile to the recipient’s preferences – a fresh citrus for an energetic friend, a warm woody scent for a grounded loved one, or a soothing floral for someone needing tranquility. This level of customization transforms a simple item into a truly thoughtful and cherished keepsake. It’s an eco-conscious choice too, often involving reusable tin containers and natural, biodegradable ingredients, reducing waste compared to traditional perfume bottles.
The Art of Scent Blending: Understanding Fragrance Notes
Creating a beautiful and balanced fragrance is an art, and the secret lies in understanding scent notes. Every perfume, whether liquid or solid, is composed of a blend of notes that unfold over time, creating a unique olfactory journey. These are typically categorized into three layers: top notes, middle notes (or heart notes), and base notes.
- Top Notes: These are the first scents you detect upon application. They are typically light, fresh, and volatile, evaporating quickly. Citrus oils like bergamot, lemon, or orange often serve as invigorating top notes, providing an initial burst of aroma.
- Middle Notes: Also known as heart notes, these emerge after the top notes have faded. They form the core of the fragrance, providing balance and body. Floral, spicy, or herbaceous oils such as rosemary, lavender, geranium, or nutmeg are common middle notes.
- Base Notes: These are the deepest, richest, and longest-lasting scents. They provide depth, warmth, and longevity to the cologne, often lingering for hours. Resinous, woody, or musky oils like frankincense, pine, cedarwood, sandalwood, or patchouli are excellent base notes, anchoring the entire composition.
For this particular wax cologne recipe, we utilize a thoughtful combination to achieve a harmonious and inviting aroma. Frankincense acts as a grounding base note, providing a warm, earthy foundation. Rosemary contributes a herbaceous, slightly camphorous middle note, adding a crisp, clean dimension. Bergamot delivers a bright, uplifting citrus top note, creating an immediate refreshing impression. Finally, a touch of pine adds a rich, woody, and subtly festive base or middle note, enhancing the overall depth and character. The key to a successful blend is not just choosing pleasant individual scents, but ensuring they complement each other and evolve beautifully over time.
Essential Materials for Your Homemade Scent
Gathering the right ingredients is the first step towards crafting your exquisite wax cologne. Each component plays a crucial role in the final texture, scent, and longevity of your solid perfume. Fortunately, these materials are readily available online or at most craft and natural product stores.
- Essential oils: frankincense, rosemary, bergamot, pine. These high-quality oils provide the core fragrance. Ensure they are pure, therapeutic-grade essential oils for the best scent and skin benefits.
- Natural beeswax pellets: Beeswax provides the solid structure of your cologne. Pellets are easier to measure and melt evenly. It’s a natural emulsifier and thickener, known for its skin-protective properties.
- Jojoba oil: This is a versatile carrier oil, excellent for blending essential oils and nourishing the skin. Jojoba oil is technically a liquid wax, closely resembling the natural sebum of our skin, making it highly absorbable and non-greasy.
- Shea butter: Known for its incredible moisturizing properties, shea butter adds a creamy, luxurious texture to the wax cologne. It also helps to stabilize the scent and nourish the skin upon application.
- Stirrer: A small spoon, popsicle stick, or glass stirring rod will work perfectly for mixing.
- 1oz tin can: These small, travel-friendly tins are ideal containers for solid cologne. They are reusable and protect the cologne from light and air, preserving its scent.
Crafting Your Wax Cologne: A Step-by-Step Guide
Now that you have all your materials ready and understand the basics of scent notes, it’s time to bring your personalized wax cologne to life. Follow these detailed steps carefully for the best results, ensuring a beautifully scented and perfectly textured solid perfume.
Step 1: Preparing Your Essential Oil Blend
The foundation of your wax cologne is its aromatic core – the essential oil blend. Precision in measurement is crucial for a balanced and consistent scent. In a small, clean bowl or a separate measuring cup, carefully combine the following essential oils: begin with 25 drops of frankincense, adding its deep, resinous, and slightly sweet base note. Next, incorporate 35 drops of rosemary essential oil, which offers a fresh, herbaceous, and stimulating middle note. Introduce 20 drops of bergamot for its bright, uplifting, and subtly citrusy top note, adding a refreshing initial burst. Finally, add 5 drops of pine essential oil, contributing a crisp, woody, and grounding aroma that ties the blend together. Use your stirrer to gently mix these essential oils until they are thoroughly combined. Once blended, set this aromatic mixture aside; it will be incorporated later into the melted base, ensuring the delicate fragrance compounds are not compromised by excessive heat.
Step 2: Melting the Nourishing Base
For the base of your wax cologne, we will create a nourishing blend of beeswax, jojoba oil, and shea butter. This step requires a double boiler setup, which safely melts waxes and butters without direct heat, preventing burning and preserving their beneficial properties. If you don’t have a dedicated double boiler, you can easily create one by placing a heat-safe glass measuring cup or bowl over a saucepan filled with a few inches of simmering water. Ensure the bottom of the measuring cup does not touch the water, as the steam will provide indirect heat. For a standard 1oz tin can, you will need 1 teaspoon of natural beeswax pellets, 1 teaspoon of jojoba oil, and 1 teaspoon of shea butter. Add all three ingredients to your measuring cup. As the water simmers, the ingredients in the measuring cup will slowly begin to melt. Gently stir the mixture occasionally to facilitate even melting and ensure a smooth, homogeneous liquid. This process typically takes about 1 to 2 minutes, or until all components are fully liquid and clear.
Step 3: Combining and Setting Your Signature Scent
Once your wax, jojoba oil, and shea butter mixture is completely melted and clear, carefully remove the measuring cup from the double boiler setup. It’s important to allow the mixture to cool for approximately 30 seconds to a minute before adding the essential oils. This brief cooling period helps prevent the volatile essential oil compounds from evaporating too quickly due to the heat. While the base is still liquid but slightly cooler, pour in your pre-blended essential oil mixture from Step 1. Immediately and continuously stir the mixture thoroughly for about 30 seconds to ensure the essential oils are evenly dispersed throughout the wax base. Rapid stirring is key here to prevent the oils from separating as the mixture begins to cool. Once well combined, swiftly transfer the fragrant liquid cologne mixture into your clean 1oz tin can. Fill the tin almost to the brim. Now comes the waiting game: allow the cologne to cool and harden completely. This process typically takes at least 30 minutes at room temperature, but it may take longer in warmer environments. For best results, let it set undisturbed until it is completely firm. Once solid, your personalized wax cologne is ready! You can now decorate or personalize the tin can with labels, ribbons, or artistic touches to make it an even more special gift or a unique item for yourself.
Personalizing Your Wax Cologne Gifts
The true beauty of DIY projects lies in the freedom to customize. While the provided essential oil blend offers a wonderful starting point, don’t hesitate to experiment with different combinations to create unique scents tailored to individual preferences. For a more masculine profile, consider blends with cedarwood, sandalwood, vetiver, or black pepper. For a lighter, more feminine touch, lavender, ylang-ylang, jasmine, or sweet orange can be beautiful additions. Always research the properties and safety guidelines of new essential oils before using them, especially regarding skin application.
Beyond the scent, the presentation of your wax cologne tin offers another avenue for personalization. Small labels designed with the recipient’s name or a special message can add a thoughtful touch. You can also decorate the tins with paint, markers, or even decoupage. Consider pairing the wax cologne with other homemade items, such as the Easy DIY Winter Incense Logs, to create a delightful gift set. The possibilities are endless, making each wax cologne a truly one-of-a-kind treasure.
Tips for a Flawless Wax Cologne
To ensure your DIY wax cologne turns out perfectly every time, keep these practical tips in mind:
- Quality Ingredients Matter: Always opt for high-quality, therapeutic-grade essential oils and natural waxes and butters. This not only ensures a superior fragrance but also a product that is safe and beneficial for the skin.
- Temperature Control is Key: When adding essential oils, ensure your melted base has cooled slightly. Adding them to an excessively hot base can cause the delicate aromatic compounds to evaporate, resulting in a weaker scent.
- Experiment with Scents: Don’t be afraid to deviate from the recipe once you’ve mastered the basic technique. Keep a notebook to record different essential oil blends and their proportions so you can recreate your favorites.
- Safety First: Always handle essential oils with care. Some oils can be photosensitive (e.g., certain citrus oils), meaning they can increase skin sensitivity to sunlight. Always dilute essential oils in a carrier oil (like jojoba oil) before applying to the skin. Perform a patch test on a small area of skin before widespread use, especially if you have sensitive skin or known allergies.
- Proper Storage: Store your wax cologne in a cool, dry place away from direct sunlight and extreme temperatures. Heat can cause the cologne to melt, while sunlight can degrade the essential oils. The tin container is designed to protect it.
- Scaling Up: If you plan to make multiple tins, simply multiply the ingredient quantities proportionally. It’s often easier to make larger batches of the base and essential oil blend separately before combining.
- Consistency Check: If your finished cologne is too soft, you might need a tiny bit more beeswax in your next batch. If it’s too hard, a little more jojoba oil or shea butter can adjust the texture.
By following these guidelines, you’ll be well on your way to becoming a skilled artisan of natural solid perfumes.
Crafting your own wax cologne is more than just a DIY project; it’s an opportunity to create something personal, meaningful, and genuinely useful. Whether you’re making it for yourself or as a thoughtful gift for friends and family, the process is rewarding, and the results are truly delightful. So, gather your materials, embrace your inner perfumer, and enjoy the journey of creating a signature scent that embodies warmth, care, and natural elegance. Happy crafting!
*All these images are credited to HGTV Home via YouTube. Give their channel a visit and subscribe for more inspiring DIY content!