
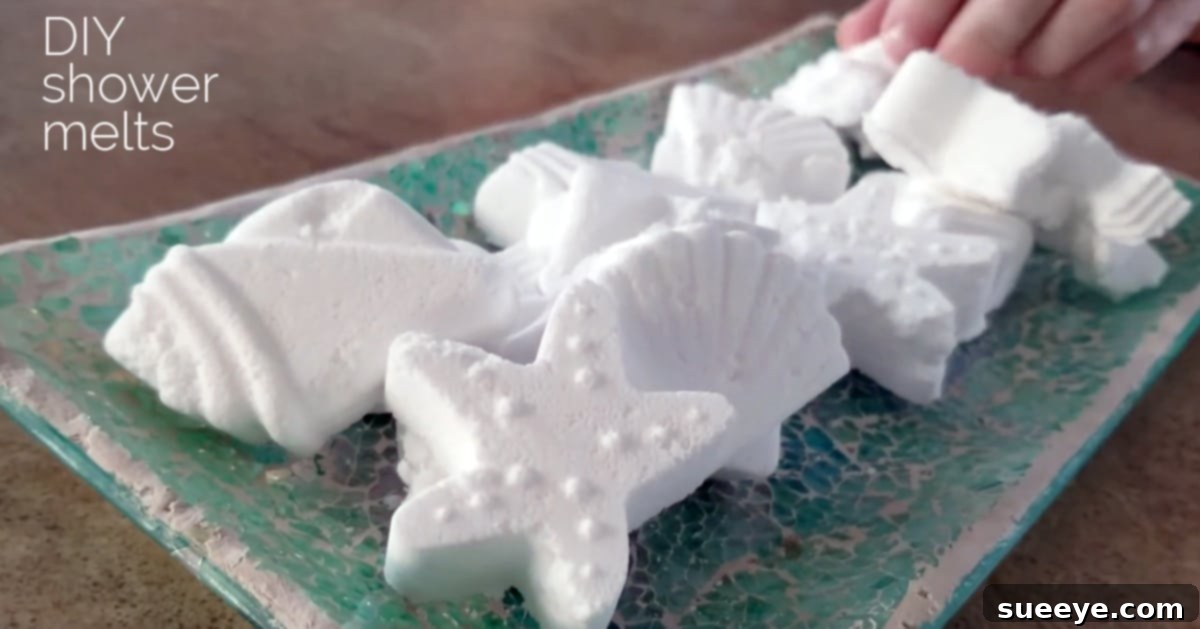
Transform Your Shower: The Ultimate Guide to DIY Shower Fizzies for a Spa-Like Experience
In today’s fast-paced world, finding moments of tranquility and self-care is more important than ever. While many of us are familiar with the indulgent fizz of a bath bomb, there’s a less-known, equally delightful alternative making waves: the shower fizzy, also lovingly known as a shower steamer or shower melt. Unlike bath bombs that fully dissolve in water, shower fizzies are ingeniously designed to slowly release their aromatic magic into the shower steam, infusing your entire bathroom with the therapeutic scents of your favorite essential oils. Imagine stepping into a warm shower, and as the steam rises, it carries notes of invigorating peppermint, calming lavender, or refreshing eucalyptus, turning your routine cleanse into a daily spa retreat.
These innovative aromatherapy powerhouses offer an accessible way to harness the benefits of essential oils. Whether you’re seeking profound relaxation after a long day, a boost of energy to start your morning, or much-needed relief from sinus congestion, a homemade shower fizzy can deliver an amazing addition to your shower routine. They work by reacting with the steam and indirect water, slowly melting and allowing the concentrated essential oils to diffuse into the air, creating a truly immersive sensory experience.
My Journey to Discovering the Power of Shower Steamers
My personal introduction to shower melts came during a particularly stubborn winter cold that simply wouldn’t budge. I was feeling utterly miserable, congested, and desperate for any form of relief. A thoughtful friend, seeing my plight, arrived with a care package. Among the teas and comforting gestures, she included a small basket containing heart-shaped shower melts, each heavily laden with the potent, clearing scent of eucalyptus oil. Skeptical yet hopeful, I decided to give one a try during my next shower.
The moment the warm water and steam hit the fizzy, my bathroom was transformed. The powerful, camphorous aroma of eucalyptus quickly permeated the air. It wasn’t just a pleasant smell; it was an immediate sensation of opening and clearing. Not only did that single shower melt significantly help to relieve my relentless sinus congestion, allowing me to breathe more easily, but it also made the entire showering experience incredibly relaxing. It felt less like a necessity and more like a therapeutic escape, truly akin to a luxurious day at the spa, right in my own home.
That initial success was an epiphany. After experiencing firsthand the profound benefits of these little aromatherapy wonders, I was inspired. I decided to try my hand at crafting my own homemade shower melts. Since then, I’ve embarked on a delightful journey of experimentation, exploring countless combinations of essential oils. While the possibilities are endless, my current go-to blend for both relaxation and a touch of invigoration is a harmonious mix of 10 drops of peppermint oil, 10 drops of calming lavender, and 5 drops of uplifting bergamot oil. This blend creates a beautifully balanced aroma that clears the mind while soothing the senses, proving that sometimes, the simplest pleasures can bring the greatest joy.
Why Make Your Own DIY Shower Fizzies?
Beyond the cost savings, crafting your own shower fizzies provides several compelling advantages:
- Customizable Aromatherapy: You have complete control over the essential oils used, allowing you to tailor scents to your specific needs – be it relaxation, energy, or respiratory support.
- Natural Ingredients: Avoid synthetic fragrances, dyes, and preservatives often found in commercial products.
- Therapeutic Benefits: Essential oils are known for their varied properties, from anti-inflammatory to mood-boosting, enhancing your well-being with every shower.
- Creative Outlet: It’s a fun and rewarding DIY project that yields delightful results.
- Thoughtful Gifts: Handmade shower fizzies make incredibly personal and appreciated gifts for friends and family.
Essential Ingredients & Tools for Crafting Shower Steamers
Gathering your supplies is the first exciting step in creating your personalized shower aromatherapy experience. Most ingredients are readily available at grocery stores, craft shops, or online retailers.
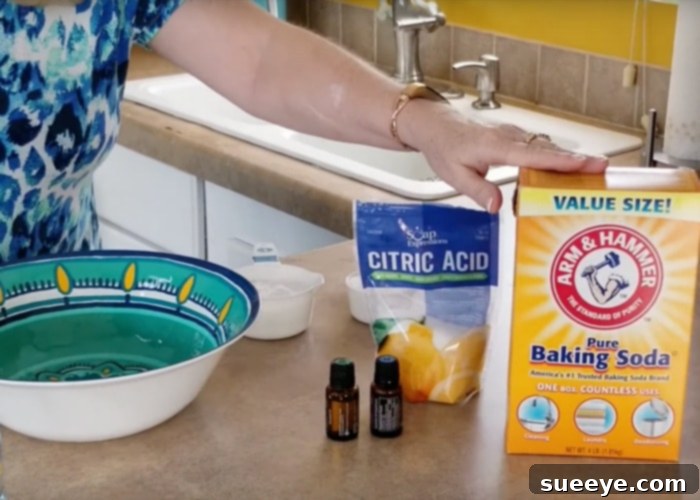
- 1 cup Baking Soda (Sodium Bicarbonate): This common household item forms the base of your shower fizzy. When combined with citric acid and a little moisture, it creates the characteristic fizzing action that releases the essential oils into the steam. Ensure it’s fresh for optimal results.
- 1/2 cup Citric Acid: A natural acid found in citrus fruits, citric acid is crucial for the effervescent reaction. Together with baking soda, it creates the gentle fizz that allows your essential oils to diffuse beautifully into the shower atmosphere.
- 20-25 drops Essential Oil(s) of Choice: This is where the magic happens! Choose high-quality, pure essential oils for the best therapeutic benefits and fragrance. Consider blends for specific purposes (see our suggestions below).
- Witch Hazel for Spritzing: This natural astringent is the secret to binding your mixture without triggering a premature fizz. Unlike water, which can cause an immediate reaction, witch hazel provides just enough moisture to activate the citric acid and baking soda slowly, ensuring your fizzies hold their shape until shower time.
- Silicon Molds with Small Shapes: Silicon molds are ideal because they are flexible, making it incredibly easy to release your finished shower melts without breakage. Small shapes (like hearts, stars, or simple rounds) are perfect as they provide a good single-use size.
- Spray Bottle: Essential for applying witch hazel evenly and in small, controlled amounts. This prevents over-wetting your mixture, which is a common pitfall.
- Mixing Bowl: A non-reactive bowl (glass or stainless steel) is best for combining ingredients.
- Whisk or Spoon: For thoroughly mixing your dry ingredients and essential oils.
Choosing the Right Essential Oils for Your Shower Fizzies:
The beauty of DIY shower fizzies lies in the ability to customize your aromatherapy experience. Here are some popular essential oil choices and their common benefits:
- For Sinus Congestion & Respiratory Support: Eucalyptus, Peppermint, Tea Tree, Rosemary, Spearmint. These oils are known for their clearing and invigorating properties, helping to open airways.
- For Relaxation & Stress Relief: Lavender, Chamomile, Bergamot, Frankincense, Cedarwood. Perfect for an evening shower to unwind and prepare for sleep.
- For Energy & Upliftment: Lemon, Sweet Orange, Grapefruit, Peppermint, Bergamot. Ideal for a morning shower to awaken your senses and boost your mood.
- For Immune Support: Clove, Cinnamon, Tea Tree, Wild Orange. These can add an extra layer of wellness during colder months.
- My Favorite Blend: 10 drops Peppermint, 10 drops Lavender, 5 drops Bergamot for a refreshing yet calming effect.
How to Make Your Own DIY Shower Steamers: A Step-by-Step Guide
Crafting your own shower fizzies is a straightforward and rewarding process. Follow these detailed steps to create your batch of aromatic shower melts.
Step One: Combine Dry Ingredients & Essential Oils
Begin by placing the precise measurements of 1 cup baking soda and 1/2 cup citric acid into a clean, dry mixing bowl. It’s crucial that your bowl is completely dry to prevent any premature fizzing. Use a whisk or a spoon to thoroughly combine these dry ingredients, ensuring an even distribution. This step is important for the chemical reaction that will occur later. Once mixed, add 20-25 drops of your chosen essential oil or blend directly into the dry mixture. If your skin is sensitive, you might want to wear gloves during this part. Stir vigorously again to distribute the essential oils evenly throughout the powder. The goal is for the scent to be consistent, and for the oils to be absorbed by the baking soda and citric acid.
For those seeking sinus relief, a powerful combination of peppermint, tea tree, and eucalyptus essential oils would be excellent choices at this stage. You might even increase the drops slightly if you desire a very potent aromatherapy experience, but always start with the recommended amount and adjust in future batches.
Step Two: Gradually Add Witch Hazel for the Perfect Consistency
Now comes the most delicate part of the process: adding the witch hazel. Fill your spray bottle with witch hazel. Hold the bottle a few inches above the mixture and begin to spray, spritzing in short bursts while continuously stirring the mixture. The key here is gradual application and constant mixing. You want to add just enough witch hazel to bind the mixture without making it too wet, which could cause it to fizz prematurely. Continue to spray and stir until the consistency of the mixture resembles damp sand – specifically, sand that you can press together in your hand, and it holds its shape without crumbling, yet it’s not visibly wet or clumpy. If it’s too dry, your fizzies will crumble. If it’s too wet, they’ll expand, lose their shape, or fizz before they’re even dry. Aim for that perfect middle ground, where it feels slightly tacky but not soggy.
Step Three: Firmly Mold Your Shower Fizzies
Once your mixture has reached the ideal “wet sand” consistency, it’s time to transfer it into your silicon molds. Take small portions of the mixture and press them firmly into each cavity of your chosen silicon molds. It’s essential to pack the mixture as tightly and compactly as possible. The firmer you press, the more solid and durable your shower fizzies will be, preventing them from crumbling easily once dry. Fill each mold to the brim and ensure the surface is flat and smooth. After molding, leave your shower melts undisturbed in their molds to dry and harden. This drying process is crucial and typically takes a minimum of 4 hours, but for best results and maximum firmness, I often recommend letting them dry for 12 to 24 hours, especially in humid environments. Place them in a cool, dry place away from direct sunlight or moisture.
Step Four: Release and Store Your Homemade Shower Melts
Once your shower fizzies have thoroughly dried and hardened, they are ready to be released from their molds. Silicon molds are fantastic for this step due to their flexibility. Gently press on the back of each mold cavity to pop out your hardened shower melts. If a particular fizzy seems a bit stubborn, you can carefully stretch the mold slightly around its edges to loosen it before pushing from the bottom. Handle them with care to avoid any breakage, especially if they are delicate shapes.
To preserve their potency and freshness, it’s vital to store your finished shower fizzies correctly. Place them in an airtight container or a glass jar with a tight-fitting lid. This protects them from humidity, which can cause them to lose their fizz, and from air exposure, which can diminish the effectiveness of the essential oils over time. Stored properly, your homemade shower melts can retain their quality and fragrance for several weeks to a few months, ready to transform your daily shower into an aromatic sanctuary whenever you need it.
How to Use Your Shower Fizzies for Maximum Benefit:
Using your homemade shower fizzy is simple and incredibly relaxing. The trick is to place it strategically to maximize its aromatic release without dissolving it too quickly.
Placement is Key: Do not place the shower melt directly in the path of the water stream, as this will cause it to dissolve too rapidly. Instead, place it on the floor of your shower, slightly off to the side, where it will be hit by indirect water splashes and the rising steam. A shower shelf or soap dish away from the direct spray can also work beautifully.
Activation by Steam: As the hot water runs, the heat and steam in your shower will activate the shower fizzy. It will begin to slowly melt and fizz, releasing its concentrated essential oils into the air. This diffusion process is what allows the therapeutic aromas to permeate your shower space.
Maximize the Experience: As the scents fill the air, take deep breaths. Allow the essential oils to work their magic – helping to relax your mind, invigorate your senses, open up congested sinuses, and clear your breathing passages. For an even more indulgent experience, consider dimming the lights, playing some calming music, and truly allowing yourself to relax and de-stress during this precious self-care moment.
Each shower melt is typically designed for a single shower session, providing a consistent and potent aromatherapy experience from start to finish. Enjoy the transformation of your daily routine into a luxurious, therapeutic escape!
Troubleshooting & FAQs for Perfect Shower Fizzies
Even with a clear recipe, sometimes things don’t go exactly as planned. Here are some common issues and their solutions, along with answers to frequently asked questions.
- Why are my shower fizzies crumbling? This is usually a sign that your mixture was too dry. The “wet sand” consistency needs to be just right – enough moisture to bind but not so much that it fizzes prematurely. Add a few more spritzes of witch hazel, mix well, and re-test the consistency. Ensure you’re packing the mixture very firmly into the molds.
- Why aren’t my shower fizzies fizzing? If they’re not fizzing, it could be for a few reasons. They might not have been fully dried, leading to a weak reaction. Or, perhaps the ingredients (especially baking soda or citric acid) are old and have lost their potency. Ensure your ingredients are fresh and stored in airtight containers. Also, confirm they are getting enough indirect water and steam during use.
- Why did my fizzies expand or fizz prematurely in the mold? This happens when the mixture gets too wet during the making process. Too much witch hazel, or accidentally using water instead of witch hazel, can cause the reaction to start too soon. Work slowly with the spray bottle and mix continuously.
- How long do homemade shower fizzies last? When stored in an airtight container in a cool, dry place, your shower fizzies can last for several weeks to a few months. Their scent might subtly fade over time, but their effectiveness should remain.
- Can I use water instead of witch hazel? While water technically binds the mixture, it’s not recommended. Water is much more reactive with baking soda and citric acid, often causing the mixture to fizz and expand immediately, making it hard to mold and dry properly. Witch hazel provides the necessary moisture for binding with a much slower reaction time.
- Can I add color to my shower fizzies? Yes, you can! Use mica powders or natural colorants specifically designed for bath and body products. Add a small amount to your dry ingredients in Step One. Be cautious with food coloring, as it can sometimes stain your shower or skin.
By keeping these tips in mind, you’ll be well on your way to consistently perfect, aromatherapy-infused shower fizzies that elevate your daily routine.
Embrace the Aromatic Bliss of DIY Shower Fizzies
Creating your own shower fizzies is more than just a craft; it’s an investment in your well-being. It’s an opportunity to infuse your daily shower with therapeutic aromas, transforming a mundane task into a moment of pure bliss and self-care. Whether you’re seeking relief from seasonal sniffles, a powerful burst of energy to kickstart your morning, or a calming embrace to wind down your evening, these homemade shower melts offer a customizable solution.
The satisfaction of crafting something beneficial with your own hands, combined with the delightful experience it provides, is truly rewarding. So, gather your ingredients, choose your favorite essential oils, and embark on this wonderful DIY journey. You’ll not only create a product that enhances your health and mood but also discover a new way to bring the luxury of a spa right into the comfort of your home, one aromatic shower at a time. Enjoy the process, and revel in the incredible benefits of your personalized, homemade shower steamers!