
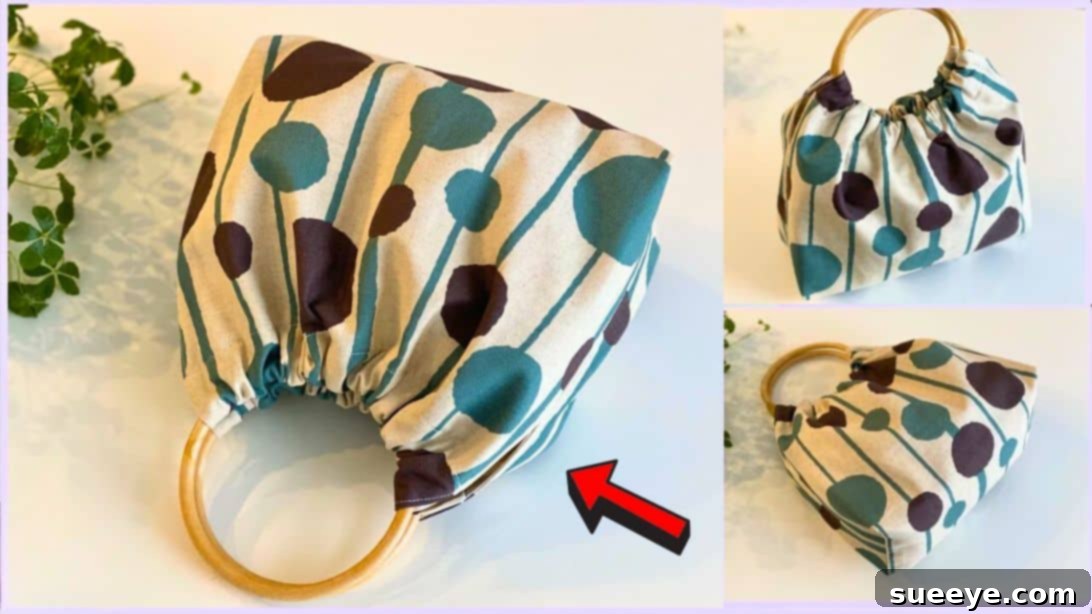
DIY Ring Bag Tutorial: Craft Your Perfect Summer Accessory with Ease
Imagine effortlessly combining style and practicality into an accessory that’s uniquely yours. This charming ring bag is not just a trend; it’s a versatile companion for all your summer adventures. Whether you’re heading to a leisurely picnic, a sunny beach, or simply enjoying a day out, this super cute and functional bag is designed to impress. Its distinctive ring handles offer a comfortable and chic way to carry your essentials, while a thoughtfully included inner pocket keeps your cards, keys, or money secure and easily accessible. Dive into this step-by-step tutorial and discover the joy of creating a beautiful, handmade bag that truly stands out. You’ll be guided through each stage, ensuring a rewarding crafting experience from start to finish. Learn how to bring this delightful project to life through this detailed guide, inspired by the creative insights from Ozachan channel.
Why a Ring Bag? Your Ultimate Summer Companion
The ring bag has emerged as a quintessential summer accessory, celebrated for its unique aesthetic and practical design. Its defining feature, the elegant ring handles, offers a contemporary twist on traditional bag styles, providing both comfort and a distinct visual appeal. Perfect for warmer weather, this bag effortlessly complements various summer outfits, from casual beachwear to chic picnic ensembles. Beyond its beauty, this design prioritizes functionality. The spacious interior, coupled with a discreet internal pocket, ensures you can carry all your necessities – sunglasses, sunscreen, a book, and small valuables – without compromising on style. Crafting your own ring bag allows for unparalleled customization, giving you the freedom to select fabrics and colors that truly reflect your personal taste. Experience the satisfaction of creating a durable, stylish, and highly practical accessory that will be your go-to bag all season long. It’s not just a bag; it’s a statement piece that speaks volumes about your personal style and creativity.
Materials You’ll Need to Craft Your Ring Bag
Before embarking on your sewing journey, gathering all your materials is crucial for a smooth and enjoyable crafting process. The right fabrics and tools will make a significant difference in the final look and durability of your ring bag. Here’s a comprehensive list of what you’ll need to create your beautiful accessory:
- Outer Fabric: Approximately 15.75″ x 28.35″ (40 cm x 72 cm) of cotton linen blend. Cotton linen is an excellent choice for the outer fabric due to its beautiful drape, natural texture, and durability. It offers a slightly structured yet soft feel, making it ideal for a stylish summer bag. Its breathable nature also makes it perfect for warm-weather use.
- Inner Fabric (Lining): Approximately 15.75″ x 28.35″ (40 cm x 72 cm) of cotton fabric. A soft, smooth cotton works perfectly for the lining. It helps the bag maintain its shape, provides a clean finish, and protects your belongings. You can choose a coordinating solid color or a subtle pattern to add an element of surprise when the bag is opened.
- Pocket Fabric: Approximately 7.9″ x 13.4″ (20 cm x 34 cm) of fabric. This piece will create a functional inner pocket, essential for keeping small items organized. You can use a scrap from your inner fabric or choose a contrasting fabric for a fun detail.
- Bag Rings: Two rings, each with a 5.12″ (13 cm) diameter. These are the distinctive handles of your bag and are central to its design. You can find these rings in various materials such as bamboo, wood, or acrylic. Choose a material and finish that complements your fabric choices and overall aesthetic. Ensure they are sturdy enough to bear the weight of your bag’s contents.
- Essential Sewing Supplies: In addition to the main materials, ensure you have basic sewing tools on hand for a successful project:
- A reliable sewing machine with appropriate thread (polyester or cotton blend for durability, matching your fabric colors).
- Sharp fabric scissors or a rotary cutter and mat for precise and clean cuts.
- Plenty of pins or fabric clips to hold layers together securely during stitching.
- An iron and ironing board for crisp seams and professional finishes, which are vital for a polished look.
- A fabric marker or tailor’s chalk for clearly marking lines and measurements.
- A ruler or measuring tape for accurate measurements, especially critical for cutting and placement.
- A seam ripper (a must-have for correcting any minor mistakes!).
Having all these items ready before you begin will ensure a seamless and efficient sewing experience, allowing you to focus on the creative process and enjoy bringing your vision to life.
Step-by-Step Instructions to Sew Your Ring Bag
Follow these detailed instructions carefully to construct your beautiful and functional ring bag. Precision and patience are key to achieving a professional finish, ensuring your handmade accessory is both durable and stylish. Each step builds upon the last, so take your time and enjoy the process of crafting.
Step 1: Crafting the Inner Pocket
Begin by taking your designated pocket fabric. Lay it flat, then fold it in half crosswise, ensuring the right sides of the fabric are facing each other. This means the printed or ‘pretty’ side is on the inside, ready for stitching. Carefully mark a small opening, approximately 2-3 inches (5-7.5 cm) long, along the top folded edge of the fabric. This opening will be used later to turn the pocket right side out cleanly. Using a sewing machine, sew along all sides of the fabric with a consistent 0.4″ (1 cm) seam allowance, carefully skipping the marked opening on the top and leaving the bottom edge unstitched for now. After sewing, trim off the corners just above the seam line, being careful not to cut through the stitches. This crucial step helps to reduce bulk and ensures crisp, sharp corners once the pocket is turned. Now, reach into the opening you left and gently flip the pocket right side out. Use a point turner or a dull pencil to push out the corners perfectly, creating a neat rectangle. Press the entire pocket flat with an iron, paying special attention to the edges and seam lines to achieve a professional finish. Finally, sew a narrow topstitch, approximately 1/8 inch (3 mm) from the edge, along the folded side of the opening to close it neatly and reinforce the top edge of the pocket. This creates a clean and durable finish that will withstand regular use.
Step 2: Attaching the Pocket to the Lining Fabric
Next, retrieve your main inner fabric (lining), which will form the interior of your bag. Lay it flat, right side up, on your work surface. To find the center and ensure symmetrical pocket placement, fold the lining fabric in half lengthwise, press firmly with an iron to create a temporary crease, then unfold. Repeat this by folding it in half crosswise and pressing again. These creases will serve as helpful guides for precise placement. Now, place the finished pocket onto one side of the lining fabric. For ideal placement, measure down 5.12″ (13 cm) from the top raw edge of the lining fabric to the top edge of the pocket. Ensure the pocket is also centered horizontally on that specific half of the lining fabric. Pin the pocket securely in place along its two sides and bottom edge. Stitch the pocket to the lining fabric along both vertical sides and the bottom edge, using a standard seam allowance (e.g., 1/8″ or 3 mm from the pocket edge). Remember to leave the top edge of the pocket open for functionality. Reinforce the top corners of the pocket opening with a few backstitches or a small triangle of stitching to prevent tearing during use. This step seamlessly integrates the functional pocket into your bag’s interior, providing a convenient space for your smaller valuables.
Step 3: Joining Outer and Lining Fabrics
Take your outer fabric and place it on top of the prepared lining fabric, ensuring that the right sides of both fabrics are facing each other. This is a critical step for a clean finish once the bag is turned right side out. Align all the raw edges carefully, paying particular attention to the short sides. Pin the short sides of the outer and lining fabrics together to prevent shifting. Using a consistent 0.4″ (1 cm) seam allowance, sew along these two short sides. Once sewn, carefully press the seams open with an iron. Pressing seams open helps to reduce bulk, distributes the fabric evenly, and allows the fabric to lay flatter, resulting in a neater and more professional finish both inside and outside the bag. After pressing, align these two newly sewn seams directly in the middle of your fabric rectangle. This forms a continuous fabric tube with the outer fabric on one side and the lining fabric on the other, connected at the short ends. Pin them together at the center seam to keep them aligned for subsequent steps.
Step 4: Creating the Bag’s Base: Boxed Corners
To give your bag a defined base and volume, you will create boxed corners. Lay the joined fabric tube flat, ensuring the center seams from the previous step are aligned. Measure and draw a precise rectangle of 1.57″ (4 cm) in width by 1.97″ (5 cm) in height on each of the four corners of your large fabric rectangle. This means two rectangles will be drawn on the outer fabric side and two on the lining fabric side. Use a fabric marker or tailor’s chalk for clear, visible lines. Carefully cut out these four rectangles, removing the fabric from the corners. This action creates the necessary foundation for your bag’s structured and spacious base. Ensure your cuts are precise and straight for even and well-formed corners, which will contribute significantly to the overall shape of your finished bag.
Step 5: Sewing the Sides and Leaving an Opening
With the fabric still laid flat, identify the two long raw edges that will become the top and bottom of your bag once fully constructed. From the center seam (the one you pressed open in Step 3), measure 5.5″ (14 cm) outwards on both sides along both the top and bottom edges. Mark these points clearly with your fabric marker. You will now sew along the top and bottom raw edges of the fabric. However, it is crucial to leave an unstitched opening along one of these edges – typically on the lining side – between the marked points. This opening, approximately 11 inches (28 cm) long, will be used later to turn the entire bag right side out. Sew the top and bottom edges with a consistent 0.4″ (1 cm) seam allowance, ensuring to reinforce the start and end of your stitches around the opening with backstitches to prevent the seam from unraveling. Once sewn, press all these new seams open as well to maintain a smooth, flat interior and exterior, reducing bulk in the finished bag.
Step 6: Forming the Boxed Corners and Final Assembly
Now, it’s time to form the boxed corners you prepared in Step 4. For each of the four corners, gently bring the raw edges of the cut-out rectangle together, aligning the side seam with the bottom seam. This action will cause the corner to flatten into a straight line. Pin these edges together precisely, making sure the seams match perfectly. Stitch across this new seam with a 0.4″ (1 cm) seam allowance. Repeat this process for all four corners – two on the outer fabric and two on the lining fabric. This creates a three-dimensional, rectangular base for both your outer bag and your lining, giving your bag its essential structure and depth. Next, carefully place the lining bag inside the outer bag, ensuring the wrong sides of both fabrics are now facing each other and the right sides are exposed. Align all seams and edges, especially at the top opening, making sure the lining sits perfectly within the outer bag. Using the opening you left in Step 5 (on the lining side), carefully pull and turn the entire bag right side out. Once turned, gently push out all corners and edges, using a point turner if necessary, to ensure they are crisp and well-defined. Smooth out any wrinkles and ensure the lining sits perfectly inside the outer bag without any puckering. Press the entire bag with an iron for a crisp, finished appearance.
Step 7: Finishing the Side Seams for Ring Attachment
Now that the bag is turned right side out and the lining is neatly inside, it’s time to prepare the top edges for the elegant ring handles. Locate the side seams of your bag where the outer and lining fabrics meet at the top opening. You will now carefully close any remaining opening on the side seams, or simply topstitch along the side seams near the top opening, making sure to catch both the outer and lining fabrics together. This step is crucial for securing the outer and lining layers at the side seams, ensuring they don’t shift during use and creating a clean, finished edge where the rings will be attached. You can either hand stitch any remaining opening with an invisible ladder stitch for a flawless finish, or machine stitch very close to the edge (e.g., 1/8″ or 3 mm) if you prefer. The primary goal here is to create a secure, neat, and durable edge on both sides that will firmly support the channel for the ring handles in the next step.
Step 8: Attaching the Ring Handles
This is the final and most exciting step, bringing your ring bag to life and giving it its distinctive charm! From the open top edge of both layers (outer and lining combined) on each side of the bag, measure down a precise 3.15″ (8 cm) and make a clear mark with your fabric marker. Draw a straight line connecting these marks across the entire width of the bag’s top opening on each side. This line will guide your fold for the ring channel. Now, take one of your ring handles. On one side of the bag, carefully insert the top corner of the fabric into the ring, pushing it through slightly. Then, fold the top raw edge of the fabric up towards the inside of the bag, aligning the fold precisely with the straight line you just drew. Ensure the ring is securely encased within this fabric fold. Pin this fold extensively, making sure to go through all layers of fabric to hold the ring firmly in place and create a sturdy channel. Stitch carefully along the folded edge, as close to the ring as possible without catching the ring itself. This creates a strong casing that holds the ring handle firmly. Continue folding and sewing along the line, ensuring the ring is snugly fitted within the fabric channel, until you reach the other end of that side. Repeat this entire process with the second ring handle on the opposite side of the bag. Take your time to ensure the rings are evenly spaced and securely attached, as they are crucial for both the bag’s functionality and its aesthetic appeal.
Your Beautiful Ring Bag is Complete!
Congratulations! You have successfully crafted your very own stylish and unique ring bag. Take a moment to admire your handiwork – the crisp seams, the functional inner pocket, and those elegant ring handles that define its unparalleled charm. This versatile accessory is now ready to accompany you on countless summer adventures, from casual strolls in the park to elegant garden parties or relaxing beach days. Feel free to personalize it further with charms, tassels, or a custom embroidery to truly make it your own and reflect your individual style. Embrace the immense satisfaction of creating something beautiful and functional with your own hands. Enjoy carrying your unique handmade ring bag and watch as it garners compliments wherever you go, a testament to your creativity and skill!