
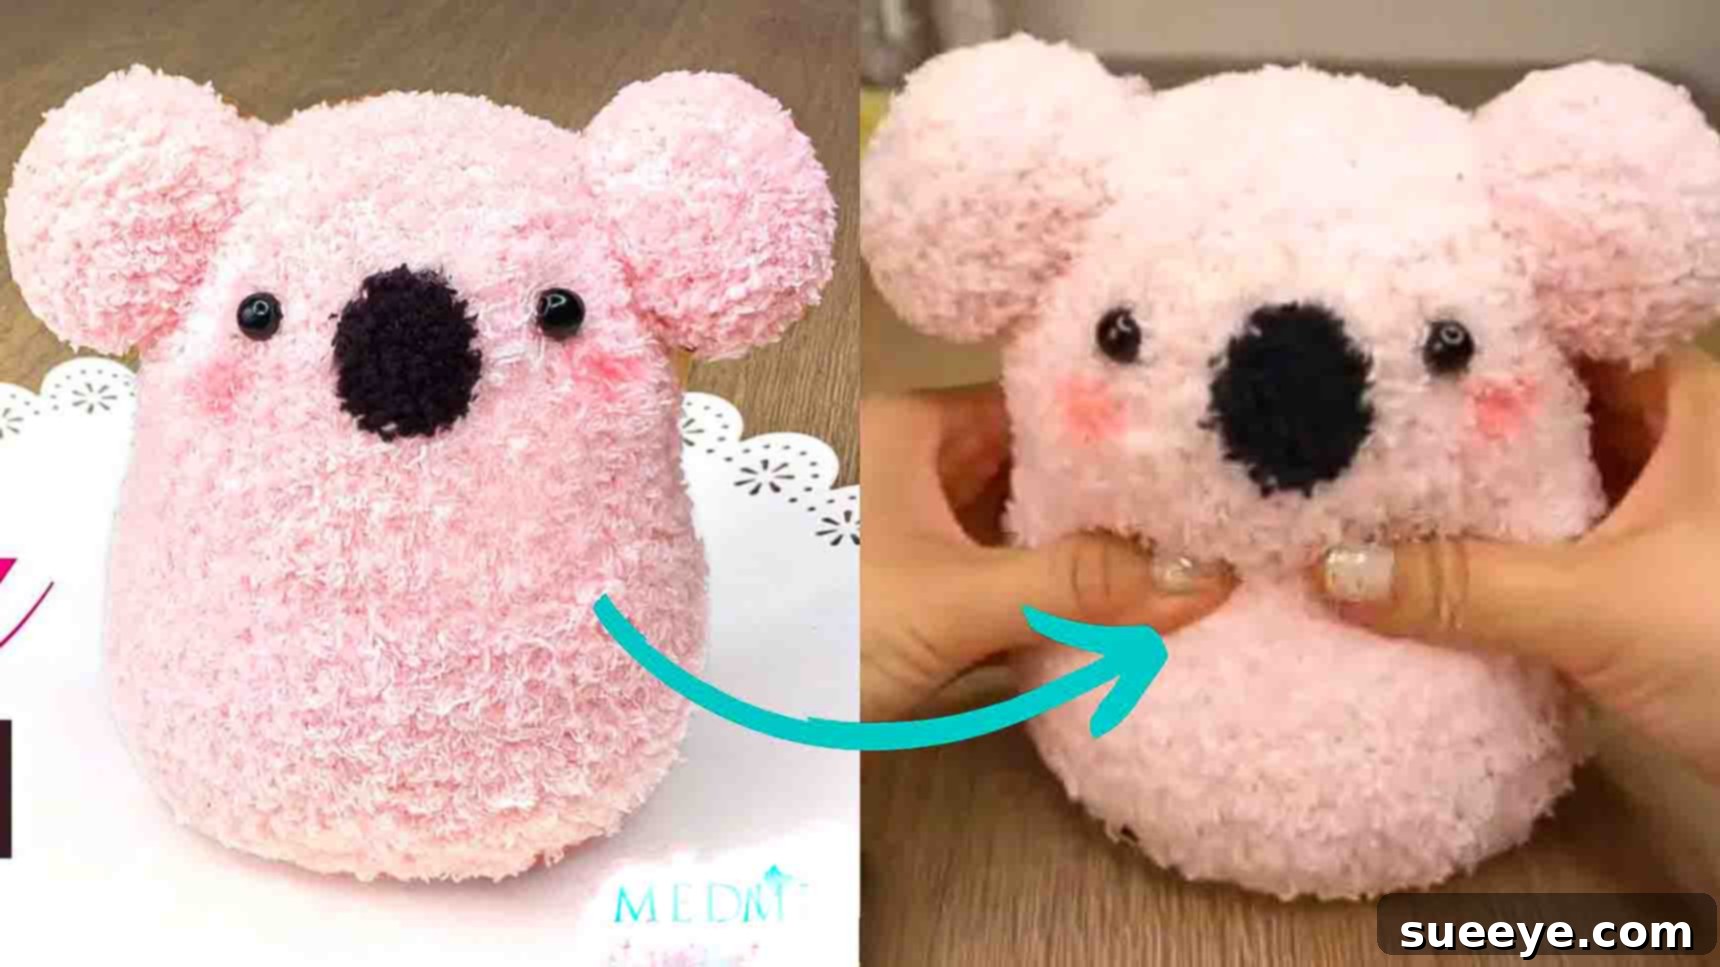
Are you searching for a heartwarming and engaging craft activity to enjoy with your children or perhaps a simple, satisfying project for yourself? Look no further! This adorable DIY koala plush, inspired by the fantastic Maqaroon tutorial on YouTube, is guaranteed to bring a smile to anyone’s face. We truly believe it’s one of the cutest creations you’ll encounter today. What makes this project even more appealing is its incredible simplicity; all you need is a pair of socks and a few basic crafting materials that you likely already have around the house. It’s an ideal project for beginners, offering a delightful introduction to the world of sewing and toy-making without requiring complex skills or specialized equipment. Dive into this fun endeavor today by following our comprehensive, step-by-step instructions below and create your very own charming koala companion.
Crafting offers a multitude of benefits, especially when shared with children. Engaging in DIY projects like making a koala plush not only provides a wonderful opportunity for family bonding but also fosters creativity, enhances fine motor skills, and teaches patience and perseverance. Kids love the hands-on experience of bringing a toy to life, and the sense of accomplishment they feel upon completing their very own plushie is truly invaluable. This project encourages imaginative play and provides a tangible result – a soft, cuddly friend made with love. It’s a fantastic way to introduce basic sewing concepts in a fun, accessible manner, proving that you don’t need to be an expert to create something truly special and handmade.
Materials You’ll Need:
Gathering your materials is the first exciting step in bringing your cuddly koala to life. You’ll be amazed at how simple the list is, mostly comprising items easily found at home or at any craft store. Choosing the right sock is key to your koala’s character, so opt for something soft and fluffy to achieve that authentic koala texture!
- Fluffy Socks: One pair of clean, soft, and ideally fluffy socks. Gray or white socks work best for a classic koala look, but feel free to experiment with other colors for a unique touch. The fluffier, the better for that cuddly feel!
- Polyester Stuffing: Also known as poly-fil, this is essential for giving your koala its plump, huggable form. You can usually find this at craft stores or even repurpose stuffing from old pillows.
- White Craft Glue: A strong, quick-drying craft glue is perfect for securely attaching smaller features like the nose. Ensure it’s suitable for fabric.
- Marker: A washable fabric marker or a regular felt-tip marker will be used for drawing guidelines on your sock before cutting and sewing.
- Needle and Thread: A sharp sewing needle and strong thread are necessary for all the stitching. Choose a thread color that matches your sock for a seamless finish.
- Scissors: A sharp pair of fabric scissors will make cutting through the sock fabric clean and easy.
- Beads or Buttons: These will form your koala’s expressive eyes. Small black buttons or beads are ideal, but you can also use embroidery floss to stitch eyes for younger children’s safety.
- Black Scrap Fabric: A small piece of black felt or any other non-fraying black fabric will be used to cut out your koala’s distinctive nose.
Step-by-Step Directions to Craft Your Koala:
Step 1: Forming the Koala’s Body and Head
The journey to creating your koala begins with shaping its main body and head from a single sock. This initial step sets the foundation for your adorable plushie, so take your time and follow the instructions carefully for the best results.
- Prepare Your Sock: Begin by taking one of your fluffy socks and turning it inside out. Lay it flat on a clean, stable surface, ensuring it is smooth and wrinkle-free. For this step, the longer side of the sock, typically from the heel to the toe, will become the koala’s main body, while the shorter opening will be shaped into the head.
- Outline the Head: Using your marker, carefully draw a gentle curve on the shorter, open end of the sock. This curve will define the shape of your koala’s head. Position this line just above the heel section of the sock, creating enough space for a well-proportioned head. Aim for a soft, rounded shape that will contribute to its charming appearance.
- Sew the Headline: With your needle and thread, sew along the marker line you’ve just drawn. A backstitch is highly recommended here, as it creates a strong, durable seam that will withstand stuffing and play. Ensure your stitches are neat and even.
- Trim Excess Fabric: Once your seam is securely sewn, carefully cut out the excess fabric from the shorter side, leaving a small seam allowance (about 1/4 inch or 0.5 cm) beyond your stitched line. This trimming will clean up the head shape and remove bulk.
- Create the Opening Slit: Next, make a small, horizontal slit in the middle of the back of the koala’s body section – NOT on the head. This slit should be roughly 1 to 1.5 inches (2.5 to 3.5 cm) long, providing an opening through which you will turn the sock right side out and add the stuffing. Be careful not to cut through both layers of fabric.
- Turn and Stuff: Gently turn the entire sock right side out through the slit you just made. Use a blunt object like a chopstick or the eraser end of a pencil to help push out all the edges and curves, ensuring a smooth shape. Now, begin filling the koala with polyester stuffing. Focus on filling the body section first with a generous amount to give it a plump, substantial feel. Then, carefully stuff the head, ensuring it’s firm but still squeezable.
- Shape and Define: Once stuffed, use your hands to gently massage and shape the koala. Define the distinction between the head and body by compressing the stuffing slightly at the “neck” area. This will give your koala a more structured and recognizable form.
- Close the Opening: To seal the stuffing inside, sew a running stitch along the raw edges of the opening slit you created earlier. A running stitch is a simple, straight stitch that’s easy to execute. Once you reach the end of the opening, pull the thread tight. This will gather the fabric, effectively sealing the base. Secure the thread with a strong double knot to ensure the stuffing remains safely inside.
Step 2: Adding the Adorable Facial Features and Ears
Now that your koala has a body, it’s time to bring its personality to life by adding its most endearing features – the ears, eyes, and nose. These details are what make your koala truly unique and irresistibly cute.
- Prepare the Ears: From the remaining sock fabric, cut out two circles. These will form your koala’s characteristic round ears. Aim for circles approximately 2 to 3 inches (5 to 7.5 cm) in diameter, depending on the size of your koala’s head. Ensure they are as symmetrical as possible.
- Sew and Stuff the Ears: For each fabric circle, sew a running stitch along the very edge. Leave a small opening. Add a tiny pinch of polyester stuffing into the center of each circle to give the ears a slight plumpness and shape. Then, pull the thread tight to gather the fabric, effectively creating a small, rounded ear shape. Finish with a knot.
- Attach the Ears: Position the finished ears on each side of the koala’s head. Place them slightly towards the top and back of the head for a realistic koala appearance. Hand-sew them securely in place using small, discreet stitches that match your sock color. Ensure they are firmly attached and stand upright.
- Mark the Eyes: Using your marker, lightly dab two small dots on the koala’s face where you want its eyes to be. Pay attention to spacing and symmetry to give your koala an expressive look. For safety, especially if this toy is for a young child, consider embroidering the eyes with black thread instead of using small buttons or beads.
- Attach the Eyes: If using beads or buttons, carefully sew one bead or button onto each marked spot for the eyes. Make sure to sew them very securely with multiple stitches to prevent them from coming loose, as small parts can be a choking hazard for infants and toddlers.
- Craft the Nose: Take your small black scrap fabric (felt works wonderfully for this) and cut it into a distinctive koala nose shape. This is typically a rounded, slightly triangular or oval shape. You can draw it on first with the marker and then cut it out.
- Attach and Secure the Nose: Apply a small amount of white craft glue to the back of the fabric nose and carefully attach it to the center of your koala’s face, just below the eyes. Press firmly and allow the glue to dry slightly. For added durability and a professional finish, you can also sew the outer edge of the nose to the koala’s face with small, neat stitches. This prevents the nose from peeling off during play.
- Add a Touch of Blush: For an extra dash of cuteness, gently apply a tiny bit of pink or peach blush (from an old makeup compact, or use a pink crayon/fabric marker rubbed onto a cloth) to the koala’s cheeks. This simple step adds a lovely, rosy glow and brings even more character to your handmade friend.
Congratulations! Your adorable DIY koala plush is now complete. Hold it up and admire your handiwork – you’ve just created a one-of-a-kind cuddly companion!
Tips for Success and Customization:
To ensure your koala-making experience is smooth and enjoyable, here are a few additional tips and ideas for personalizing your creation:
- Choose the Right Sock: The texture of your koala largely depends on the sock. Fluffy, chenille, or even fuzzy thermal socks create the softest, most cuddly koalas. Experiment with different patterns and colors for a unique touch – a striped koala or a polka-dotted one could be incredibly charming!
- Stuffing Consistency: Don’t be afraid to use plenty of stuffing. A firmly stuffed koala holds its shape better and is more huggable. However, avoid overstuffing to the point where the fabric stretches or the seams become strained.
- Safety First: If the koala is intended for a baby or a very young child, always prioritize safety. Opt for embroidered eyes and noses instead of buttons, beads, or small felt pieces that could become choking hazards. Ensure all seams are extra strong.
- Sewing Basics: If you’re new to hand-sewing, practice your stitches on a scrap piece of fabric first. Consistency in stitch size and tension will result in a neater, more durable plush. Don’t worry if your stitches aren’t perfect; handmade charm is part of the appeal!
- Personalize Your Koala:
- Accessories: Add a tiny satin ribbon bow around its neck, a mini felt scarf, or even a small embroidered leaf for it to “hold.”
- Embroidered Details: Use embroidery floss to add tiny eyebrows, a smiling mouth, or even paw pads on its little hands.
- Different Expressions: Change the position or size of the eyes and nose to give your koala a different expression – sleepy, curious, or super cheerful!
- Sound Element: For an extra sensory experience, carefully insert a small jingle bell or crinkle paper into the stuffing (ensuring it’s securely enclosed) for a sensory toy.
- Durability: For a toy that will endure lots of hugs and adventures, reinforce key areas like the ear attachments and the nose with extra stitches.
Why Make a DIY Koala Plush?
Beyond the simple joy of crafting, making your own koala plush offers a unique blend of creativity, sustainability, and personal satisfaction. It’s an excellent way to repurpose old socks, giving them a new lease on life as a cherished toy rather than ending up in a landfill. This project encourages resourcefulness and provides a wonderful alternative to mass-produced toys, fostering an appreciation for handmade items. Imagine the delight on a child’s face when they realize they’re hugging a toy made by their own hands or by a loved one! It’s more than just a craft; it’s an opportunity to create memories and a tangible symbol of affection.
Whether you’re looking for a rainy-day activity, a thoughtful handmade gift, or simply a charming new addition to your plush collection, this DIY koala plush project is wonderfully rewarding. The clear instructions, coupled with the minimal material requirements, make it accessible to crafters of all skill levels. So, grab your fluffy socks, unleash your creativity, and get ready to stitch up your very own adorable koala. We guarantee you’ll love the process as much as the finished product. Share your creations with friends and family, and inspire others to embark on their own crafting adventures!