
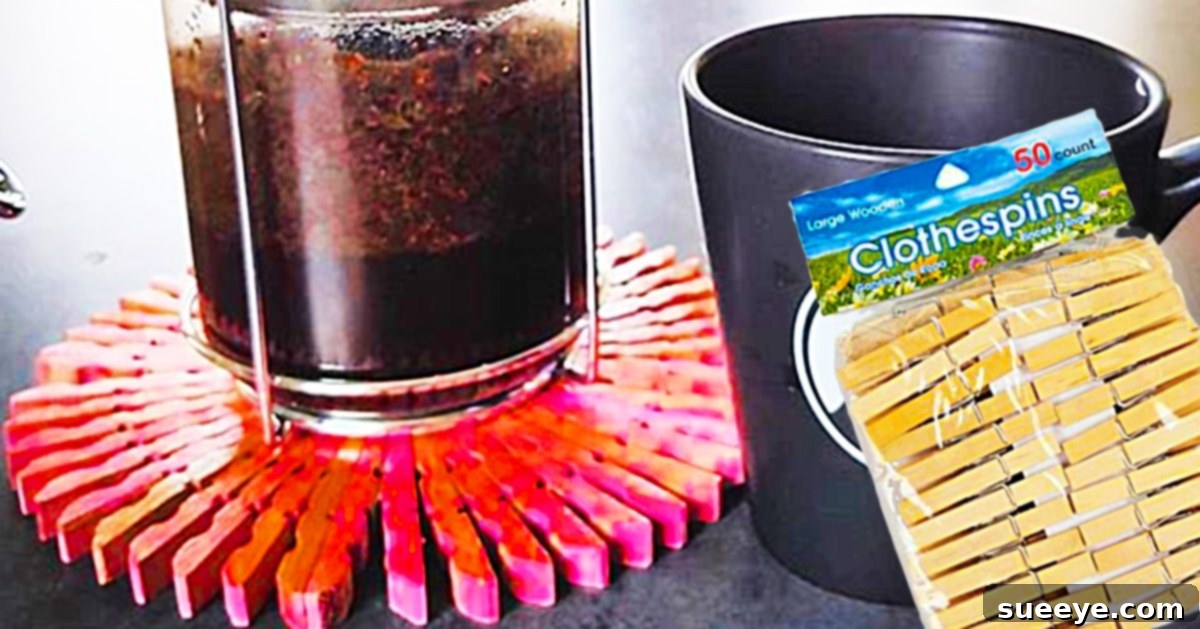
DIY Clothespin Trivet: An Easy & Stylish Home Decor Craft
Are you searching for a creative, budget-friendly, and incredibly satisfying DIY project that adds a touch of charm to your home? Look no further than the humble clothespin! This delightful clothespin trivet tutorial by This Southern Girl Can on YouTube introduced me to an ingenious idea that’s perfect for crafters of all skill levels. It transforms ordinary wooden clothespins into a stunning, functional piece of kitchen decor – a trivet that protects your surfaces with style.
This project stands out for its remarkable simplicity and therapeutic nature. It doesn’t demand intricate calculations, a huge budget, or a frantic hunt for obscure materials. All you truly need is a bag of standard wooden clothespins and your trusty hot glue gun. Imagine the relaxation of a crafting session where the primary activity is mindfully assembling pieces, watching your creation take shape before your eyes. Once assembled, the customization possibilities are endless. Whether you prefer a vibrant pop of color, a distressed farmhouse aesthetic, or a rich, rustic wood stain, this DIY clothespin trivet is a blank canvas awaiting your personal touch. Let’s dive into creating a unique and practical accent for your home or a thoughtful handmade gift.
Why Craft a Clothespin Trivet?
Beyond being an enjoyable pastime, crafting a clothespin trivet offers numerous benefits:
- Budget-Friendly: Clothespins are incredibly inexpensive, often found in bulk at dollar stores or craft supplies. This makes it an accessible project for everyone.
- Eco-Conscious Upcycling: Give new life to an everyday item, diverting it from potential waste and creating something beautiful and functional.
- Beginner-Friendly: No advanced crafting skills are required. If you can use a hot glue gun, you can make this trivet!
- Therapeutic and Relaxing: The repetitive action of disassembling and gluing can be incredibly calming, making it a perfect de-stressor after a long day.
- Highly Customizable: Easily paint, stain, or embellish your trivet to match any existing home decor style, from modern minimalist to rustic farmhouse.
- Practical and Functional: A trivet is an essential kitchen item, protecting tables and countertops from hot pots and dishes. Your handmade version will be both useful and a conversation starter.
- Great for Gifting: A handmade trivet makes a thoughtful and personal gift for housewarmings, holidays, or any special occasion.
Materials for Your DIY Clothespin Trivet
Gathering your supplies for this project is straightforward. Most items are likely already in your home or easily acquired from any craft store or even a general store.
- A Pack of Wooden Clothespins: The star of our project! For a standard-sized trivet (approximately 7-8 inches in diameter), you’ll typically need around 50-70 wooden clothespins. It’s always a good idea to buy a slightly larger pack than you think you’ll need, just in case some break during disassembly or for future projects. Opt for traditional wooden clothespins, as plastic ones are harder to work with and lack the rustic charm.
- A Hot Glue Gun and Glue Sticks: Your primary tool for assembly. Ensure your glue gun is in good working order and have a generous supply of glue sticks. High-temperature glue guns tend to provide a stronger, more durable bond, but a low-temperature gun can work too, just be mindful of drying time and strength.
- Spray Paint (or Wood Stain/Sealant): This is for customizing the finish.
- Spray Paint: Choose your favorite color to match your kitchen or dining room decor. Matte, semi-gloss, or high-gloss finishes all offer different aesthetics.
- Wood Stain: If you prefer a more natural or rustic look, a wood stain can enhance the wood grain of the clothespins. Various shades are available, from light oak to dark walnut.
- Wood Sealer/Varnish: Even if you choose to leave the wood natural, applying a clear sealer or varnish will protect your trivet from moisture and spills, making it more durable.
- Optional but Recommended:
- Protective Mat or Newspaper: To cover your workspace and protect it from hot glue drips and paint/stain.
- Gloves: Especially if you’re using stain or spray paint, to protect your hands.
- Craft Knife or Small Pliers: Can be helpful for carefully removing stubborn metal springs from clothespins.
- Sandpaper (fine-grit): For smoothing any rough edges before finishing, if desired.
Directions: Crafting Your Clothespin Trivet Step-by-Step
This detailed guide will walk you through the process of creating your beautiful clothespin trivet. The journey begins with preparing your materials and culminates in a personalized piece ready for display.
1. Preparing Your Clothespins
The first crucial step is to disassemble your wooden clothespins. Each traditional clothespin consists of two wooden halves held together by a small metal spring. Carefully remove the metal spring from each clothespin. You can usually do this by gently twisting and pulling the wooden halves apart. If a spring is particularly stubborn, a pair of small pliers or a craft knife (used with extreme caution) can help pry it loose. Repeat this process until you have separated all the clothespins you intend to use. You’ll be left with individual wooden halves. Set the metal springs aside; they won’t be needed for this project but can be saved for other crafts.
2. Forming the Basic ‘V’ Units
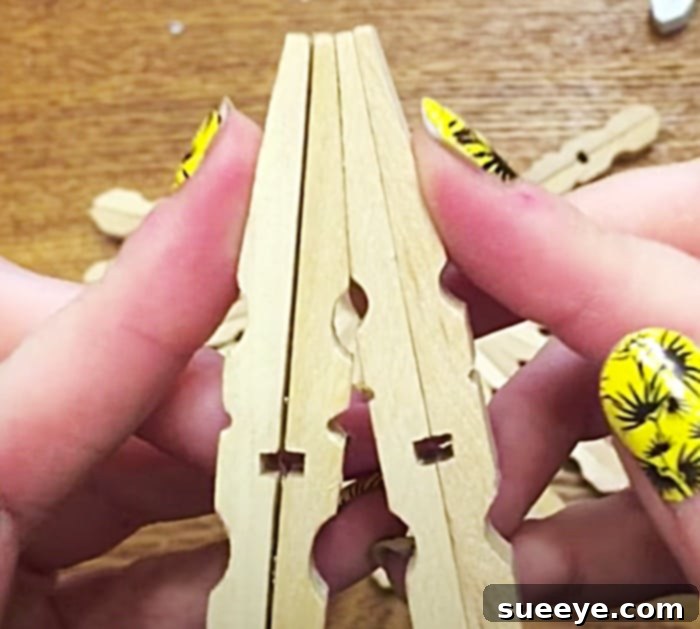
Now, it’s time to start gluing! Take two of the wooden clothespin halves. Apply a thin but consistent line of hot glue along one of the flat, longer edges of the first wooden piece. Immediately take the second wooden piece and press its corresponding flat edge firmly against the glued edge of the first piece. You want to align them perfectly so that they form a ‘V’ or ‘U’ shape when viewed from the end, with the original rounded ends of the clothespins facing outwards. Hold the pieces together for a few seconds until the hot glue sets. Ensure the bond is strong and the pieces are securely attached. Repeat this step for all your separated clothespin halves, creating a large number of these individual ‘V’ shaped units. The original tutorial mentions “16 sections”; this likely refers to creating 16 of these fundamental ‘V’ units initially.
3. Assembling the Trivet’s Core (Radial Pattern)
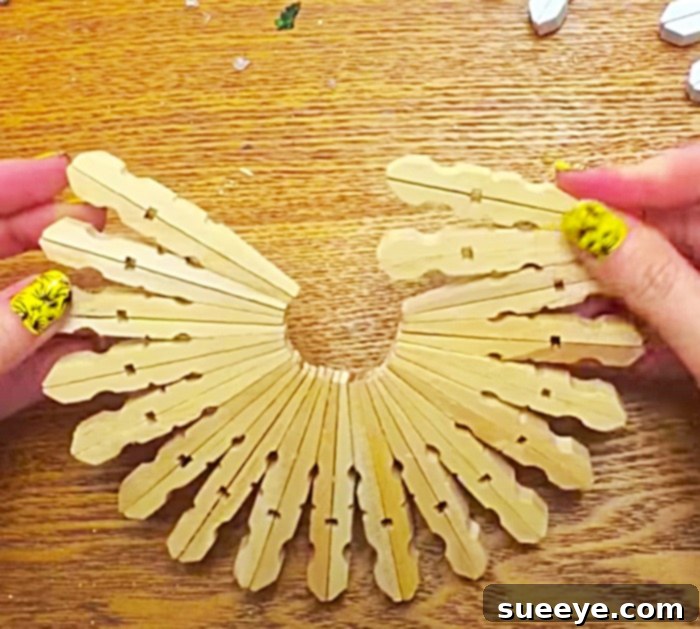
With your collection of ‘V’ units ready, it’s time to assemble them into the circular trivet shape. This step creates the distinctive radial pattern that makes this trivet so appealing. Start by taking two of your ‘V’ units. Apply hot glue along the outer flat side of one ‘V’ unit where it would meet another. Press the outer flat side of the second ‘V’ unit firmly against the first, ensuring the original rounded ends of the clothespins are pointing outwards from a central point. You are essentially gluing these ‘V’ units side-by-side, forming a growing arc.
Continue this process, adding one ‘V’ unit at a time, gluing each new unit to the last one you added. As you add more units, you will naturally begin to form a circular shape. The “turn and start gluing them in the opposite direction” instruction from the original suggests a method to ensure the circular pattern closes neatly or to create a particular visual effect. Focus on maintaining a consistent curve and a strong bond between each ‘V’ unit. Aim for a tight, cohesive circle without large gaps. For a standard 7-8 inch trivet, you might use anywhere from 20 to 30 of these ‘V’ units to complete the outer ring, depending on their size and how tightly they are packed. When you reach the end, glue the last ‘V’ unit to the very first one to close the circle and complete your trivet’s base.
4. Reinforcement and Finishing Touches
Once all the ‘V’ units are glued together to form a complete circle, carefully inspect your trivet. Add extra hot glue to any areas that look weak or where the bond isn’t as secure as it could be. Pay particular attention to the joints between the ‘V’ units and where the final ‘V’ unit meets the first one to ensure a seamless and robust connection. Allow the entire trivet to cool and dry completely. This is crucial for the glue to achieve its maximum strength. You can gently sand any rough edges if you desire a smoother finish, but this is optional.
Personalizing Your Clothespin Trivet
This is where your creativity truly shines! The plain wooden trivet is a beautiful base, but adding a finish can transform its look and protect the wood.
Painting Your Trivet
If you choose to paint, spray paint is often the easiest and most effective method for achieving an even coat on a textured surface like this. Lay your trivet on a protective surface in a well-ventilated area. Apply thin, even coats of spray paint, allowing each coat to dry according to the manufacturer’s instructions before applying the next. This prevents drips and ensures a smooth finish. You can opt for a single bold color, a neutral tone, or even experiment with multiple colors for a striped or ombre effect. Consider using painter’s tape to mask off sections if you want crisp lines for multi-color designs. A sealant or clear coat spray can be applied afterward for added durability and a desired sheen.
Staining Your Trivet
For a rich, natural, or rustic appearance, wood stain is an excellent choice. Staining enhances the natural grain of the wood. Apply the stain with a brush or cloth, following the wood grain. Wipe off any excess stain after a few minutes to achieve your desired depth of color. Lighter stains offer a subtle enhancement, while darker stains can mimic expensive hardwoods. After the stain has dried completely (this can take 24-48 hours depending on the product and humidity), apply a clear wood sealant or varnish. This will protect the wood from moisture, heat, and wear, ensuring your trivet lasts for years.
Embracing the Natural Look
Don’t feel obligated to add color or stain! The natural wood of the clothespins, especially with a clear sealant, offers a wonderfully minimalist and organic aesthetic. This approach highlights the material itself and fits beautifully into Scandinavian, rustic, or farmhouse-style decors. A simple clear coat protects the wood without altering its inherent beauty.
Care and Maintenance of Your Clothespin Trivet
To ensure your DIY clothespin trivet remains beautiful and functional for years to come, a little care goes a long way:
- Cleaning: Wipe down your trivet with a damp cloth to remove any dust or food spills. Avoid harsh chemicals or abrasive scrubbers, especially if it’s painted or stained, as these can damage the finish.
- Heat Protection: While trivets are designed for heat, extreme, prolonged exposure to very hot cookware directly from the stove or oven can still potentially affect the glue or finish. Allow extremely hot items to cool slightly before placing them on the trivet, or use for moderately hot dishes.
- Avoid Soaking: Do not submerge your trivet in water, as this can weaken the hot glue bonds and damage the wood.
- Re-seal (if needed): If your trivet sees a lot of use, you might consider reapplying a clear sealant every few years to maintain its protective layer.
Beyond the Trivet: More Clothespin Craft Ideas
Once you’ve mastered the clothespin trivet, you might find yourself with extra clothespins and a desire to keep crafting! Here are a few other ideas for using clothespins creatively:
- Photo Displays: Glue clothespins onto a piece of string or wire to create a rustic photo garland.
- Mini Planters: Glue clothespin halves around small tin cans to create charming mini planters or pen holders.
- Ornaments: Decorate clothespin halves with glitter and paint to create unique holiday ornaments.
- Memo Holders: Attach a clothespin to a magnetic strip to create a fridge magnet that holds notes and photos.
Conclusion
The journey from a simple bag of clothespins to a stylish and practical trivet is a testament to the power of DIY. This project, lovingly shared by This Southern Girl Can, is more than just a craft; it’s an opportunity to unwind, express your creativity, and add a personal touch to your home decor. Its affordability, ease of construction, and endless customization options make it an ideal project for anyone looking to try their hand at crafting.
Whether you choose to paint it in a bold hue, stain it for a touch of rustic elegance, or simply seal its natural beauty, your handmade clothespin trivet will be a unique addition to your kitchen or dining area. So, grab your clothespins and hot glue gun, sit back, relax, and enjoy the satisfying process of creating something beautiful and functional with your own hands. Happy crafting!