
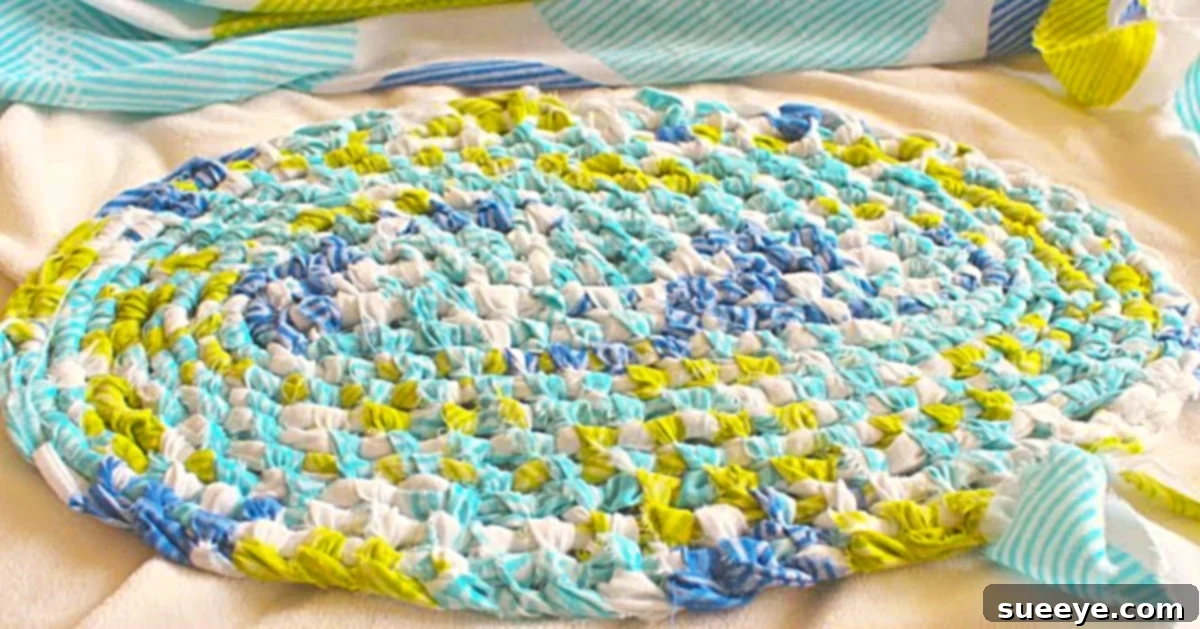
How To Make An Amish Toothbrush Knot Rug: Your Comprehensive DIY Guide
The allure of handcrafted goods and delicious traditional foods often brings to mind the Amish community, renowned for their dedication to quality and resourcefulness. Among their many practical and beautiful creations, the Amish Toothbrush Knot Rug stands out as a testament to sustainable living and enduring craftsmanship. This unique rag rug technique, known for its sturdy construction and charming aesthetic, offers a wonderful opportunity to infuse your home with rustic warmth and a touch of handmade artistry. When I first encountered an awesome Amish toothbrush knot rug video tutorial on YouTube, I was instantly captivated. As someone who appreciates all things Amish and cherishes the beauty of handmade items, I knew immediately that this was a project I had to undertake. Our kitchen and porch area were in dire need of some cozy, small rag rugs, and this tutorial provided the perfect inspiration and clear guidance to bring this creative vision to life. One of the most appealing aspects of this rug-making method is its incredible versatility and eco-friendliness: you can choose to work with brand new fabric, or you can embrace sustainability by recycling old sheets, duvet covers, or even worn-out clothing, transforming them into something beautiful and functional.
Why Craft Your Own Amish Toothbrush Knot Rug?
Beyond the simple joy of creating something with your own hands, there are numerous compelling reasons to embark on an Amish Toothbrush Knot Rug project:
- Sustainable & Eco-Friendly: This craft is a fantastic way to repurpose textile waste. Instead of discarding old sheets, t-shirts, or duvet covers, you can give them a new life, reducing your environmental footprint and contributing to a circular economy.
- Durable & Long-Lasting: The tightly knotted structure of these rugs makes them exceptionally resilient. They are designed to withstand heavy foot traffic and frequent washing, proving to be a practical addition to high-traffic areas like kitchens, hallways, and entryways.
- Cost-Effective Home Decor: By utilizing existing fabric scraps or inexpensive remnants, you can create beautiful and custom rugs at a fraction of the cost of store-bought alternatives.
- Personalized & Unique: With an endless array of fabric colors and patterns available, you have complete creative freedom to design a rug that perfectly complements your home decor. Each rug you make will be a unique expression of your personal style.
- Relaxing & Therapeutic: The repetitive motion of cutting fabric strips and knotting can be incredibly meditative and stress-relieving. It’s a wonderful way to unwind and engage in a mindful activity.
- Authentic Handcrafted Appeal: An Amish Toothbrush Knot Rug adds a charming, rustic, and authentic touch to any room. It brings warmth, texture, and the story of handmade tradition into your living space.
Materials You’ll Need:
Gathering your materials is the first exciting step in bringing your Amish Toothbrush Knot Rug to life. Here’s what you’ll need to get started:
- Fabric: This is the star of your rug. You can use either new fabric, purchased specifically for this project, or embrace the eco-friendly spirit by recycling old sheets, duvet covers, T-shirts, towels, or other cotton-based textiles. The key is to cut your chosen fabric into consistent 1 1/2 inch wide strips. A queen-sized sheet can yield enough material for a medium-sized rug, so plan accordingly for your desired rug dimensions.
- A Clothespin: While the name “toothbrush knot rug” suggests a special tool, this simplified method cleverly uses a basic clothespin. It acts as a helpful aid for manipulating the fabric strips and securing knots, making the process smoother and more accessible.
- A Large Notebook with Clips: This ingenious item serves as a temporary loom or frame for building the initial spine of your rug. The clips or rings of the notebook provide a stable base to attach your core ribbon and first fabric strips, ensuring a solid foundation for your creation. A clipboard or even a sturdy piece of cardboard with slits can also serve a similar purpose.
- A Pair of Sharp Scissors: Good quality fabric scissors are essential for precise and efficient cutting of your fabric strips. Sharp scissors prevent fraying and ensure clean edges, which contributes to a more professional-looking finished rug.
- A Spool of Strong Ribbon (or Twine/Yarn): This will form the core or “spine” of your rug. Choose a sturdy, non-stretchy ribbon, twine, or strong yarn that will hold its shape and provide a durable foundation for your knotted fabric strips. Its color won’t be visible in the finished rug, so focus on strength.
Detailed Directions: Crafting Your Amish Toothbrush Knot Rug
The beauty of this Amish Toothbrush Knot Rug technique lies in its simplicity and repetitive, meditative nature. The directions for this awesome Amish toothbrush knot rug video tutorial on YouTube are incredibly straightforward, making it an ideal project for crafters of all skill levels. Follow these steps to create your own beautiful rag rug:
Step 1: Fabric Preparation
Begin by preparing your fabric. If using recycled materials, ensure they are clean and dry. Using your sharp scissors, cut your chosen fabric into strips that are approximately 1 1/2 inches wide. Consistency in width is crucial for an even rug, so take your time with this step. For a medium-sized rug, you’ll need a significant amount of strips, so it’s a good idea to prepare all your fabric before you start knotting.
Step 2: Setting Up the Spine
This is where your large notebook (or alternative frame) comes into play. Open the notebook and use its clips or rings to securely attach one end of your chosen ribbon. This ribbon will be the central core, or spine, around which your rug will grow. Leave a tail of about 6-8 inches of ribbon for securing later. Next, take one of your prepared fabric strips and also fasten it securely to the notebook, adjacent to the ribbon. The goal is to create a stable starting point for your knotting.
Step 3: Beginning the Knotting Process
Now, you’ll begin to build the central portion of the rug. Take your first fabric strip and loop it around the ribbon, bringing the ends together. This forms the very first knot. The specific knot used is typically a simple slip knot or half-hitch, but the key is to ensure it’s snug around the ribbon without being too tight or too loose. The clothespin can be used here to help hold loops or push fabric through tight spots, acting as a simplified “needle.” Continue adding fabric strips by knotting them onto the growing spine. As you add more strips, you will begin to form a sturdy, circular core. The original video tutorial provides excellent visual guidance for mastering this initial knotting technique.
Step 4: Expanding the Rug in Rounds
Once your central spine is established, you will continue working outwards in a spiral, adding new fabric strips as needed. Each new knot is worked into the previous row of knots, effectively building a flat, circular rug. When a fabric strip runs out, simply join a new strip by tying the end of the old strip to the beginning of the new strip with a small, secure knot. Trim any excess fabric close to the knot for a seamless appearance. Maintain consistent tension with each knot to ensure an even, flat rug without puckering or gaps. This continuous knotting process will gradually increase the width of your rug.
Step 5: Finishing Your Rug
Continue knotting in rounds until your rug reaches your desired width and size. Once satisfied, carefully trim any remaining loose ends of fabric from the last knots, ensuring they are neatly tucked or secured. The initial ribbon tail can be woven back into the rug or tied off securely to the adjacent fabric knots to complete the project. Give your finished rug a gentle shake and flatten it out to ensure it lies evenly.
Tips for a Perfect Amish Toothbrush Knot Rug
- Consistent Strip Width: This is key to an even and professional-looking rug. Try to cut all your fabric strips to the same 1 1/2 inch width.
- Even Tension: Maintain a consistent tension as you knot. Too loose, and your rug will be floppy; too tight, and it might pucker. Practice makes perfect!
- Color Planning: Think about your color scheme before you start. You can create vibrant multi-colored rugs, subtle ombrés, or classic striped patterns.
- Joining Strips: When joining new strips, try to make the small connecting knot on the underside of the rug for a cleaner finish.
- Use Your Clothespin Wisely: The clothespin can be incredibly useful for pushing fabric through tight loops or holding sections as you knot, especially as the rug grows larger and heavier.
- Don’t Be Afraid to Experiment: While this guide provides a solid foundation, feel free to try different fabric types or even experiment with varying strip widths for unique textures.
- Consider a Traditional Tool: Although this method uses a clothespin, a traditional “toothbrush needle” (a specially shaped tool, often made from a toothbrush handle, with a notched end) can make the knotting process even faster and easier, especially for larger rugs. If you enjoy the craft, consider investing in or making one.
Caring for Your Handmade Rag Rug
One of the many benefits of the Amish Toothbrush Knot Rug is its ease of care. Since most are made from cotton or similar durable fabrics, they are generally machine washable. For best results, wash your rug on a gentle cycle with cold water. Avoid harsh detergents or bleach. After washing, reshape the rug and allow it to air dry completely, either by laying it flat or hanging it. This prevents shrinking and maintains its shape and integrity. Spot clean any spills immediately with a damp cloth and mild soap. Proper care will ensure your beautiful, handcrafted rug lasts for many years to come.
Creative Variations and Other Projects
Once you’ve mastered the basic circular Amish Toothbrush Knot Rug, don’t stop there! The possibilities are endless:
- Different Shapes: While circular rugs are common, you can adapt the technique to create oval, rectangular, or even square rugs by adjusting your starting point and how you turn your corners.
- Functional Decor: Beyond floor rugs, use this technique to create unique placemats, trivets for hot dishes, chair pads, pet beds, or even sturdy tote bags.
- Texture Play: Experiment with different types of fabric. Denim strips create a wonderfully robust and textured rug, while flannel or fleece scraps offer a softer, cozier feel.
- Intricate Designs: Plan your fabric color changes to create stripes, concentric circles, or even simple geometric patterns within your rug.
Embrace the Joy of Handmade Comfort
I just adore these Amish Toothbrush Knot Rugs, and I can envision them looking absolutely fabulous in our kitchen and gracing our porch area with their charming, homey presence. More than just a practical floor covering, these rugs represent a connection to a simpler time, a dedication to sustainable practices, and the immense satisfaction that comes from creating something beautiful and useful with your own hands. The process, from preparing the fabric to tying the final knot, is incredibly rewarding. It’s a craft that not only yields a durable and attractive product but also offers a peaceful escape into creativity. I wholeheartedly encourage you to give this project a try. Whether you’re seeking to add a unique touch to your home, reduce textile waste, or simply enjoy a new crafting challenge, making an Amish Toothbrush Knot Rug is a truly worthwhile endeavor. Happy knotting!