
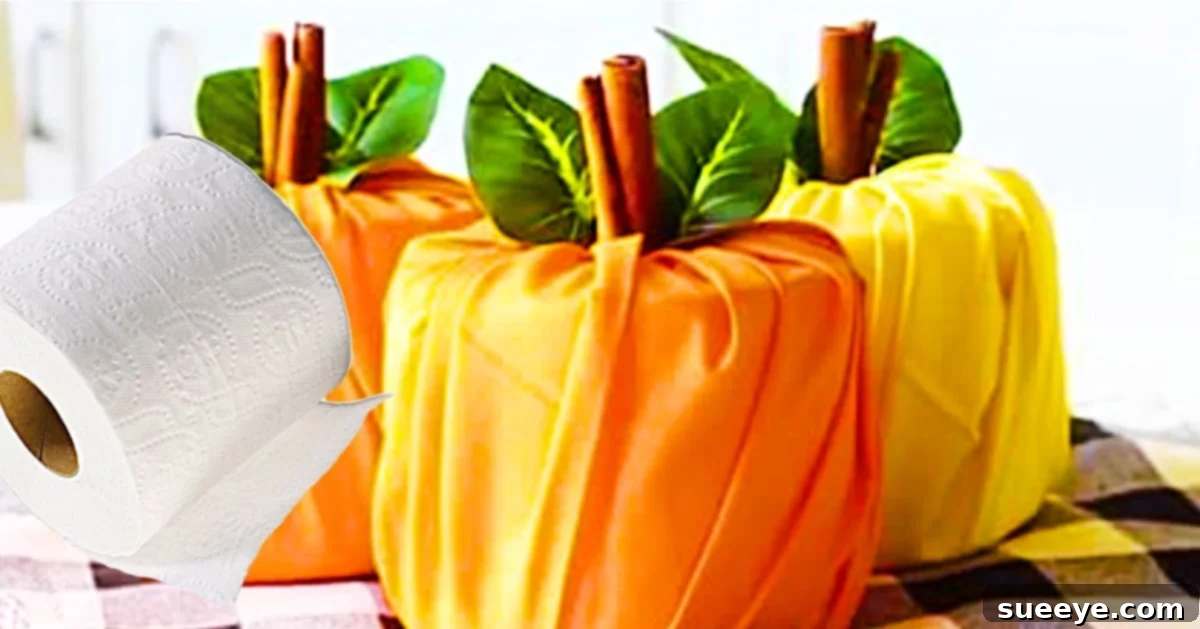
As the leaves begin to change and the crisp autumn air settles in, our homes naturally follow suit with warm, inviting decor. While living rooms and kitchens often get the bulk of seasonal attention, why not extend that cozy, fall-themed charm to every corner of your home, including your bathroom? Infusing your bathroom with autumn spirit can transform it from a purely functional space into a delightful sanctuary, enhancing the overall festive ambiance of your home.
One of the easiest, most budget-friendly, and undeniably adorable ways to achieve this is by crafting simple DIY toilet paper pumpkins. This ingenious idea, inspired by tutorials like the one from My Sew Bliss on YouTube, offers a quick and creative solution for adding a touch of fall to your bathroom decor without requiring any special skills, sewing, or gluing. These charming little pumpkins instantly elevate the space, making it feel sharp, festive, and perfectly ready for the holiday season ahead.
Imagine walking into a bathroom that not only serves its purpose but also brings a smile to your face with its autumnal accents. These no-fuss toilet paper roll pumpkins are not just cute; they’re a testament to how simple household items can be transformed into beautiful decorative pieces. They offer a unique blend of rustic charm and seasonal elegance, proving that you don’t need to spend a fortune to achieve a high-impact look. Let’s dive into how you can easily create these delightful fall accents for your own home.
How To Make A Charming Pumpkin Toilet Paper Wrap for Your Bathroom
Creating these festive fall pumpkins is incredibly straightforward, making it an ideal project for crafters of all skill levels. The beauty of this DIY lies in its simplicity and the use of readily available materials. You’ll be amazed at how quickly a humble toilet paper roll can become a centerpiece of your fall bathroom decor.
Essential Materials for Your DIY Toilet Roll Pumpkins:
- A Small Piece of Fabric: The heart of your pumpkin’s aesthetic. Think fall colors and patterns!
- A Toilet Roll: A full roll works best for a firm, well-shaped pumpkin.
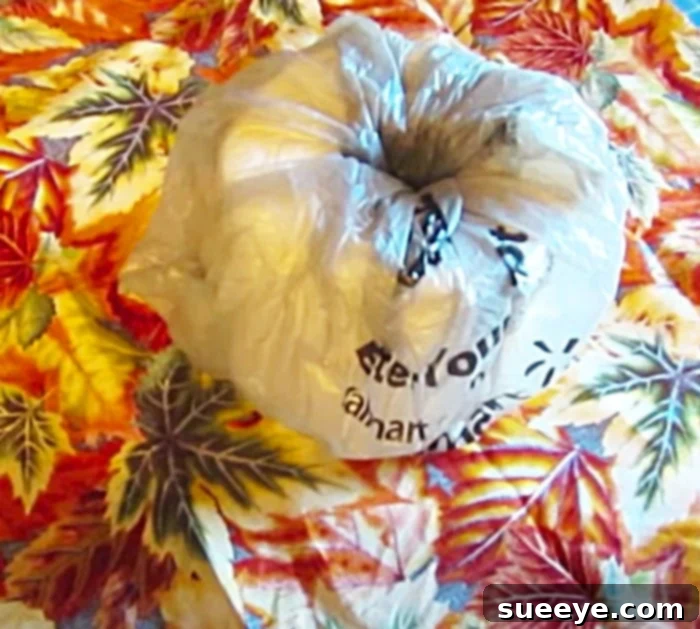
- A Plastic Grocery Bag: Or alternative stuffing material for structure and fullness.
- A Small Piece of Wood: This will serve as the pumpkin’s stem, adding a natural touch.
Choosing Your Materials Wisely for the Best Look
The success of your toilet paper pumpkin largely depends on your fabric choice. Opt for fabrics with fall-inspired colors and textures like flannel, cotton, burlap, or even old plaid shirts that you no longer use. Colors like deep orange, rust, mustard yellow, rich burgundy, forest green, or warm browns will perfectly capture the autumn spirit. For patterns, consider subtle plaids, leaf motifs, or simply a solid color that complements your existing bathroom palette. The fabric piece should be large enough to fully wrap around the toilet roll with ample overhang for tucking – typically a square measuring about 18-20 inches per side is a good starting point, but you might adjust based on the thickness of your fabric and the size of your toilet roll.
For the “stem,” a small twig found outdoors, a cinnamon stick, a wine cork, or even a short piece of dowel rod can work wonderfully. The plastic grocery bag acts as a crucial internal stuffing, helping to shape the fabric into a plump, rounded pumpkin form and keeping it taut. If you prefer an eco-friendlier alternative, crumpled newspaper, tissue paper, or even scrap fabric can also be used as filler.
Step-by-Step Directions to Craft Your Fall Toilet Paper Pumpkins:
This simple craft comes together in just a few easy steps, as beautifully demonstrated in the DIY toilet paper pumpkin covering video tutorial by My Sew Bliss on YouTube. Follow along to create your own charming bathroom accents:
1. Prepare Your Core and Fabric
Begin by taking your full toilet paper roll. This will be the sturdy core of your pumpkin. Next, loosely stuff a plastic grocery bag into the center of the toilet paper roll. This might seem odd, but this step is crucial. The bag will provide internal structure, allowing you to tuck the fabric into the roll’s center more easily and helping to maintain the pumpkin’s shape later on.
Now, lay your chosen fabric piece flat on a clean surface. Ensure it’s smoothed out to avoid wrinkles. Place your prepared toilet paper roll, with the plastic bag inside, directly in the center of your fabric. Make sure the fabric extends evenly around all sides of the toilet roll, leaving plenty of material to gather and tuck.
2. Begin the Wrap and Tuck
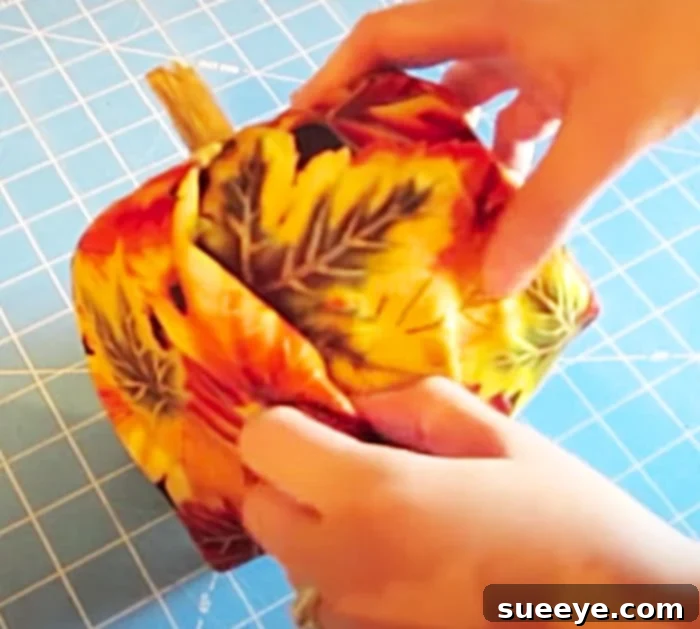
The next step is where your pumpkin truly begins to take shape. Start by bringing one corner or edge of the fabric up and into the center hole of the toilet paper roll. Gently push it down into the hole, nestling it against the plastic bag stuffing. Continue this process, working your way around the entire toilet paper roll. Gather sections of the fabric and carefully tuck them into the center opening of the roll. The goal is to distribute the fabric evenly, creating soft folds and a rounded, pumpkin-like appearance on the outside. Don’t worry if it’s not perfect initially; you can adjust and smooth the fabric as you go along. The plastic bag inside will help hold the tucked fabric in place.
3. Secure with the Stem
Once you have all the fabric neatly tucked and arranged to form a pleasing pumpkin shape, it’s time to add the finishing touch: the stem. Take your small piece of wood (or chosen stem alternative) and firmly insert it into the center hole of the toilet paper roll, where you’ve tucked all the fabric. The stem will not only complete the pumpkin illusion but also serve a practical purpose by securing the fabric in place, ensuring your DIY pumpkin holds its form. Give it a gentle press to make sure it’s snug.
Voila! Your adorable fall toilet paper pumpkin is complete. These simple yet stunning creations look absolutely amazing in any bathroom setting. They add a pop of color, texture, and seasonal cheer that truly transforms the space.
Integrating Your DIY Pumpkins into a Full Fall Bathroom Theme
These toilet paper pumpkins are fantastic on their own, but they truly shine when integrated into a broader fall bathroom decor scheme. Here are some ideas to complement your new creations:
- Strategic Placement: Place a single pumpkin on the back of the toilet tank, or group several together on a vanity tray with other fall elements like mini gourds or pinecones. They also look charming on open shelving, nestled amongst towels.
- Textiles: Swap out your regular hand towels for ones in warm fall colors like burnt orange, deep red, or olive green. A festive shower curtain with a leaf pattern or plaid design can also make a big impact.
- Scents: Introduce fall aromas with cinnamon-scented candles, pumpkin spice diffusers, or essential oil blends that evoke autumn. The cozy scent will enhance the visual appeal.
- Natural Elements: Add small bundles of dried wheat, a sprig of faux fall leaves, or a tiny vase with a single autumn flower. Even a small potted mum can bring life and color to the space.
- Warm Lighting: Consider warmer-toned light bulbs or adding a string of battery-operated fairy lights around a mirror for a soft, inviting glow.
Why Embrace DIY Fall Bathroom Decor?
Choosing to DIY your fall bathroom decorations, especially with a project as simple as these toilet paper pumpkins, offers numerous benefits:
- Cost-Effective: You’re utilizing items you likely already have or can acquire very cheaply, making it a budget-friendly way to refresh your decor.
- Personalized Touch: Handmade items bring a unique charm and personality to your home that store-bought decor often lacks. You can customize the fabric to perfectly match your aesthetic.
- Eco-Friendly: Upcycling toilet paper rolls and scrap fabric is a wonderful way to reduce waste and give new life to everyday items.
- Therapeutic and Fun: Crafting can be a relaxing and enjoyable activity. It’s a rewarding way to spend an afternoon, either solo or with family.
- Seasonal Versatility: These pumpkins are easy to create, allowing you to switch up your decor effortlessly each season without a major investment.
Final Thoughts on Your Autumnal Bathroom Makeover
Transforming your bathroom for fall doesn’t have to be a daunting or expensive task. With a little creativity and a few basic materials, you can craft beautiful, mood-lifting decorations that infuse your space with the warmth and coziness of autumn. These DIY toilet paper pumpkins are a perfect example of how simple ideas can yield stunning results, adding a personalized and festive touch to your home.
So, gather your materials, perhaps rewatch the “My Sew Bliss” tutorial for extra inspiration, and get ready to create some charming fall accents that will make your bathroom feel warm, inviting, and truly ready for the season. You’ll love the festive atmosphere they bring, making every visit to the bathroom a little more delightful!