
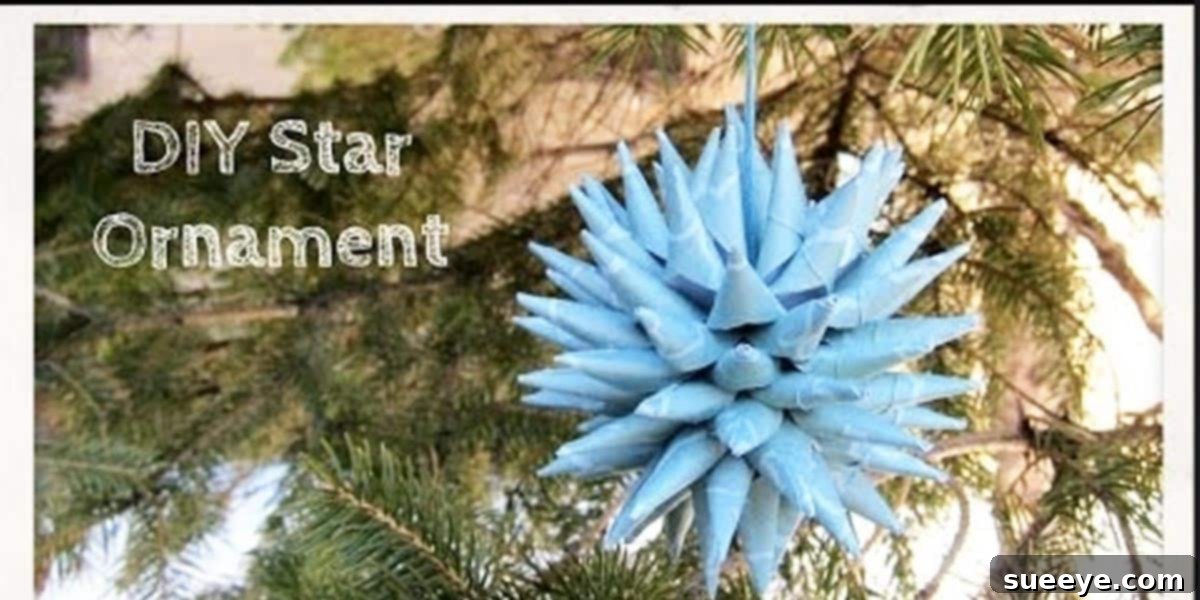
Craft Your Own Stunning Polish Star Ornament: A Comprehensive DIY Guide
As the holiday season draws near, there’s a unique joy in preparing for festivities, especially when it involves adding a personal touch to your home decor. This year, allow yourself to be captivated by the charm of the origami Polish Star ornament. These exquisite paper creations, sometimes affectionately dubbed “Polish porcupines,” have a fascinating history and an undeniable allure. If your Christmas tree could use a dose of handcrafted magic, or if you simply love exploring traditional paper crafts, this intricate yet achievable project is the perfect remedy. They are not only easy to make with a little patience but also offer a wonderful opportunity to showcase your crafting skills and create truly unique holiday keepsakes.
Unveiling the Polish Star: A Timeless Tradition
The tradition of crafting paper ornaments, particularly stars, holds a special place in Polish culture, deeply rooted in the vibrant peasant communities of centuries past. Before mass-produced decorations became commonplace, families ingeniously utilized readily available and affordable materials to adorn their homes. Paper, being both accessible and inexpensive, quickly became a favored medium. From this necessity sprang a beautiful art form, as skilled hands transformed simple sheets of paper into elaborate and festive decorations.
These paper creations were not merely ornaments; they were expressions of creativity, symbols of hope, and a testament to the resourcefulness of Polish families. The ‘Polish star’ or ‘Polish porcupine’ is a prime example of this folk art tradition. Its distinctive spiky appearance, reminiscent of its namesake, makes it stand out among other paper crafts. These stars were often hung in homes during Christmas, symbolizing the Star of Bethlehem and bringing a touch of homemade warmth and artistry to the holiday celebrations. Even today, they remain a cherished part of Polish folk art, celebrated for their beauty and the rich heritage they represent.
Why Embrace the Art of DIY Polish Stars This Holiday Season?
In a world often dominated by store-bought decor, crafting your own Polish Star ornaments offers a refreshing return to tradition and a plethora of benefits. Firstly, it infuses your holiday decor with unparalleled character and a personal story. Each star you create will carry the unique imprint of your effort and creativity, making your Christmas tree truly one-of-a-kind. Secondly, it’s an incredibly cost-effective way to decorate. You can repurpose materials you might already have, like leftover wrapping paper, old magazines, or even newspaper clippings, transforming them into stunning works of art without breaking the bank. This sustainable approach reduces waste and adds an eco-friendly dimension to your holiday preparations.
Beyond the practical advantages, the process of crafting itself is deeply rewarding. It provides a mindful activity that can alleviate stress, foster creativity, and even become a cherished annual tradition for families. Imagine gathering loved ones to fold and assemble these beautiful stars, creating not just ornaments, but lasting memories. Furthermore, handmade gifts carry an extraordinary sentiment, and a meticulously crafted Polish Star makes for a thoughtful and unique present, adding a lovely touch to any gift package or serving as a standalone token of affection. It’s more than just a decoration; it’s a piece of art, a slice of history, and a labor of love.
Gathering Your Crafting Essentials: What You’ll Need
Before embarking on this delightful crafting journey, ensure you have all the necessary tools and materials at hand. The beauty of the Polish Star lies in its simplicity, requiring only a few basic items to bring it to life.
- Paper: This is your primary material. While you can use virtually any type of paper, the thickness and finish will significantly impact the final look and ease of folding.
- Ideal: Mid-weight craft paper (65-80 lb text weight or 120-140 gsm) or cardstock. This provides enough rigidity to hold its shape without being too difficult to fold crisply.
- Creative Alternatives: Leftover wrapping paper (ensure it’s not too flimsy), old magazines with interesting patterns, patterned scrapbook paper, or even newspaper for a rustic, unique look. Experiment with colors and textures to match your personal style or holiday theme. You’ll typically need around 16-32 strips of paper, each measuring approximately 0.5 to 1 inch wide and 6 to 8 inches long, depending on the desired size of your star.
- Scissors: A good pair of sharp scissors is essential for clean, straight cuts, which are crucial for precise folding. A craft knife and a cutting mat can also be used for even greater accuracy when preparing your paper strips.
- Glue or Tape: You’ll need an adhesive to secure the folded paper components.
- Glue: A quick-drying craft glue (like PVA glue) or a glue stick works well. Ensure it dries clear to avoid visible marks. Apply sparingly to prevent wrinkling the paper.
- Tape: Double-sided tape can also be effective for a no-mess, instant hold, especially for securing the ends of the strips.
- Needle: A sturdy needle with a sharp point is required to pierce through the completed paper star to create a hanging point. A tapestry needle or a needle with a slightly larger eye might be easier to thread.
- Strong Thread: For creating the hanging loop.
- Options: Embroidery floss, thin twine, fishing line (for an invisible hang), or decorative metallic thread. Choose a thread that complements your paper choice and is strong enough to support the ornament’s weight without fraying.
- Two 1/4″ Cardboard Discs: These small discs serve as the central anchor points for your star’s two halves, providing structure and stability. You can cut these from cereal boxes, thick cardstock, or any sturdy, thin cardboard. Their precise size isn’t critical, but they should be small enough to be concealed within the star’s center, perhaps 1-1.5 inches in diameter for a typical-sized ornament.
- Optional Tools: A ruler and pencil for precise measurements when cutting strips, and a bone folder for creating crisp creases in your paper.
Step-by-Step Guide to Crafting Your Polish Star Ornament
Now, let’s dive into the fascinating process of transforming simple paper strips into a magnificent Polish Star. Follow these detailed steps carefully for the best results.
Step 1: Preparing Your Paper Strips
Precision is paramount in origami, and the Polish Star is no exception. Begin by preparing your paper strips. You will typically need between 16 and 32 strips, depending on how “spiky” and full you want your star to be. For a medium-sized ornament, aim for strips that are 0.75 inches (about 2 cm) wide and 8 inches (about 20 cm) long. Use a ruler and pencil to mark your lines, then cut them as straight and consistently as possible. Inconsistency in strip size can lead to an uneven final star, so take your time with this initial step.
Step 2: Folding the Individual Spikes (The Building Blocks)
This is the most repetitive but crucial part of the process, as each strip will form one of the star’s distinctive spikes.
- Take one paper strip. Fold it in half lengthwise, bringing the two shorter ends together. Crease it firmly. Unfold it. You now have a central crease line.
- Next, fold each long edge inwards towards the central crease line you just made. This will result in a strip that is now a quarter of its original width. Crease these folds sharply.
- Now, fold the strip in half again lengthwise, along the original central crease. You should have a narrow, four-layered strip.
- Rotate the folded strip so one of the open ends is facing you. Take one corner of this end and fold it diagonally downwards, aligning its edge with the long edge of the folded strip. This creates a small triangle. Crease sharply.
- Repeat this on the other side of the same end, folding the opposite corner downwards to form another small triangle, mirroring the first. These two triangles together create a pointed “arrowhead” shape.
- Flip the strip over and repeat steps 4 and 5 on the other end, creating a matching arrowhead.
- Finally, open up the center of the strip slightly. You will notice that the “arrowheads” are meant to be folded in such a way that when the strip is opened, they create a small pocket or a pointed “spike” when the edges are brought together and glued. This is the basic unit, or “spike,” of your star. Repeat this process for all your paper strips, ensuring consistency in folding and creasing.
Step 3: Assembling the First Half of the Star
With all your spikes folded, it’s time to start assembling. Take one of your 1/4″ cardboard discs. This will be the central core for the first half of your star.
- Apply a small dab of glue to the center of one side of the cardboard disc.
- Take one folded spike. Apply a thin line of glue along the inner, unfolded edge of its base (the flat end before the pointed folds begin).
- Carefully attach the base of the spike to the cardboard disc, positioning it so that the point of the spike faces outwards. Press firmly to secure.
- Continue adding spikes around the circumference of the cardboard disc. The key here is even spacing. If you’re using 16 spikes total, you’ll use 8 for each half. Try to space them equidistant from each other, creating a symmetrical star shape. The pointed tips should angle slightly upwards and outwards.
- Once all spikes for the first half are attached, let the glue dry completely. This might take 15-30 minutes, depending on your glue type. Ensure each spike is securely fastened to the disc.
Step 4: Creating the Second Half
Repeat Step 3 exactly as described, using your second cardboard disc and the remaining half of your folded paper spikes. It’s crucial that this second half is a mirror image of the first, with the spikes arranged in the same manner and at the same angle. Allow this half to dry thoroughly as well.
Step 5: Joining the Halves Together
Once both halves are completely dry and sturdy, it’s time for the exciting moment of joining them to form the full three-dimensional star.
- Carefully apply a thin, even layer of glue around the outer edges of one of the cardboard discs (the side where the spikes are attached). Alternatively, you can apply a small dab of glue to the base of each spike where it meets the cardboard.
- Align the second half of the star directly on top of the first, ensuring that the spikes of one half interlock or nestle neatly between the spikes of the other half. The goal is to create a seamless, spherical, spiky ornament.
- Gently press the two halves together, ensuring firm contact between the glued surfaces. Hold them in place for a few moments, or use clothespins or small clamps around the perimeter if needed, until the glue begins to set.
- Allow the entire star to dry completely and undisturbed for several hours, or even overnight, to ensure maximum stability and durability. This curing time is essential for the star to maintain its robust shape.
Step 6: Adding the Hanging Loop
Once your Polish Star is fully assembled and dry, it’s time to add the finishing touch – the hanging loop.
- Thread your strong thread through the eye of the needle. Double the thread and tie a knot at the end to create a secure loop.
- Carefully choose a discreet spot on your star, usually through the center of one of the top spikes or through the cardboard core if accessible. Gently push the needle through the paper from one side.
- Pull the thread through until the knot catches on the inside, leaving a loop of desired length (typically 4-6 inches) on the outside.
- Tie another knot at the desired length to form a sturdy loop for hanging. Trim any excess thread.
Step 7: Final Touches and Embellishments
Take a moment to admire your creation. Gently shape any spikes that might have flattened slightly during the drying process. You can also add optional embellishments: a dusting of fine glitter for extra sparkle, a light spray of metallic paint for an elegant sheen, or even small beads glued to the tips of the spikes for an added touch of luxury. Ensure any added decorations do not compromise the star’s structural integrity or weight.
Tips for a Perfect Polish Star
- Paper Choice Matters: Don’t underestimate the impact of your paper. Thinner papers are harder to fold crisply and tear easily, while very thick cardstock can be difficult to crease and glue. Find that sweet spot for optimal results.
- Precision is Key: In every step, from cutting strips to folding spikes and aligning halves, strive for precision. Small inaccuracies can accumulate and affect the overall symmetry and beauty of your finished ornament.
- Practice Makes Perfect: If it’s your first time, don’t get discouraged if your initial attempts aren’t flawless. Try making a few practice spikes before committing to your final paper.
- Use a Bone Folder: This simple tool (or the back of a spoon) can make a world of difference in creating sharp, professional-looking creases, enhancing the definition of your star’s spikes.
- Don’t Rush the Glue Drying: Allow ample drying time between steps, especially when assembling the two halves. Rushing this can lead to the star falling apart or losing its shape.
- Experiment with Sizes: Once you’ve mastered the basic technique, try varying the dimensions of your paper strips to create stars of different sizes – from tiny accent pieces to large statement ornaments.
- Consider Color Combinations: Use two different colors of paper (one for each half, or alternating spikes) for a more dynamic and visually interesting Polish Star.
Beyond the Tree: Creative Ways to Display Your Stars
While the Polish Star ornament is a natural fit for the Christmas tree, its beauty and versatility allow for numerous other display options. String several together to create a stunning holiday garland for your mantle or staircase. Use them as unique, handcrafted gift toppers, adding a memorable flourish to your presents. Hang them individually in windows to catch the light, or cluster them together as a striking centerpiece for your holiday table. These elegant paper creations aren’t just for Christmas; they can serve as beautiful year-round decor, bringing a touch of whimsical folk art to any room.
Embrace the Tradition: Your Handmade Legacy
Crafting your own Polish Star ornament is more than just a holiday project; it’s an invitation to connect with a rich cultural tradition, to unleash your creativity, and to infuse your home with unique handmade charm. The satisfaction of seeing your carefully folded paper transform into such a captivating decoration is immense. So, gather your materials, clear your workspace, and embark on this delightful journey. Whether you’re making one for yourself or a dozen as gifts, these “Polish porcupines” are sure to bring joy and a touch of artisanal elegance to your holiday season for years to come. Happy crafting!