
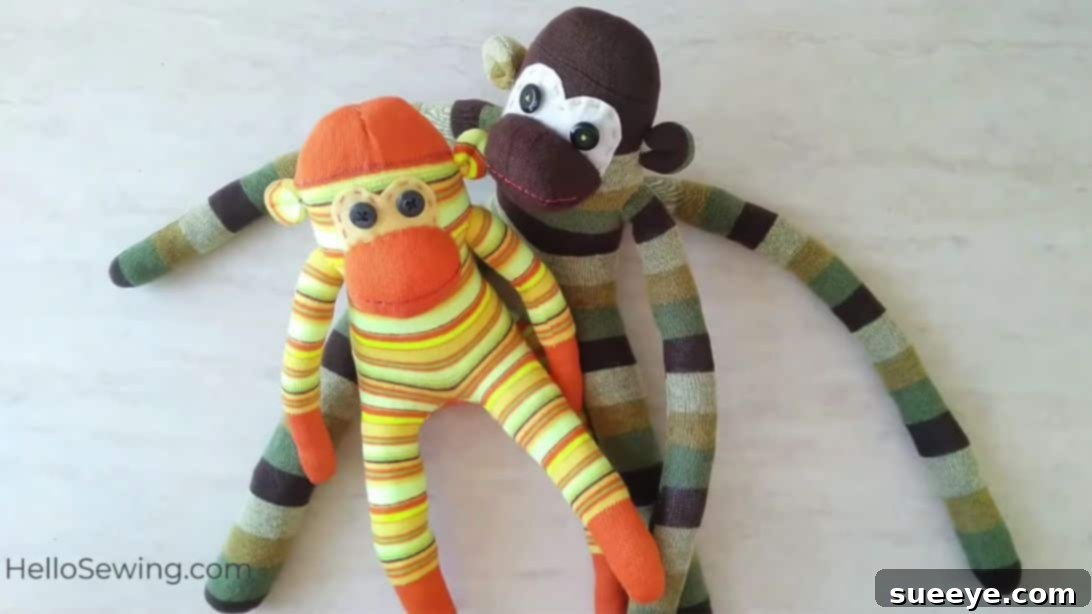
Are you looking for a delightful sewing project that combines creativity, charm, and a touch of nostalgia? The classic sock monkey is an iconic handmade toy that has captured hearts for generations, and now you can craft your very own! If you love the idea of transforming everyday materials into something extraordinary, especially repurposing a humble sock into an adorable, huggable companion, then this sewing tutorial is perfect for you. This engaging project, brought to you by the talented Hello Sewing on YouTube, promises not only a fun crafting experience but also results in a super cute and incredibly huggable creation.
Whether you’re an experienced crafter or just starting your sewing journey, this step-by-step guide is designed to be accessible and enjoyable. A handmade sock monkey makes for an unforgettable gift, a cherished keepsake, or simply a charming addition to any room. Imagine the joy of gifting a personalized, soft toy made with your own hands! Dive into this fulfilling DIY adventure and discover how simple it can be to bring these whimsical creatures to life using just a few basic materials and some enthusiastic stitching.
Unleash Your Creativity: Essential Materials for Your Sock Monkey
Before you embark on your sock monkey crafting journey, it’s essential to gather all your materials. Having everything ready at hand will ensure a smooth and enjoyable sewing experience. Most of these items are likely already in your sewing kit or can be easily found at your local craft store. Remember, the beauty of a sock monkey lies in its ability to be personalized, so feel free to choose colors and patterns that speak to you!
- 1 pair of striped socks: This is the star of our show! Classic red-heeled socks are traditional, but feel free to choose any striped, patterned, or solid socks that inspire you. Consider the size and stretch of the socks, as these will determine the final size and shape of your monkey.
- A piece of felt for the face: Opt for a color that contrasts nicely with your chosen socks, typically white, cream, or light pink. This will form the muzzle of your monkey.
- 2 buttons: These will serve as your monkey’s charming eyes. You can pick buttons that are either uniform or mismatched for a more whimsical look. Ensure they are securely sewn if the monkey is for a child, or consider embroidered eyes for younger recipients.
- Polyfill stuffing: The magical ingredient that brings your monkey to life! Polyfill provides a soft, squishy, and huggable texture. Have plenty on hand to ensure your monkey is plump and well-formed.
- 2 colors of embroidery thread: These will be used for adding facial details like the mouth and possibly extra embellishments. Choose colors that complement your socks and felt.
- Matching thread: Essential for all your general sewing, ensuring stitches blend seamlessly with your sock fabric.
- Scissors or rotary cutter and a cutting mat: For precise cutting of fabric and pattern pieces. A rotary cutter can be particularly useful for smoothly cutting curves.
- Ruler: For accurate measuring and marking.
- Iron, for pressing: Crucial for preparing your socks and ensuring crisp seams, making them easier to sew.
- Sewing clips or pins: To hold fabric pieces together securely before and during sewing, preventing shifting.
- Sewing machine: While much of the assembly can be done by hand, a sewing machine will significantly speed up the process and provide stronger, more consistent seams for the main body parts.
- Pattern: (Click here to download the pattern) A crucial component for accurate shaping. Make sure to download and print this pattern before you begin.
Step-by-Step Guide: Crafting Your Adorable Sock Monkey
Step 1: Preparing Your Socks and Pattern Pieces
The foundation of a great sock monkey lies in meticulous preparation. Start by downloading, printing, and carefully cutting out the provided patterns from Hello Sewing. Pay close attention to the pattern variations: if you’re crafting an adult-sized monkey, use the adult eye and ear patterns; for a smaller, baby monkey, select the corresponding baby-sized patterns. Accuracy in this step will ensure your monkey has perfectly proportioned features.
Next, prepare your socks. It’s a good practice to wash the socks you intend to use beforehand. This pre-shrinks the fabric and ensures they are clean, providing a fresh canvas for your creation. Once dry, turn the socks inside out and give them a light press with an iron. This helps flatten any creases and makes them easier to mark and sew. If your chosen socks have a folded cuff, carefully remove its stitches to flatten it out completely, then iron the sock again to stretch it a bit, ensuring a smooth surface for your pattern pieces.
Now, select your socks. You’ll need two socks for this project. One sock will be dedicated to forming the main body, head, and legs of your monkey. The second sock will be used for the remaining body pieces, such as the arms, tail, and face components. Carefully lay out your socks, ensuring they are flat and smooth. Using the downloaded pattern pieces, precisely mark the outline of each part onto the wrong side of the respective sock. For instance, the body and leg piece will be marked on one sock, while the arm, tail, and face components will be marked on the other. Use a fabric marker or tailor’s chalk that is visible but erasable.
With all your pieces marked, it’s time to sew. Using your sewing machine, stitch along the marked lines. If your pattern indicates a seam allowance, sew approximately ¼ inch away from the cutting lines, towards the inside of the shape. For curves, such as those on the limbs and tail, make sure to sew slowly and smoothly to achieve a nice, rounded shape. Once all the parts are sewn, carefully cut them out along the designated cutting lines. For curved sections, gently clip the seam allowance (make small snips into the fabric, but don’t cut through the stitching) to allow the fabric to lay smoothly when turned. Finally, turn all your sewn pieces right side out. A turning tool or a chopstick can be very helpful for pushing out the smaller limbs and ensuring crisp edges.
Step 2: Stuffing, Assembling, and Adding Charming Details
Now comes the exciting part: bringing your sock monkey to life with stuffing and assembly! Begin by stuffing the body section, including the limbs and tail, with Polyfill. This is where you can truly customize the feel of your monkey. Make sure to distribute the stuffing evenly, pushing it into all corners and tips of the limbs and tail using a chopstick or a similar tool. You can opt for a very firm, sturdy monkey or a softer, squishier one, depending on your preference. Just ensure there are no lumpy areas, and the form is consistent.
Once sufficiently stuffed, it’s time to close the open edges. For the main body and any other openings, use a ladder stitch (also known as an invisible stitch) about 1/8-inch away from the edge. This stitch is ideal for creating a neat, almost invisible seam. To secure the thread ends, wrap the thread around your needle a few times, then run the needle through the stuffed body of the puppet. Push the thread inside the puppet, and when the needle emerges at the other end, gently pull and cut the thread flush with the fabric. The thread end will disappear inside the stuffing, leaving no visible knot.
To further shape the limbs and ensure the stuffing is evenly distributed, gently roll them between your palms. This helps to smooth out any lumps and achieve a pleasing, rounded contour for the arms and legs. Next, move on to the ears. Fill each ear section lightly with Polyfill. Fold the raw edge of each ear inward to create a neat finish, then close the opening using the same discreet ladder stitch technique you used for the body. Repeat this process for both ears, ensuring they are symmetrical and well-formed.
With all your individual body parts ready, it’s time for assembly! Carefully pin all the body parts – arms, tail, ears, and felt muzzle – in their assigned places on the main body. Take your time to position them accurately, stepping back to ensure the proportions look right. Once you’re happy with the placement, securely sew the arms, tail, and mouth piece using a slip stitch. This hand-sewing technique, like the ladder stitch, is excellent for attaching pieces discreetly, making the stitches almost invisible. For the eyes, position the two buttons precisely where you want them to be and sew them on very securely with strong thread, making sure they are firmly attached and safe, especially if the monkey is for a child. Alternatively, you can embroider the eyes for an even safer option.
To create the monkey’s charming mouth, first, lightly draw where you want the smile to be on the felt muzzle with an erasable fabric marker. This helps guide your stitches. If the mouth piece has a raw edge, fold it inward slightly before basting or slip stitching it into place on the face. You can then use embroidery thread to create a simple, cheerful smile, backstitching along your drawn line for a clean finish. Remember, the charm of a handmade sock monkey often comes from its unique, slightly imperfect features. For more detailed visual guidance on stitching techniques and precise placement, be sure to watch the full video tutorial from Hello Sewing.
And there you have it! Your very own charming and huggable sock monkey, ready to bring smiles and comfort. This project is a wonderful testament to the joy of DIY crafting, proving that with a little time and creativity, you can transform simple materials into something truly special. Each handmade sock monkey carries its own unique personality, reflecting the care and effort put into its creation. Whether it becomes a beloved toy, a heartwarming gift, or a decorative accent in your home, it’s sure to be cherished.
We extend our sincere gratitude to Hello Sewing for sharing this fantastic and accessible tutorial. Their clear instructions and inspiring video make this classic craft enjoyable for everyone. We highly encourage you to visit and subscribe to their YouTube channel for more creative ideas, detailed sewing projects, and endless inspiration for your next DIY adventure. Happy sewing!
*All image credit belongs to Hello Sewing via YouTube. Follow and subscribe to her channel for more inspiring DIY projects!