
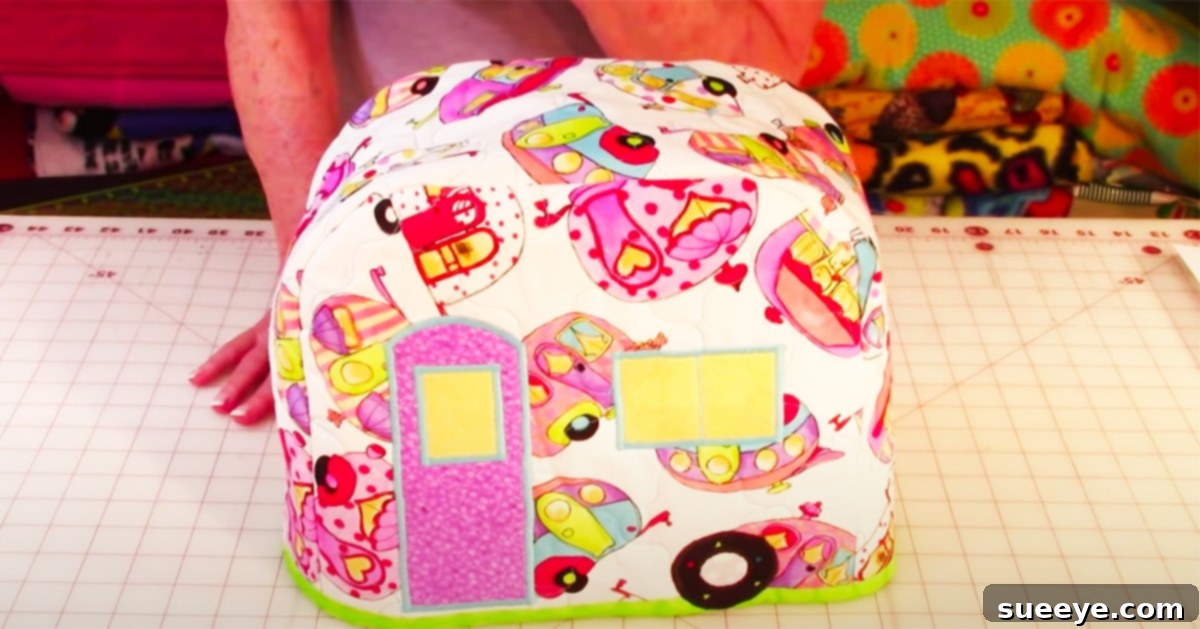
Welcome to a delightful and practical sewing adventure! If you’re searching for an easy, beginner-friendly sewing project that adds a touch of charm and functionality to your kitchen, then you’ve landed in the right place. This fantastic DIY toaster cover tutorial, inspired by The Sewing Room Channel on YouTube, offers an excellent opportunity to hone your sewing skills while creating something genuinely useful. Beyond its primary function of protecting your toaster from dust and grime, this project also serves as a thoughtful and personalized gift idea for friends and family. Imagine a custom-made cover perfectly matching someone’s kitchen decor – it’s a detail that truly elevates a space.
While the original design is perfectly suited for a standard 2-slice toaster, the beauty of this DIY approach lies in its adaptability. With just a few simple adjustments to the measurements, you can effortlessly scale this project up to fit a larger 4-slice toaster, or even other small kitchen appliances that could benefit from a protective and stylish cover. The creator behind The Sewing Room Channel is renowned for her ability to transform everyday items into quick, low-cost, and incredibly satisfying sewing projects. Her knack for crafting covers for almost every kitchen appliance is inspiring, demonstrating how these small additions can become super handy and keep your kitchen looking tidy and well-organized.
What makes this particular tutorial stand out is its clarity and thoroughness. The instructions provided are meticulously detailed, ensuring that even a novice sewer can follow along with confidence and achieve a professional-looking result. As someone whose toaster tends to collect dust all too easily, I’m personally excited to give this project a try. A custom toaster cover is not just about aesthetics; it’s about maintaining cleanliness, extending the life of your appliance, and adding a unique, handmade element to your home. This article will guide you through the essentials, offering expanded insights and tips, while encouraging you to watch the full video for the comprehensive visual guide.
Why a DIY Toaster Cover? The Ultimate Kitchen Accessory
In many homes, the toaster is a frequently used appliance, yet it often sits exposed on the countertop, gathering dust, crumbs, and occasionally grease splatters. Over time, this accumulation can not only make your kitchen look untidy but also potentially affect the toaster’s performance and hygiene. A DIY toaster cover offers a simple yet effective solution to these common problems, transforming your appliance from a mere utilitarian object into an integrated part of your kitchen’s aesthetic.
Beyond its practical benefits, a handmade toaster cover provides an unparalleled opportunity for personalization. Mass-produced kitchen accessories rarely offer the specific patterns, colors, or textures that perfectly complement your existing decor. By sewing your own, you gain complete creative control. You can select fabrics that resonate with your personal style, whether it’s a vibrant print that adds a pop of color, a subtle neutral that blends seamlessly, or even a whimsical design that showcases your personality. This level of customization ensures that your toaster cover is not just functional but also a true reflection of your home’s unique charm.
For those who don’t use their toaster every single day, a cover is particularly beneficial. It acts as a protective barrier, shielding the internal mechanisms from dust particles that could otherwise settle inside and become difficult to remove. This simple act of covering can contribute to the longevity of your appliance, keeping it cleaner and potentially reducing the need for frequent internal cleaning. Moreover, it creates a cleaner, more streamlined appearance on your countertop, tucking away the toaster’s industrial look when it’s not in use. It’s a small detail that contributes significantly to an overall sense of order and design coherence in the kitchen.
Finally, a DIY toaster cover makes an incredibly thoughtful and budget-friendly gift. Handmade items carry a special sentiment, showing the recipient that you’ve invested time and effort into creating something unique just for them. It’s an ideal present for housewarmings, birthdays, or any occasion where a personal touch is appreciated. Given the relatively low cost of materials and the straightforward nature of the project, it’s a gift that delivers high value both emotionally and practically, without breaking the bank.
Supplies: Gathering Your Materials for Success
Before diving into the creative process, it’s essential to gather all your materials. Having everything ready not only streamlines your workflow but also ensures you have the right components to achieve a durable and aesthetically pleasing toaster cover. Each item plays a specific role in the construction, from providing structure and protection to adding a professional finish.
- Bias Tape: This versatile strip of fabric, cut on the bias (diagonal grain), is crucial for finishing the raw edges of your toaster cover. It provides a clean, neat, and durable binding, particularly around the bottom edge, giving your project a polished, store-bought look. You can purchase pre-made bias tape in various widths and colors, or even make your own from a coordinating fabric for a truly customized touch.
- Cotton Batting: Often used in quilting, cotton batting provides structure, a soft feel, and a layer of insulation for your toaster cover. It helps the cover maintain its shape, preventing it from looking flimsy, and offers a bit of padding. Choose a medium-loft batting for a good balance of body and flexibility. This layer goes between your outer fabric and the lining, enhancing the overall quality and durability of the finished product.
- Lining Fabric: The lining fabric will be on the inside of your toaster cover, protecting the batting and providing a clean interior finish. Opt for a smooth, durable fabric, such as a plain cotton, that complements your outer fabric. The lining doesn’t need to be as decorative as the exterior, but a pleasant color or subtle pattern can add to the overall appeal. It’s also easy to keep clean.
- Front and Back Fabric: This is where your personal style truly shines! The front and back fabric, also referred to as the outer or main fabric, is the primary visual component of your toaster cover. Choose a durable, washable fabric like quilting cotton, canvas, or even a decorative linen blend. Consider patterns and colors that match your kitchen decor or reflect your unique taste. You’ll need enough for the main panels that form the primary faces of your cover.
- Gusset Fabric: The gusset refers to the side and top connecting strip that forms the three-dimensional shape of the toaster cover. This piece essentially wraps around the sides and top of your toaster, connecting the front and back panels. You can use the same fabric as your front and back panels for a cohesive look, or choose a complementary solid or pattern to add visual interest and a design accent.
In addition to these main fabric components, ensure you have basic sewing essentials like good quality thread (polyester is often recommended for its strength and durability), sharp fabric scissors or a rotary cutter and mat, sewing pins or clips, an iron and ironing board, and of course, your sewing machine. A clear acrylic ruler and fabric marking pen will also be invaluable for precise measurements and cuts.
Directions: Crafting Your Custom Toaster Cover Step-by-Step
Embarking on this DIY toaster cover project is a rewarding experience, especially with the clear guidance from The Sewing Room Channel. While the video tutorial provides the most comprehensive visual instructions, here we expand on the key steps, offering additional detail to help you understand each stage of the construction process. Remember, precise measuring and careful cutting are the foundation of any successful sewing project.
Step 1: Precise Measuring and Cutting Your Fabric Pieces
Before cutting, measure your toaster thoroughly. You’ll need its width, depth, and height. To determine the size of your fabric pieces, add seam allowances (typically 1/2 inch or 1/4 inch on all sides) to these measurements. For a standard 2-slice toaster cover, you’ll generally cut:
- Front Panel: One piece each from outer fabric, cotton batting, and lining fabric. Dimensions will be (toaster width + seam allowance) by (toaster height + seam allowance).
- Back Panel: One piece each from outer fabric, cotton batting, and lining fabric. Dimensions will be identical to the front panel.
- Gusset (Side & Top Strip): One long strip each from outer fabric, cotton batting, and lining fabric. The length of this strip will be (toaster depth + toaster width + toaster depth + seam allowance for each end) and the width will be (toaster height + seam allowance). This piece will wrap around the two sides and the top of the toaster. You might need to cut two separate gusset pieces for the sides and a top piece depending on the toaster’s top shape, but for a simple rectangular cover, one continuous strip is often used.
Ensure all your cuts are straight and accurate. Using a rotary cutter and mat with a clear ruler can significantly improve precision.
Step 2: Layering and Quilting Your Panels
This step adds body, structure, and a beautiful quilted texture to your toaster cover. For each of your main fabric pieces (front panel, back panel, and gusset strip), you will create a “quilt sandwich”:
- First, lay your lining fabric piece flat on your work surface, right side down.
- Next, place the corresponding cotton batting piece directly on top of the lining. Smooth it out to remove any wrinkles.
- Finally, place your outer fabric piece on top of the batting, right side up. Ensure all edges are aligned.
- Secure these three layers together by pinning extensively or using basting spray, making sure there are no puckers or shifts.
- Now, perform a quilting stitch pattern across each layered piece. This stitching serves two purposes: it securely holds the layers together, preventing the batting from shifting over time, and it adds decorative texture. You can choose a simple grid pattern of straight lines, diagonal lines, or even a free-motion quilting design if you feel adventurous. The Sewing Room Channel tutorial will likely demonstrate a straightforward quilting method, perfect for beginners. Aim for even stitches and remember to backstitch at the beginning and end of each line of stitching. Repeat this process for the front, back, and gusset sections.
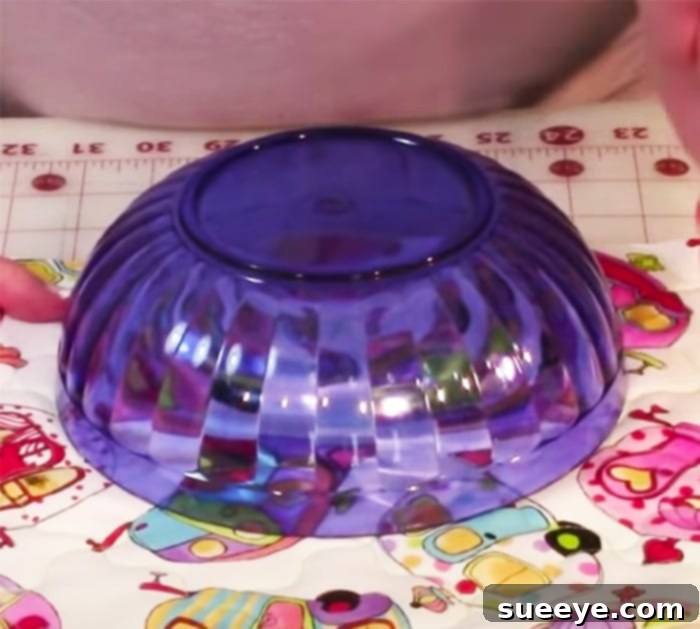
Step 3: Assembling the Toaster Cover Panels
Once all your pieces are quilted, it’s time to bring them together to form the shape of the toaster cover. This typically involves attaching the front and back panels to the gusset strip.
- Take your quilted front panel and your quilted gusset strip. With right sides together, align one short end of the gusset strip with one side of the front panel. Pin them carefully, matching all edges.
- Sew these pieces together using your chosen seam allowance (e.g., 1/4 inch). Remember to backstitch at the start and end of your seam for added security.
- Continue to attach the gusset around the perimeter of the front panel, pivoting at the corners to create crisp edges. The gusset will then extend to form the top and the other side, eventually meeting the back panel.
- Similarly, attach the quilted back panel to the remaining free edges of the gusset strip. This will enclose the structure and give you the basic three-dimensional shape of your toaster cover. Ensure everything needs to be centered and aligned as you pin to guarantee a neat finish. After sewing, carefully trim any excess fabric from the seam allowances, particularly at the corners, to reduce bulk.
- Press your seams open or to one side, using an iron. Pressing is a crucial step in sewing that helps to flatten seams, giving your project a much more professional and finished appearance.
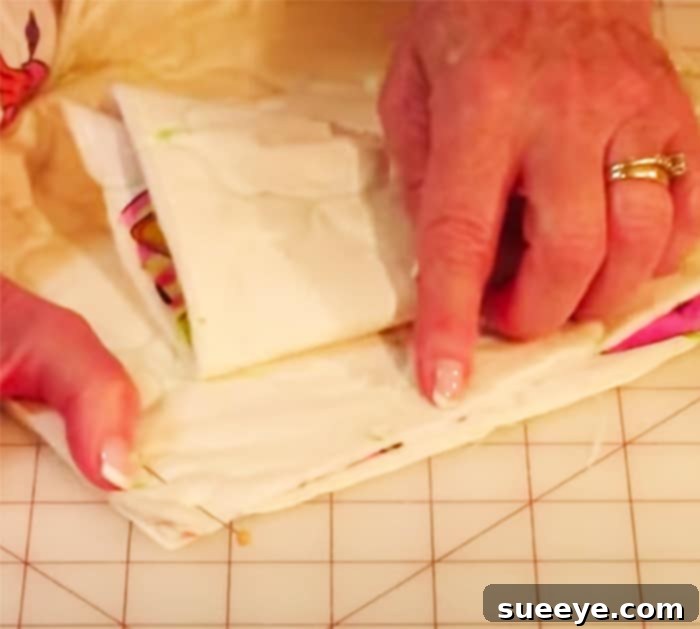
Step 4: Finishing the Bottom Edge with Bias Tape
The final step in constructing your toaster cover is to neatly finish the raw bottom edge using bias tape. This not only prevents fraying but also adds a decorative touch.
- Open up one side of your bias tape. Align the raw edge of the bias tape with the raw bottom edge of your toaster cover, with the right side of the bias tape facing the right side of your toaster cover. Start at a discrete spot, like the back corner.
- Pin the bias tape all the way around the bottom edge of the cover. When you get back to your starting point, overlap the ends of the bias tape slightly for a neat finish.
- Sew the bias tape to the toaster cover along the crease closest to the raw edge.
- Once sewn, fold the bias tape over to the inside of the toaster cover, completely enclosing the raw edge. Pin it in place from the right side of the cover.
- Topstitch all the way around the bottom edge, catching the folded bias tape on the inside. This final stitch will secure the bias tape and give a clean, professional finish.
For comprehensive visual guidance and additional tips, it is highly recommended to watch The Sewing Room Channel tutorial on YouTube. Her detailed instructions will ensure you master each step with confidence.
Customization Tips and Final Thoughts
Overall, this DIY toaster cover project is a delightful way to add a personal and functional item to your kitchen. The finished product, with its structured form, often evokes a charming resemblance to a cozy little house or even a miniature RV, adding a unique character to your countertop. As highlighted earlier, toaster covers are incredibly convenient and useful, particularly if your toaster isn’t in daily use, providing that essential barrier against dust and grime.
The true beauty of this sewing project lies in its immense potential for customization. You are the designer!
- Fabric Choices: Don’t limit yourself to basic cottons. Explore various fabric designs – from playful patterns and vibrant colors to subtle textures and sophisticated neutrals. Consider themed fabrics for holidays or special occasions. A farmhouse-style kitchen might benefit from a rustic plaid or botanical print, while a modern minimalist space could feature a solid linen or geometric pattern. The possibilities are endless, allowing you to perfectly match your cover to the aesthetic of your home and kitchen.
- Embellishments: Elevate your design with simple embellishments. You could add decorative buttons, a small fabric label, a delicate trim along the bottom edge, or even simple appliqué shapes. These small details can transform a basic cover into a truly unique piece of kitchen art.
- Adjustable Sizing: As mentioned, the measurements are easily adaptable. Before you start, accurately measure your specific toaster (width, depth, height) and add appropriate seam allowances. For an even more versatile cover that might fit various appliances, consider adding a little extra ease to your measurements.
- Gift Giving: Remember, this project makes an exceptional handmade gift. Tailor the fabric choices to the recipient’s kitchen decor and personal style for a truly thoughtful present. Package it with a bow and perhaps a small bag of gourmet coffee for a charming housewarming gift.
This sewing project is not just creative; it’s genuinely inspiring. It encourages you to think beyond store-bought options and create something with your own hands, for your home, or for others. The best part? All you truly need for this project are basic sewing skills. If you can operate a sewing machine, sew a straight line, and follow instructions, then you’re good to go! It’s an excellent project for beginner sewers looking to build confidence and produce a practical item they can use every day. So, gather your supplies, fire up your sewing machine, and get ready to craft a beautiful and functional custom toaster cover that will protect your appliance and brighten your kitchen space. Happy sewing!