
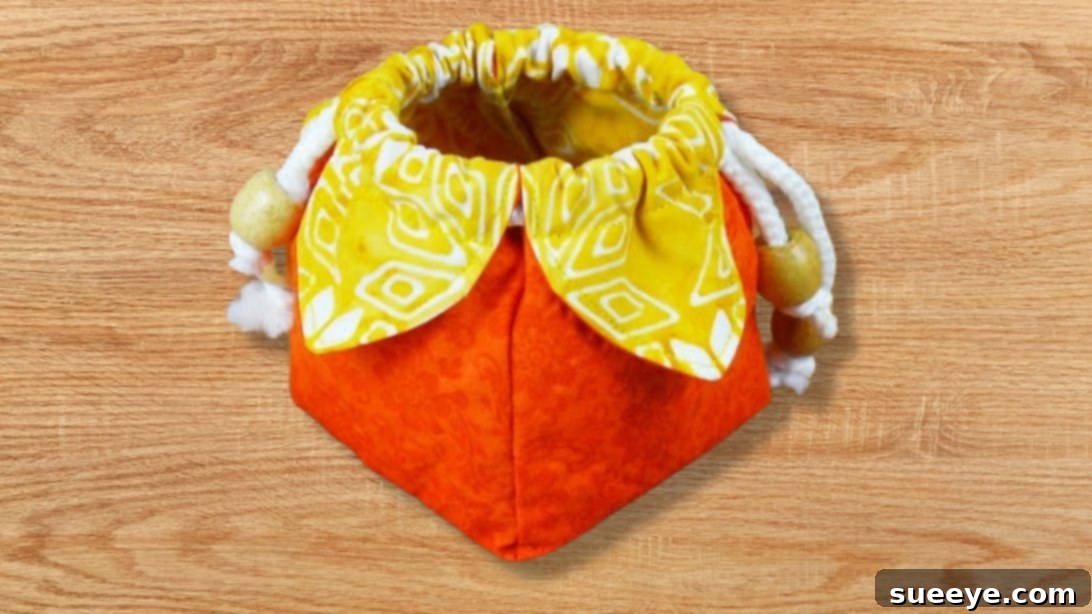
Transforming your fabric scraps into something beautiful and practical is one of the most rewarding aspects of sewing. This delightful DIY flower drawstring pouch project offers the perfect opportunity to do just that. Utilizing leftover fabrics from past creations, you can craft a charming and versatile pouch, ideal for storing coins, cherished jewelry, or any other small treasures you wish to keep organized. Inspired by the ingenious designs of Fafa DIY, this project is not only eco-friendly but also adds a touch of handmade elegance to your everyday life. Its unique floral shape and secure drawstring closure make it a wonderful accessory or a heartfelt handmade gift. Below, you’ll find comprehensive step-by-step instructions to guide you through creating your very own flower drawstring pouch, turning those humble fabric remnants into a blooming masterpiece.
Why Craft a DIY Flower Drawstring Pouch?
Beyond the simple act of sewing, creating a flower drawstring pouch offers a multitude of benefits. It’s an excellent way to practice your sewing skills, especially for those new to working with curves and small details. For seasoned crafters, it provides a quick and satisfying project that yields immediate results. More importantly, this project champions sustainability by encouraging the use of fabric scraps that might otherwise go to waste. Imagine turning a small piece of that beloved fabric from a dress or quilt into a useful item that keeps its memory alive.
These pouches are incredibly versatile. They can serve as a stylish coin purse, a protective holder for delicate jewelry when traveling, a compact makeup bag, or even a unique gift bag for small presents. The floral design adds a whimsical and artistic touch, making each pouch a personal statement piece. Plus, the satisfaction of creating something functional and beautiful with your own hands is truly unparalleled.
Essential Materials for Your Flower Drawstring Pouch
Before diving into the sewing process, gather all your materials to ensure a smooth and uninterrupted crafting session. The beauty of this project lies in its simplicity and the modest requirements. You might already have most of these items in your sewing kit!
- Outer Fabric: One piece measuring 16.5 inches x 16.5 inches. Choose a sturdy cotton, linen, or even a soft canvas for the exterior. This fabric will define the look and feel of your pouch, so select a pattern or color that sparks joy.
- Inner Fabric: One piece measuring 16.5 inches x 16.5 inches. A coordinating or contrasting fabric works well here. Poplin or quilting cotton is often a good choice for linings, offering a smooth finish and adding durability.
- Pair of Scissors: Sharp fabric scissors are crucial for clean, precise cuts, especially when working with curves.
- 2 Pieces of Cord: Each measuring approximately 17.7 inches (about 45 cm). You can use various types of cord such as satin cord, cotton cord, thin rope, or even ribbon. Ensure it’s sturdy enough to hold the pouch closed effectively.
- Pattern: The specific flower petal pattern is essential for achieving the distinct shape of this pouch. You can usually access this pattern by clicking the description link provided in the original Fafa DIY video. Print it out accurately to scale.
- 4 Wooden Beads: These are optional but add a lovely decorative and functional touch to the ends of your drawstrings. Choose beads with holes large enough to accommodate your chosen cord.
- Sewing Machine & Thread: A basic sewing machine and a spool of thread matching your outer fabric will be your best friends for this project.
- Pins or Fabric Clips: For securing fabric layers before sewing.
- Iron & Ironing Board: Pressing at various stages is vital for crisp seams and a professional finish.
- Chalk or Fabric Marker: For transferring pattern markings if needed.
Step-by-Step Instructions: Sewing Your Flower Drawstring Pouch
Follow these detailed steps carefully to construct your beautiful flower drawstring pouch. Precision and patience are key, especially when dealing with the petal shapes.
Step 1: Preparing and Cutting the Outer Fabric
Begin by taking your 16.5-inch x 16.5-inch outer fabric square. Lay it flat and smooth on your work surface. First, fold the square in half, aligning the raw edges perfectly. Press the fold gently to create a crease. Then, fold it in half again, perpendicular to your first fold, resulting in a smaller square. Press this second fold. Finally, fold this smaller square diagonally, creating a precise triangle. This meticulous folding ensures symmetry for your flower design. Now, retrieve your printed flower petal pattern. Position the pattern on the folded corner of your fabric triangle—the corner where all the original raw edges and folds meet. Carefully cut around the pattern using your sharp fabric scissors. Take your time to achieve a smooth, even curve. Once cut, unfold the fabric to reveal your perfectly symmetrical four-petal flower shape. Set this piece aside.
Step 2: Cutting the Inner Fabric and Initial Assembly
Repeat the exact same folding and cutting process from Step 1 with your 16.5-inch x 16.5-inch inner fabric square. Precision here is just as important to ensure your lining matches the outer fabric perfectly. Once cut and unfolded, you will have a second identical four-petal fabric flower. Now, lay your inner fabric flower flat on your work surface with its ‘right side’ (the side you want visible on the inside of the finished pouch) facing upwards. Carefully place the outer fabric flower on top of the inner fabric, ensuring their ‘right sides’ are facing each other (right sides together). Align all the edges and corners of the petals as accurately as possible. Use plenty of pins or fabric clips to secure the two layers together, especially around the curved edges of each petal, preventing any shifting during sewing.
Step 3: Sewing the Petal Curves
With the outer and inner fabric layers pinned together, it’s time to sew the curved edges of the four petals. Using your sewing machine, stitch around the curved perimeter of each of the four petals, leaving the straight edges at the base of the petals unstitched for now. Use a consistent seam allowance, typically around 1/4 inch (6mm) from the raw edge. Start and end each seam with a backstitch to secure the threads. When sewing curves, go slowly and steadily, gently pivoting the fabric as needed to follow the curve smoothly. This careful approach will result in beautifully rounded petals. Remember to only sew the outer curved edges, leaving the inner parts of the petals open.
Step 4: Forming the Pouch and Finishing the Seams
After sewing the curved edges of the petals, gently pull the fabric at the corner where two petals meet, flattening the seam allowances and bringing the two straight edges of adjacent petals together. This action will create a new straight seam line. Pin these straight edges securely. Repeat this process for all four corners, effectively forming the structured base of your pouch. Now, sew these four new straight seams. It’s crucial, however, to leave a small opening—about 1.5 to 2 inches—unstitched in just ONE of these four corners. This opening will be used to turn the pouch right side out. Before turning, carefully trim the seam allowances at the tips of the petals to reduce bulk and ensure a crisp point when turned. You can also clip curves or notch the inner curves. Then, gently reach into the unstitched opening and pull the entire pouch right side out. Carefully push out all the corners and curves with a point turner or a blunt object to achieve neat, defined petal shapes. Finally, use an iron to press all seams flat. Close the opening you left for turning with a neat topstitch or an invisible hand stitch (ladder stitch) for a professional finish. This step is critical for the pouch’s final structure and appearance.
Step 5: Topstitching the Petals and Creating the Drawstring Casing
With the pouch turned right side out and the opening sewn closed, it’s time to add some finishing details. First, topstitch around the outer edges of each of the four petals, approximately 1/8 inch (3mm) from the edge. Topstitching not only gives a professional, finished look but also helps the petals maintain their shape and adds durability. Next, prepare the channels for your drawstrings. Fold each petal outward, creating a small hem or casing. The measurement for this fold is crucial for your cord; fold approximately 0.8 inches (2 cm) from the top edge of each petal. The exact measurement can be adjusted slightly based on the thickness of your chosen cord. Pin these folds in place evenly around all four petals. Then, stitch along the folded edge, creating a continuous channel or casing on each petal. Ensure the stitch line is parallel to the top edge and wide enough for your cord to pass through easily. This will form the pathway for your drawstrings.
Step 6: Inserting the Cords and Adding Beads
This is the final step where your flower drawstring pouch comes to life! Take one of your 17.7-inch cords. Attach a safety pin to one end of the cord; this will act as a guide. Thread the cord through the casing of the first petal, then through the next, and continue all the way around all four petals, ensuring it emerges from the casing of the first petal where you started. Remove the safety pin. Now, take both ends of this cord and thread them through two of your wooden beads. Tie a secure knot at the end of each cord, below the beads, to keep them in place and prevent fraying. For the second cord, repeat the threading process. However, this time, start threading from the opposite corner or petal, weaving it through all four casings so that it emerges from its starting point. This creates the double-drawstring mechanism. Thread the remaining two wooden beads onto these cord ends and tie secure knots. Give both sets of drawstrings a gentle tug to gather the pouch, admiring your completed DIY flower drawstring pouch!
Tips for a Flawless Finish
- Pressing is Your Friend: Use an iron at every stage to press seams flat and set folds. This makes a huge difference in the crispness and professional appearance of your finished pouch.
- Sharp Scissors & Needles: Always use sharp fabric scissors for clean cuts. A fresh sewing machine needle will prevent snags and skipped stitches.
- Test Your Stitch: Before sewing on your actual project, always test your stitch length and tension on a scrap piece of your chosen fabric.
- Go Slow on Curves: When sewing curves, reduce your sewing machine’s speed. This gives you more control and helps achieve a smoother, more even curve.
- Trim & Clip Seams: Trimming seam allowances, especially on curves and points, reduces bulk and allows the fabric to lay flatter when turned right side out. Clipping into concave curves and notching convex curves helps the fabric spread or contract smoothly.
- Use a Point Turner: A point turner or a knitting needle can be invaluable for pushing out corners and curves neatly after turning your pouch right side out.
Customization Ideas for Your Drawstring Pouch
Once you’ve mastered the basic flower drawstring pouch, consider these ideas to personalize your creations:
- Fabric Play: Experiment with different fabric combinations. A vibrant floral outer fabric with a solid contrasting lining, or a subtle geometric print with a bold inner color. Consider using denim scraps for a more robust pouch, or silk for a luxurious feel.
- Embellishments: Add embroidery, fabric paint, iron-on patches, or appliques to the petals for extra flair. Small buttons or charms could also be sewn onto the center or edges.
- Size Variations: Adjust the initial fabric square dimensions to create pouches of different sizes – a tiny one for earrings, a larger one for glasses, or even a very large one for a project bag. Remember to adjust the cord length proportionally.
- Drawstring Alternatives: Instead of simple cords, try braided fabric strips, decorative ribbons, or even crochet chains.
- Bead Choices: Explore different types of beads – glass, metal, ceramic, or even handmade polymer clay beads – to match your pouch’s aesthetic.
- Internal Pockets: For a more organized pouch, consider adding a small slip pocket to the lining before assembling the pouch.
Caring for Your Handmade Pouch
The care instructions for your flower drawstring pouch will primarily depend on the fabric choices you made. For most cotton pouches, a gentle machine wash in cold water with similar colors is appropriate. Tumble dry on low or air dry to prevent shrinkage and maintain fabric integrity. If you’ve used delicate fabrics like silk or added intricate embellishments, hand washing and air drying might be necessary. Always iron on a low to medium setting, avoiding any embellishments that might melt or get damaged by heat. Proper care will ensure your beautiful handmade pouch lasts for years to come, continuing to bring joy and functionality.
This DIY tutorial truly showcases the magic of transforming simple fabric scraps into a cherished, functional item. We highly recommend exploring more creative projects by following and supporting Fafa DIY on Youtube. Their channel is a treasure trove of inspiring and approachable sewing tutorials for every skill level. Happy crafting!