
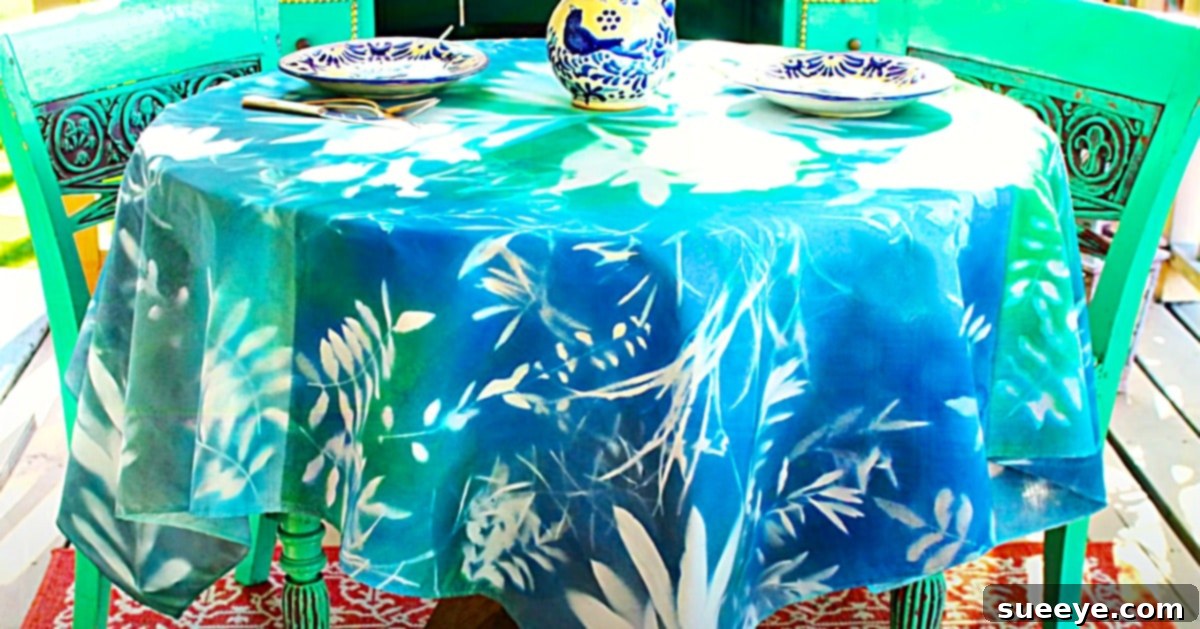
DIY Fall Foliage Tablecloth: Transform Your Home with Natural Autumn Decor
As the vibrant hues of summer gracefully recede, a crisp, invigorating breeze signals the arrival of autumn. For many, this seasonal transition brings a deep sense of relief and a renewed desire to embrace the cozy warmth of fall. The longer nights and cooler temperatures invite us to gather indoors, making it the perfect time to infuse our living spaces with the comforting essence of the season. I, for one, am absolutely thrilled to bid farewell to the long, hot summer days and dive headfirst into curating an inviting autumn atmosphere.
My internet searches have been buzzing with inspiring ideas for awesome fall decor, aiming to help my family transition into this beautiful season with a refreshed mindset. During one of these delightful explorations, I stumbled upon an absolutely gorgeous tablecloth video tutorial by the talented Mark Montano on YouTube. This discovery instantly sparked my creative spirit, and I couldn’t wait to recreate this stunning piece of home decor. This DIY fall foliage tablecloth isn’t just another craft; it’s a brilliant way to bring the captivating beauty of nature directly to your dining or living area, offering a unique blend of artistry and natural charm.
Why a DIY Fall Foliage Tablecloth? Elevating Your Autumn Ambiance
A beautifully designed tablecloth does more than just protect your furniture; it serves as a foundational element for your room’s aesthetic, instantly elevating the entire space. This specific fall foliage tablecloth, crafted with natural elements, promises to give any room a delightful pop of seasonal color and transform even the plainest table into a captivating focal point. Beyond its immediate visual appeal, there’s a subtle magic that tablecloths weave, especially when it comes to dining. Imagine setting a humble, everyday dish on a table adorned with this vibrant, nature-inspired cloth – suddenly, your meal looks significantly more appetizing and inviting. It adds a touch of sophistication and care that enhances the overall dining experience for you and your guests.
Moreover, embracing a DIY project like this offers numerous advantages. It’s a wonderful opportunity to personalize your home decor, ensuring that your space truly reflects your taste and personality. Unlike mass-produced items, a handmade tablecloth carries a unique story and an undeniable charm. It’s also an incredibly cost-effective way to refresh your seasonal decor, utilizing readily available materials and your own creativity. This project is perfect for anyone looking to add a bespoke, elegant touch to their autumn home without breaking the bank. It brings the outdoors in, celebrating the rich textures and colors of fall foliage in a sophisticated and artistic manner.
Materials For Your Enchanting Fall Foliage Tablecloth:
Gathering your materials is the first exciting step in bringing this beautiful vision to life. The beauty of this project lies in its simplicity and the use of natural, easily accessible components. Here’s what you’ll need to create your stunning fall foliage tablecloth:
- Freshly Gathered Branches and Twigs: Explore your garden, backyard, or local park (with permission, if necessary!) for an assortment of leaves, branches, and small twigs. Look for a variety of shapes and sizes to create a dynamic and interesting design. Leaves with distinct vein patterns will create the most striking prints.
- Two Pieces of Sturdy Wood or Heavy Books: These will be used to create a makeshift press, essential for flattening your collected foliage. Ensure the pieces are large enough to comfortably sandwich your branches and leaves without them sticking out. Plywood or thick cutting boards work wonderfully, as do several heavy encyclopedias or coffee table books.
- Craft Fabric Paint: Choose your desired autumn color palette. Traditional fall colors like deep reds, burnt oranges, golden yellows, and forest greens are popular, but don’t hesitate to experiment with metallics or muted tones for a modern twist. Ensure the paint is specifically labeled for fabric to ensure durability and washability.
- Small Spray Bottles (for paint application): These are crucial for achieving the delicate, ethereal spray effect that mimics natural shadows. You’ll need one spray bottle per paint color you plan to use. Clean, empty household spray bottles (like those for misting plants) can be repurposed, just ensure they’re thoroughly cleaned.
- A Plain Tablecloth: Select a tablecloth in a solid, light color (white, cream, light grey, or even a pale natural linen) to serve as your canvas. Natural fibers like cotton or linen work best as they absorb fabric paint beautifully. Consider the size of your table and choose a tablecloth that drapes elegantly.
Directions: Crafting Your Unique Autumn Masterpiece
Embarking on this creative journey is both relaxing and rewarding. This step-by-step guide, inspired by Mark Montano’s ingenious technique, will walk you through the process of creating a breathtaking piece of Autumn home decor. For a visual demonstration, I highly recommend watching Mark Montano’s detailed video tutorial on YouTube.
Step 1: Gathering and Preparing Your Natural Elements
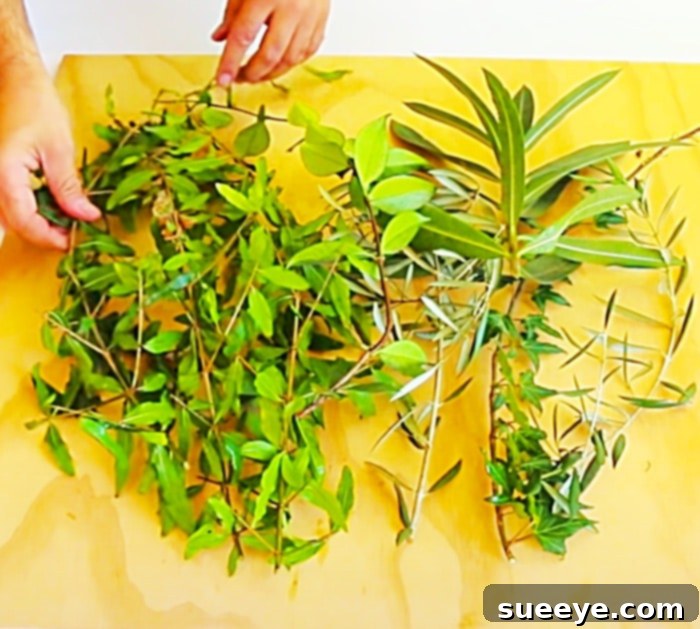
Begin by venturing outdoors to collect an array of beautiful fall foliage. Seek out leaves and small, thin branches or twigs that have interesting shapes and textures. The more varied your collection, the more dynamic and organic your final design will appear. Once you have a sufficient amount, the crucial next step is to press them. To do this, carefully arrange your collected vines, leaves, and branches between your two pieces of wood or within the pages of several heavy books. The goal is to flatten them completely, removing any moisture and ensuring they lie perfectly flat. This pressing process is vital for creating crisp, clear prints later on. Leave them pressed for at least 24-48 hours, or even longer for thicker pieces, to ensure they are thoroughly flattened and somewhat dried.
Step 2: Setting Up Your Workspace and Preparing the Tablecloth
Once your foliage is pressed and ready, prepare your workspace. Choose a well-ventilated area, preferably outdoors or in a garage, to prevent inhaling paint fumes. Lay down a large drop cloth, old newspapers, or a plastic sheet to protect your surfaces from overspray. Unfold your plain tablecloth and smooth it out over your protected work area, ensuring there are no wrinkles or creases that could distort your design. If your tablecloth is new, a quick wash and iron before starting can help with paint absorption and a smoother finish.
Step 3: Preparing Your Fabric Paints
Pour your chosen fabric paints into the small spray bottles. If the paint is very thick, you might need to dilute it slightly with a tiny amount of water (check the paint manufacturer’s instructions for appropriate dilution ratios) to ensure it sprays easily and finely. Test each spray bottle on a scrap piece of fabric or paper to check the consistency and spray pattern. You want a fine mist, not heavy splatters.
Step 4: Arranging the Foliage on the Tablecloth
Now for the artistic part! Carefully arrange your flattened leaves and branches onto the surface of your tablecloth. Experiment with different layouts. You can create a dense, overlapping pattern for a rich, textured look, or space them out for a more minimalist and elegant design. Consider creating a central motif, a border, or scattering them randomly. Play with the orientation of the leaves – some face up, some face down – to add visual interest. Take your time with this step, as the arrangement directly impacts the final aesthetic of your tablecloth.
Step 5: Applying the Fabric Paint
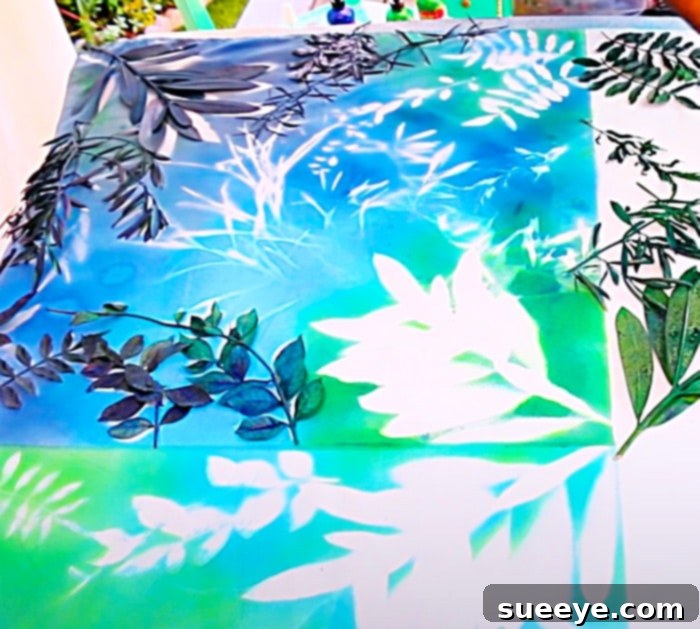
Once you are satisfied with your arrangement, it’s time to apply the paint. Holding the spray bottle about 6-12 inches (15-30 cm) away from the tablecloth, gently and evenly mist the paint over the foliage. The paint will settle around the edges of the leaves and branches, creating a beautiful silhouette effect. You can use a single color for a classic look or layer different fall colors for a multi-dimensional, vibrant outcome. For instance, start with a light base color, then add touches of darker shades to create depth. Be careful not to oversaturate the fabric; a light, even coat is usually sufficient. Allow each color layer to dry slightly before adding another, especially if you are layering colors, to prevent bleeding.
Step 6: Revealing Your Masterpiece and Drying
After you have applied all your desired paint colors and they have set slightly (they don’t need to be completely dry, just not wet enough to smear), carefully remove the leaves and branches from the tablecloth. Lift them gently, one by one, to reveal the stunning natural prints underneath. The result will be a collection of intricate, organic patterns that capture the essence of fall. Be prepared to be amazed by the detail and beauty of the foliage imprints! Once all the foliage is removed, allow the tablecloth to air dry completely for several hours, or even overnight, in a clean, dust-free environment. Ensure it is fully dry before moving on to the final step.
Step 7: Curing the Fabric Paint (Heat Setting)
To make your beautiful DIY fall foliage tablecloth permanent and washable, you must cure or “heat set” the fabric paint. Most fabric paints require heat setting to bond properly with the fibers. This typically involves ironing the painted areas with a dry iron on a medium-high setting (without steam) for a few minutes on each section, or placing the tablecloth in a dryer on high heat for a specified duration. Always refer to the specific instructions on your fabric paint bottle for the most accurate curing method and temperature. Once cured, your tablecloth will be ready to withstand gentle washing and bring joy for many seasons to come.
Creative Variations and Care Tips for Your Fall Tablecloth
The beauty of DIY projects lies in their endless potential for personalization. While a fall foliage tablecloth is perfect for autumn, you can adapt this technique for any season! Imagine using delicate spring blossoms for a pastel-themed Easter tablecloth, or bold tropical leaves for a summer outdoor gathering. Experiment with different types of fabric paint—glitter, metallic, or even glow-in-the-dark options for a playful touch. Consider making matching placemats or napkins to complete your dining set. You could also incorporate stenciled words or simple line drawings for added detail, or use fabric markers to outline some of the leaf patterns for a more defined look.
To ensure your handcrafted tablecloth remains beautiful for years, always wash it gently. Use a mild detergent, cold water, and a delicate cycle, or hand wash if possible. Air drying is often best, or tumble dry on a low setting. Avoid harsh bleaches or strong stain removers that could damage the paintwork. With proper care, this gorgeous and unique tablecloth will become a cherished part of your seasonal decor, bringing the enchanting spirit of fall into your home year after year.
The Joy of Handmade Decor: A Personal Touch for Every Season
There’s an undeniable satisfaction that comes with creating something beautiful with your own hands. This DIY fall foliage tablecloth is more than just a decorative item; it’s a labor of love that infuses your home with personal warmth and character. In a world saturated with mass-produced goods, a handmade piece stands out, telling a story and radiating a unique charm. The process itself offers a wonderful opportunity for creative expression, a chance to slow down, connect with nature, and engage in a fulfilling activity.
This tablecloth is not just gorgeous, but also incredibly fun to make! It’s an excellent project for a solo crafting session, a relaxing afternoon with friends, or a delightful family activity that even younger members can assist with (under supervision, of course, especially with spray paint). The anticipation of peeling back the foliage to reveal the intricate prints is truly magical. So, why not embrace the spirit of autumn and embark on this wonderful DIY journey? Transform a simple piece of fabric into a stunning centerpiece that captures the very essence of the season, making your home feel cozier and more inviting than ever before. Go ahead, watch Mark Montano’s tutorial, gather your supplies, and create a masterpiece that celebrates the beauty of fall!