
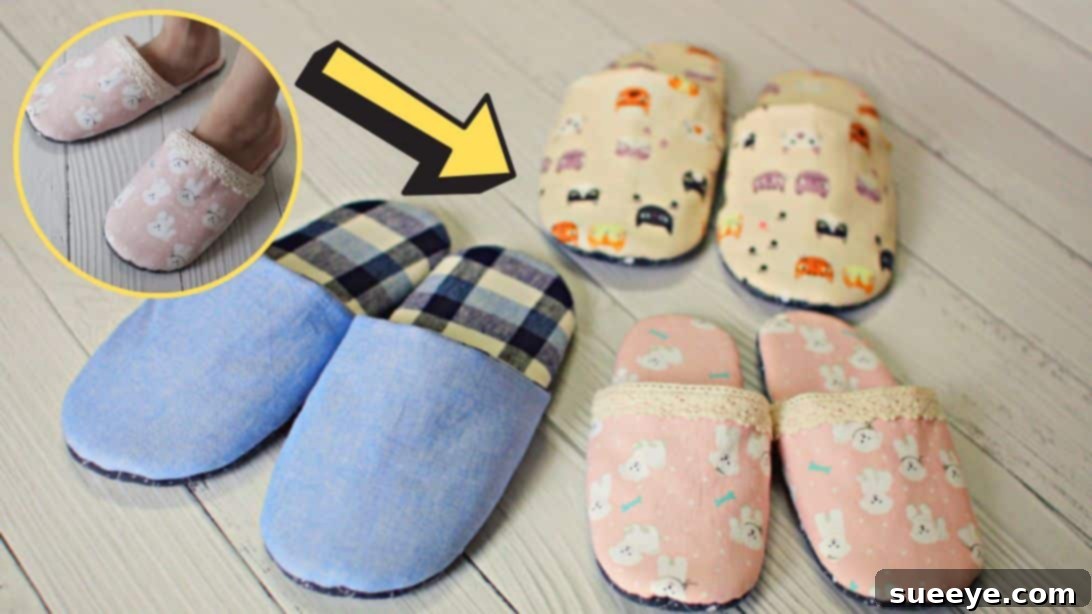
Mastering the Art of DIY Fabric Slippers: A Comprehensive Sewing Tutorial for Ultimate Comfort
Do you have a passion for sewing and a stash of beautiful fabric waiting for its next purpose? If so, you’re in for a treat! This delightful sewing project, inspired by the creative genius of made by JOJO on YouTube, will guide you through creating your very own incredibly comfortable and stylish fabric slippers. Forget generic store-bought options; these homemade wonders are not only significantly more affordable but also offer a level of personalized comfort that mass-produced slippers simply can’t match. Imagine slipping your feet into a pair of soft, cozy slippers made exactly to your liking – a true luxury crafted with your own hands.
Whether you’re looking for a relaxing weekend project, a thoughtful handmade gift, or simply a way to utilize your fabric scraps, this DIY fabric slipper tutorial is perfect. We’ll break down each step, making the process clear and enjoyable, even for those new to sewing. Get ready to transform ordinary fabric into extraordinary footwear!
Why Sew Your Own Fabric Slippers?
The appeal of crafting your own pair of slippers extends far beyond the simple act of sewing. Here are several compelling reasons why this project is a must-try for any craft enthusiast:
- Unbeatable Comfort and Fit: Store-bought slippers often come in limited sizes and materials, rarely offering that perfect, custom fit. By making your own, you can choose fabrics that are soft against your skin, provide optimal cushioning, and conform perfectly to your foot’s unique shape.
- Cost-Effective Crafting: High-quality slippers can be surprisingly expensive. This DIY project allows you to create superior footwear using fabrics you might already have or can purchase affordably, saving you money in the long run.
- Personalized Style: Express your individuality! With an endless array of fabric choices, you can design slippers that perfectly match your pajamas, home decor, or personal style. From vibrant patterns to subtle neutrals, the design possibilities are limitless.
- Eco-Friendly Fabric Utilization: This project is fantastic for using up leftover fabric scraps and remnants from other projects. It’s a wonderful way to reduce waste and give new life to materials that might otherwise go unused.
- The Joy of Handmade Gifts: A pair of handmade slippers makes an incredibly thoughtful and personal gift for friends, family, or loved ones. The effort and care you put into creating them will surely be appreciated.
- Enhanced Durability (with non-slip): By carefully selecting your materials, especially the non-slip sole fabric, you can create slippers that are not only comfortable but also more durable and safer than many commercial alternatives.
Essential Materials for Your DIY Fabric Slippers
Before diving into the sewing process, gather all your materials. Having everything ready will ensure a smooth and enjoyable crafting experience.
- Quilted Batting Fabric (Middle Layer for Sole & Toe Cover): This provides the plush cushioning and structure for your slippers. You’ll need two pieces for the sole and one for the toe cover. Choose a medium-loft batting for a good balance of comfort and stability.
- Quilted Non-Slip Fabric (Sole Bottom): Crucial for safety, this fabric will form the bottom of your slipper sole, preventing slips and falls. Look for options with rubberized dots or a textured surface.
- Linen Fabric (Outer Sole & Toe Cover Lining): Linen offers a lovely texture and durability. It will be used for the outer fabric of the sole and as the lining for the toe cover. You can substitute with other sturdy woven fabrics like canvas or twill.
- Cotton Fabric (Outer Toe Cover): Ideal for the visible outer part of the toe cover, cotton is soft, breathable, and comes in countless patterns. Choose a design that speaks to your style!
- Fabric Pins or Clips: Essential for holding your fabric layers securely in place during sewing. Clips are especially helpful for thicker fabrics.
- Fabric Marking Pen or Chalk: For transferring pattern markings and guiding your stitching lines.
- Sharp Fabric Scissors: Precision cutting is key for a professional finish.
- Hand Sewing Needle and Thread: For closing the final opening, matching your fabric color.
- Sewing Machine: A standard sewing machine with a walking foot (optional but helpful for quilting) will make quick work of this project.
- Slipper Pattern: The foundation of your slippers! Click here to download the free pattern provided by made by JOJO. Remember to print it at 100% scale and verify the test square if included. This pattern typically includes multiple sizes, ensuring a perfect fit.
Step-by-Step Directions: Crafting Your Cozy Fabric Slippers
Follow these detailed instructions to construct your beautiful and comfortable fabric slippers. Take your time with each step, and don’t hesitate to refer to the original video tutorial by made by JOJO for visual guidance.
Step 1: Preparing Your Pattern and Cutting Fabric Pieces
The journey to your custom slippers begins with accurate pattern preparation and precise fabric cutting. This foundational step ensures all subsequent stages flow smoothly.
- Print and Cut the Pattern: Begin by downloading and printing the free slipper pattern. Ensure your printer settings are at 100% scale to maintain the correct dimensions. Carefully cut out the desired slipper size from the printed pattern sheets.
- Add Seam Allowance: The provided pattern pieces typically represent the finished size. You’ll need to add a seam allowance of approximately 3/8 inch (about 1 cm) around all edges of each pattern piece before cutting your fabric. This extra margin is crucial for assembly.
- Prepare Sole Fabric Layers: For each slipper sole, you will need four distinct layers:
- One piece of linen (or chosen outer sole fabric) for the top surface of the sole.
- Two pieces of quilted batting to provide softness and structure for the middle of the sole.
- One piece of quilted non-slip fabric for the very bottom of the sole, ensuring grip.
- Prepare Toe Cover (Vamp) Fabric Layers: For each slipper’s toe cover (also known as the vamp), gather three layers:
- One piece of cotton (or chosen outer toe cover fabric) for the visible exterior.
- One piece of linen (or chosen lining fabric) for the interior lining of the toe cover.
- One piece of quilted batting for the soft, cushioned middle layer of the toe cover.
Step 2: Constructing the Slipper Vamp (Toe Cover)
The toe cover is the first major component you’ll assemble. This section involves layering, sewing, and turning to create a neat, cushioned piece.
- Layering the Vamp Fabrics: Take your three toe cover pieces. Start with the quilted batting at the bottom. Place the outer cotton fabric on top of the batting, ensuring its “right side” (the decorative side) is facing upwards. Finally, place the linen lining fabric on top, with its “right side” facing down, so the two right sides of the cotton and linen are facing each other.
- Secure and Sew the Bottom Edge: Align the straight bottom edges of these three layered fabrics. Use fabric clips or pins to hold them securely in place. Stitch along this straight bottom edge using a 3/8-inch seam allowance.
- Trim and Reduce Bulk: After sewing, carefully trim the seam allowance as close to the stitching as possible, without cutting the stitches. This helps to reduce bulk. For the curved upper edge, trim the seam allowance to about 1/4 inch.
- Turn and Press: Turn the inner lining fabric over so that the right sides of the outer cotton and linen lining are now facing outwards, and the batting is neatly sandwiched between them. Press the bottom seam nicely with your fingers or an iron to create a crisp edge.
- Topstitch the Curve: Clip or pin the curved edges of the toe cover to hold the layers together. Stitch along this curved edge with a 1/4-inch seam allowance. This not only secures the layers but also gives the toe cover a finished look. Trim any excess fabric neatly.
Step 3: Preparing the Slipper Sole
With the vamp ready, our focus shifts to preparing the sole, which will provide the foundation for the entire slipper.
- Layering the Sole Fabrics: Take your two pieces of quilted batting for the sole and lay them at the bottom. Place the outer linen fabric (the one that will be visible on the top of your foot when wearing the slipper) on top of the batting, with its “right side” facing down. This means the wrong side of the linen will be facing you.
- Secure and Sew the Outer Edge: Pin or clip these three layers (two batting, one outer sole fabric) together around their entire outer edge. Sew along this outer perimeter using a 1/4-inch seam allowance.
- Trim Excess Batting: After stitching, carefully trim away any excess batting that extends beyond your stitching line. This reduces bulk and creates a neater edge.
- Mark the Midpoint: To ensure proper alignment with the vamp, fold the sole piece in half lengthwise. Mark the midpoint at the toe and heel ends with your fabric marking pen. This mark will be essential in the next step.
Step 4: Joining the Vamp to the Sole
Now it’s time to bring the two main slipper components together, forming the basic shape of your slipper.
- Find the Vamp Midpoint: Take your finished toe cover (vamp) piece, fold it in half, and mark its midpoint at the bottom edge.
- Match Midpoints and Attach Vamp: Align the midpoint mark of the vamp with the midpoint mark at the toe end of the sole piece. Pin or clip them together, ensuring that the “right side” of the vamp is facing the “right side” of the sole’s outer fabric.
- Continue Pinning Edges: Gently curve the vamp around the front of the sole, matching the raw edges of the rest of the pieces. Continue pinning or clipping them securely, making sure the right sides remain facing each other.
- Sew the Vamp to the Sole: Carefully sew the vamp to the sole around the curved edge where they meet, using a 1/4-inch seam allowance. Go slowly, especially around the curves, to maintain a smooth line.
Step 5: Attaching the Non-Slip Sole and Finishing Touches
The final sewing step involves adding the crucial non-slip bottom and preparing the slipper for its ultimate reveal.
- Prepare for Non-Slip Fabric: Once the vamp is sewn to the sole, fold the fabric of the toe/vamp down and flat against the sole. This will help keep it out of the way for the next step.
- Position the Non-Slip Fabric: Take your quilted non-slip fabric piece. Place it on top of the entire slipper assembly (sole with attached vamp), aligning all the outer edges perfectly. Ensure the “right side” of the non-slip fabric is facing down, towards the outer sole fabric.
- Sew the Outer Edge (Leave Gap): Pin or clip all the layers together around the entire outer perimeter of the slipper. Stitch around this edge with a 3/8-inch seam allowance. Crucially, remember to leave a 4-inch gap unstitched along one of the straighter sides (like the arch area) of the slipper. This opening is vital for turning the slipper right side out.
- Trim Excess and Clip Curves: Trim away any excess fabric close to your stitching line, especially around the curves, to ensure a smooth finish when turned. Clip small notches into the seam allowance around all curved sections (without cutting into the stitches). This will help the curves lay flat.
- Turn Right Side Out: Gently reach through the 4-inch gap you left and carefully pull the entire slipper right side out. Take your time to push out all the seams and curves with a point turner or blunt object to achieve a nice shape.
- Hand Sew the Opening: Once the slipper is fully turned out and shaped, neatly hand sew the remaining opening closed using a ladder stitch or invisible stitch. This will create a clean, seamless finish.
- Admire Your Work! Your custom-made, incredibly comfortable fabric slippers are now complete! Repeat the entire process for the second slipper, and get ready to enjoy handmade comfort.
Tips for Perfect Slipper Making
To ensure your DIY fabric slippers are not just comfortable but also beautifully crafted and durable, consider these expert tips:
- Fabric Pre-Washing: Always pre-wash and dry your fabrics before cutting. This prevents potential shrinkage after your slippers are finished.
- Use a Walking Foot: If your sewing machine has a walking foot attachment, use it! It’s incredibly helpful when sewing multiple layers of fabric, especially quilted materials, as it helps feed them evenly.
- Clip Curves Generously: Don’t shy away from clipping notches into your seam allowances on curved edges. This allows the fabric to spread and lie flat when turned right side out, preventing puckering.
- Pressing is Key: Pressing seams open or to one side with an iron after stitching helps create crisp, professional-looking finishes.
- Test Stitches: Always test your stitch length and tension on a scrap piece of your layered fabrics before sewing the actual slipper components.
- Reinforce Stress Points: Backstitch at the beginning and end of each seam, especially where the vamp joins the sole, for added durability.
- Personalize and Embellish: Once you’ve mastered the basic slipper, consider adding embroidered details, fabric appliques, or decorative stitching to make them truly unique.
Caring for Your Handmade Slippers
To keep your custom fabric slippers looking and feeling fresh, proper care is important:
- Gentle Washing: Machine wash on a gentle cycle with cold water using a mild detergent. For best results, place them in a mesh laundry bag to protect them.
- Air Dry Recommended: Avoid tumble drying, as high heat can damage the batting and potentially the non-slip sole. Instead, reshape the slippers and allow them to air dry thoroughly.
- Spot Cleaning: For small spills or dirt, spot clean with a damp cloth and mild soap.
Frequently Asked Questions (FAQs)
What type of fabric is best for DIY fabric slippers?
For ultimate comfort, soft woven cottons, flannels, or even fleece are excellent choices for the outer and lining fabrics. For the sole, a durable linen or canvas works well, paired with a dedicated non-slip fabric for the bottom.
Can I make these slippers without a sewing machine?
While a sewing machine makes the process much faster and easier, it is possible to hand sew these slippers using strong, durable stitches like a backstitch. However, it will require significantly more time and patience.
How do I choose the right size from the pattern?
The free pattern typically includes a size chart that corresponds to standard shoe sizes. Measure your foot length from heel to toe and compare it to the chart to select the most appropriate size. If you’re between sizes, it’s often better to go up one size.
Can I use a different type of batting?
Yes, you can experiment with different types of batting. Polyester batting offers good resilience and cushioning, while cotton batting can provide a flatter, firmer feel. Just ensure it’s suitable for sewing and can be layered effectively.
How long does this project typically take?
For an experienced sewer, a single pair of slippers might take 2-3 hours. For beginners, it could take 4-6 hours or more for the first pair, as you get accustomed to the steps and techniques. Remember, taking your time often leads to better results!
Embark on Your Next Sewing Adventure
There’s immense satisfaction in creating something beautiful and functional with your own hands, and these DIY fabric slippers are no exception. This comprehensive tutorial, building upon the wonderful inspiration from made by JOJO, empowers you to craft personalized, ultra-comfortable footwear that beats any store-bought option. You’ve not only honed your sewing skills but also created a cozy haven for your feet.
So, gather your fabrics, fire up your sewing machine, and prepare to step into a world of handmade comfort. We encourage you to share your creations and inspire others to embark on this rewarding sewing journey. Happy stitching!
*All image credit belongs to made by JOJO via YouTube. Follow and subscribe to her channel for more fantastic sewing tutorials and creative ideas!