
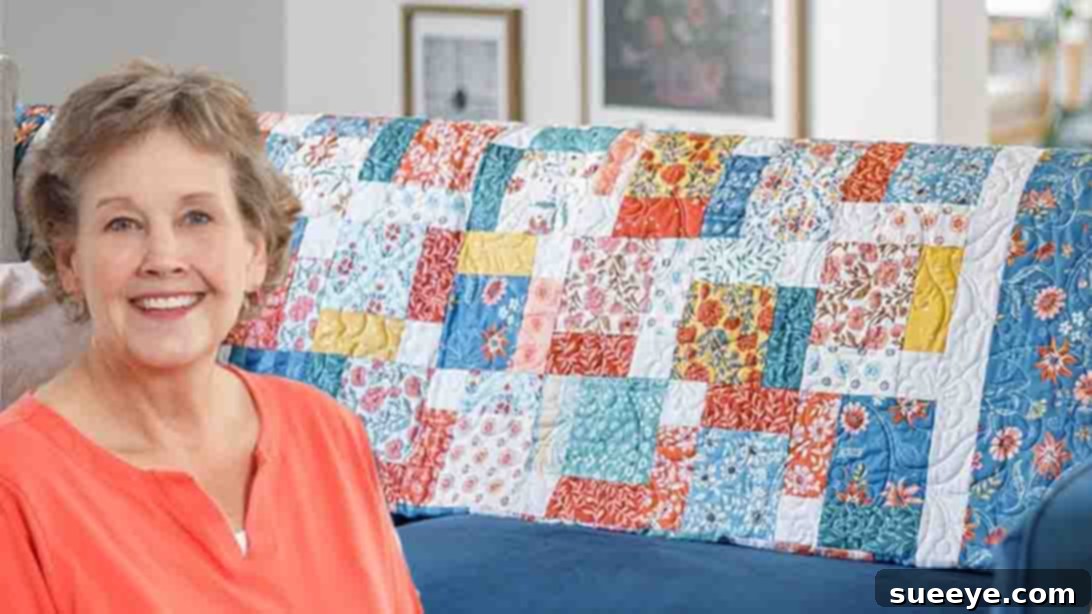
Master the Dressed to the Nines Quilt: A Stunning Beginner-Friendly Charm Pack Project
Are you searching for your next quilting project, something that looks intricate but is surprisingly simple to create? Look no further! The enchanting Dressed to the Nines Quilt, brought to you by the expert quilters at Missouri Star, is an absolute gem. This project initially might appear complex, a masterpiece of design, yet it stands out as one of the most straightforward and satisfying quilts you’ll ever undertake. It’s a brilliant rendition of the beloved disappearing nine-patch technique, perfectly suited for utilizing those delightful charm packs you’ve been collecting. If your stash boasts a treasure trove of 5-inch fabric squares just waiting for the ideal creative outlet, then this is truly the project you’ve been dreaming of.
The beauty of this Missouri Star quilt lies in its accessibility. It’s not just easy to make; it’s tailor-made for quilters of all skill levels, especially beginners. You won’t need advanced techniques or years of experience to achieve spectacular results. In fact, it’s an excellent opportunity to practice and refine your foundational quilting skills, such as precise cutting, consistent seam allowances, and accurate pressing. Imagine turning a stack of charming fabrics into a beautiful, personalized quilt that looks like it took weeks of intricate work, all in a fraction of the time. Why wait? Gather your favorite charm packs and embark on this rewarding quilting journey today! To guide you every step of the way, you can watch the comprehensive video tutorial below, or simply continue reading for detailed written instructions.
Why the Dressed to the Nines Quilt is Your Next Must-Make Project
This exquisite quilt pattern offers numerous benefits that make it an ideal choice for any quilter:
- Beginner-Friendly Design: Despite its sophisticated appearance, the construction relies on basic sewing techniques, making it perfect for those new to quilting.
- Clever Use of Charm Packs: It’s an ingenious way to bust through your charm pack stash, transforming those pre-cut bundles into a cohesive and stunning quilt.
- Quick Assembly: The disappearing nine-patch method allows for rapid block creation, speeding up the overall quilting process.
- Stunning Visual Effect: The rotation of the cut blocks creates an intriguing secondary pattern that adds depth and visual interest, making it appear far more complicated than it is.
- Skill Practice: A fantastic project to hone your cutting, piecing, and pressing skills, building confidence with every stitch.
- Customization Potential: Easily adaptable to different color schemes and fabric themes, allowing for endless personalization.
Getting Started: What You’ll Need
To embark on your Dressed to the Nines Quilt adventure, gather the following materials. Having everything prepared before you start will ensure a smooth and enjoyable crafting experience:
- 4 packages of 5″ print squares: These are your charm packs! Each pack typically contains 42 squares, so four packages will give you ample variety and quantity for your quilt blocks.
- 1 yard of accent fabric: This fabric will be used for the center square of each nine-patch block, providing a crucial contrast or complementary color, and also for the inner border.
- 1 1/4 yards of outer border fabric: This larger border fabric will frame your quilt beautifully, adding dimension and a finishing touch.
- 3/4 yard of binding fabric: Binding is essential for finishing the edges of your quilt, providing durability and a professional look.
- 5 yards of vertical seam backing fabric (or 2 1/4 yards of 108″ wide backing): This is for the back of your quilt. The wider option minimizes seams, while the standard width will require a vertical seam down the middle.
- Batting: (Not listed, but essential for a quilt) You will need a piece of batting roughly 71″ x 84″ to go between your quilt top and backing.
- Basic Quilting Supplies: A sewing machine, rotary cutter, cutting mat, quilting ruler, iron, ironing board, pins, and thread.
Step-by-Step Guide to Crafting Your Dressed to the Nines Quilt
Step 1: Crafting the Disappearing Nine-Patch Blocks
The magic of the Dressed to the Nines Quilt begins with creating the individual blocks, which are based on the clever disappearing nine-patch technique. This method transforms a simple 3×3 grid into an intricate design with just a few cuts and rotations.
- Select and Arrange Your Squares: From your charm packs, choose eight distinct print squares. For the center, select one accent square. This accent square is key to the “disappearing” effect, so choose a fabric that either contrasts sharply or harmonizes beautifully with your print squares. Lay these nine squares out on a flat surface in a 3×3 grid, just like a traditional nine-patch block. Ensure you’re happy with the arrangement and how the colors and patterns interact.
- Sew the Nine-Patch: Once satisfied with your layout, sew the squares together in three rows. Use a consistent 1/4-inch seam allowance throughout your project for accurate piecing. After sewing each row, press the seams. For the first and third rows, press the seams in one direction (e.g., to the right). For the middle row, press the seams in the opposite direction (e.g., to the left). This will allow your seams to nest beautifully when you join the rows.
- Join the Rows: Now, sew the three rows together to form your complete nine-patch block. Carefully align the seams to ensure your points meet cleanly. Again, press these seams nicely. You can press them open or to one side, whichever you prefer for flatter results.
- Make the “Disappearing” Cuts: This is where the magic happens! Take your finished nine-patch block and lay it flat. Using your rotary cutter and a long ruler, make two cuts: one horizontally through the exact middle of the block, and one vertically through the exact middle. You should now have four equal smaller squares.
- Rotate and Rearrange: With your four new squares, rotate the upper right square 90 degrees clockwise. Similarly, rotate the bottom left square 90 degrees clockwise. Observe how this simple rotation instantly creates a striking new pattern, revealing the “dressed to the nines” design. The original nine-patch has seemingly disappeared, giving way to a more complex layout.
- Sew the Block Together: Sew these four rotated squares back together to form a larger, transformed block. Treat these four sections as a new 2×2 grid. Sew the top two squares together and the bottom two squares together. Then, join these two new rows. Press your seams once more, ensuring the block lies flat and square.
- Repeat for Quilt Top: Now that you’ve mastered one block, repeat these steps to create more blocks for your entire quilt top. The number of blocks will depend on your desired quilt size, but for a typical throw quilt, you’ll need several identical blocks.
Step 2: Assembling Your Quilt Top and Adding Borders
Once you have a sufficient number of Dressed to the Nines blocks, it’s time to bring your quilt top to life by assembling them and adding the crucial border elements.
- Lay Out Your Blocks: For the quilt top, you will arrange your finished blocks in a specific grid. Lay out four blocks across and five blocks down. This arrangement will create a quilt top that effectively showcases the unique pattern of each block. It’s often helpful to use a design wall or even just a clean floor space to lay out all your blocks first. This allows you to step back, observe the overall design, and make any necessary adjustments to the placement of colors or patterns before you start sewing.
- Sew Blocks into Rows: Once you are happy with the layout, sew your blocks together into five horizontal rows, each containing four blocks. Maintain that consistent 1/4-inch seam allowance. As you sew, pay close attention to aligning the seams where blocks meet to ensure a clean, professional finish. Press the seams of each row in alternating directions (e.g., press seams to the right for row 1, to the left for row 2, etc.) to help them nest when joining rows.
- Join Rows to Form Quilt Center: Now, sew these five long rows together, one by one, to complete the center of your quilt top. Take your time, pinning carefully at the seam intersections to ensure everything lines up perfectly. Press your finished quilt center thoroughly to make it flat and square.
- Attach the Inner Border: Next, you’ll add the inner border using your 1 yard of accent fabric. Cut strips 2 1/2 inches wide from this fabric. Measure the length and width of your quilt center and cut your border strips accordingly, adding them to the sides first, then the top and bottom. This inner border serves as a subtle frame, separating the intricate block pattern from the outer border.
- Attach the Outer Border: Finally, attach the 6-inch wide outer border, cut from your 1 1/4 yards of border fabric. This wider border provides a substantial frame for your quilt, enhancing its size and giving it a finished, polished look. Measure, cut, and attach these strips carefully, starting with the side borders and then the top and bottom.
- Final Dimensions: After all your blocks are assembled and borders attached, your finished quilt top should proudly measure approximately 67″ x 80″. This generous size makes for a wonderful throw quilt, perfect for snuggling, or a charming twin-size quilt.
Step 3: Finishing Your Quilt (Batting, Backing, and Binding)
With your quilt top complete, the final steps involve preparing your quilt for use and giving it a professional finish. This involves creating the quilt sandwich and adding the binding.
- Create the Quilt Sandwich: Lay your backing fabric wrong side up on a clean, flat surface, smoothing out any wrinkles. Tape it down if needed. Next, carefully place your batting on top of the backing, ensuring it extends beyond the edges of the backing slightly. Finally, center your finished quilt top right side up on top of the batting. Smooth out all layers, removing any puckers or folds.
- Baste the Layers: Secure the three layers together using your preferred basting method. This could be safety pins (pin basting), spray basting adhesive, or hand basting with thread. The goal is to keep all three layers from shifting during the quilting process.
- Quilt as Desired: Now comes the quilting! This is where you stitch through all three layers to hold them together and add texture. You can choose to quilt simple straight lines, follow the lines of your piecing (stitch-in-the-ditch), or experiment with free-motion quilting designs. The choice is yours and offers another opportunity for personalization.
- Trim and Square Up: Once quilted, trim the excess batting and backing so that all edges are even with your quilt top. Square up your quilt, ensuring all corners are 90 degrees.
- Add the Binding: Using your 3/4 yard of binding fabric, cut 2 1/2-inch wide strips. Join these strips together to form one continuous length. Attach the binding to the edges of your quilt, either by machine or by hand, to create a durable and attractive finish that encloses all the raw edges. This step truly completes your Dressed to the Nines Quilt, making it ready for cuddles or display!
Tips for Success and Personalization
To ensure your Dressed to the Nines Quilt is a resounding success and truly reflects your style, consider these helpful tips:
- Fabric Selection is Key: While charm packs are designed to coordinate, think about the impact of your accent square. A high-contrast accent will make the “disappearing” effect more dramatic, while a subtle accent will create a softer, more blended look. Don’t be afraid to mix and match different charm packs for a scrappy aesthetic!
- Precision in Cutting and Sewing: The disappearing nine-patch relies on accurate cutting of the initial block and consistent 1/4-inch seam allowances. Take your time with these steps; accuracy here will prevent issues later.
- Pressing Matters: Proper pressing is just as important as sewing. Pressing seams correctly helps blocks lie flat and square, which is crucial for achieving a smooth quilt top. Consider pressing seams open to reduce bulk, especially where many seams meet.
- Design Wall Advantage: If you have one, utilize a design wall (even a flannel sheet taped to a wall works!) to lay out your blocks before sewing them into rows. This visual aid allows you to arrange and rearrange blocks until you achieve the perfect flow and balance of colors and patterns.
- Experiment with Rotation: The provided instructions specify rotating the upper right and bottom left squares. Try experimenting with different rotations on a test block to see what other interesting patterns emerge. This can unlock even more unique “disappearing nine-patch” variations!
- Enjoy the Process: Quilting is a journey, not just a destination. Embrace any imperfections as unique characteristics of your handmade creation. The most important thing is to enjoy the creative process and the satisfaction of bringing a beautiful quilt to life.
Your Next Quilting Adventure Awaits!
The Dressed to the Nines Quilt is a testament to how simple techniques can yield incredibly complex and beautiful results. With the clear guidance from Missouri Star and these detailed steps, you have all the tools and inspiration to create a stunning piece of textile art. Whether you’re a seasoned quilter looking for a quick and satisfying project or a beginner eager to dive into the world of patchwork, this disappearing nine-patch quilt made with charm packs is an absolute joy to make. Its elegant design will impress, and its simplicity will delight. So, grab your rotary cutter, thread your machine, and transform those charming fabric squares into a quilt that’s truly dressed to the nines. We can’t wait to see your beautiful creations!
Further Reading and Resources
For another detailed look at the disappearing nine-patch technique and additional tips, check out this comprehensive guide: Disappearing Nine-Patch Quilt Tutorial