
DIY Mold Removal: Bleach vs. Vinegar for Walls & Ceilings – A Comprehensive Guide
Mold is not just an unsightly nuisance; it poses serious health risks and can cause significant damage to your home’s structure. If you spot mold growing on your walls, ceilings, or any other surfaces, it’s crucial to address it promptly and effectively. This comprehensive guide will walk you through the process of removing and killing mold using two common household products: bleach and vinegar. We’ll delve into which solution is better for different situations, highlight essential safety measures, and provide detailed, step-by-step instructions to help you reclaim a healthy, mold-free environment.
Understanding the Threat: Why Mold is Dangerous
Mold spores are naturally present in our environment, but when they find a damp, dark, and warm spot with a food source (like drywall or wood), they can quickly proliferate indoors. Ignoring mold growth can lead to a host of problems:
- Health Risks: Exposure to mold can trigger allergies, asthma attacks, skin irritation, eye irritation, and respiratory problems. Certain types of mold, often referred to as “black mold” (Stachybotrys chartarum), can produce mycotoxins that are particularly harmful, leading to more severe health issues.
- Structural Damage: Mold feeds on organic materials, gradually deteriorating walls, ceilings, insulation, and wooden structures. This can compromise the structural integrity of your home over time and lead to costly repairs.
- Unpleasant Odors: Mold often emits a musty, earthy odor that can permeate your home, making it an uncomfortable living space.
It’s vital to remember that while this guide offers DIY solutions for small to moderate mold problems, extensive infestations, especially those covering areas larger than 10 square feet or suspected black mold, should always be handled by professional mold remediation specialists.
Identifying and Locating Mold in Your Home
Mold can hide in plain sight or in less obvious areas. Common places to check include bathrooms, kitchens, basements, utility rooms, and anywhere water damage has occurred. Look for:
- Visible Growth: Mold can appear in various colors, including black, green, white, or even orange. It often has a fuzzy, slimy, or powdery texture.
- Musty Odor: A persistent earthy or stale smell is a strong indicator of hidden mold, even if you can’t see it.
- Water Stains: Discolored patches on walls or ceilings, especially after leaks or floods, are prime spots for mold development.
- Allergy Symptoms: If you or your family members experience unexplained allergy-like symptoms indoors, mold could be the culprit.
The primary cause of indoor mold is moisture. Addressing the source of moisture – whether it’s a leaky pipe, a humid bathroom, or poor ventilation – is paramount to preventing recurrence after cleaning.
Essential Supplies for Safe and Effective Mold Removal
Before you begin any mold removal project, gather all necessary supplies to ensure your safety and the effectiveness of the cleaning process. This ensures you’re prepared for the task ahead and minimizes health risks.
Your Mold Removal Toolkit:
- Bleach: Regular household chlorine bleach (not color-safe or splash-less varieties).
- White Vinegar: Undiluted distilled white vinegar.
- Spray Bottles: Separate bottles for bleach solution and vinegar.
- Rags or Sponges: Disposable or old rags are best to avoid spreading spores.
- Heavy-Duty Rubber Gloves: To protect your skin from mold and cleaning solutions.
- N95 Respirator or Face Mask: Crucial for protecting your respiratory system from airborne mold spores and chemical fumes.
- Eye Protection: Safety goggles or glasses to prevent splashes from reaching your eyes.
- Bucket of Hot Water: For rinsing and diluting bleach.
- Scrub Brush: For tougher mold stains.
- Fan or Dehumidifier: To dry the area thoroughly after cleaning.
- Plastic Sheeting or Drop Cloths: To protect surrounding furniture and flooring.
Always prioritize your health. Proper ventilation is also key; open windows and use exhaust fans during and after the cleaning process.
The Great Debate: Bleach vs. Vinegar for Mold Removal
Both bleach and vinegar are effective household cleaners, but they work differently against mold and are suited for different applications. Understanding their strengths and weaknesses will help you choose the right product for your specific mold problem.
Bleach: The Powerful Oxidizer
Household chlorine bleach is a strong disinfectant and oxidizer. It effectively kills mold spores on the surface of non-porous materials like tiles, bathtubs, glass, and sealed countertops. The active ingredient, sodium hypochlorite, breaks down the cellular structure of mold.
- Pros:
- Highly effective at killing surface mold and disinfecting non-porous surfaces.
- Quickly lightens and removes visible mold stains.
- Affordable and readily available.
- Cons:
- Toxic Fumes: Produces harsh fumes that can irritate the respiratory system, skin, and eyes. Requires excellent ventilation.
- Corrosive: Can damage or discolor fabrics, paints, and certain metals. Test on an inconspicuous area first.
- Doesn’t Penetrate Porous Surfaces: While it kills surface mold, bleach often doesn’t penetrate deeply into porous materials (like wood, drywall, or grout) to kill the mold roots. This means the mold can regrow beneath the surface.
- Environmental Concerns: Can be harmful to the environment if disposed of improperly.
- Never Mix: Absolutely *never* mix bleach with vinegar, ammonia, or other cleaners, as it can create highly toxic gases.
Vinegar: The Natural, Deep-Penetrating Solution
Distilled white vinegar is a mild acid (typically 5% acetic acid) that can kill about 82% of mold species. Unlike bleach, vinegar is non-toxic and biodegradable, making it a more environmentally friendly and safer choice for general household use. Its slightly acidic nature allows it to penetrate porous surfaces more effectively than bleach, attacking the mold at its roots.
- Pros:
- Non-Toxic and Safer: A natural and biodegradable option, safer for homes with children, pets, or individuals with chemical sensitivities.
- Penetrates Porous Surfaces: Better at killing mold roots in materials like wood, drywall, and grout, which helps prevent regrowth.
- Versatile: Can be used on a wider variety of surfaces without causing discoloration or damage.
- Effective Fungicide: Proven to kill a wide range of mold species.
- Cons:
- Less Potent on Surface Stains: May not remove heavy surface stains as quickly or completely as bleach, though it will kill the mold.
- Odor: Leaves a distinct vinegar smell, which usually dissipates within a few hours.
- Slower Acting: Often requires a longer dwell time to be fully effective.
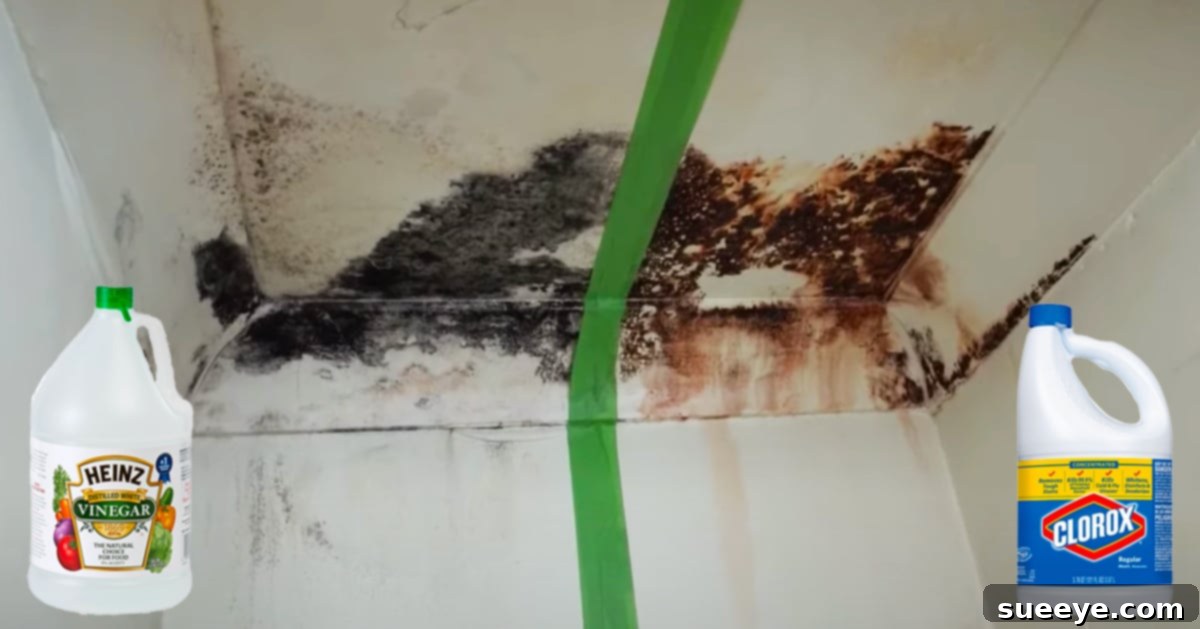
Which one is better? For surface mold on non-porous materials where quick stain removal is key, bleach can be very effective. However, for mold on porous surfaces, or if you prefer a less toxic, more root-killing solution, vinegar is often the superior choice. For heavily built-up mold on walls and and ceilings, as demonstrated by Billshowto, a direct comparison can show distinct results, with bleach often providing a more immediate visual clean. The ultimate decision depends on the surface type, the severity of the mold, and your personal preference for chemical use.
Step-by-Step Directions for DIY Mold Removal
Once you’ve chosen your preferred cleaning agent (or decided to test both in separate areas), follow these detailed steps for safe and effective mold removal. Remember, never mix bleach and vinegar!
Detailed Instructions:
- Preparation is Key:
- Ventilate: Open windows and doors, and turn on any exhaust fans to ensure maximum airflow.
- Protect Yourself: Don your heavy-duty rubber gloves, N95 respirator or face mask, and eye protection. Long sleeves and pants are also recommended.
- Protect Your Space: Move furniture away from the affected area. Lay down plastic sheeting or old drop cloths to protect flooring and nearby items from drips and splashes.
- Prepare Your Solutions:
- For Bleach: In a spray bottle, mix 1 part household bleach with 10 parts hot water (e.g., 1/2 cup bleach per 5 cups hot water). Never use bleach undiluted on surfaces as it can be too harsh.
- For Vinegar: Fill a separate spray bottle with undiluted distilled white vinegar. Do not dilute it.
- Apply the Solution:
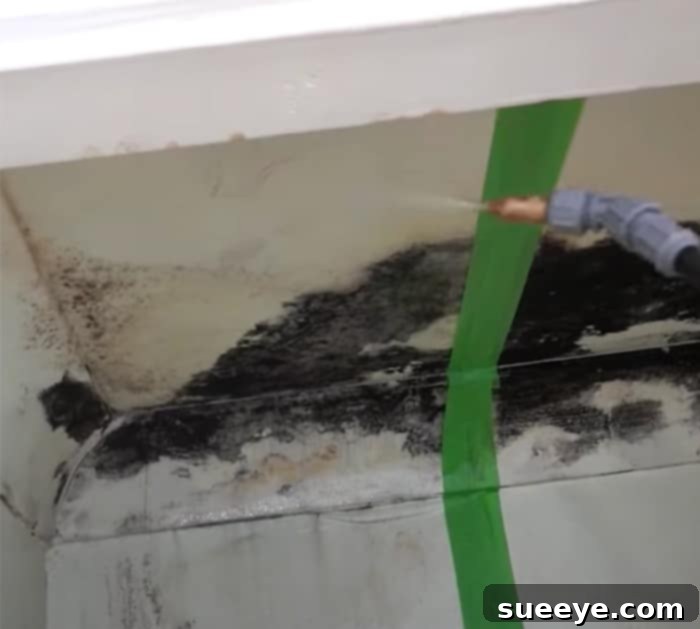
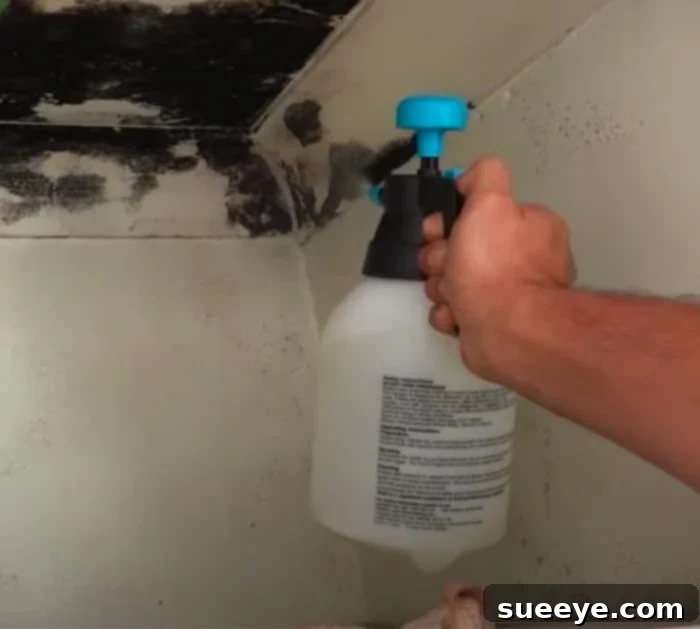
- Targeted Application: Lightly spray the mold-affected area with your chosen solution until the mold is thoroughly dampened. If using both, apply bleach solution to one affected side and undiluted vinegar to another side. Avoid oversaturating, especially on drywall, to prevent further damage.
- Ensure Coverage: Make sure the entire mold patch is covered.
- Allow Dwell Time:
- Bleach: Let the bleach solution sit on the mold for about 10-15 minutes. This gives the bleach time to kill the surface mold and break down the stains.
- Vinegar: Allow the vinegar to sit for a minimum of 30 minutes to an hour. Vinegar needs more time to penetrate and kill the mold roots effectively.
- Scrub and Wipe Away:
- Scrub Gently: Using a clean rag or soft scrub brush, gently scrub the moldy surface. You should see the mold start to lift and disappear.
- Wipe Clean: Use fresh, clean rags to wipe away the loosened mold and solution. It’s crucial to frequently rinse your rag in a separate bucket of clean water or use multiple disposable rags. This prevents spreading mold spores to other areas.
- Rinse (for Bleach): After wiping, you might want to lightly wipe the bleach-treated area with a rag dampened with plain water to remove any bleach residue, especially if the area will be painted later. Rinsing is generally not necessary for vinegar, as it’s non-toxic and its residue is harmless.
- Inspect and Repeat if Necessary:
- Assess Results: After the first cleaning, inspect the area. If stubborn stains or traces of mold remain, repeat the application and scrubbing process. For heavily built-up mold, a second application might be essential for a deep clean.
- Persistent Spots: For particularly tough spots, a soft-bristled brush can be used carefully.
- Dry Thoroughly:
- Crucial Step: After cleaning, it is absolutely vital to dry the area completely. Use fans, dehumidifiers, or open windows to ensure the surface is dry to the touch. Any lingering moisture can lead to mold regrowth.
For additional visual guidance and detailed insights into the process, continue to watch Billshowto on YouTube. His demonstration offers valuable practical tips.
Beyond Cleaning: Preventing Future Mold Growth
Removing existing mold is only half the battle. To ensure a mold-free home in the long run, proactive prevention is essential. Mold thrives on moisture, so controlling humidity and addressing water issues are your primary defenses.
- Address Water Leaks Promptly: Fix leaky pipes, roofs, or windows immediately. Even small leaks can create ideal conditions for mold.
- Control Indoor Humidity: Aim to keep indoor humidity levels below 60%. Use dehumidifiers in damp areas like basements and crawl spaces. Monitor humidity with a hygrometer.
- Ensure Proper Ventilation:
- Use exhaust fans in bathrooms and kitchens during and after showering/cooking.
- Open windows regularly to allow fresh air circulation.
- Ensure clothes dryers vent outdoors, not into your home.
- Clean and Dry Regularly:
- Clean bathrooms and kitchens regularly with mold-inhibiting cleaners.
- Immediately dry any wet spots, spills, or condensation. Don’t let puddles sit.
- If carpets or rugs get wet, dry them thoroughly within 24-48 hours, or consider removing them.
- Improve Air Circulation: Arrange furniture to allow air to circulate around walls, especially in colder rooms.
- Consider Mold-Resistant Products: When renovating or building, consider using mold-resistant drywall, paints, and insulation in moisture-prone areas.
Conclusion: A Proactive Approach to a Mold-Free Home
Mold is a persistent adversary, but with the right knowledge and tools, you can effectively tackle small to moderate infestations in your home. As seen in various demonstrations, including Billshowto’s detailed examples, the choice between bleach and vinegar often comes down to the surface type and the desired outcome, with bleach providing a powerful surface clean and vinegar offering a deeper, safer root-killing solution for many surfaces. Regardless of the method you choose, safety, thoroughness, and addressing the root cause of moisture are paramount.
By staying vigilant, acting quickly at the first sign of mold, and implementing preventive measures, you can ensure your living environment remains healthy and free from the dangers of mold. Remember, for extensive or persistent mold issues, consulting a professional mold remediation service is always the safest and most effective course of action.