
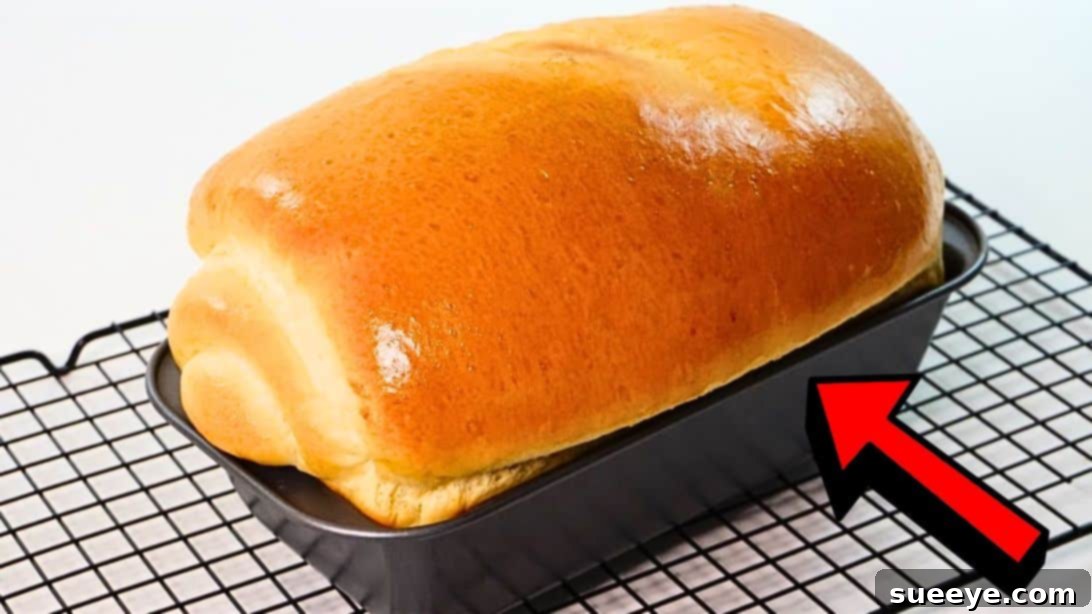
Embark on a delightful baking journey with this incredibly simple yet profoundly satisfying recipe for soft and fluffy sandwich bread. Whether you’re a novice baker eager to craft your first homemade loaf or a seasoned pro seeking a reliable, no-fuss recipe, this guide promises a delectable result. Inspired by the expert methods shared by Savor Easy on YouTube, this bread boasts an irresistible texture that practically melts in your mouth. It’s the perfect canvas for your favorite jams and spreads, or simply wonderful enjoyed on its own. Prepare to transform your kitchen into a fragrant haven and enjoy the unmatched taste of freshly baked bread.
The Ultimate Soft & Fluffy Sandwich Bread Recipe: Your Step-by-Step Guide
There’s nothing quite like the aroma and taste of freshly baked bread. This recipe elevates the humble sandwich loaf into a culinary masterpiece, delivering an exceptionally soft, airy, and flavorful bread that will become a staple in your home. Forget store-bought loaves; once you taste this homemade version, you’ll never look back. It’s not just a recipe; it’s an invitation to experience the joy and satisfaction of creating something truly wonderful from scratch.
Why Bake Your Own Soft Sandwich Bread?
- Unmatched Freshness: Enjoy bread that’s still warm from the oven, with a delicate crust and tender crumb.
- Superior Taste and Texture: This recipe yields a bread that is incredibly soft, light, and airy, far surpassing the texture of most commercial breads.
- Control Over Ingredients: Know exactly what goes into your bread – no unpronounceable additives or preservatives.
- Cost-Effective: Making bread at home is often more economical than buying artisanal loaves.
- Therapeutic Experience: The process of kneading and watching dough rise can be incredibly calming and rewarding.
- Versatility: Perfect for sandwiches, toast, French toast, or simply tearing apart and enjoying with butter.
Ingredients for Your Fluffy Homemade Loaf
Gathering your ingredients correctly is the first step towards baking success. For this incredible soft sandwich bread, you’ll need common pantry staples, but ensure they are fresh, especially your yeast, for optimal results. All ingredients should ideally be at room temperature unless specified, as this helps with uniform mixing and yeast activation.
- ½ cup warm water (around 105-115°F or 40-46°C – ideal for yeast activation)
- ½ cup milk (whole milk is recommended for richness)
- 1 large egg (room temperature)
- 1/3 cup melted butter (unsalted, cooled slightly)
- 2 tsp instant yeast (ensure it’s fresh and active)
- 3¼ cups all-purpose flour (measured correctly, spooned and leveled)
- ¼ cup granulated sugar (to feed the yeast and add sweetness)
- 1 tsp salt (fine sea salt or table salt, crucial for flavor and dough structure)
- 2 tbsp neutral oil, for greasing the bowl (e.g., vegetable, canola, or light olive oil)
For the Golden Eggwash
The eggwash provides a beautiful golden-brown crust and a subtle sheen to your baked bread, making it look as professional as it tastes.
- 1 large egg
- 2 tbsp milk
Step-by-Step Directions to Bake Your Perfect Sandwich Bread
Follow these detailed instructions to achieve an irresistibly soft and fluffy homemade bread. Each step is crucial for developing the right texture and flavor.
Step 1: Mixing, Kneading, and the First Rise
In a large mixing bowl, combine the warm water, milk, room-temperature egg, and slightly cooled melted butter. Use a whisk or a fork to gently break the egg yolk and stir the wet ingredients together until they are well combined. This ensures even distribution and proper hydration. Next, sprinkle the instant yeast over the wet mixture and give it a quick stir. Allow it to sit for a minute or two; you might see a slight foam, indicating your yeast is active. Then, add the all-purpose flour, granulated sugar, and salt to the bowl. Begin mixing these ingredients, either by hand with a sturdy spoon or a dough whisk, or in a stand mixer fitted with a dough hook. Continue to mix until a shaggy dough forms and most of the flour is incorporated. At this stage, the dough will be somewhat sticky.
Cover the bowl loosely and let the dough rest for about 20 minutes. This resting period, known as autolyse, allows the flour to fully hydrate and gluten development to begin naturally, making the subsequent kneading much easier and more effective. After resting, transfer the dough to a clean, lightly floured counter. Begin kneading the dough for approximately 7 minutes, or until it becomes smooth, elastic, and no longer sticky. If the dough feels too sticky during kneading, sprinkle a very small amount of flour onto your hands and the counter, but avoid adding too much, as this can make your bread dense. The dough should pass the “windowpane test” – you should be able to stretch a small piece thin enough to see light through it without tearing, indicating good gluten development. Once adequately kneaded, shape the dough into a smooth ball, lightly grease your mixing bowl with a tablespoon of oil, place the dough seam-side down in the bowl, and roll it around to coat it lightly with oil. Cover the bowl tightly with plastic wrap to prevent the dough from drying out.
Step 2: Second Proofing, Shaping, Baking, and Cooling
Set the covered bowl aside in a warm, draft-free place to allow the dough to proof (rise). This first rise, or bulk fermentation, typically takes about 1 hour, or until the dough has visibly doubled in size. The exact time can vary depending on your kitchen’s temperature; a warmer environment will accelerate the process. Once doubled, gently “degas” the dough by pressing it down with your knuckles to release the accumulated gases. This helps create an even crumb structure. Transfer the dough onto a lightly floured surface and gently flatten it into a rectangle.
Carefully roll the dough tightly into a log, starting from one of the longer sides. Pinch the seam closed and tuck in the ends to create a neat loaf shape. This tight rolling helps build tension in the dough, contributing to a better rise and crumb. Prepare a 7×4 inch loaf pan by greasing it thoroughly and lining it with parchment paper, leaving an overhang on the longer sides to easily lift the bread out later. Carefully place the shaped dough into the prepared loaf pan, seam-side down. Cover the loaf pan loosely with plastic wrap or a clean kitchen towel and let it proof again in a warm spot for another 30 minutes, or until it has nearly doubled in size and looks puffy. During this second rise, preheat your oven to 180°C (356°F).
While the oven preheats, whisk together the remaining egg and milk for the eggwash in a small bowl. Once the dough has completed its second rise, gently brush the eggwash evenly over the top of the risen dough. This creates that beautiful golden crust. Carefully place the loaf pan into the preheated oven and bake for approximately 25 minutes. The bread should be golden brown on top and sound hollow when tapped on the bottom. An internal temperature of 190-200°F (88-93°C) indicates it’s fully baked. Once baked, remove the loaf pan from the oven and let it cool in the pan for about 10-15 minutes on a wire rack. This allows the internal structure to set. Then, using the parchment paper overhang, carefully unmold the bread and transfer it directly to the wire rack to cool completely before slicing. Slicing warm bread can compress the crumb, so patience is key! Slice it to your preferred thickness and enjoy!
Expert Tips for Your Perfect Soft & Fluffy Loaf
- Measure Accurately: Especially flour and yeast. Too much flour can make bread dry, too little makes it sticky.
- Yeast Freshness: Always check your yeast’s expiration date. If unsure, proof it in a small amount of warm water with a pinch of sugar before adding other ingredients.
- Room Temperature Ingredients: Ensures better emulsion and yeast activity, leading to a more consistent dough.
- Don’t Rush Proofing: The rising times are approximate. Focus on the dough doubling in size, not just the clock.
- Kneading is Key: Proper kneading develops gluten, essential for the bread’s structure and elasticity. Don’t skimp on this step.
- Warm Environment for Rising: A slightly warm, draft-free spot (like a turned-off oven with the light on) is ideal for consistent rising.
- Cool Completely: Resist the urge to slice too early! Cooling allows the internal structure to firm up, preventing a gummy texture.
Serving Suggestions for Your Homemade Bread
This incredibly soft and fluffy sandwich bread is versatile and delicious in many ways. Use it for classic sandwiches with your favorite fillings, from turkey and cheese to peanut butter and jelly. It also makes fantastic toast, perfect with butter, jam, or avocado. Try it for the best French toast you’ve ever had, or cube it for homemade croutons. For a simple treat, enjoy a slice with a drizzle of honey or a sprinkle of cinnamon sugar.
Storage Tips for Freshness
To keep your homemade sandwich bread fresh and delicious, store it at room temperature in an airtight container or a bread box for up to 3-4 days. Avoid refrigeration, as this can cause the bread to stale faster. For longer storage, slice the cooled loaf and freeze the slices in a freezer-safe bag for up to 2-3 months. You can then toast individual slices directly from the freezer.
Bake Your Way to Happiness
There you have it – a comprehensive, easy-to-follow guide to baking the most wonderfully soft and fluffy homemade sandwich bread. This recipe is more than just instructions; it’s an invitation to create comforting, delicious memories in your kitchen. With its irresistible texture and simple ingredients, this bread is sure to become a beloved staple in your home. Go ahead, give it a try, and savor the incredible taste of fresh, homemade goodness. Happy baking!
All images in this article are credited to Savor Easy via YouTube. We highly recommend visiting their channel and subscribing for more fantastic recipes and baking inspiration!