
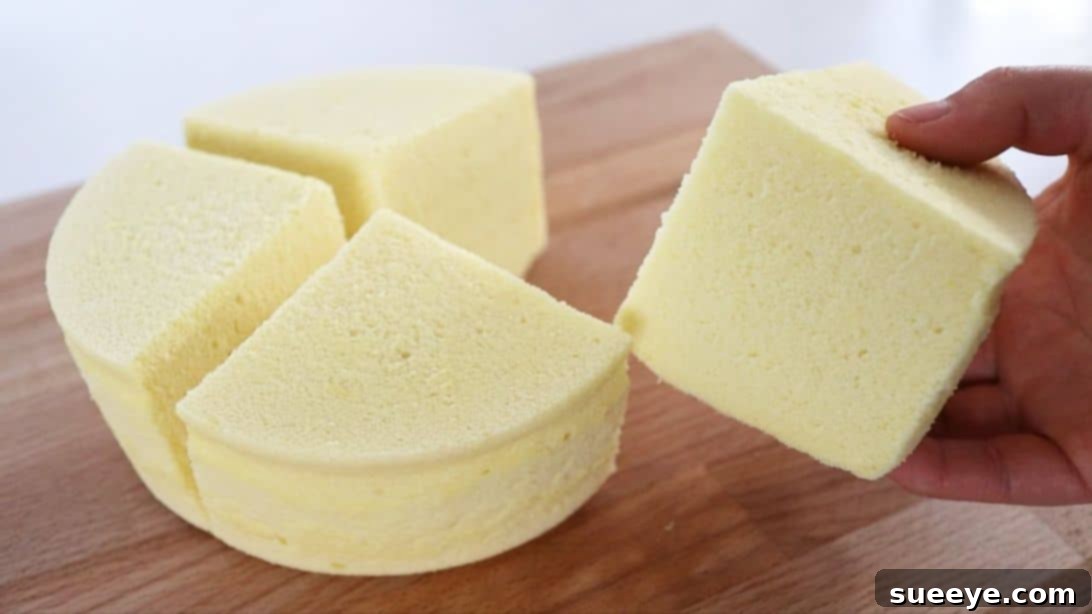
Welcome to the delightful world of no-bake desserts! If you’ve ever dreamt of creating a stunningly fluffy and moist sponge cake without the need for an oven, your dream is about to come true. This incredible no-bake sponge cake recipe, popularized by Qiong Cooking, has taken the internet by storm for good reason. It’s unbelievably simple to prepare, yet yields a cake that’s light as air, tender, and incredibly satisfying. Forget the stress of preheating and precise oven temperatures; this recipe utilizes a gentle steaming method to achieve perfection. Whether you’re a seasoned baker or a complete novice, this oven-free sponge cake is an absolute game-changer, promising a dessert that’s not just delicious but also a joy to make. Its delicate texture and subtle sweetness make it a versatile base, perfect for topping with fresh whipped cream, vibrant berries, a dusting of powdered sugar, or any of your favorite adornments. Get ready to impress your family and friends with this surprisingly easy and utterly delicious creation.
The Secret to a Fluffy No-Bake Sponge Cake: Steaming Perfection
Sponge cakes are celebrated for their airy texture and ability to soak up flavors, making them ideal for various desserts. Traditionally, they are baked in an oven, relying on heat to set their delicate structure. However, this innovative recipe harnesses the power of steam to cook the cake gently and evenly, ensuring a consistently moist crumb that’s simply irresistible. This method not only bypasses the need for an oven but also helps prevent the cake from drying out, which can be a common challenge with baked sponge cakes. The result is a cake that’s incredibly tender, incredibly fluffy, and remarkably moist—a true testament to the versatility of kitchen techniques.
Before diving into the steps, let’s gather our simple ingredients and essential tools. Quality ingredients are key to the success of any recipe, and this no-bake sponge cake is no exception. Paying attention to details, from the freshness of your eggs to the type of flour used, will significantly impact the final texture and flavor of your masterpiece.
Ingredients for Your Fluffy Steamed Sponge Cake
Crafting this delightful no-bake sponge cake requires just a few basic ingredients, each playing a crucial role in achieving its signature light and airy texture. For the best results, ensure all your ingredients are at room temperature unless otherwise specified, as this helps them combine more smoothly and creates a more stable batter.
- 3 Large Eggs: Fresh, large eggs are the cornerstone of this recipe. We’ll be separating the whites and yolks, with the egg whites forming the meringue that gives the cake its incredible lift and airy structure.
- 2 Tablespoons of Cooking Oil: A neutral-flavored oil like vegetable oil, canola oil, or light olive oil works best. It adds essential moisture and tenderness to the cake without imparting any strong flavors.
- 3 Tablespoons of Milk: Whole milk is recommended for its richness, contributing to the cake’s moistness and delicate crumb.
- 0.54 Cup of Cake Flour (approximately 1/2 cup + 2 teaspoons): Cake flour is essential here. Its lower protein content results in a more tender, finer crumb compared to all-purpose flour. If you don’t have cake flour, you can create a substitute by removing 2 tablespoons from 1/2 cup of all-purpose flour and replacing it with 2 tablespoons of cornstarch, then sifting well.
- 1/2 Teaspoon of Vanilla Extract (optional): While optional, vanilla extract adds a lovely aromatic depth to the cake. Use a good quality pure vanilla extract for the best flavor.
- 1/4 Teaspoon of Lemon Juice: This small but mighty ingredient is added to the egg whites. The acidity helps stabilize the meringue, allowing it to whip up into stiffer, more stable peaks, which are crucial for the cake’s volume.
- 2 Tablespoons of Granulated Sugar: Sugar sweetens the meringue and helps create its stable structure. It’s added gradually to ensure the egg whites whip up properly.
Essential Equipment You’ll Need:
Having the right tools makes the process smoother and more enjoyable.
- Two Medium-Sized Mixing Bowls: For separating egg whites and yolks. Ensure they are scrupulously clean and grease-free for optimal meringue whipping.
- Electric Hand Mixer or Stand Mixer: Absolutely essential for whipping the egg whites to stiff peaks.
- Whisk: For combining the yolk mixture.
- Fine-Mesh Sieve: For sifting the cake flour, ensuring a lump-free batter.
- Silicone Spatula: Ideal for gently folding the meringue into the batter without deflating it.
- Steamer Basket or Pot with Steamer Rack: A large pot with a tight-fitting lid and a steamer insert is necessary for the no-bake cooking method.
- Round Baking Mold (e.g., a 6-inch or 8-inch cake pan): Choose a mold that fits comfortably inside your steamer.
- Aluminum Foil: For wrapping the bottom of the mold and covering the top during steaming.
- Cooling Rack: For proper cooling of the cake after steaming.
Step-by-Step Instructions for Your Fluffy No-Bake Sponge Cake
Follow these detailed instructions carefully to achieve a light, airy, and moist no-bake sponge cake that will become a staple in your dessert repertoire. Precision and gentle handling are key, especially when dealing with the delicate meringue.
Step 1: Prepare Your Eggs
Begin by carefully separating the egg whites from the yolks. Crack each egg individually and gently transfer the yolk from one half of the shell to the other, allowing the white to fall into a clean, grease-free bowl below. Place the yolks into a separate bowl. It is absolutely crucial that no trace of egg yolk or grease gets into the egg whites, as this will prevent them from whipping up properly into a stable meringue. Ensure both bowls are meticulously clean and dry.
Step 2: Create the Yolk Mixture Base
To the bowl containing your egg yolks, add 2 tablespoons of cooking oil and 3 tablespoons of milk. Using a whisk, gently combine these ingredients until they are thoroughly incorporated and the mixture is smooth and uniform in color. Avoid over-whipping at this stage; simply mix until everything is well-blended. This forms the rich, moist base of your sponge cake batter.
Step 3: Incorporate the Cake Flour
Place a fine-mesh sieve directly over your yolk mixture bowl. Sift the 0.54 cup (approximately 1/2 cup plus 2 teaspoons) of cake flour directly into the mixture. Sifting is an important step as it aerates the flour and removes any lumps, ensuring a silky-smooth batter. Once sifted, gently whisk the flour into the yolk mixture until it is completely smooth and no dry flour spots remain. Be careful not to overmix, as this can develop the gluten in the flour, leading to a tough cake. Mix just until combined.
Step 4: Add Vanilla and Set Aside
If using, add 1/2 teaspoon of vanilla extract to your smooth yolk-flour mixture. Stir gently until the vanilla is fully incorporated. This adds a lovely fragrant note to your cake. Once mixed, set this batter aside while you prepare the meringue.
Step 5: Master the Meringue
This step is the most critical for achieving a truly fluffy sponge cake. Add 1/4 teaspoon of lemon juice to your bowl of egg whites. The lemon juice helps stabilize the protein structure of the egg whites. Using an electric hand mixer or a stand mixer, begin whipping the egg whites on medium-high speed.
As soon as the egg whites develop large, frothy bubbles, it’s time to start adding the sugar. Add 1/3 of the granulated sugar (approximately 2/3 tablespoon). Continue whipping. When the bubbles become smaller and the mixture starts to look thicker and whiter, add another 1/3 of the sugar. Whip again, and finally, when visible lines begin to form in the meringue as you whip, add the remaining 1/3 of the sugar.
Continue whipping until the meringue is glossy and forms stiff peaks. To check for stiff peaks, lift the beater; the meringue should stand straight up with a sharp tip and look dry rather than wet. If it droops, continue whipping. However, be careful not to over-whip, which can make the meringue grainy and difficult to fold. The consistency should be stable and hold its shape perfectly.
Step 6: Gently Fold the Meringue into the Batter
Now comes the delicate part: incorporating the airy meringue into your denser yolk batter without deflating it. Take about 1/3 of your prepared meringue and add it to the yolk batter. Using a silicone spatula, gently fold it in. The goal is to lighten the yolk batter and temper it before adding the rest of the meringue. Use an “over and under” or “cut and fold” motion, rotating the bowl as you go, being careful not to stir or whisk.
Once the first third is just incorporated, add the remaining meringue to the batter. Continue to fold gently with your spatula until the mixture is uniform and streaks of egg white are no longer visible. The batter should now be light, airy, and pale in color. Avoid overmixing, as this will cause the precious air bubbles to collapse, resulting in a dense cake.
Step 7: Prepare the Baking Mold and Pour
Prepare your chosen baking mold (e.g., a 6-inch or 8-inch round cake pan). To prevent moisture from entering the cake during steaming, securely wrap the bottom of the mold with aluminum foil. Ensure it’s sealed tightly around the base. Now, carefully pour the prepared batter into the mold. Pouring from a slightly higher position can help release any larger air bubbles trapped in the batter. Once poured, gently tap the mold on your countertop a few times to settle the batter and release any remaining large air pockets. Use a spatula to gently smoothen the surface of the batter.
Step 8: Cover the Mold for Steaming
To ensure a smooth, beautiful top on your sponge cake and prevent any condensation from dripping onto the batter during steaming, wrap the top of the mold loosely with another piece of aluminum foil. This acts as a protective shield, maintaining the cake’s delicate texture.
Step 9: Steam Your No-Bake Sponge Cake
Set up your steamer. Fill a large pot with about 2-3 inches of water and bring it to a rolling boil over medium-high heat. Once boiling, carefully place your foil-wrapped cake mold into the steamer basket or onto the steamer rack within the pot. Ensure the water level is below the bottom of the cake pan so the cake isn’t sitting directly in water. Cover the steamer pot tightly with its lid. Steam the cake for approximately 45 minutes on medium heat. The steaming time might vary slightly depending on your steamer and the size of your mold. The cake is done when a skewer inserted into the center comes out clean.
Step 10: Cool and Release Your Fluffy Creation
Once steaming is complete, carefully remove the cake mold from the steamer. Immediately remove the aluminum foil from both the top and bottom of the mold. Gently thump the bottom of the mold twice on a countertop – this helps prevent the cake from shrinking excessively. Then, invert the cake mold upside down onto a cooling rack. Allow the cake to cool completely in this inverted position. This gradual cooling helps maintain its fluffy texture and prevents it from collapsing. Once fully cooled (this can take an hour or two), gently press from the edges of the cake towards the middle with your hands to loosen it, and carefully lift the mold to release your beautiful, fluffy, and moist no-bake sponge cake.
Tips for a Perfect Fluffy and Moist No-Bake Sponge Cake
- Room Temperature Ingredients: Always use room temperature eggs and milk. They combine more easily and result in a smoother, more emulsified batter and a more voluminous meringue.
- Cleanliness is Key: Ensure your egg white bowl and mixer attachments are immaculately clean and free of any grease. Even a tiny bit of fat can prevent egg whites from whipping properly.
- Don’t Overmix the Yolk Batter: Mix just until the flour is incorporated to avoid developing gluten, which can make the cake tough.
- Gentle Folding: When incorporating the meringue, always use a gentle folding motion with a silicone spatula. Your goal is to preserve as much air as possible in the batter.
- Secure Foil Wrap: Make sure the aluminum foil around the bottom and top of the cake pan is sealed tightly to prevent any water from seeping into the batter or condensation dripping onto the cake.
- Consistent Steaming Temperature: Maintain a steady medium heat during steaming. Too high heat can cause the cake to rise too quickly and crack, while too low might prolong cooking and result in a denser texture.
- Proper Cooling: Inverting the cake immediately after steaming and cooling it completely on a rack is crucial for preventing shrinkage and ensuring a stable structure.
Serving Suggestions and Variations
This no-bake sponge cake is a delightful treat on its own, but its simple elegance makes it a perfect canvas for various toppings and flavors.
- Classic Toppings: A dollop of freshly whipped cream and a generous scattering of fresh berries (strawberries, raspberries, blueberries) is a timeless combination that enhances both the flavor and visual appeal.
- Citrus Zest: Grate some fresh lemon or orange zest over the cake for a bright, aromatic lift.
- Chocolate Drizzle: Melted chocolate or a simple chocolate ganache can add a touch of indulgence.
- Powdered Sugar: A simple dusting of powdered sugar offers a chic and understated finish.
- Fruit Curd: Pair it with a tangy lemon curd or passion fruit curd for a delightful contrast in flavors.
- Matcha Green Tea: For a unique twist, you can sift 1-2 teaspoons of high-quality matcha powder with the cake flour for a subtly flavored green tea sponge cake.
- Cocoa Powder: Substitute a small amount of cake flour with unsweetened cocoa powder for a chocolate version.
Storage of Your No-Bake Sponge Cake
Store any leftover sponge cake in an airtight container at room temperature for up to 2 days, or in the refrigerator for up to 3-4 days, especially if it has fresh cream or fruit toppings. For optimal freshness, it’s best enjoyed on the day it’s made, when its texture is at its peak fluffiness and moistness.
No-Bake Fluffy and Moist Sponge Cake: Your Next Favorite Dessert
This no-bake fluffy and moist sponge cake recipe is truly a marvel. It defies conventional baking wisdom by delivering a cake that rivals its oven-baked counterparts in taste and texture, all with minimal fuss. The steaming method ensures a level of moisture and tenderness that is often hard to achieve, making every bite a heavenly experience. It’s a fantastic option for warmer months when turning on the oven is less appealing, or simply for those who prefer a simpler, more hands-off approach to dessert making.
By following these detailed instructions and incorporating our helpful tips, you’re well on your way to creating a show-stopping dessert that’s easy, delicious, and incredibly satisfying. Whether you’re whipping it up for a special occasion or just a weeknight treat, this steamed sponge cake is sure to become a cherished recipe in your culinary collection. So, gather your ingredients, follow the steps, and prepare to delight in the wondrous simplicity of a perfectly fluffy, moist, and utterly irresistible no-bake sponge cake. Happy cooking!