
Transforming your outdoor living areas with beautiful, custom lighting doesn’t have to break the bank. In fact, with a bit of creativity and a trip to your local dollar store, you can achieve stunning results that look far more expensive than they are. This incredible DIY solar light hack, inspired by ingenious creators like ChicOnTheCheap, opens up a world of possibilities for illuminating your garden, patio, or balcony with stylish, personalized flair. Imagine crafting bespoke solar lanterns and unique accent lights using everyday items like dollar store vases, candle holders, and various containers, all powered by inexpensive solar lights. The beauty of this project lies in its simplicity and affordability: each solar light costs merely a dollar, and the container you choose for it will likely cost the same. For just $2, you can create a completely customizable lighting solution that requires no wiring, no outlets, and absolutely no professional installation, making it perfect for any outdoor space craving a touch of brilliance and charm.
Whether you’re looking to add ambient glow to a cozy corner, define a pathway, or create a captivating centerpiece for outdoor entertaining, these dollar store solar light creations offer an unbeatable combination of practicality, aesthetics, and budget-friendliness. Forget about complicated electrical work or pricey designer fixtures. This hack empowers you to unleash your inner decorator and craft lighting features that perfectly complement your home’s unique style, all while harnessing the sustainable power of the sun. Get ready to discover how easily you can brighten up your nights and enhance your outdoor decor with these ingenious, wallet-friendly projects.
Essential Materials for Your DIY Solar Lanterns
Embarking on this fun and simple DIY project requires only a handful of readily available materials. The brilliance of this hack truly shines when you realize how few items are needed to create such impactful outdoor lighting solutions. Most of these can be sourced from a dollar store, keeping your costs incredibly low. Before you begin, gather the following:
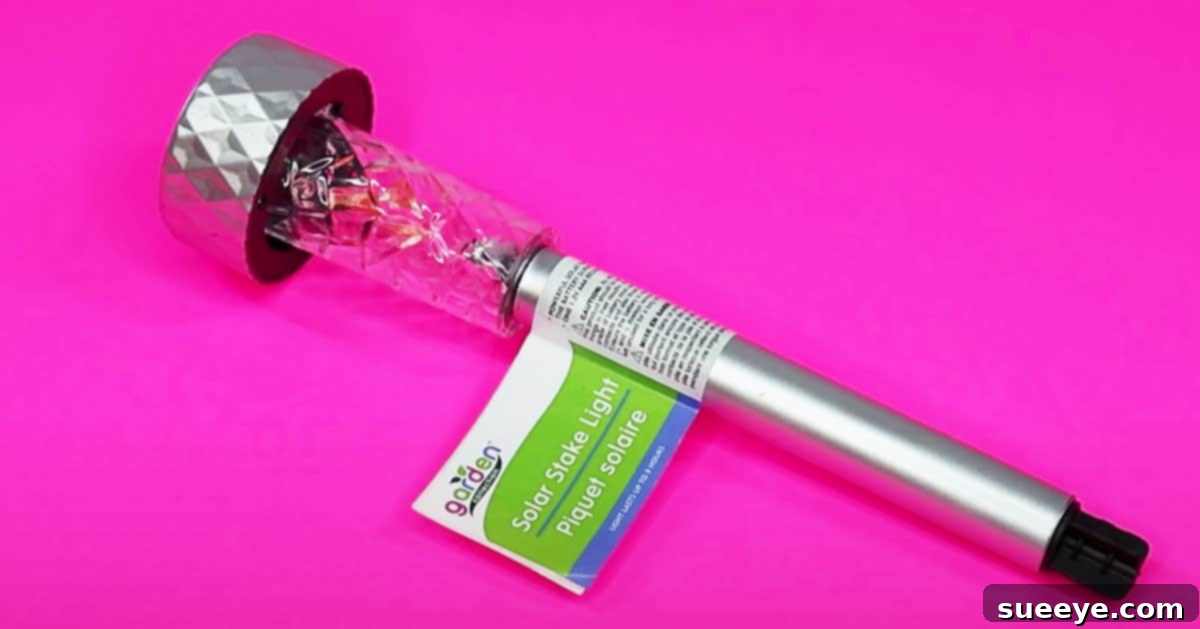
- Solar Yard Lights: These are the star of the show. Look for the simple, stake-style solar lights commonly found in garden sections. They typically come with a small solar panel on top and an LED light. Their simplicity makes them ideal for repurposing.
- Container Of Your Choosing: This is where your creativity truly comes into play. The dollar store offers an astonishing array of vases, jars, candle holders, decorative bowls, and even unique glassware that can be transformed into beautiful lantern bases. Consider different shapes, sizes, and materials like glass for a bright glow, frosted glass for a diffused look, or even metal for a rustic touch.
- E6000 Glue: This industrial-strength adhesive is highly recommended for its durability and, most importantly, its waterproofing properties. Outdoor projects demand a strong bond that can withstand the elements, and E6000 delivers just that, ensuring your creations last season after season.
The creator behind this brilliant concept, ChicOnTheCheap, specifically highlights the importance of using E6000 glue to secure the solar light within your chosen container. This crucial step creates a watertight seal, protecting the delicate internal components of the solar light from rain, dew, and splashes. This simple addition significantly extends the lifespan of your DIY lanterns, allowing you to enjoy their glow for many evenings to come. For a plethora of creative container ideas and visual inspiration, be sure to check out ChicOnTheCheap’s comprehensive video tutorial. You’ll be amazed by the diverse range of items that can be repurposed into stunning solar light displays.
Step-by-Step Guide to Crafting Your Custom Solar Lights
Creating your personalized solar lanterns is a remarkably straightforward process, requiring minimal effort for maximum impact. Follow these simple steps to transform your dollar store finds into captivating outdoor lighting:
Step One: Preparing Your Solar Light
The first step in repurposing your solar yard light is to prepare it for its new role as a decorative lantern insert. Most dollar store solar lights come with a ground stake designed for traditional garden placement. To fit the light seamlessly into a container, this stake must be removed. Gently twist or pull the light fixture away from the stake. This detachment is usually quite simple and requires no tools. Once separated, you’ll be left with the main light unit, including the solar panel, battery compartment, and LED bulb. Before proceeding, it’s always a good idea to ensure the solar light is functional by briefly covering the solar panel in a dark room; the light should illuminate. This confirms it’s ready for its transformation and will save you from potential disappointment later.
Image Credit: ChicOnTheCheap via YouTube video.
Step Two: Assembling and Waterproofing Your Custom Lantern
With your solar light prepared, it’s time to bring your vision to life by pairing it with your chosen container. Carefully place the solar light unit into the opening of your container. Depending on the container’s design, the solar panel might sit flush on the rim, or it might be recessed slightly. The goal is to ensure the solar panel has an unobstructed view of the sky to charge effectively. This step is also crucial for waterproofing, a vital aspect for any outdoor decor exposed to the elements. To waterproof your creation, apply a continuous bead of E6000 glue around the rim of your container where the solar light will rest. Once the glue is applied, firmly press the solar light into place, ensuring a tight seal. Allow the glue ample time to cure according to the manufacturer’s instructions, typically 24-72 hours, to achieve its maximum strength and watertight properties. This bonding will effectively protect the internal electronics from moisture, ensuring longevity.
Beyond waterproofing, this step also offers a fantastic opportunity for further customization. Consider adding decorative elements inside your chosen container before permanently sealing it with the solar light. Clear glass vases, for instance, can be filled with colored glass pebbles, iridescent marbles, sea glass, small river stones, or even fairy lights (battery-operated ones for extra glow!) to create stunning visual effects. These additions not only enhance the aesthetic appeal but can also help diffuse the light in captivating ways or add a bit of weight to ensure stability. Experiment with different textures and colors to match your outdoor aesthetic perfectly.
Image Credit: ChicOnTheCheap via YouTube video.
Step Three: Charging and Placement for Optimal Glow
Once your custom solar lanterns are fully assembled and the E6000 glue has completely cured, they are ready for their debut. Before placing them in their permanent outdoor locations, it’s essential to allow them to sit in direct sunshine for at least a full day. This initial charge ensures the internal battery is fully powered, maximizing their illumination time on the first night. Solar lights operate by absorbing sunlight during the day and automatically turning on at dusk, casting a warm or cool glow for several hours into the night. For optimal performance, strategic placement is key. Choose locations in your garden, patio, or balcony that receive unobstructed sunlight for the majority of the day. Avoid areas shaded by trees, buildings, or dense foliage, as this will significantly reduce charging efficiency and, consequently, the duration and brightness of the light at night.
Consider the ambiance you wish to create when selecting placement. Line a garden path with a series of uniform lanterns for a welcoming glow, group different-sized lights on a patio table as a captivating centerpiece, or tuck them among flower beds to highlight your landscaping. These versatile lights are perfect for enhancing curb appeal, illuminating entertaining spaces, or simply adding a touch of magic to your evening strolls. Remember to periodically wipe down the solar panels with a damp cloth to remove any accumulated dust, dirt, or debris, as a clean panel is crucial for efficient solar energy absorption. With proper charging and placement, your custom dollar store solar lights will provide beautiful, sustainable illumination for countless nights.
Unleashing Your Creativity: Endless Design Possibilities
The beauty of this dollar store solar light hack lies in its boundless potential for customization. The video tutorial by ChicOnTheCheap, for instance, showcases a diverse array of containers that can be repurposed, offering a glimpse into the creative freedom available. From elegant glass vases that diffuse light beautifully to rustic tea light holders that provide intimate accents, and versatile mason jars that can be hung or placed, the options are truly endless. Candle holders of various styles and materials can also be reimagined, transforming classic forms into modern solar-powered beacons.
Think beyond just placing the light in a container. Consider theme-based designs: for a rustic look, use distressed metal containers or wrap mason jars in twine; for a modern minimalist vibe, opt for sleek, geometric glass or ceramic vessels. You can even create taller, more dramatic lighting features. By securing the solar light assembly to an extended stake, perhaps a sturdy broom handle or a piece of rebar, you can craft impressive solar light torches that add vertical interest and increased illumination to pathways or garden borders. The key is to experiment with different heights, textures, and groupings to create a dynamic and inviting outdoor atmosphere. Explore thrift stores, garage sales, and even your own cupboards for unique containers that can add a personal touch to your solar light creations. With a little imagination, every ordinary item can become an extraordinary piece of outdoor decor, brilliantly lit by the sun.
Tips for Longevity and Maximizing Your Solar Light Investment
To ensure your beautiful, custom solar lights continue to shine brightly for as long as possible, a few simple maintenance tips can make a significant difference. Firstly, consistently ensure your solar panels are clean. Dust, pollen, leaves, and other debris can accumulate on the panel’s surface, hindering its ability to absorb sunlight efficiently. A quick wipe with a damp cloth every few weeks will maintain optimal charging performance. Secondly, while E6000 glue is excellent for waterproofing, extreme weather conditions over time can test its limits. Periodically inspect the seal around your solar light; if you notice any cracking or separation, a small reapplication of glue can reinforce the seal and prevent moisture intrusion.
The internal rechargeable batteries within solar lights typically have a lifespan of 1-2 years. If you notice your lights becoming dimmer or staying illuminated for shorter periods, it’s likely time to replace the battery. Most solar lights use standard AA or AAA NiMH (Nickel-Metal Hydride) rechargeable batteries, which are readily available and inexpensive. Replacing them is usually a simple process of unscrewing the battery compartment. In regions with harsh winters, consider bringing your solar lights indoors during the coldest months. Storing them in a sheltered location will protect the batteries and electronic components from extreme temperatures, extending their overall life. By following these straightforward tips, you can enjoy the charming glow of your DIY dollar store solar lights for many seasons to come, making your initial small investment yield incredible long-term value and beauty for your outdoor spaces.
This ingenious dollar store solar light hack is a testament to how easily and affordably you can elevate your outdoor decor. It’s more than just a lighting solution; it’s an opportunity to infuse your personal style into your garden, patio, or balcony without the typical expense. With minimal materials, a few simple steps, and a dash of creativity, you can transform ordinary solar yard lights into extraordinary, custom-made lanterns. So, head to your nearest dollar store, gather your supplies, and start crafting the beautiful, sustainable, and utterly unique outdoor lighting solutions you’ve always dreamed of. Your outdoor oasis awaits!