
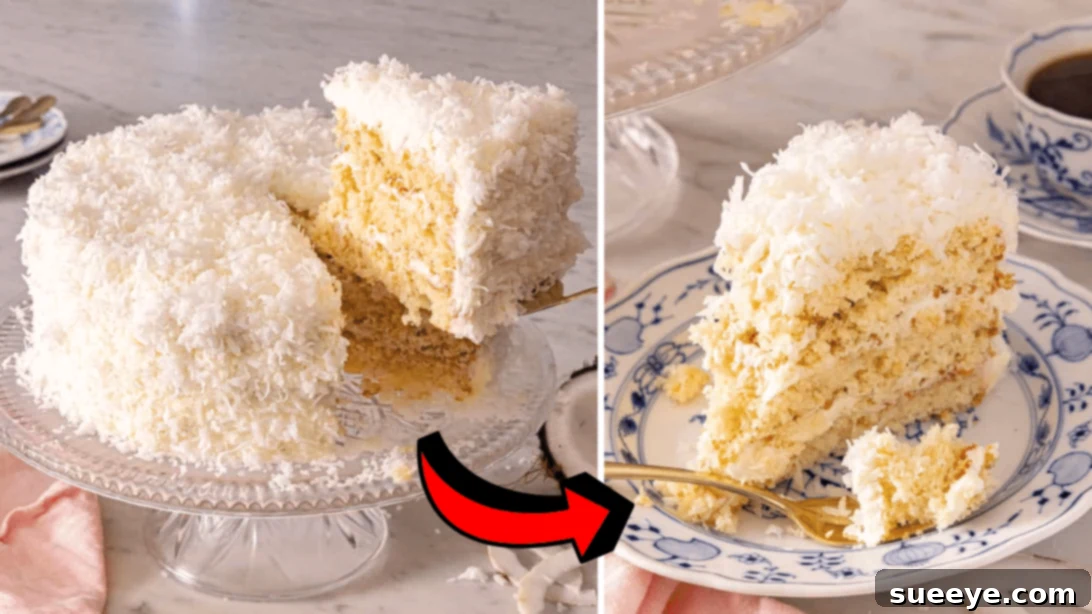
The Ultimate Old-Fashioned Coconut Cake: A Preppy Kitchen Masterpiece
Few desserts evoke a sense of nostalgia quite like a perfectly baked coconut cake. Its delicate texture, rich coconut flavor, and often, a luxurious cream cheese frosting, make it an irresistible classic. Having experimented with several variations over the years, I can confidently say that this particular recipe, brilliantly shared by Preppy Kitchen on YouTube, stands out as truly the best. It delivers an incredibly moist crumb and a balanced sweetness that will have you reaching for another slice before you’ve even finished the first.
This Old-Fashioned Coconut Cake is more than just a dessert; it’s a celebration in itself. Its elegant appearance and unforgettable taste make it an ideal centerpiece for birthday parties, holiday feasts, family gatherings, or any special occasion where you want to impress. What’s even better is its universal appeal – both children and adults are consistently charmed by this delightful treat. If you’re looking for a reliable, utterly delicious, and surprisingly straightforward recipe to master, look no further. Prepare to create a culinary masterpiece that will be requested again and again.
RELATED RECIPE IDEA: If you love coconut, you might also enjoy Grandma’s Easy Triple Coconut Pound Cake Recipe for another delightful variation.
Essential Ingredients for this Old-Fashioned Coconut Cake:
For the Moist Coconut Cake Layers:
- 3 cups of cake flour. Using cake flour, which has a lower protein content than all-purpose flour, is crucial for achieving the cake’s signature soft, tender, and delicate crumb.
- 2 cups of granulated sugar. Provides sweetness and contributes to the cake’s moistness and golden crust.
- 2¼ tsp of baking powder. This leavening agent helps the cake rise, resulting in a light and airy texture.
- ½ tsp of baking soda. Activated by acidic ingredients, baking soda works alongside baking powder to ensure optimal lift and tenderness.
- 1 tsp of salt. A pinch of salt enhances all the other flavors, balancing the sweetness and bringing out the rich coconut notes.
- 1 cup of unsalted butter, at room temperature and cubed. Room temperature butter creams beautifully with sugar, incorporating air for a light texture and contributing rich flavor and moisture.
- 4 egg whites, lightly beaten. Egg whites add structure and lift without the richness of yolks, contributing to the cake’s bright, white appearance and tender texture.
- 1 cup of milk, at room temperature. Room temperature milk emulsifies better with other ingredients, ensuring a smooth, consistent batter.
- 2 tsp of vanilla extract. Classic vanilla complements the coconut beautifully, adding depth and warmth to the overall flavor profile.
- 1 tsp of coconut extract. This intensifies the coconut flavor, making sure it shines through in every bite.
- 1 cup of sweetened shredded coconut. Incorporated directly into the batter, this adds texture, natural sweetness, and a burst of authentic coconut flavor.
For the Luscious Cream Cheese Frosting:
- 1 cup of unsalted butter, softened. Softened butter is key for a smooth, creamy, and spreadable frosting.
- 1 (8 oz) block of cream cheese, at room temperature. Full-fat cream cheese at room temperature ensures a rich, tangy, and lump-free frosting.
- 1 tsp of vanilla extract. Essential for balancing the flavors and adding a classic sweetness to the frosting.
- ¼-½ tsp of coconut extract. Adjust to your preference for a more pronounced coconut essence in the frosting.
- ¼ tsp of salt. A small amount of salt cuts through the sweetness and enhances the creaminess of the frosting.
- 5 cups of powdered sugar. The base of the frosting, powdered sugar dissolves easily to create a smooth, velvety texture.
- 2½ cups of sweetened shredded coconut. Abundantly used to coat the cake, providing beautiful texture and an intense coconut experience.
How to Bake This Incredible Old-Fashioned Coconut Cake:
Step 1: Prepare Your Pans and Dry Ingredients
Begin by preheating your oven to a precise 350°F (175°C). This ensures the oven is at the correct temperature when the cake batter is ready, promoting even baking. Prepare three 9-inch round cake pans by generously greasing them with butter or a non-stick baking spray, then lightly dusting them with flour. This critical step prevents sticking and helps the cakes release cleanly. For an extra layer of insurance and perfectly flat bottoms, line the base of each pan with parchment paper. Cut the parchment into circles that fit snugly inside the pans. Set these prepared pans aside.
In a large mixing bowl, meticulously sift together the cake flour, granulated sugar, baking powder, baking soda, and salt. Sifting is crucial here as it aerates the dry ingredients, eliminates any lumps, and ensures a uniform mixture, contributing to a lighter cake. Next, add the cubed, room-temperature unsalted butter to the dry ingredients. Using an electric mixer on low speed, beat the mixture for about 1 minute until it resembles coarse, moist crumbs. This technique, known as the reverse creaming method, helps to coat the flour in fat, creating an incredibly tender cake.
Step 2: Incorporate Wet Ingredients and Coconut
To the crumbly mixture, add the lightly beaten egg whites, room temperature milk, vanilla extract, and coconut extract. Continue mixing on low speed until all the ingredients are just combined. Avoid overmixing at this stage. Once combined, increase the mixer speed to medium and beat for precisely 1 minute. This step aerates the batter further, making it fluffy and light. Stop the mixer, scrape down the sides of the bowl with a rubber spatula to ensure everything is evenly incorporated, then gently fold in the sweetened shredded coconut. Folding rather than beating prevents the coconut from breaking down too much. Evenly divide the cake batter among the three prepared pans, using an offset spatula to smooth out the surface in each pan. This promotes even rising and baking.
Step 3: Bake and Cool the Cake Layers
Carefully place the cake pans into your preheated oven. Bake for approximately 30 minutes. To ensure even baking and a consistent rise across all three layers, rotate the pans halfway through the baking time, at the 15-minute mark. Continue baking until a wooden toothpick inserted into the center of a cake comes out with a few moist crumbs attached, but no wet batter. This indicates the cakes are perfectly cooked and still wonderfully moist. Once baked, remove the cakes from the oven and allow them to cool in their pans on a wire rack for about 20 minutes. This crucial resting period allows the cakes to firm up and prevents them from breaking when inverted. After 20 minutes, carefully invert the cakes onto the wire rack to cool completely. Gently peel off the parchment paper from the bottoms. Ensure the cakes are completely cool before frosting; warm cakes will melt the frosting.
Step 4: Prepare the Decadent Cream Cheese Frosting
In a large mixing bowl, using an electric mixer, beat the softened unsalted butter on medium-high speed for about 3 minutes until it becomes exceptionally creamy, light, and fluffy. This aeration step is vital for a light frosting. Next, add the room-temperature cream cheese, vanilla extract, coconut extract, and a pinch of salt. Continue beating for another 2 minutes, or until the mixture is fluffy and well combined. Remember to scrape down the sides of the bowl occasionally with a spatula to ensure all ingredients are thoroughly mixed and no lumps remain.
Step 5: Finish the Frosting and Assemble Your Masterpiece
Gradually add the powdered sugar, 1 cup at a time, to the butter and cream cheese mixture while mixing continuously on low speed. This prevents a sugar cloud and ensures the sugar is fully incorporated. Once all the sugar is added, scrape down the sides of the bowl one last time. Increase the mixer speed to medium and beat the frosting for 1 more minute until it reaches a wonderfully fluffy and smooth consistency. Now, it’s time to assemble your cake! Following the visual guidance from the Preppy Kitchen video tutorial, generously layer the frosting between each cake layer, ensuring even distribution. Once stacked, apply a crumb coat of frosting over the entire cake, then follow with a final, thick layer of frosting. Press the remaining sweetened shredded coconut all over the sides and top of the cake for that classic, inviting finish. Place the assembled cake in the refrigerator to chill for at least 30 minutes. This helps the frosting set, making the cake easier to slice and serve. Once chilled, slice, serve, and savor every exquisite bite! Enjoy!
Expert Tips for Baking the Perfect Coconut Cake:
- Room Temperature Ingredients are Key: Ensure butter, cream cheese, milk, and egg whites are all at room temperature. This allows them to emulsify properly, creating a smoother batter and frosting, resulting in a more uniform texture in the final product.
- Don’t Overmix: After adding the dry ingredients to the wet, mix only until just combined. Overmixing develops the gluten in the flour, leading to a tough, dense cake.
- Sift Dry Ingredients: Sifting flour, sugar, baking powder, baking soda, and salt together aerates them and removes any lumps, ensuring a light and even crumb.
- Accurate Measurements: Baking is a science. Use proper measuring cups and spoons, and for best results, weigh your ingredients with a kitchen scale, especially flour.
- Patience with Cooling: Resist the urge to frost warm cakes. Warmth will cause the butter and cream cheese in the frosting to melt, leading to a messy, runny disaster.
- Quality Extracts: Invest in good quality vanilla and coconut extracts. They make a significant difference in the depth and authenticity of the cake’s flavor.
- Toasting Coconut: For an extra layer of flavor and crunch, lightly toast some of the shredded coconut before using it for decoration. This caramelizes the sugars and intensifies the coconut flavor.
Serving and Storage Suggestions:
This Old-Fashioned Coconut Cake is absolutely divine on its own, but it pairs wonderfully with a fresh cup of coffee or a delicate tea. For an elegant presentation, garnish individual slices with a few fresh berries, such as raspberries or blueberries, or a sprig of mint. The vibrant colors will contrast beautifully with the white frosting. Store any leftover cake in an airtight container in the refrigerator for up to 3-4 days. For longer storage, slices can be individually wrapped and frozen for up to 2 months. Thaw in the refrigerator overnight before serving.
Why This Easy Old-Fashioned Coconut Cake Recipe is a Must-Try:
This recipe truly simplifies the art of baking a classic coconut cake without compromising on flavor or texture. From its remarkably moist cake layers, bursting with real coconut, to the rich and tangy cream cheese frosting that perfectly balances the sweetness, every element is designed for pure indulgence. The clear, step-by-step instructions ensure success, even for those who are new to baking elaborate cakes. It’s an approachable recipe that yields professional-quality results, making it the perfect choice for home bakers aiming to impress. Give it a try, and discover why this Old-Fashioned Coconut Cake will quickly become a cherished favorite in your recipe collection.
*All image credit belongs to Preppy Kitchen via YouTube. Follow and subscribe to his channel for more inspiring and delicious recipes!