
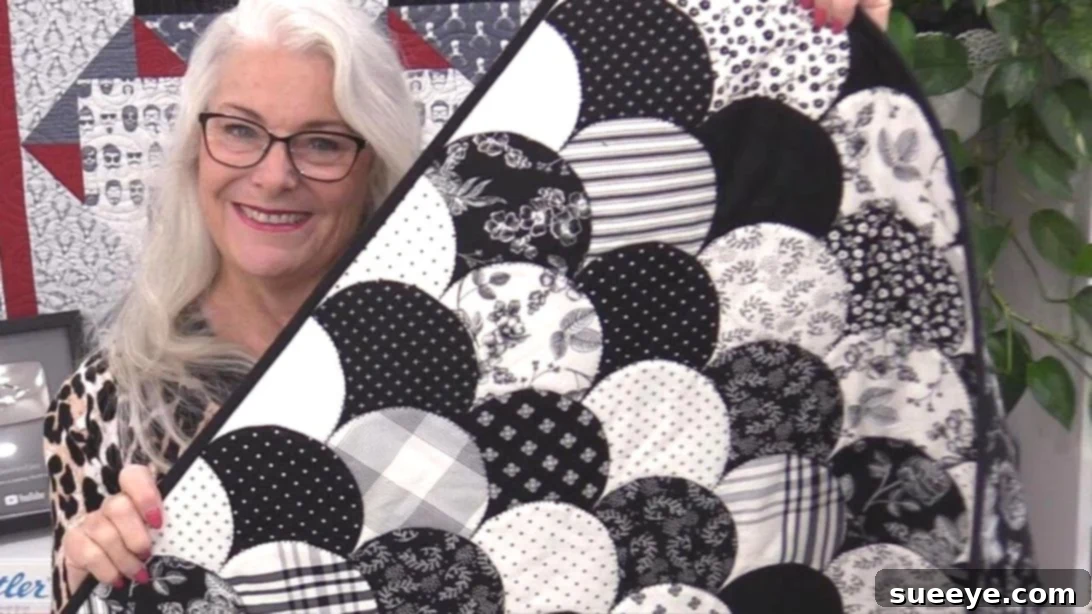
Mastering the Clamshell Quilt: An Easier Method for Stunning Results
Clamshell quilts are renowned for their intricate beauty and elegant curved designs, making them a coveted project for many quilters. However, the traditional method of sewing these delicate curves can often be a source of frustration, challenging even experienced crafters. The precision required to align multiple curved pieces perfectly and avoid puckering is a common hurdle that deters many from attempting this stunning pattern.
But what if there was a simpler, more efficient way to achieve those flawless clamshell shapes? We’ve discovered an innovative technique, brilliantly demonstrated by SewVeryEasy, that transforms the daunting task of sewing clamshells into a genuinely enjoyable and quick process. This method leverages smart preparation and strategic stitching to virtually eliminate the common pitfalls associated with curved piecing, allowing you to create a beautiful clamshell quilt with confidence and ease. Get ready to embark on a quilting journey where precision meets simplicity, and watch your clamshell quilt come to life faster than you ever imagined!
Ready to revolutionize your quilting approach? Below, you’ll find a detailed, step-by-step guide that breaks down this ingenious technique. While this written tutorial provides comprehensive instructions, we highly recommend watching the accompanying video from SewVeryEasy for visual guidance that complements each step perfectly.
Why Traditional Clamshell Quilting is a Challenge
Before diving into the easier method, it’s helpful to understand why quilters often find clamshell patterns intimidating. The core difficulty lies in sewing two opposing curves together seamlessly. This process often leads to several common issues:
- Puckering and Gathers: Fabric, especially on curves, tends to stretch and distort, leading to uneven seams and puckers.
- Matching Points: Achieving perfectly aligned points where the clamshells meet is crucial for a polished look, but incredibly difficult with traditional techniques.
- Time-Consuming: The constant pinning, clipping, and careful manipulation of fabric can make a single clamshell row take an exorbitant amount of time.
- Inconsistent Shapes: Without a stable guide, each clamshell unit might vary slightly in size or curve, affecting the overall symmetry of the quilt.
This tutorial addresses these challenges head-on, offering a solution that minimizes frustration and maximizes your quilting enjoyment.
Essential Materials for Your Clamshell Quilt
Gathering the right materials is the first step towards a successful quilting project. This method utilizes a few key items that significantly streamline the process and ensure precise results. Here’s what you’ll need:
- 5″ Charm Packs: These pre-cut fabric squares are perfect for clamshells, offering a convenient starting point for your fabric units. They eliminate the need for initial cutting, saving time and ensuring uniform sizing. Consider selecting charm packs with a cohesive color palette for a harmonious quilt, or mix and match for a vibrant, eclectic look.
- Stabilizer (Printable PDF): This is one of the secret weapons of this method. The stabilizer provides a firm, accurate template for your curved seams. You can print the PDF template here. Ensure your printer is set to print at 100% scale to maintain the correct dimensions.
- Wash-Away Applique Sheets: These sheets are crucial for precise placement and temporary adhesion. You’ll be printing your stabilizer pattern directly onto the non-stick side of these sheets. They simplify the applique process by holding your fabric pieces in place without permanent glue, dissolving cleanly once the quilt is washed.
- Batting: The middle layer of your quilt, batting adds warmth, loft, and helps define the quilting stitches. Choose a batting type that suits your desired quilt weight and drape – cotton, polyester, or a blend are common choices.
- Backing Fabric: This forms the bottom layer of your quilt. Select a fabric that complements your charm pack choices and is wide enough to accommodate your quilt top plus a few inches for ease of handling during the quilting process.
- Basic Quilting Tools: Don’t forget your standard quilting essentials: a sewing machine, sharp scissors or a rotary cutter with a cutting mat, an iron and ironing board, quilting pins, and a good quality ruler.
Step-by-Step Guide: Crafting Your Easy Clamshell Quilt
Now, let’s dive into the practical steps. Follow these detailed instructions carefully, and you’ll be amazed at how easily your beautiful clamshell quilt comes together.
Step 1: Preparing Your Individual Clamshell Units
The foundation of this easier method lies in precise preparation. Begin by printing the stabilizer template onto the non-stick side of your wash-away applique sheets. Make sure your printer settings are accurate to ensure the templates are the correct size. Once printed, meticulously cut out each stabilizer box, ensuring clean, crisp edges. Next, press all of your 5-inch fabric squares to remove any wrinkles and create a smooth working surface. Take one cut stabilizer piece and carefully align it on top of a single fabric square. The key here is to ensure the glue side of the applique sheet is touching the right side of your fabric. This temporary adhesion will hold the stabilizer in place, acting as a crucial guide for your sewing.
Step 2: Sewing the Perfect Clamshell Curve
With your fabric and stabilizer perfectly aligned, it’s time to sew. Using your sewing machine, stitch carefully around the curved edge of the stabilizer. For optimal results on curves, set your stitch length to a slightly smaller size, around 2.0 to 2.2. This shorter stitch length allows for smoother transitions around the curve, preventing jagged edges and providing greater control. Take your time, guiding the fabric evenly, and repeat this process for all your prepared fabric squares. The stabilizer acts as a clear guide, making the curved sewing much less daunting.
Step 3: Trimming and Turning for Crisp Shapes
After sewing, you’ll have fabric squares with a stitched curve. The next crucial step is trimming the excess fabric. Carefully cut around the outside of your stitched line, getting as close as possible without accidentally cutting into the stitches themselves. Precision here is key to a clean finish. Once trimmed, gently turn each clamshell unit right side out. The stabilizer will now be on the inside. Use your fingers or a point turner to gently push out the curves, creating a neat, defined clamshell shape. Press each turned unit lightly with your hands to flatten and set the shape. This step will significantly impact the final appearance of your clamshells.
Step 4: Preparing Your Quilt Base and Layout Grid
Now it’s time to prepare the base for your quilt. Lay your chosen backing fabric smoothly on a large, flat surface. Place your batting on top of the backing fabric, ensuring it’s centered and extends beyond the backing by a few inches on all sides. At the top edge of your batting, place a 4-inch wide strip of your chosen fabric. This strip will serve as your initial guide and anchor for the first row of clamshells. Secure this strip firmly to the batting and backing with pins to prevent shifting. Next, accurately divide this 4-inch strip into 5-inch segments. You can use a fabric marker or pins to mark these divisions, creating a grid that will guide the placement of your clamshell units.
Step 5: Laying the First Row of Clamshells with Precision
Take one of your prepared clamshell units (which, once turned, will resemble a cone or scallop shape with a pointed top). Carefully position it on the 4-inch guide strip, ensuring the curved bottom edge of the clamshell rests precisely on the strip. The pointed top of the clamshell should be facing upwards. Place the subsequent clamshell units alongside the first, aligning their side edges within the 5-inch segments you marked in the previous step. Use a quilting ruler to double-check that all the points are perfectly straight and evenly spaced across the strip. Once satisfied with the alignment, secure each clamshell unit with pins. Now, using an applique stitch on your machine, sew all the way around the curved edge of each clamshell unit, from one side to the other. It is absolutely crucial not to stitch the pointed top part of the clamshell in this step. This intentional omission allows for easy layering in the subsequent rows.
Step 6: Building Subsequent Rows with Layering
With your first row securely appliqued, it’s time to add the second layer of clamshells. For this row, you will align the fusible edge of each new clamshell unit with the pointed top of the clamshells in the row below. This creates a beautiful, overlapping effect characteristic of clamshell patterns. Press each new clamshell unit firmly in place (the wash-away applique sheet’s temporary adhesive helps here). Once positioned and pressed, applique all the way around the curved edge of each clamshell, just as you did in the previous step, again leaving the pointed top unstitched. Continue this process, building row by row, ensuring consistent alignment and even spacing for a cohesive and stunning quilt top. The repetitive nature of this step allows you to get into a rhythm, making the process faster and more enjoyable.
Step 7: Finishing the Edges and Preparing for Binding
As you progress through the rows, you’ll notice that the clamshell units naturally create an undulating edge, and in some alternate rows, a portion of the quilt batting will be exposed along the raw edge. This is completely normal for this method. To prepare for binding, you’ll need to trim off these exposed batting portions and squared up the quilt edges. Carefully cut along the edge, leaving a consistent quarter-inch allowance (approx. 0.25 inches) beyond the stitched edges of your clamshells. This quarter-inch allowance is vital for creating a clean and professional finish when you attach your binding strip. For the very top edge of your quilt, ensure you also leave a quarter-inch allowance for the binding. This final trimming step ensures your quilt is perfectly squared and ready for the final, decorative binding that frames your beautiful clamshell design.
Tips for a Flawless Clamshell Quilt
To ensure your clamshell quilting project goes as smoothly as possible and yields stunning results, keep these expert tips in mind:
- Practice Makes Perfect: If you’re new to curved sewing, consider practicing on a few scrap fabric pieces before tackling your main quilt. This allows you to get a feel for the technique without risking your primary materials.
- Pressing is Your Best Friend: Don’t underestimate the power of a good press. Pressing at each stage helps to set seams, flatten fabric, and ensures accuracy. Use a steam iron for crisp results.
- Use a Walking Foot: For even fabric feeding, especially when working with multiple layers and curves, a walking foot attachment for your sewing machine can be incredibly helpful. It minimizes shifting and puckering.
- Quality Materials Matter: Invest in good quality charm packs and threads. High-quality materials will be easier to work with, stitch more smoothly, and contribute to the longevity and beauty of your finished quilt.
- Take Your Time: While this method is faster than traditional ones, rushing can still lead to errors. Enjoy the process and allow yourself to work at a comfortable, steady pace.
- Good Lighting: Ensure your workspace is well-lit to clearly see your lines, pins, and fabric details, which is crucial for precision.
Benefits of This Simplified Clamshell Method
Embracing this innovative method for creating clamshell quilts offers a multitude of advantages that will enhance your quilting experience:
- Enhanced Precision: The stabilizer and wash-away applique sheets act as precise guides, ensuring perfectly uniform clamshell shapes and accurate curves, virtually eliminating distortion and unevenness.
- Significantly Faster: Compared to traditional curved piecing, this technique drastically reduces the time spent on preparation, intricate pinning, and painstaking alignment, allowing you to complete your project more quickly.
- Reduced Frustration: Say goodbye to the common headaches of puckering seams and misaligned points. This method is designed to minimize errors and maximize enjoyment, making quilting a stress-free hobby.
- Professional Finish: The controlled stitching and precise shaping lead to a quilt top that looks professionally made, with crisp edges and beautifully flowing curves that will impress.
- Beginner-Friendly: While clamshells are often considered an advanced pattern, this method makes the design accessible to quilters of all skill levels, empowering more people to try it.
Frequently Asked Questions About Clamshell Quilting
- What type of stabilizer should I use?
- The tutorial specifically recommends a printable stabilizer used with wash-away applique sheets. Ensure it’s suitable for your printer and that the adhesive is temporary and water-soluble for clean removal once the quilt is washed.
- Can I use fabric scraps instead of charm packs?
- Absolutely! While charm packs offer convenience and uniform sizing, you can certainly cut your own 5-inch squares from fabric scraps. Just ensure they are precisely cut to maintain uniformity in your clamshell units.
- How do I choose the right batting for my quilt?
- The best batting depends on your desired outcome. Cotton batting is breathable, creates a classic drape, and crinkles nicely after washing. Polyester offers more loft and warmth. Blends provide a balance of both. Consider the climate and intended use of your quilt.
- What if my machine struggles with the small stitch length on curves?
- Ensure your needle is sharp and new. You might also try slowing down your sewing speed considerably. Some machines handle smaller stitches on curves better than others, so practice on scraps to find what works best for your specific machine.
- Is it really necessary to press at every step?
- Yes, pressing is a critical, often overlooked step in quilting. It helps to set stitches, remove bulk from seams, and ensures your fabric lies flat and true, which is especially important for intricate patterns like clamshells to achieve a crisp, professional look.
Conclusion: Embrace the Joy of Clamshell Quilting
You’ve now uncovered the secrets to creating a stunning clamshell quilt with unprecedented ease and speed. This innovative method, championed by SewVeryEasy, transforms a once-challenging pattern into an accessible and incredibly rewarding project. By utilizing printable stabilizers and wash-away applique sheets, you gain the precision needed for those beautiful curves without the usual frustration. Say goodbye to puckered seams and hello to a flawless finish!
Whether you’re a seasoned quilter looking for a quicker technique or a beginner eager to tackle an advanced-looking pattern, this tutorial provides all the guidance you need. Gather your materials, watch the video for visual reinforcement, and prepare to be delighted by the process and the exquisite results. This method promises to elevate your quilting skills and bring a new level of enjoyment to your crafting. Happy quilting!