
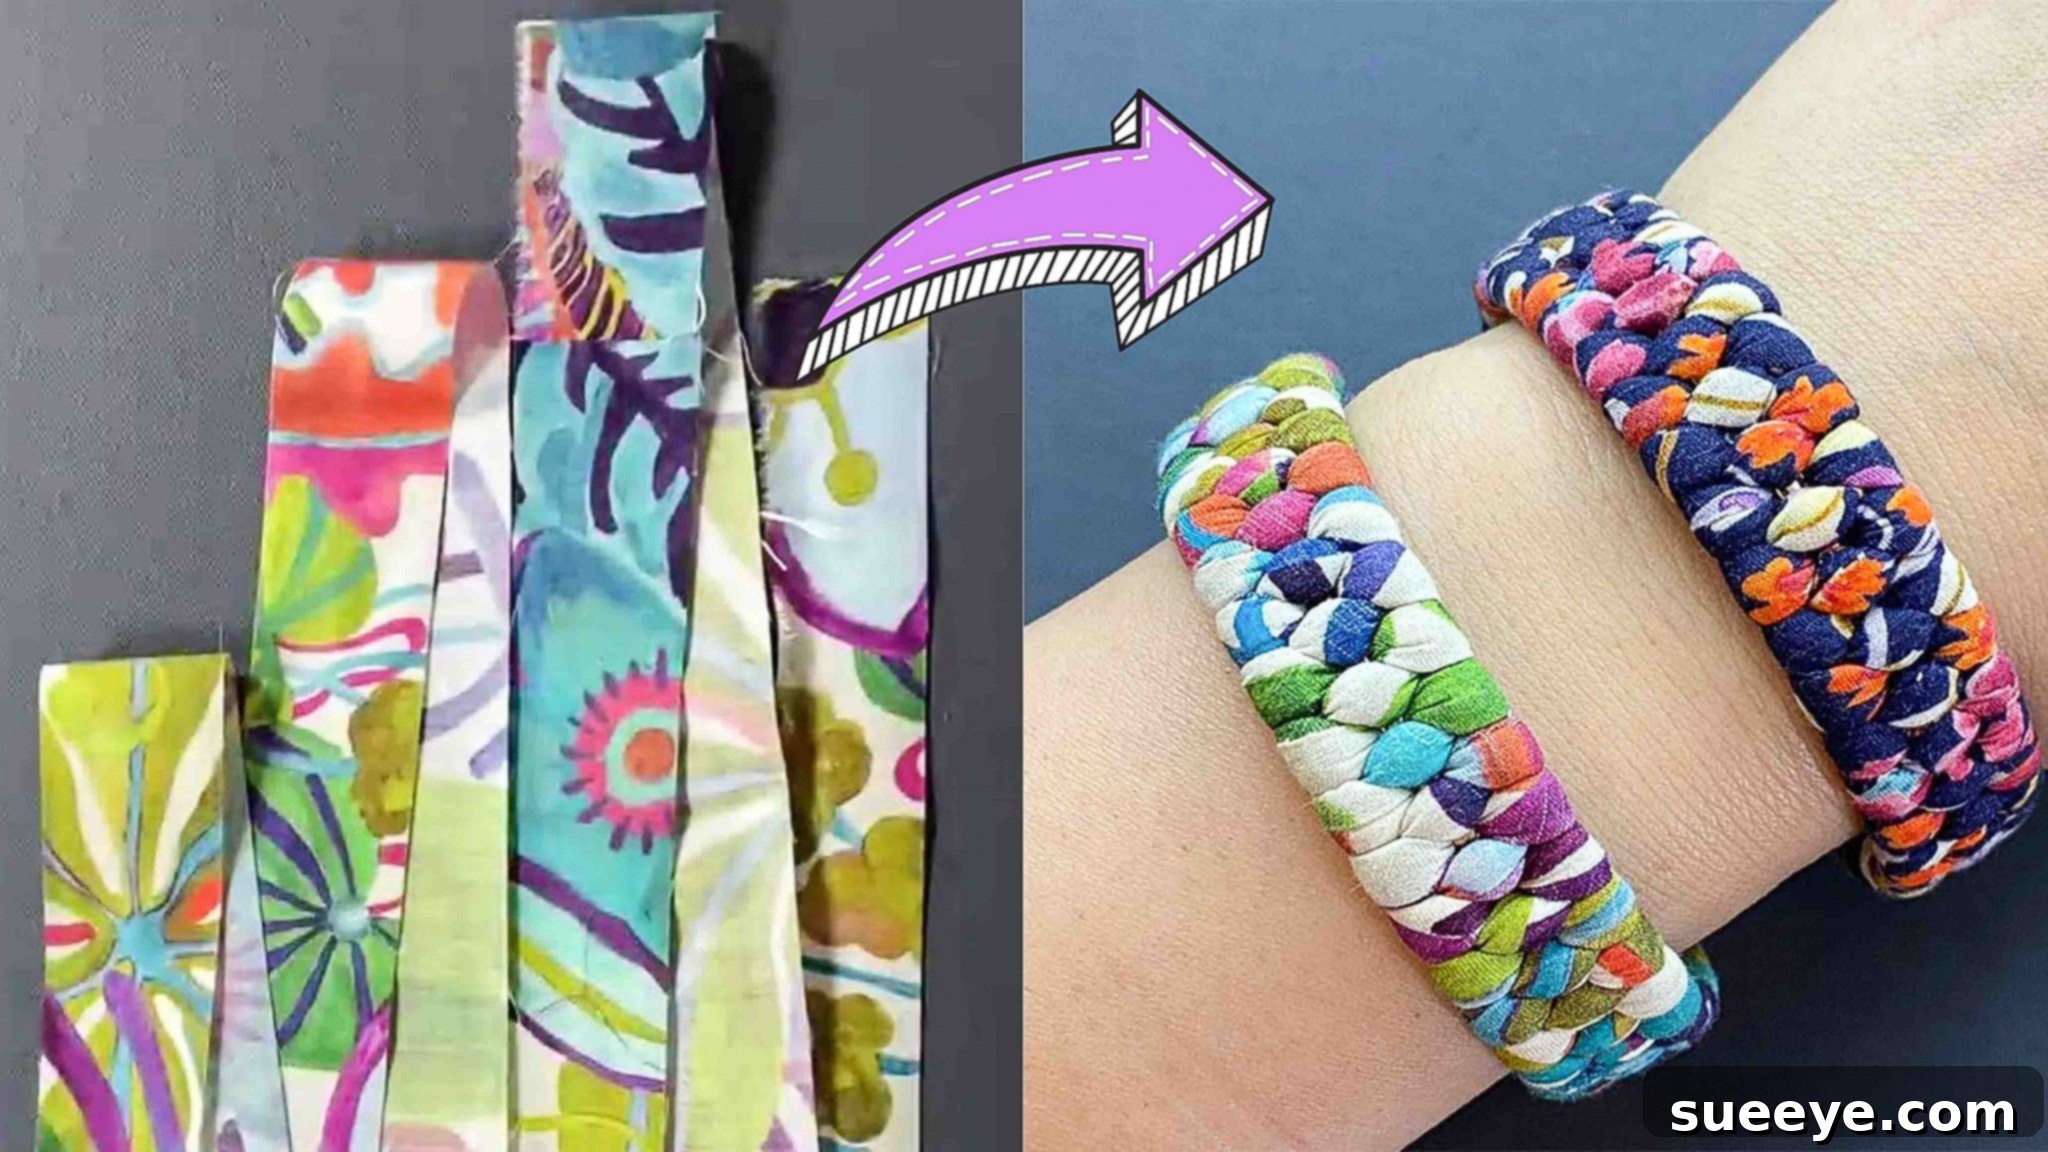
Unleash Your Creativity: Crafting Stunning Braided Bracelets from Fabric Scraps
Are you a passionate fashionista with a heart for sustainability? Do you love the idea of transforming forgotten scraps into dazzling accessories? If so, then get ready to dive into the enchanting world of upcycling with this incredible fabric scrap braided bracelet tutorial! Inspired by the brilliant creators at Red Blossom Designs on YouTube, this guide will empower you to craft unique, stylish bracelets that not only elevate your look but also contribute positively to our planet. Who wouldn’t want to look effortlessly chic while making an eco-conscious choice?
Making these braided bracelets is not just a craft; it’s a statement. It’s surprisingly easy, incredibly fun, and deeply rewarding. Forget mass-produced accessories; it’s time to infuse your wardrobe with a touch of personal flair and environmental responsibility. Gather your materials, prepare your workspace, and let’s bring your A-game to the world of handmade fashion. This comprehensive tutorial will walk you through every step, ensuring you create a masterpiece you’ll be proud to wear and share.
Why Upcycle Fabric Scraps into Fashionable Bracelets?
In an age where fast fashion dominates, the practice of upcycling offers a refreshing and responsible alternative. Fabric scraps, often discarded without a second thought, possess immense potential for transformation. By choosing to craft a braided bracelet from these remnants, you’re not just making a piece of jewelry; you’re actively participating in a movement towards a more sustainable lifestyle. Here’s why upcycling fabric scraps for your next accessory project is a fantastic idea:
- Environmental Stewardship: Every piece of fabric you repurpose means less waste ending up in landfills. This reduces pollution, conserves resources, and lowers your carbon footprint. It’s a small step that makes a big difference.
- Unleash Unique Style: Mass-produced items often lack individuality. Handmade bracelets, especially those crafted from an assortment of fabric scraps, offer unparalleled uniqueness. No two bracelets will ever be exactly alike, ensuring your accessory is as individual as you are.
- Cost-Effective Crafting: Why buy new materials when you have a treasure trove of textiles waiting to be reimagined? Utilizing fabric scraps from old clothes, linens, or previous sewing projects is incredibly economical, allowing you to indulge your creative impulses without breaking the bank.
- Therapeutic & Rewarding: The process of crafting is inherently meditative and enjoyable. From selecting your fabrics to the rhythmic motion of braiding, each step can be a relaxing escape. The satisfaction of wearing or gifting something you’ve made yourself is immeasurable.
- Perfect for Gifting: A handmade fabric scrap bracelet makes a thoughtful, personalized gift for friends and family. It shows care, creativity, and a commitment to sustainable living, making it much more meaningful than a store-bought item.
Embrace the challenge of giving new life to old materials. This tutorial offers a fantastic entry point into the world of upcycling, proving that style and sustainability can beautifully intertwine.
Gathering Your Creative Toolkit: Materials for Your Braided Bracelet
Before embarking on this exciting crafting journey, it’s essential to gather all your materials. Having everything at hand ensures a smooth and enjoyable creative process. Here’s a detailed look at what you’ll need:
- Fabric (of your choice): This is the star of your bracelet! Think about the colors, patterns, and textures you want to combine. Cotton, linen, jersey, or even silk scraps can work beautifully. Consider coordinating colors for a cohesive look or mixing bold prints for an eclectic vibe.
- Needle and Thread: A sharp sewing needle and strong all-purpose thread are crucial for assembling your fabric strip and securing the ends. Choose a thread color that either matches your fabric or provides a subtle contrast.
- 3 Pieces of Thin Metal Wristbands: These form the core structure of your bracelet, providing rigidity and shape. Ensure they are comfortable to wear and the right size for your wrist. Bracelets with a smooth, thin profile work best for a seamless wrap.
- Iron: An iron is indispensable for pressing your fabric strip, ensuring crisp folds and a professional finish before sewing.
- Yarn: A 6-strand embroidery floss or thin yarn is used to stuff the fabric tube, giving it body and a soft, rounded shape for braiding. The thickness of the yarn will influence the final plumpness of your fabric strip.
- Scissors: Sharp fabric scissors are essential for clean, precise cuts.
With these materials assembled, you’re ready to transform simple scraps into a wearable piece of art.
Step-by-Step Guide to Crafting Your Fabric Scrap Braided Bracelet
Now, let’s get down to the exciting part: bringing your fabric scrap braided bracelet to life! Follow these detailed instructions carefully for the best results.
Step 1: Preparing Your Fabric Strip and Stuffing
The foundation of your braided bracelet is a neatly prepared and stuffed fabric strip. Precision in this step will ensure a beautiful, professional-looking finished product.
- Cut Your Fabric Strip: Begin by cutting a strip of your chosen fabric. The ideal measurement is approximately 2.5 cm (about 1 inch) wide and 2 meters (about 79 inches) long. If your fabric scraps aren’t long enough, you can easily join two or more pieces together using a small seam to achieve the required length. This flexibility allows you to use even smaller remnants.
- Fold and Press: Once you have your continuous strip, fold it in half lengthwise, with the right sides facing inwards. Using your iron, press this fold firmly. This step creates a crisp edge and prepares the fabric for sewing, ensuring a neat and straight seam.
- Sew the Fabric Tube: Take your folded and pressed fabric strip to your sewing machine. Stitch along the raw edge with a 5 mm (approximately 1/4 inch) seam allowance. This will create a long, narrow fabric tube. Be careful to maintain a consistent seam allowance for an even tube.
- Prepare for Turning: To easily turn your fabric tube right side out, cut one end of the tube diagonally. This reduces bulk at the tip and makes it easier to manipulate.
- Turn the Fabric Tube: Thread a sturdy needle with a strong thread, long enough to pass through the entire length of your fabric tube. Securely stitch the needle to the diagonal end of the fabric tube, ensuring it’s firmly attached and won’t pull off. Now, carefully push the needle, eye-first, into the fabric tube and guide it all the way through to the other end. As you pull the thread, the fabric tube will begin to turn right side out, revealing the neat seam on the inside. This method is much easier than trying to turn a narrow tube with a safety pin or bodkin.
- Stuff with Yarn: Once your fabric tube is turned, grab your 6-strand yarn. Attach one end of the yarn to the thread still attached to the needle. Using the needle and thread, gently pull the yarn through the entire length of the fabric tube. The yarn will act as a filler, giving the fabric strip a soft, padded, and rounded form, which is essential for achieving a full and attractive braid. Ensure the yarn fills the tube evenly, avoiding any bunching.
- Trim Excess Yarn: Once the yarn has been pulled through and the fabric tube is uniformly plumped, cut off any excess yarn extending from both ends of the fabric strip. You should now have a long, stuffed fabric string ready for braiding.
Step 2: Attaching the Wristbands and Braiding
With your fabric strip prepared, it’s time to incorporate the metal wristbands and begin the unique braiding process that gives this bracelet its charm.
- Secure the First Wristband: Take one of your thin metal wristbands. Position one end of your stuffed fabric string against this wristband. Using your needle and thread, firmly sew the fabric string end to the metal wristband. Make several strong stitches to ensure it’s securely attached, as this connection will bear tension during the braiding process.
- Position the Remaining Wristbands: Arrange the other two metal wristbands alongside the first one. They should be parallel and close together, ready to be enveloped by the fabric string.
- Begin the Over-Under Wrap: Now, you’ll start wrapping the fabric string around the three wristbands in a continuous “over-under-over-under” motion. Imagine the three wristbands as the strands of a braid. Pass your fabric string over the first wristband, under the second, over the third, then loop back around and continue the pattern. The goal is to fully wrap and cover all three metal wristbands, creating a solid, cohesive braided look. Maintain even tension as you wrap to ensure a neat and tight finish. This technique creates a distinctive, interwoven appearance that is both beautiful and sturdy. Continue until the entire length of the metal wristbands is covered.
Step 3: Finishing Your Braided Bracelet
The final steps involve neatly securing the end of your fabric string to complete your beautiful braided bracelet, ensuring it’s durable and looks professionally finished.
- Expose and Remove Yarn: Once you have fully wrapped the metal wristbands, cut the tip of the fabric string that remains. This will expose the yarn stuffing inside. Carefully pull out and cut away this exposed yarn, leaving only the fabric at the very end of your wrapped bracelet. This step helps reduce bulk for a cleaner finish.
- Trim and Fold the Fabric End: Cut the remaining fabric, leaving a small portion (about 1-2 cm or 0.5 inches) extending beyond the last wrapped section. Fold this small portion inwards towards the bracelet, tucking under any raw edges.
- Secure the End: Using your needle and thread, sew this folded fabric end securely onto the bracelet, right where it meets the last wrapped section. Make sure to stitch through several layers to create a strong, invisible closure. Take your time to hide your stitches as much as possible for a seamless look.
Congratulations! You have now completed your exquisite fabric scrap braided bracelet. Take a moment to admire your handiwork and the unique beauty you’ve created from simple materials.
Tips for Success and Customization
To make your fabric scrap braided bracelets even more spectacular and truly reflective of your personal style, consider these additional tips and customization ideas:
- Fabric Selection Matters:
- Colors & Patterns: Experiment with contrasting colors for a vibrant look, or use complementary shades for a more subtle elegance. Small floral prints, geometric patterns, or even solid colors can create vastly different aesthetics.
- Texture Play: While cotton is easy to work with, don’t shy away from other fabrics. A mix of different textures, like a smooth cotton combined with a slightly slubby linen, can add an interesting tactile dimension to your bracelet.
- Vary the Wristbands:
- Sizes: Use different diameter wristbands for a more chunky or delicate bracelet.
- Shapes: While thin circular bands are typical, explore oval or even squared metal bands for a unique twist. Ensure they are smooth to prevent snagging your fabric.
- Add Embellishments:
- Beads & Charms: Before securing the fabric ends, you can thread small beads or charms onto the fabric strip or even directly onto the metal wristbands in between the fabric wraps for extra sparkle and personality.
- Buttons & Appliqués: Small, decorative buttons or tiny fabric appliqués can be sewn onto the finished bracelet for a whimsical touch.
- Experiment with Braiding Tension:
- Practice maintaining consistent tension during the “over-under” wrapping. Tighter wraps will result in a firmer, more compact bracelet, while slightly looser wraps can create a softer, more relaxed feel.
- Consider the Occasion:
- Create an everyday bracelet with sturdy cotton fabrics, or craft a more elegant piece using satin or silk scraps for special occasions.
- Gifting with Thought:
- Personalize a bracelet by using fabric scraps from a loved one’s old garment, making it a truly sentimental and memorable gift.
- Care Instructions:
- Most fabric bracelets can be gently hand-washed with mild soap and air-dried if they become soiled. Avoid harsh chemicals or machine washing to preserve their shape and color.
Troubleshooting Common Issues
Even seasoned crafters encounter challenges. Here are a few common issues you might face and how to troubleshoot them:
- Uneven Wrapping/Braiding: This often happens due to inconsistent tension. Try to keep a steady pull on your fabric strip as you wrap. If you notice an uneven section, gently unwrap a small portion and re-wrap it with more uniform tension.
- Fabric Bunching or Twisting: Ensure your fabric strip is pressed flat and your seam is straight before you begin turning it and stuffing it with yarn. When turning, make sure the fabric is not catching inside itself.
- Ends Not Securing Neatly: The key to a clean finish is to trim the yarn well and leave just enough fabric to fold and securely stitch down. Don’t leave too much excess fabric, as it can be bulky, but ensure there’s enough to fully tuck under raw edges. Multiple small, hidden stitches are better than a few large, visible ones.
- Bracelet Feels Too Loose or Too Tight: The size of your initial metal wristbands will determine the bracelet’s fit. Ensure you select wristbands appropriate for the wearer’s wrist size. If you want a looser fit, you might use slightly larger wristbands or incorporate a small chain extender at the closure (though this tutorial uses a continuous wrap).
Patience is key in crafting. Don’t be discouraged if your first attempt isn’t perfect. Each bracelet you make will refine your skills and creativity.
Conclusion: Wear Your Creativity, Embrace Sustainability
You’ve now mastered the art of creating stunning braided bracelets from simple fabric scraps! This project, inspired by the innovative spirit of Red Blossom Designs, goes beyond just making jewelry; it’s a testament to the power of upcycling, sustainable crafting, and personal expression. Each bracelet you create is a unique piece of wearable art, a conversation starter, and a gentle nod to eco-conscious living.
By transforming what would otherwise be discarded fabric into a beautiful accessory, you’re not only adding a distinctive touch to your wardrobe but also contributing to a more sustainable world. It’s a craft that is both gratifying and impactful, offering a delightful way to explore your creativity while being mindful of our planet.
We encourage you to experiment with different fabrics, colors, and embellishments. Let your imagination soar and create a collection of braided bracelets that truly reflect your individual style. Share your creations, inspire others, and continue to explore the endless possibilities that upcycling offers. Happy crafting, and enjoy wearing your beautifully handmade fabric scrap braided bracelet!