
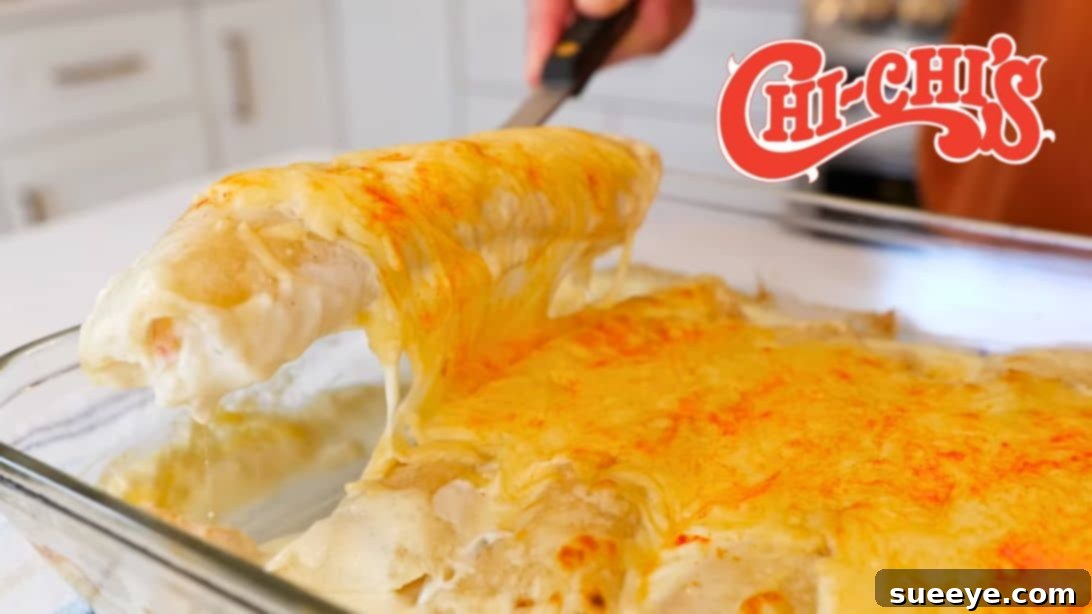
There are some flavors from the past that simply transport you back in time, and for many, Chi Chi’s enchiladas hold that exact power. For years, I chased that elusive taste, desperately searching for a copycat recipe that could truly capture the essence of my favorite Chi Chi’s dish. I tried numerous versions, hoping to rekindle the joy of those creamy, savory enchiladas, but none quite hit the mark. They often lacked the specific depth of flavor or the comforting creaminess that made Chi Chi’s so unforgettable. The search for that perfect blend of spices, the tender seafood, and that signature rich white sauce often left me feeling nostalgic but unsatisfied.
Then, during a recent quest for culinary inspiration, I stumbled upon a revelation: a meticulously crafted casserole recipe shared by the talented folks at Views on the Road. From the first glance at the ingredient list and the detailed method described, I had a strong feeling this might be the one. The preparation immediately ignited a spark of excitement, and with the very first bite, I was instantly transported. It wasn’t just delicious; it was a vivid taste of memory, a perfect replica of the enchilada experience I’d been craving for so long. This recipe isn’t merely food; it’s a culinary journey back to a beloved era, delivering comfort and incredible flavor in every single bite. If you’ve been yearning for that authentic Chi Chi’s taste, prepare to create your own cherished memories with this outstanding Chi Chi’s Enchilada Casserole.
Ingredients for Your Nostalgic Chi Chi’s Enchilada Casserole
Crafting this incredible Chi Chi’s style enchilada casserole requires a careful selection of fresh, high-quality ingredients. Each component plays a vital role in building the dish’s signature creamy texture and rich, savory flavor profile. Here’s what you’ll need, along with some tips for choosing and preparing the best options to ensure your casserole is a resounding success:
- 12 Flour Tortillas: For this recipe, opt for soft, medium-sized flour tortillas (ideally about 8-10 inches in diameter). Their pliability is crucial to prevent tearing when rolled and baked. Warming them slightly before assembly, as detailed in the instructions, is a small but vital step that guarantees a smooth rolling process and a better texture in the final dish.
- 3 Cups of Half and Half: This is the cornerstone of the sauce’s luxurious creaminess. Half and half offers a perfect balance of richness without making the sauce overly heavy or greasy, as heavy cream sometimes can. For a slightly lighter option, whole milk can be substituted, but be aware that the characteristic creamy texture might be slightly less intense.
- 2 Cups of Shredded Cheese: For the ultimate flavor, melt, and visual appeal, a blend is highly recommended. Pepper Jack cheese is an excellent choice, contributing a fantastic subtle kick and exceptional meltability. Mozzarella or Chihuahua cheese are also superb options for their smooth melting properties and mild, creamy flavor that beautifully complements seafood. To achieve the best texture and avoid anti-caking agents found in pre-shredded varieties, we highly recommend freshly shredding your cheese.
- 1 Tablespoon of All-Purpose Flour: This modest ingredient is essential for creating the roux, which forms the stable, thick base of our creamy sauce. It helps to bind the butter and half and half, ensuring a velvety smooth and consistent texture that coats the enchiladas perfectly.
- 2 Tablespoons of Unsalted Butter: The foundation of our roux, butter provides crucial richness and depth of flavor. Using unsalted butter allows you to precisely control the overall saltiness of your dish, which is important when using other savory ingredients like chicken bouillon.
- 1/2 Teaspoon of White Pepper: White pepper is chosen for its milder, more subtle peppery flavor compared to black pepper, which can sometimes be too dominant in delicate creamy sauces. It adds a gentle warmth without introducing visible specks, maintaining the sauce’s pristine appearance.
- 1 Teaspoon of Chicken Bouillon Granules: This ingredient is a true flavor enhancer. It imparts a concentrated savory depth and umami, elevating the entire sauce and mimicking the complex, slow-cooked flavors often found in cherished restaurant dishes. It’s a key component for that ‘secret ingredient’ taste.
- 3 Dashes of Nutmeg: This might seem like an unconventional addition, but nutmeg brings a faint, warm, and subtly sweet undertone that magnificently complements creamy sauces and seafood. It adds an unexpected layer of complexity and sophistication, so please, don’t skip it!
- Dashes of Paprika or Smoked Paprika: Used primarily as a final garnish, paprika adds a lovely vibrant color and a mild, sweet pepper flavor to the top of the casserole. Smoked paprika, if preferred, will introduce a subtle, earthy smokiness that further enhances the dish’s depth, especially when sprinkled on top just before baking.
- 1/2 Small Onion: When finely diced, the onion provides an aromatic and sweet base for the seafood filling. As it softens, it releases its natural sugars and savory notes, building the essential flavor profile for the tender shrimp and crab. Yellow or white onions are generally the best choices for their balanced flavor.
- 1 Pound of Deveined Shrimp: Whether you opt for fresh or frozen (and properly thawed) shrimp, ensure they are peeled and deveined for convenience and ease of eating. Medium to large shrimp (typically 31-40 count or 21-25 count per pound) are ideal as they retain their plump texture during cooking and don’t become overly small or chewy.
- 1 Small Package of Imitation Crab Meat or King Crab Meat: Imitation crab meat is a budget-friendly and widely accessible option that still contributes a pleasant, tender texture and a mild, sweet flavor to the filling. For an elevated experience and a more authentic taste, real king crab meat is a phenomenal choice, though it’s certainly a more premium ingredient. Regardless of your choice, ensure it’s gently flaked or shredded before being incorporated into the filling.
Crafting Your Chi Chi’s Enchilada Casserole: Step-by-Step Guide
Follow these detailed steps carefully to recreate the nostalgic perfection of Chi Chi’s enchilada casserole. Precision and attention to detail at each stage will ensure a truly unforgettable meal that brings back those beloved flavors.
Step 1: Begin with the Roux – The Foundation of Flavor
To start, place a medium-sized saucepan or a deep skillet over medium heat. Add the two tablespoons of unsalted butter and allow it to melt completely. Watch carefully; once the butter is fully melted and begins to sizzle gently, sprinkle in the one tablespoon of all-purpose flour. Immediately begin to whisk continuously for approximately 10 to 15 seconds. This brief cooking time is absolutely crucial to cook out the raw flour taste, which can otherwise leave a pasty flavor, without browning the butter. You are aiming for a pale, golden paste, not a dark roux. Be vigilant throughout this step, as butter can burn very quickly; maintain consistent heat and keep your whisk moving constantly to ensure an even cook.
Step 2: Develop the Creamy White Enchilada Sauce
Now, gradually pour in the three cups of half and half into the pan with your roux, whisking constantly and vigorously to prevent any lumps from forming. It’s important to add the liquid slowly to allow the roux to fully absorb it and create a smooth emulsion. As you continue to whisk, incorporate the 1/2 teaspoon of white pepper, 1 teaspoon of chicken bouillon, and the three dashes of nutmeg. Continue whisking gently and patiently until all the ingredients are well combined and the sauce begins to thicken and simmer around the edges. This process typically takes about 5-7 minutes. Once you observe gentle bubbling, remove the pan from the heat immediately. Stir in the two cups of freshly shredded cheese until it is completely melted and smoothly incorporated into the sauce. The residual heat from the sauce will be ample to melt the cheese without causing it to separate or become grainy, resulting in your rich, velvety white enchilada sauce.
Step 3: Prepare for Assembly – Divide the Sauce
Once your luscious creamy sauce is ready, transfer approximately two-thirds of it into a separate heat-proof container or bowl. It’s important to set this larger portion aside; it will be used later for generously coating the rolled enchiladas and topping the entire casserole before baking. The remaining one-third of the sauce will serve as the base for creating your delectable seafood filling.
Step 4: Craft the Irresistible Seafood Filling
Return the pan containing the remaining one-third of the sauce to the stovetop and set the heat to a low temperature. Add your finely diced 1/2 onion, the 1 pound of deveined shrimp, and the small package of flaked imitation crab meat (or the luxurious real king crab meat). Gently mix all the ingredients together, ensuring that the seafood and onion are thoroughly coated with the creamy sauce. Increase the heat to medium and continue to cook, stirring occasionally, for a very brief 1 1/2 to 2 minutes. The primary objective here is to cook the shrimp just until it turns pink and opaque, indicating it’s done. Exercise extreme caution not to overcook the shrimp, as it can quickly become tough and rubbery, compromising the texture of your filling. As soon as the shrimp changes color, turn off the heat. If the filling appears a bit dry or too thick for your liking, you can stir in 1 tablespoon of milk to achieve your desired moist and flavorful consistency.
Step 5: Warm Your Tortillas for Perfect Rolling
In a separate dry pan or skillet, gently warm each flour tortilla over medium-low heat for approximately 10-15 seconds per side. Alternatively, you can stack them, wrap them loosely in a damp paper towel, and microwave for 30-60 seconds. Warming the tortillas is a crucial step that makes them significantly more pliable and easier to roll without any cracking or tearing, which is essential for creating a neat and intact enchilada. This step also subtly enhances their flavor and improves their overall texture once baked into the casserole.
Step 6: Prepare Your Baking Dish Base
Spread a thin, even layer of the reserved creamy white sauce (from Step 3) over the bottom of your chosen baking dish. This foundational layer serves several important purposes: it acts as a protective barrier, preventing the enchiladas from sticking to the bottom of the dish; it adds essential moisture to the lower layer of tortillas; and it infuses extra flavor from the very start of the baking process. A standard 9×13 inch baking dish is typically ideal for accommodating a dozen enchiladas, but you may need to adjust based on the specific size of your tortillas.
Step 7: Assemble Your Enchiladas with Care
Now, it’s time for the main assembly of your delicious casserole. Take one warm tortilla and spoon a generous, but manageable, amount of your rich seafood filling (from Step 4) down the center of the tortilla. Be mindful not to overfill, as this can make rolling difficult and cause the filling to spill out. Carefully roll the tortilla tightly but gently, creating a snug and compact enchilada. Place the rolled enchilada seam-side down in your prepared baking dish. Repeat this process with the remaining tortillas and filling, arranging them neatly in a single layer in the baking dish. If your dish requires it, you can slightly overlap them to fit all 12 enchiladas comfortably.
Step 8: Generously Top and Garnish
Once all your enchiladas are neatly arranged and nestled in the baking dish, pour the remaining creamy white sauce (from Step 3) evenly over the top, ensuring that every enchilada is thoroughly coated and drenched in the luscious sauce. This layer will not only keep the enchiladas moist but also create a beautiful, rich, and bubbling crust during baking. Next, generously sprinkle your remaining shredded cheese over the blanket of sauce. Finally, for an extra touch of inviting color and a hint of warm, peppery flavor, lightly sprinkle some paprika or smoked paprika over the cheese. This step not only boosts the visual appeal but also adds a subtle yet delightful layer of aromatic flavor.
Step 9: Bake to Golden Perfection and Serve
Preheat your oven to 380°F (195°C). Carefully place the baking dish, uncovered, inside the preheated oven and bake for 15 to 20 minutes. The enchiladas are ready when the cheese is thoroughly melted, gloriously bubbly, and slightly golden brown around the edges. The entire casserole should be heated through, and the sauce should be simmering beautifully, indicating it’s reached optimal temperature. Keep a close eye on them towards the end of the baking time to prevent over-browning. Once perfectly baked, remove the casserole from the oven and allow it to rest for a few minutes before serving. This brief resting period allows the sauce to settle and makes for easier, cleaner serving. Serve hot and prepare to savor every nostalgic, incredibly delicious bite!
Tips for an Unforgettable Chi Chi’s Enchilada Casserole
To truly master this classic and ensure your casserole is nothing short of spectacular, consider these additional tips and tricks from experienced home cooks. These insights can elevate your dish from simply good to absolutely unforgettable:
- Precision with Shrimp Cooking: As mentioned, shrimp cooks incredibly quickly. It transitions from undercooked to perfectly tender to rubbery in a matter of seconds. As soon as it turns pink and opaque, remove it from the heat source immediately. This prevents tough, chewy shrimp, ensuring every bite of your filling is succulent and enjoyable.
- The Advantage of Freshly Shredded Cheese: While the convenience of pre-shredded cheese is tempting, it often contains anti-caking agents like cellulose that can result in a less smooth, sometimes grainy sauce and a less appealing melt. Taking a few extra minutes to freshly shred your cheese will yield a far superior, creamier melt and better integration into your rich sauce and topping.
- Taste and Adjust Seasoning Throughout: A chef’s most important tool is their palate. Always taste your sauce and filling before assembly. Depending on the brand of chicken bouillon you use and your personal preference, you might want to add a pinch more salt, a dash more white pepper, or even a tiny bit of garlic powder to fine-tune the flavors to perfection.
- The Non-Negotiable Step of Warming Tortillas: This step is critical for successful enchilada assembly. Warm tortillas become pliable and flexible, making them easy to roll without cracking or breaking. Cold, stiff tortillas are prone to tearing, which can lead to a messy casserole and a frustrating cooking experience. Don’t skip this simple but essential step!
- Customize Your Heat Level: The original Chi Chi’s enchilada often has a mild flavor profile, but if you prefer a bit more zest, don’t hesitate to customize. Consider adding a dash of cayenne pepper to your creamy sauce or incorporating a few finely minced jalapeños (with seeds removed for milder heat, or left in for more kick) directly into your seafood filling. A drizzle of your favorite hot sauce after serving can also provide a personalized heat boost.
Variations to Explore with Your Enchilada Casserole
While this recipe brilliantly replicates the beloved Chi Chi’s flavor, don’t hesitate to experiment and make it uniquely your own. Enchilada casseroles are wonderfully versatile and invite creativity:
- Alternative Protein Power: If seafood isn’t your preference, or you’re simply looking for variety, this recipe adapts beautifully. You can easily substitute the shrimp and crab with two cups of shredded cooked chicken (a store-bought rotisserie chicken works wonderfully for a quick option), seasoned ground beef, or even vegetarian options like a hearty mix of sautéed mushrooms, spinach, and black beans. Ensure any substitute protein is cooked and seasoned prior to mixing with the sauce.
- Diverse Cheese Blends: Experiment with different cheese combinations to discover new flavor dimensions. A mix of Monterey Jack and Colby cheeses can offer a delightfully mild and buttery flavor, while incorporating a bit of sharp cheddar can add a tangy complexity to both the sauce and the golden-brown topping.
- Flavorful Filling Add-ins: Enhance your seafood filling with additional vegetables for extra flavor, texture, and color. Finely diced red or green bell peppers, sweet corn kernels (fresh or frozen), or even a small can of mild roasted green chilies (drained well) can be excellent additions that complement the seafood beautifully.
- Amp Up the Spice: For those who genuinely love a kick, consider incorporating a small amount of finely chopped serrano peppers or a generous pinch of red pepper flakes directly into your seafood filling for a vibrant burst of heat. Remember to start small and add more to taste.
Serving Suggestions for Your Chi Chi’s Enchilada Casserole
This rich and satisfying Chi Chi’s enchilada casserole is fantastic as a stand-alone main course, but it truly shines when paired with a few thoughtfully chosen complementary sides. These additions can balance the richness and complete your Tex-Mex meal:
- Classic Mexican Rice: A light and fluffy side of Mexican rice is a timeless pairing, offering a subtle flavor and textural contrast that perfectly balances the creaminess of the enchiladas.
- Hearty Refried Beans: Creamy, savory refried beans provide another layer of comforting heartiness to the meal, making it even more filling and satisfying. Black beans, either whole or refried, are also an excellent choice.
- Refreshing Fresh Salad: To cut through the richness of the casserole, a crisp green salad tossed with a vibrant, zesty vinaigrette (perhaps lime-cilantro based) offers a refreshing contrast and adds a welcome lightness to the plate.
- Essential Garnishes: Don’t forget the fresh toppings! A generous dollop of cool sour cream or a healthier Greek yogurt, a sprinkle of fresh chopped cilantro, diced avocado or a scoop of guacamole, and a side of fresh pico de gallo can all brighten up each serving, adding both flavor and visual appeal.
Storing and Reheating Leftovers
If you’re fortunate enough to have leftovers (which can be rare with this delicious dish!), this casserole stores and reheats beautifully, making it an excellent meal-prep option:
- Refrigeration: Allow the entire casserole to cool completely to room temperature before storing. Once cool, cover the baking dish tightly with several layers of plastic wrap or aluminum foil. Alternatively, transfer individual servings to airtight containers. The casserole will keep fresh and delicious in the refrigerator for 3-4 days.
- Freezing for Longer Storage: For extended storage, this casserole freezes exceptionally well. Once completely cooled, wrap the baking dish tightly with several layers of plastic wrap and then a layer of heavy-duty aluminum foil. You can also transfer individual portions to freezer-safe containers or freezer bags. It can be safely frozen for up to 2-3 months without significant loss of quality. Remember to thaw overnight in the refrigerator before proceeding with reheating.
- Optimal Reheating Methods: For individual portions, the microwave is generally the quickest and most convenient method; heat until warmed through, stirring if necessary. For reheating the entire casserole, it’s best to cover it loosely with foil to prevent drying out and bake in a preheated oven at 350°F (175°C) for approximately 20-30 minutes, or until it’s heated through and bubbly in the center. If you desire a slightly crispier cheese topping, remove the foil for the last 5-10 minutes of baking.
The Chi Chi’s Enchilada Casserole: A Recipe to Cherish
This Chi Chi’s Enchilada Casserole recipe is far more than just a simple meal; it’s a nostalgic bridge to cherished memories and a profound testament to the enduring power of classic, comforting flavors. It masterfully delivers that sought-after restaurant-quality taste right into the heart of your home kitchen, boasting a creamy, rich sauce, perfectly cooked tender seafood, and soft tortillas that absorb every drop of deliciousness. Whether you’re eagerly recreating a beloved nostalgic favorite from your past or joyfully discovering this incredible dish for the very first time, this recipe promises to be a comforting, crowd-pleasing, and utterly satisfying addition to your culinary repertoire. Gather your ingredients with anticipation, follow these detailed steps with confidence, and prepare to embark on a delightful culinary journey that culminates in a dish your family and friends will undoubtedly rave about for years to come. Happy cooking, and enjoy the taste of tradition!