
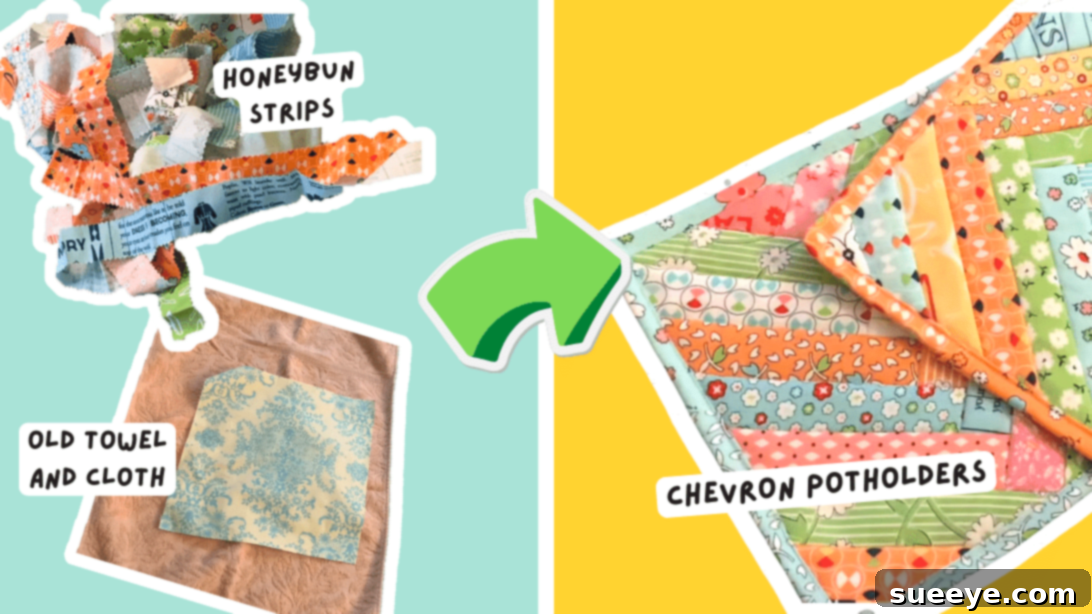
Craft Your Own Stylish Chevron Potholders: An Eco-Friendly DIY Project
Are you looking for a creative and sustainable way to refresh your kitchen decor? Do you have a stash of old towels and colorful fabric scraps just waiting for a new purpose? Look no further! This comprehensive guide will show you how to transform these everyday items into trendy, functional, and super cute chevron potholders. Chevron patterns are a timeless classic, gracing everything from modern homes to chic kitchen accessories in popular online shops. Instead of spending money on mass-produced items, why not unleash your inner crafter and create your very own unique set?
We’re thrilled to share an ingenious method inspired by Beth from My Sewing Room, whose video tutorial makes this project incredibly accessible for sewers of all skill levels. Beth’s approach is not only brilliant but also wonderfully resourceful; she masterfully utilizes leftover 1.5-inch fabric strips from a “honeybun” package, demonstrating the true spirit of repurposing. This project is a fantastic opportunity to reduce waste, save money, and add a personal touch to your home. Get ready to dive into a rewarding sewing adventure and craft a set of potholders that are as practical as they are stylish!
Why Make Your Own Chevron Potholders?
Beyond the simple joy of creating something with your own hands, there are numerous compelling reasons to embark on this DIY potholder project:
- Sustainability & Upcycling: Give new life to old towels and fabric scraps, diverting them from landfills and reducing textile waste. This project embodies eco-conscious crafting, turning potential waste into valuable household items.
- Cost-Effective Decor: High-quality, stylish potholders can be surprisingly expensive when purchased new. By making your own, you save money while achieving a bespoke look that perfectly matches your kitchen’s aesthetic and personal preferences.
- Personalized Style: You have complete creative control! Choose your favorite colors, patterns, and fabric textures for the strips to create a set of potholders that truly reflects your unique taste and complements your existing kitchen decor.
- Thoughtful Handmade Gifts: A set of beautifully handmade chevron potholders makes a wonderful and heartfelt gift for housewarmings, holidays, birthdays, or any special occasion. Your friends and family will surely appreciate the effort, thoughtfulness, and personal touch.
- Skill Building: This project is an excellent way to practice fundamental sewing techniques, including precise cutting, fabric piecing, and applying binding. It’s a great confidence-builder for beginners and a satisfying quick project for experienced sewers.
Materials You’ll Need: Gathering Your Creative Toolkit
Gathering your supplies is the first exciting step in any creative project. For these chevron potholders, we’ll focus on repurposing and using readily available items, making this an accessible and sustainable craft that’s kind to both your wallet and the planet:
- Old Towel: This will serve as the inner batting for your potholder, providing essential insulation and thickness. Choose a clean, moderately thick towel – an old bath towel, hand towel, or even a smaller tea towel works perfectly. Avoid overly thin or excessively plush towels for best results.
- 10 x 10-inch Square Cloth: This sturdy piece of fabric will be your backing, providing a clean, finished look to one side of the potholder. A durable cotton fabric, such as quilting cotton or canvas, is ideal for its resilience and ease of handling.
- Fabric Strips: These are the vibrant heart of your chevron pattern! You’ll need an assortment of 1.5-inch wide fabric strips. This is a fantastic opportunity to use up leftover fabric scraps from previous projects, repurpose strips from a jelly roll package, or even cut up old clothes or linens that have interesting patterns and colors. Varying the colors and prints of your strips will significantly enhance the dynamic chevron effect.
- 505 Adhesive Spray (Optional but Recommended): This temporary fabric adhesive spray is a game-changer! It helps hold your fabric layers precisely in place before you begin sewing, preventing frustrating shifts and ensuring a neat finish. The best part? It washes out easily without leaving residue.
- Basic Sewing Supplies: Ensure you have a functional sewing machine, good quality thread that matches or complements your fabrics, sharp fabric scissors, a rotary cutter and cutting mat (highly recommended for precise, straight strips), a quilter’s ruler, fabric pins or clips, an iron and ironing board, and a fabric marker or chalk for temporary markings.
Step-by-Step Instructions to Create Your Chevron Potholders:
Step 1: Preparing Your Foundation – The Base Layer
Precision in the initial steps ensures a beautifully finished product. Begin by taking your old towel and cutting it into a perfect 9-inch square. This square will form the insulating core of your potholder, providing heat resistance and bulk. Next, lay your chosen 10×10-inch backing fabric face down on your clean work surface. Carefully center the 9-inch towel square on top of the backing fabric, ensuring even overhang on all sides of the backing. If you’re using 505 adhesive spray, lightly mist the back of the towel before placing it, then press down gently to secure it. This temporary adhesive will prevent shifting and puckering of the layers while you work with the strips. Finally, using a ruler and a fabric marker or chalk, mark the exact midline of your towel square from top to bottom. This line will serve as your crucial guide for accurately placing the chevron strips, ensuring symmetry in your design.
Step 2: Crafting the Iconic Chevron Design
Now for the exciting part – creating the distinctive chevron pattern! Start at the very bottom edge of your marked towel square. Take a small 2.5-inch fabric square (or a wider strip cut to this length) and position it at the absolute bottom center, directly straddling the midline you just marked. This square acts as your anchor point. Next, select a 1.5-inch wide fabric strip. Lay this strip diagonally, starting from one corner of your small center square and extending upwards and outwards towards the edge of your towel base. After positioning the first strip on the right side of the midline, take another 1.5-inch strip and mirror its placement on the left side, starting from the opposite corner of your small center square. The goal is to create a ‘V’ shape with the strips meeting precisely at the midline. To achieve a striking and visually appealing chevron effect, try to use strips of the same color or pattern for each left and right pair, changing colors as you progress upwards. Ensure that your strips extend slightly beyond the edges of the 9-inch towel square by at least an inch or two; you’ll trim the excess later, so it’s better to have too much than too little. Continue this process, adding alternating strips to the left and right of the midline, always ensuring they form a neat ‘V’ shape and slightly overlap the previous strips (approximately a quarter-inch overlap is usually sufficient to catch all layers with a stitch). Repeat until the entire 9-inch towel square is completely covered with your vibrant and dynamic chevron design. Once all strips are laid, you can optionally give it a light press with a warm iron to further set the layers before stitching.
Step 3: Trimming for a Clean and Defined Shape
Once your chevron pattern completely covers the towel square, with all strips securely in place, it’s time to refine the shape and prepare for binding. Using a rotary cutter and a quilter’s ruler (or sharp fabric scissors for a steady hand), carefully trim the entire assembled piece back down to a precise 9-inch square. This step is absolutely crucial for achieving crisp, clean edges and a professional, uniform finish for your potholder. Make sure to align your ruler carefully with the edges of the underlying towel square to ensure perfectly straight lines and accurate 90-degree corners. Any irregularities here will be noticeable in the final product, so take your time to ensure precision.
Step 4: The Finishing Touch – Applying the Outer Binding
Binding adds essential durability, strength, and a polished, professional edge to your potholder. This step involves a few precise folds and stitches, requiring careful attention but resulting in a beautiful finish:
- Prepare Your Binding Strip: Begin by taking two of your 1.5-inch fabric strips. Join them end-to-end (place them right sides together at a right angle, sew a diagonal seam from corner to corner, then trim the excess fabric and press the seam open). This creates one long continuous binding strip, ensuring you have ample length to go around the entire perimeter of the potholder.
- Attach Binding to the Back: Lay your potholder with the backing fabric facing up on your work surface. Align the raw edge of your long binding strip with the raw edge of the potholder. Make sure to leave a few inches of the binding strip unsewn at the start, as you will use this excess to neatly connect the ends later. Begin pinning the binding strip around the edges.
- Initial Stitching: Turn the potholder over so the chevron side is facing up. Now, take the loose, unattached end of the binding strip that you left at the start and fold its very tip diagonally inward, creating a neat mitered corner effect. Begin sewing the binding strip onto the potholder, sewing directly on this fold you just made, using a consistent seam allowance (typically 1/4 inch). Sew all the way around the perimeter, maintaining an even distance from the edge.
- Navigating the Corners (First Pass): As you approach each corner, stop sewing approximately a quarter-inch away from the edge of the potholder. With your needle still down in the fabric, make a small diagonal stitch directly into the corner to secure the previous stitches and prepare for the turn. Then, pivot your work (with the needle remaining in the fabric) and lift your presser foot. This maneuver allows you to smoothly turn the fabric for the next side.
- Creating the Diagonal Fold: After pivoting, carefully lift the binding strip straight up and away from the potholder. This action naturally creates a crisp diagonal fold at the corner. Next, gently fold the binding strip back down, aligning its raw edge perfectly with the next raw edge of the potholder. Start sewing again from the very top of this newly formed corner, continuing your 1/4-inch seam allowance along the new side. Continue this precise process for all four corners until you reach where you started, approximately a few inches from your initial stitch.
- Joining the Ends: When you’ve almost completed the circle, stop your stitching a few inches before your starting point, leaving the ends of the binding strip free. Trim the excess binding strip, allowing for about a 1-inch overlap. Carefully join the two ends of the binding strip neatly (you can sew them together with a diagonal seam for a seamless look or a simple straight seam, then trim any bulk). Finish sewing the remaining binding to the potholder, closing the circle of stitches.
- Folding to the Front & Final Stitching: Turn the potholder right side up so your vibrant chevron pattern is visible. Now, carefully fold the binding edges over to the front of the potholder, neatly enclosing all the raw edges you just stitched. This creates a clean, finished border. Pin the binding securely in place all the way around, ensuring an even width. Finally, topstitch the binding onto the front of the potholder, sewing close to the inner edge of the binding strip. This final seam will secure the binding permanently, give your potholder a professional, clean finish, and enhance its durability.
And there you have it! Your very own, beautifully handmade chevron potholder is complete. This project is not just about creating a functional kitchen item; it’s about the deep satisfaction of repurposing, the joy of crafting, and adding a unique, personalized touch to your home. Experiment with different color combinations and fabric textures to create a whole collection that perfectly suits your style. These make fantastic, thoughtful gifts for friends and family, too! Enjoy your new, stylish, and practical kitchen accessory, knowing it was made with your own skilled hands.
Easy Chevron Potholders: Your Next Favorite DIY Kitchen Project