
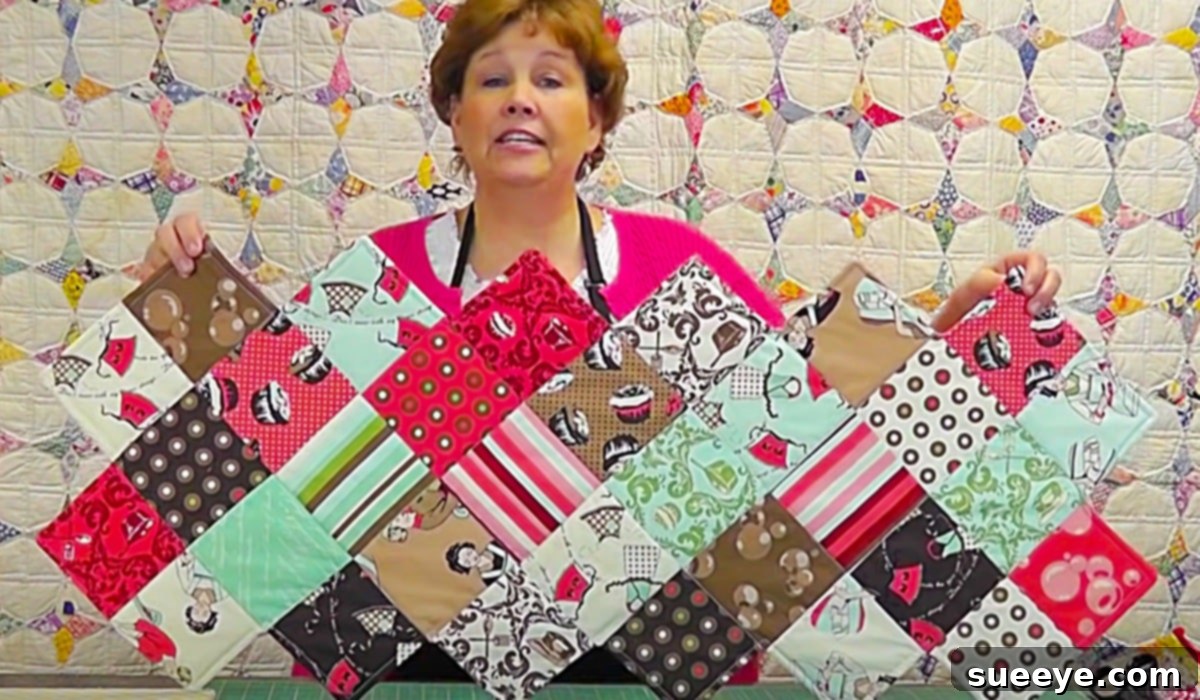
Craft a Stunning Zig-Zag Charm Pack Table Runner: An Easy Guide for Quilters
Embark on a delightful quilting journey with a project that promises both beauty and simplicity: the Zig-Zag Charm Pack Table Runner. This pattern is not only visually striking but also incredibly accessible, making it an ideal choice for both seasoned quilters looking for a quick make and beginners eager to dive into the world of fabric and thread. Our inspiration comes from the excellent video tutorial by the Missouri Star Quilt Company on YouTube, led by the beloved quilting expert, Jenny Doan. Her tutorials are renowned for their clarity and helpful tips, covering everything from precise pinning and pressing techniques to achieving consistent seam allowances and confidently using a seam ripper – a quilter’s truly essential tool!
The zig-zag design of this table runner offers a modern yet timeless appeal, perfectly blending into various home decor styles. It’s a wonderful way to add a handmade touch to your dining table, a coffee table, or any surface that could use a splash of color and texture. We’ll guide you through transforming a simple charm pack into a vibrant, eye-catching centerpiece, making the process enjoyable and rewarding for quilters of all skill levels. Let’s explore the materials you’ll need and dive into the step-by-step process of bringing this charming table runner to life.
Why Choose a Charm Pack for Your Table Runner Project?
One of the most appealing aspects of this table runner project is its reliance on a charm pack. For those new to quilting, a charm pack is a bundle of pre-cut fabric squares, typically 5×5 inches, all carefully curated from the same fabric collection. This thoughtful selection by designers means your fabrics are already coordinated in terms of color and pattern, eliminating the often daunting task of choosing complementary textiles yourself. This pre-cut convenience saves a tremendous amount of time on the initial cutting phase, allowing you to jump straight into the fun part: sewing and design layout.
Charm packs are incredibly versatile and perfect for smaller projects like table runners, baby quilts, or decorative cushions. They often come at an affordable price point, making them an excellent starting resource for new quilters eager to learn without a significant initial investment. Furthermore, the limited size of the squares encourages creativity in design, pushing you to make the most of each piece to create a cohesive and striking pattern. Using a charm pack simplifies the entire process, making this zig-zag table runner a satisfying and accessible project for anyone.
Essential Materials for Your Zig-Zag Table Runner
Before you begin sewing, gathering all your supplies is key to a smooth and enjoyable quilting experience. Here’s a detailed look at each item you’ll need and why it’s important for creating a beautiful finish:
- A Charm Pack: A standard pack containing 42 (5×5 inch) squares is typically sufficient for a table runner of moderate length. Feel free to select a pack with colors and patterns that perfectly complement your home decor and personal style. Consider fabrics with good contrast to make your zig-zag pattern pop.
- Batting: This is the crucial middle layer that provides your table runner with its desired loft, warmth, and quilted texture. Common choices include cotton, polyester, or blends. Cotton batting offers a natural feel and lovely drape, while polyester can provide more puffiness and warmth. Choose a piece slightly larger than your intended finished table runner dimensions (e.g., 20×60 inches for a 16×56 inch runner) to allow for shifting during quilting and subsequent trimming.
- Backing Fabric: You will need a piece of fabric for the back of your runner, which should also be slightly larger than your finished top. This fabric can be a solid color that coordinates with your charm pack, a subtle print, or even pieced together from larger fabric scraps for a more eclectic look.
- Quilt Basting Spray: This temporary adhesive spray is a fantastic tool for bonding your quilt top, batting, and backing layers together. It helps prevent shifting and wrinkling during the quilting process, offering a quick and clean alternative to traditional pinning for smaller projects. If you prefer, you can use safety pins specifically designed for quilting as an alternative.
- A Sewing Machine: Any basic sewing machine capable of performing a straight stitch will work perfectly for this project. Ensure your machine is in good working order, recently cleaned, and well-oiled for optimal performance.
- Thread: Select a high-quality sewing thread that either matches or subtly blends with your chosen fabrics. A 100% cotton thread is often preferred for quilting, especially when working with cotton fabrics, as it holds up well and creates durable seams.
- A Pair of Fabric Scissors: Keep a pair of sharp scissors specifically for fabric to ensure clean cuts when snipping threads or making minor adjustments.
- A Rotary Cutter: This tool, which resembles a pizza cutter with a circular blade, provides unparalleled precision for cutting straight lines quickly and efficiently. It’s a game-changer for quilters seeking accuracy.
- A Cutting Mat: Used in conjunction with your rotary cutter, a self-healing cutting mat protects your work surface and features grid lines that assist in achieving accurate measurements and perfectly straight cuts.
- A Quilting Ruler: A clear acrylic ruler with various measurements and angle markings is an indispensable tool for precise cutting and squaring up your blocks. A 6×24 inch ruler is a versatile choice for many quilting tasks.
- An Iron and An Ironing Board: Proper pressing is absolutely vital in quilting. It flattens seams, helps blocks lie square, and contributes significantly to the overall professional appearance and flatness of your finished table runner. Use steam if your fabric can handle it for crisp results.
Step-by-Step Directions to Create Your Stunning Zig-Zag Table Runner
Creating this captivating zig-zag table runner involves a series of straightforward steps that, when followed carefully, will result in a beautifully finished piece. While these instructions provide a comprehensive overview, we highly recommend watching the detailed video tutorial by Missouri Star Quilt Company on YouTube for visual guidance and Jenny Doan’s invaluable tips. Her demonstrations truly bring these written steps to life. Let’s begin the creative process!
Step 1: Preparing Your Charm Pack Squares for the Zig-Zag Pattern
Begin by organizing your 5-inch charm squares. For a classic zig-zag pattern, a common technique involves pairing contrasting squares and preparing them to create half-square triangles (HSTs) or similar angled units. Typically, you might take two different 5-inch squares, place them right sides together, and draw a diagonal line from one corner to the opposite. Then, sew a seam 1/4 inch away from both sides of this drawn line. After sewing, cut directly on the drawn diagonal line, which will yield two HST units from each pair. Carefully press these HSTs open or to one side, trimming them to a consistent, slightly smaller square size (e.g., 4.5 inches square) using your quilting ruler and rotary cutter. This precision is crucial for ensuring your blocks fit together accurately later.
Step 2: Assembling Your Individual Zig-Zag Blocks
Once you have your prepared units, it’s time to assemble them into the individual blocks that will form your overall zig-zag pattern. This usually involves sewing two or more of your trimmed HST units together. As you sew, pay meticulous attention to maintaining a consistent 1/4-inch seam allowance. This consistency is the cornerstone of accurate block construction and ensures that all your blocks will be the correct size and fit together perfectly. After each seam, press your block carefully, either pressing seams open to reduce bulk or to one side, depending on what works best for the fabric and pattern to keep the block flat. Finally, square up each completed block to a uniform size (e.g., 8.5 inches square, or as specified in the video tutorial) using your rotary cutter and quilting ruler for crisp, precise edges.
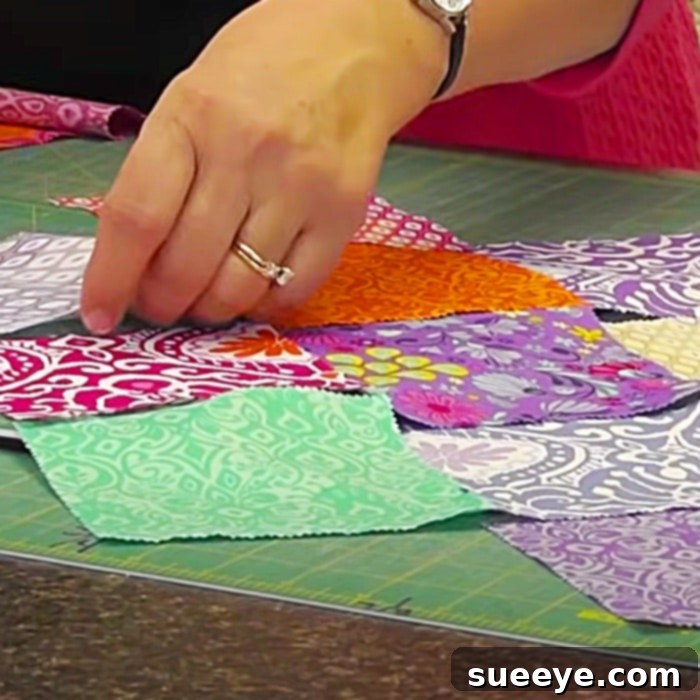
Step 3: Laying Out Your Table Runner Design
This is arguably the most creative and visually satisfying stage! Spread out your completed blocks on a design wall, a clean floor, or a large table. Experiment with different orientations of your blocks to arrange them into the distinctive zig-zag pattern you desire. Pay close attention to how the colors and patterns interact across the entire layout. This visual arrangement allows you to make any necessary adjustments to achieve the most pleasing design before you commit to sewing. Once you are satisfied with your layout, take a quick photo with your phone as a helpful reference guide to follow during the next sewing steps.
Step 4: Sewing Blocks into Rows and Rows into the Quilt Top
Following your carefully planned layout, begin sewing your individual blocks together to form longer rows. Again, diligently maintain that consistent 1/4-inch seam allowance. After assembling each row, press the seams. A useful tip is to press seams in alternating directions for adjacent rows; this technique allows the seams to “nest” perfectly when you join the rows together, reducing bulk and helping your points match more accurately. Once all your rows are complete and pressed, carefully sew them together to construct the main table runner top. Take your time during this step, aligning the seams from one row to the next with pins to ensure your zig-zags flow smoothly and precisely across the entire runner.
Step 5: Creating the Quilt Sandwich (Basting)
With your beautifully pieced quilt top finished, it’s time to prepare the ‘quilt sandwich.’ Start by laying your backing fabric wrong side up on a clean, flat surface, ensuring it is completely smooth and free of wrinkles. You may wish to tape down the edges temporarily. Next, carefully place your batting smoothly on top of the backing, making sure it extends beyond the backing edges. Finally, center your quilt top right side up on top of the batting. Use your quilt basting spray to adhere these three layers together, working methodically in small sections from the center outwards to avoid puckers. Smooth out any wrinkles as you go. As an alternative, you can use curved quilting safety pins to secure the layers every few inches, ensuring even distribution and firm attachment.
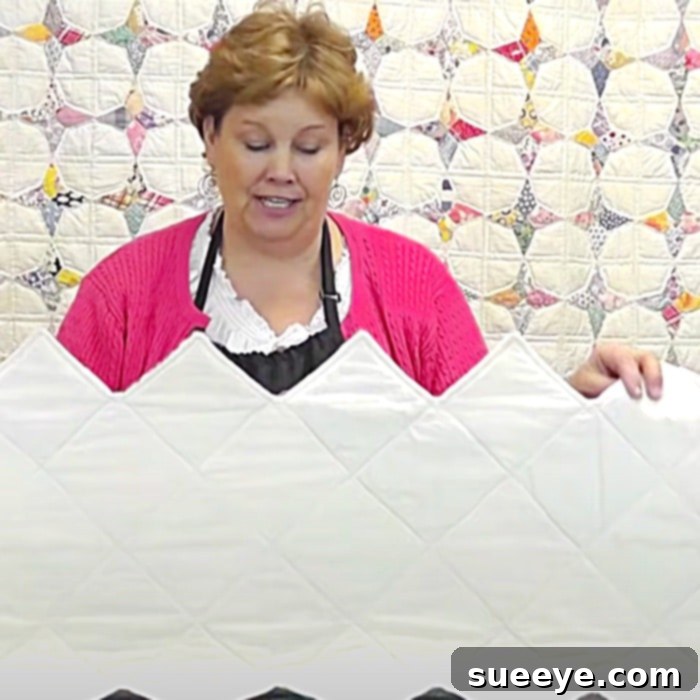
Step 6: Quilting Your Table Runner
Now comes the quilting itself! This is the process where you stitch through all three layers (the quilt top, batting, and backing) to secure them permanently and add beautiful texture to your project. For a table runner, simple straight-line quilting is often highly effective and very beginner-friendly. You can choose to “stitch-in-the-ditch” (sew along the existing seam lines of your pieced blocks) or create parallel lines across the runner in any direction you prefer. If you have a walking foot attachment for your sewing machine, it’s highly recommended for this step, as it helps feed all three layers evenly through the machine, preventing fabric shifting. Don’t be afraid to experiment with different quilting designs, or simply keep it elegant and minimal – the primary goal is to securely hold all layers together.
Step 7: Trimming and Binding Your Table Runner
Once your quilting is complete, the next step is to neatly trim the excess batting and backing fabric, squaring up the entire table runner. Use your rotary cutter and a long quilting ruler to achieve a precise, straight edge all around the perimeter of your project. The final crucial step is to add the binding. Binding provides a clean, durable, and professional finish to the edges of your quilt. You will cut long strips of fabric (typically 2.5 inches wide), sew them together to create one continuous strip, and then attach this strip around the outer edge of your runner. This is usually done by first machine-stitching it to the front and then hand-stitching or machine-stitching it to the back. There are many excellent binding tutorials available, including those from Missouri Star Quilt Company, if you’re new to this finishing step.
Expert Tips for a Perfectly Finished Table Runner
To ensure your zig-zag table runner turns out beautifully and professionally, keep these essential quilting tips in mind throughout your project:
- Precision is Paramount: While quilting is a wonderfully creative and enjoyable hobby, accuracy in your cutting and seam allowances makes a world of difference in the final outcome. Remember the old adage: “Measure twice, cut once!”
- Press, Don’t Iron: When dealing with quilt blocks and seams, always lift and press your iron down onto the fabric, rather than sliding it across. Sliding the iron can stretch and distort your fabric pieces, leading to crooked blocks.
- The Seam Ripper is Your Ally: Don’t be afraid to unpick stitches if something isn’t quite right. It’s far better to take the time to fix a mistake early on than to regret it later when the project is finished. Consider your seam ripper a helpful tool, not a sign of failure.
- Practice Your Seam Allowance: Before starting on your actual project fabric, practice sewing a perfect 1/4-inch seam on scrap fabric. Consistent seam allowances are absolutely crucial for ensuring your blocks fit together accurately and your finished piece lies flat.
- Embrace the Process: Quilting is a relaxing and incredibly rewarding craft. Don’t stress over achieving absolute perfection, especially as a beginner. Embrace the unique charm of a handmade item, and most importantly, enjoy every stitch of your creative journey!
Conclusion: A Handcrafted Treasure for Your Home
Completing your Zig-Zag Charm Pack Table Runner is a wonderfully satisfying achievement. You’ve skillfully transformed a simple pack of pre-cut squares into a beautiful, functional, and personalized piece of art for your home. This project is a testament to the enduring joy of quilting – combining creativity, precision, and the warmth of handmade craftsmanship into something tangible and lovely. Whether your finished runner graces your dining table, adds elegance to a console table, or is given as a heartfelt, handmade gift, it will undoubtedly add a touch of personalized charm and elegance to any space.
We hope this comprehensive guide, inspired by the fantastic educational resources from Missouri Star Quilt Company and the expert guidance of Jenny Doan, empowers you to confidently pick up your rotary cutter and sewing machine. Dive into the world of fabric, express your unique creativity, and enjoy the immensely fulfilling experience of bringing fabric to life with every stitch. Happy quilting!