
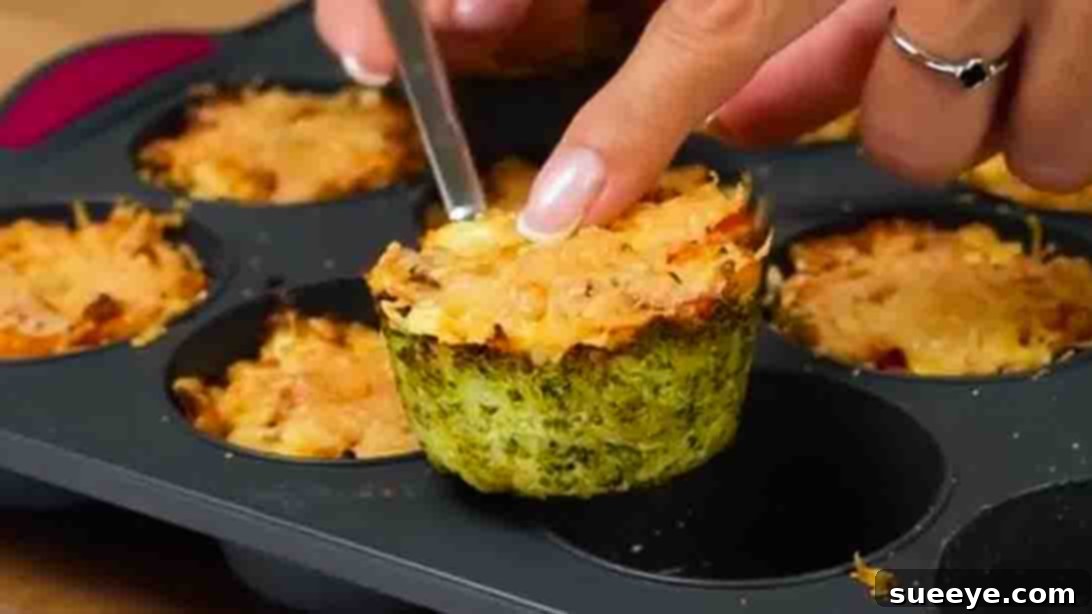
Delicious Make-Ahead Cheesy Broccoli Cups: Your New Go-To Healthy Recipe
Are you searching for a versatile, healthy, and incredibly tasty recipe that fits seamlessly into your busy lifestyle? Look no further than these sensational make-ahead cheesy broccoli cups! Whether you’re planning a wholesome breakfast, a light lunch, or a satisfying snack, these savory muffins, inspired by Frische Rezepte, are guaranteed to delight your taste buds. Bursting with fresh vegetables, rich cheese, and perfectly seasoned, these broccoli cups are not just convenient; they’re a flavorful explosion that will elevate your daily meals.
RELATED: Easy Quiche Toast Cups Recipe
What makes these cheesy broccoli cups so special? They combine the goodness of fresh broccoli with hearty eggs and a medley of other vegetables, all bound together with delicious cheese. The best part? You can prepare a batch ahead of time, making them the ultimate grab-and-go solution for hectic mornings or a perfect nutrient-packed bite whenever hunger strikes. With just a few simple ingredients, many of which you likely already have in your pantry, you can effortlessly create these delightful and healthy broccoli muffins. Dive into this comprehensive guide to learn how to master this fantastic dish and add a new favorite to your culinary repertoire.
Why You’ll Love These Cheesy Broccoli Cups
- Perfect for Meal Prep: Cook a large batch on Sunday, and enjoy healthy breakfasts and snacks all week long.
- Nutrient-Packed: Loaded with fresh broccoli, eggs, and other vegetables, these cups offer a fantastic source of vitamins, fiber, and protein.
- Incredibly Versatile: Ideal for any meal – breakfast, lunch, dinner, or a healthy snack.
- Family-Friendly: Even picky eaters will love these cheesy, flavorful bites. It’s an excellent way to sneak in more vegetables.
- Simple Ingredients: Made with everyday kitchen staples, making it an accessible recipe for everyone.
- Customizable: Easily adapt the ingredients to suit your taste preferences or what you have on hand.
Ingredients for Your Delicious Broccoli Cups
Crafting these delectable cheesy broccoli cups requires a thoughtful combination of fresh produce, protein, and savory seasonings. Here’s a detailed list of what you’ll need to gather:
- Eggs: 4 large eggs (2 boiled, 2 raw). The combination adds texture and binding.
- Broccoli Head: 1 medium to large head of fresh broccoli, providing the core vegetable and a wealth of nutrients.
- Apple Cider Vinegar: 1 tablespoon, used for soaking the broccoli to enhance cleanliness and crispness.
- Onion: 1/2 medium onion, finely chopped, for a foundational aromatic flavor.
- Carrot: 1/2 medium carrot, diced, adding a touch of sweetness and vibrant color.
- Olive Oil: A drizzle for sautéing vegetables and greasing the muffin tin, ensuring a golden finish.
- Bell Pepper: 1 medium bell pepper (any color), diced, to introduce a fresh, slightly sweet crunch.
- Seasoning: Salt and freshly ground black pepper, to taste, for essential flavor enhancement.
- Feta Cheese: 2 ounces, crumbled, for a tangy, salty kick that complements the vegetables beautifully.
- Italian Seasoning: To taste, a classic herb blend that brings warmth and depth to the dish.
- Parmesan Cheese: 2 ounces, shredded, for a rich, nutty top layer that melts into perfection.
- Greek Yogurt: 2 tablespoons, plain, forming the creamy base of our optional serving sauce.
- Mayonnaise: 3 tablespoons, adding richness and smoothness to the dipping sauce.
- Ketchup: 2 tablespoons, for a sweet and tangy element in the accompanying sauce.
- Fresh Herbs: Chopped parsley and chives, for a fresh finish and aromatic garnish in the sauce.
Step-by-Step Guide: Crafting Your Cheesy Broccoli Cups
Follow these detailed instructions to create perfect, flavorful cheesy broccoli cups every time. Remember to read through all steps before you begin to ensure a smooth cooking process.
Step 1: Prepare the Broccoli and Sauté the Aromatics
Begin by preparing your fresh broccoli. In a large bowl, combine water with 1 tablespoon of apple cider vinegar. Submerge the broccoli florets in this solution and let them soak for about ten minutes. This helps cleanse the broccoli and can even enhance its flavor. While the broccoli soaks, finely dice your onion, carrot, and bell pepper. Heat a pan over medium heat, add a generous drizzle of olive oil, and then add your diced vegetables. Sauté them gently until they turn soft and golden brown, releasing their sweet aromas. Season the sautéed vegetables with a pinch of salt and ground black pepper to your preference, then set them aside to cool slightly.
Once the broccoli has soaked, remove it from the water and grate the florets finely. A box grater or food processor can make this task quick and easy. Place the grated broccoli into a clean mixing bowl. Crack two raw eggs into the bowl with the broccoli. Season generously with salt and black pepper. Mix all ingredients thoroughly until everything is well combined and the broccoli is evenly coated with the egg mixture. This forms the foundational “cup” of our recipe.
Step 2: Form and Bake the Broccoli Cups, Prepare the Filling
Preheat your oven to 350 degrees Fahrenheit (175 degrees Celsius). Lightly grease a 12-cup muffin tin with olive oil. This is crucial to prevent sticking and ensure easy removal of your broccoli cups. Divide the grated broccoli and egg mixture evenly among the 12 muffin cups. Using the back of a spoon or your fingers, gently spread the mixture across the bottom and up the sides of each muffin cup, effectively creating a sturdy “cup” shape for your filling. Bake these broccoli bases in the preheated oven for 15 minutes. This initial bake helps the cups set and become firm.
While the broccoli cups are baking, it’s time to prepare the flavorful filling. Hard boil the remaining two eggs, then finely chop them. In a bowl, combine the cooled sautéed vegetables, the chopped boiled eggs, and the crumbled feta cheese. Add a generous amount of Italian seasoning to taste, ensuring the mixture is aromatic and well-spiced. Mix everything thoroughly until all the ingredients are evenly distributed, creating a vibrant and savory filling.
Step 3: Fill, Finish Baking, and Prepare the Sauce
Once the broccoli cups have completed their initial bake, carefully remove the muffin tin from the oven. Evenly divide the prepared filling into each partially baked broccoli cup, ensuring each cup is generously filled. Top each filled cup with a sprinkle of shredded Parmesan cheese. This will melt beautifully and form a golden, cheesy crust. Return the muffin tin to the oven and bake for an additional 15 minutes, or until the Parmesan cheese is fully melted, bubbly, and lightly golden brown, and the cups are cooked through.
While the cheesy broccoli cups are finishing up in the oven, prepare the delightful dipping sauce. In a small bowl, combine 2 tablespoons of Greek yogurt, 3 tablespoons of mayonnaise, 2 tablespoons of ketchup, and a generous sprinkle of chopped fresh parsley and chives. Stir until the sauce is smooth and well-combined. This creamy, tangy sauce perfectly complements the savory broccoli cups. Once baked, remove the broccoli cups from the oven, let them cool slightly in the tin before carefully removing them. Serve warm with the freshly made sauce on the side. Enjoy these incredibly flavorful and healthy treats!
Tips for Perfect Cheesy Broccoli Cups
- Don’t Over-Process Broccoli: When grating, aim for a fine but not mushy consistency. Too fine, and it might become watery; too coarse, and the cups won’t hold together as well.
- Drain Excess Moisture: If your grated broccoli seems very wet, gently press out some of the excess moisture with a paper towel or a clean kitchen cloth. This prevents soggy cups.
- Pack Firmly: When forming the broccoli cups in the muffin tin, press the mixture firmly against the bottom and sides to create a stable base.
- Experiment with Cheese: While feta and Parmesan are excellent, feel free to try other cheeses like cheddar, mozzarella, or Gruyere for different flavor profiles.
- Customizing Vegetables: The beauty of these cups is their adaptability. Consider adding finely chopped spinach, mushrooms, or even a hint of spice with diced jalapeños.
- For Crispier Edges: If you prefer a crispier texture, bake the empty broccoli cups for an extra 5 minutes before adding the filling.
Variations and Customization Ideas
One of the best aspects of these make-ahead cheesy broccoli cups is their incredible versatility. Don’t hesitate to experiment with different ingredients to tailor them to your taste or what you have available in your kitchen.
- Add Protein: For an even heartier meal, consider incorporating cooked and crumbled bacon, diced ham, shredded chicken, or even a plant-based sausage into your vegetable filling.
- Spice It Up: A pinch of red pepper flakes or a dash of hot sauce in the filling mixture can add a delightful kick.
- Herb Power: Beyond Italian seasoning, explore fresh herbs like dill, thyme, or oregano to give your cups a unique aromatic twist.
- Different Cheeses: Swap out feta for goat cheese for a creamier, tangier profile, or use a blend of cheddar and Monterey Jack for a classic cheesy flavor.
- Vary the Veggies: Finely chopped bell peppers of different colors, zucchini, corn, or even leftover roasted vegetables can be integrated into the filling for added texture and nutrition.
- Gluten-Free: This recipe is naturally gluten-free, making it a fantastic option for those with dietary restrictions.
Serving Suggestions for Your Broccoli Cups
These cheesy broccoli cups are incredibly versatile and can be served in various ways throughout the day:
- Breakfast: A perfect grab-and-go option for busy mornings, paired with a cup of coffee or a smoothie.
- Lunch: Serve alongside a fresh green salad or a bowl of soup for a light and satisfying meal.
- Snack: An ideal healthy snack to keep you energized between meals, especially with the refreshing dipping sauce.
- Dinner Side: They can even serve as a unique and flavorful side dish for grilled chicken, fish, or a vegetarian main course.
- Party Appetizer: Arrange them on a platter for a healthy and impressive appetizer at your next gathering.
Storing and Reheating Your Make-Ahead Cheesy Broccoli Cups
The “make-ahead” aspect is what truly makes this recipe a lifesaver for meal prep. Properly storing your broccoli cups ensures you can enjoy them throughout the week.
- Cool Completely: Before storing, allow the broccoli cups to cool completely to room temperature. This prevents condensation which can make them soggy.
- Refrigeration: Store the cooled cups in an airtight container in the refrigerator for up to 3-4 days.
- Freezing: For longer storage, you can freeze these cups. Place them on a baking sheet in a single layer and freeze until solid. Once frozen, transfer them to a freezer-safe bag or container. They can be stored in the freezer for up to 2-3 months.
- Reheating from Refrigerator: Reheat in a microwave for 30-60 seconds, or in a preheated oven at 300°F (150°C) for 10-15 minutes until warmed through.
- Reheating from Freezer: Reheat directly from frozen in a preheated oven at 325°F (160°C) for 15-20 minutes, or until thoroughly heated. Microwaving from frozen might result in a softer texture.
Loaded Cheesy Broccoli Cups: Your New Favorite Healthy Indulgence
These make-ahead cheesy broccoli cups are more than just a recipe; they’re a smart solution for nutritious, convenient eating. With their vibrant flavors, satisfying textures, and incredible adaptability, they are sure to become a staple in your kitchen. Whether you’re a seasoned chef or a beginner cook, this recipe provides a straightforward path to creating delicious and healthy meals that fit perfectly into any schedule. So go ahead, whip up a batch, and experience the joy of wholesome, flavorful food at your fingertips! Don’t forget to share your creations and any unique twists you add to this fantastic recipe. Happy cooking!