DIY Decor
26 Cheap DIY Wedding Decor Ideas On A Budget
Cheap wedding decor to make yourself: mason jar centerpieces, a flower garland chandelier, giant paper daisies, ice votives and a photo table runner.
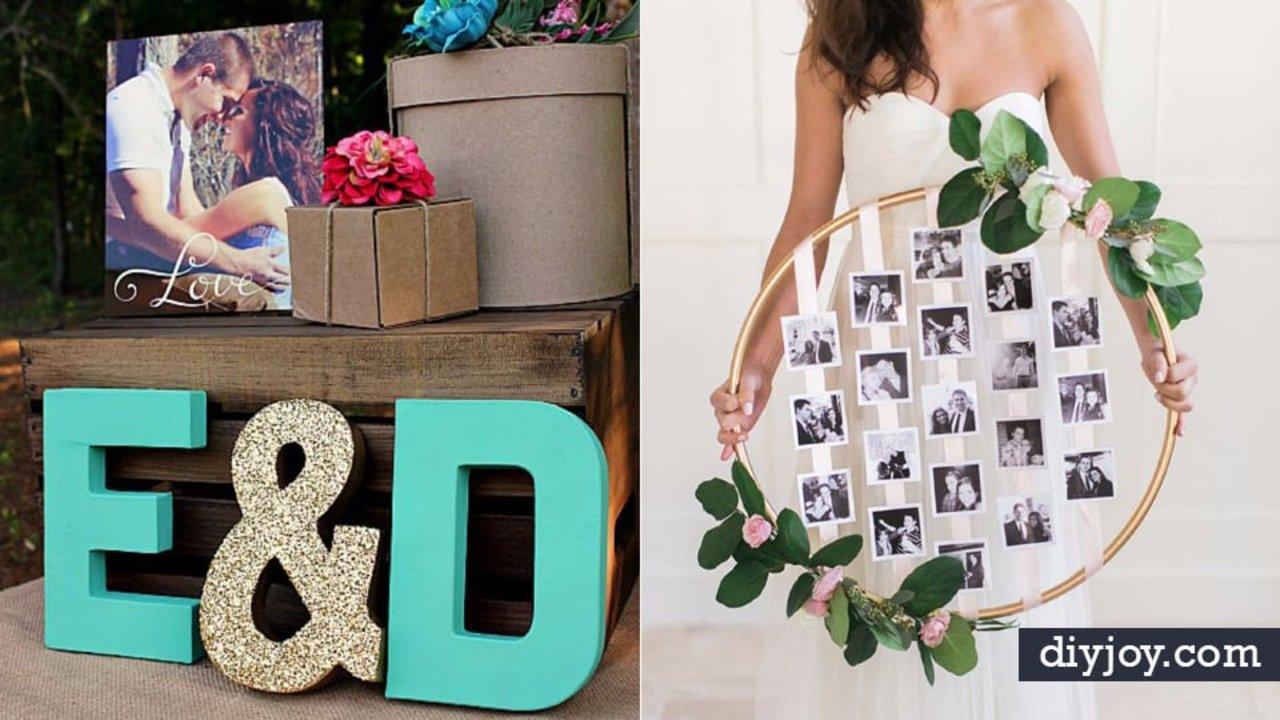
Nothing about a wedding costs what you expect it to, and decor is where the gap opens widest. A florist charges by the stem, a hire company charges by the table, and the same look built at a kitchen table over a few weekends costs a fraction of it. There are mason jars with floating candles, a chandelier hung with carnations threaded onto fishing line, giant paper daisies for a backdrop, candle holders made from thrift shop candlesticks at 99 cents each, and votives frozen out of water and glitter. Some of these are an evening. The giant flower wall is genuinely a project, so start it early and recruit somebody. Every one links straight through to the full tutorial.
1. Embellished Mason Jar Vase
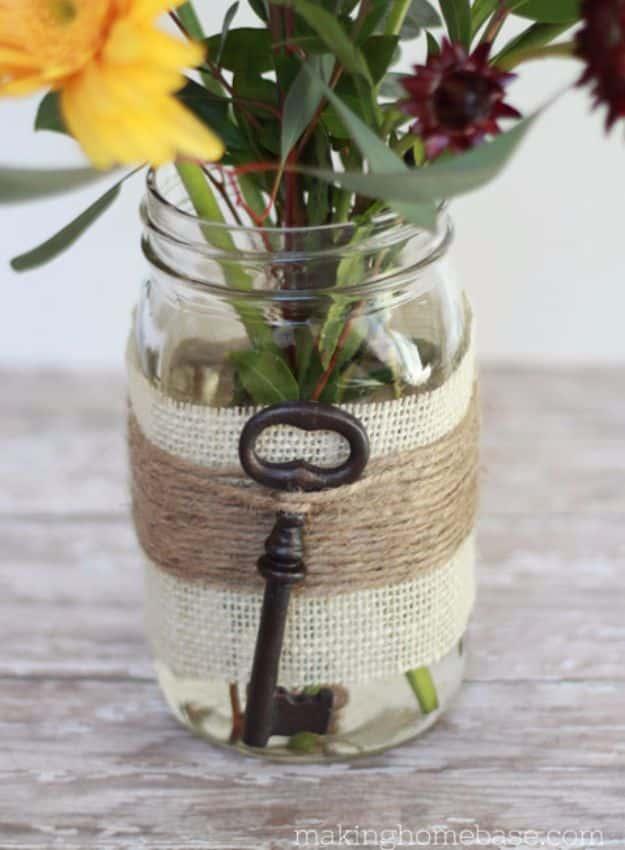
A plain mason jar wrapped in a strip of burlap with jute wound over the top and a fake skeleton key threaded onto the jute as it goes round. Making Home Base picked the key out of the dollar bin at Michaels and made the whole thing from leftovers already on the table, which is the honest appeal of it: nothing here is bought specially. Wrap the jute two or three times, string the key on, keep wrapping. As a centerpiece for a long table it costs less than a single stem from a florist and holds supermarket flowers beautifully.
Get the full tutorial at Making Home Base.
2. Cascading Chandelier Flower Garland
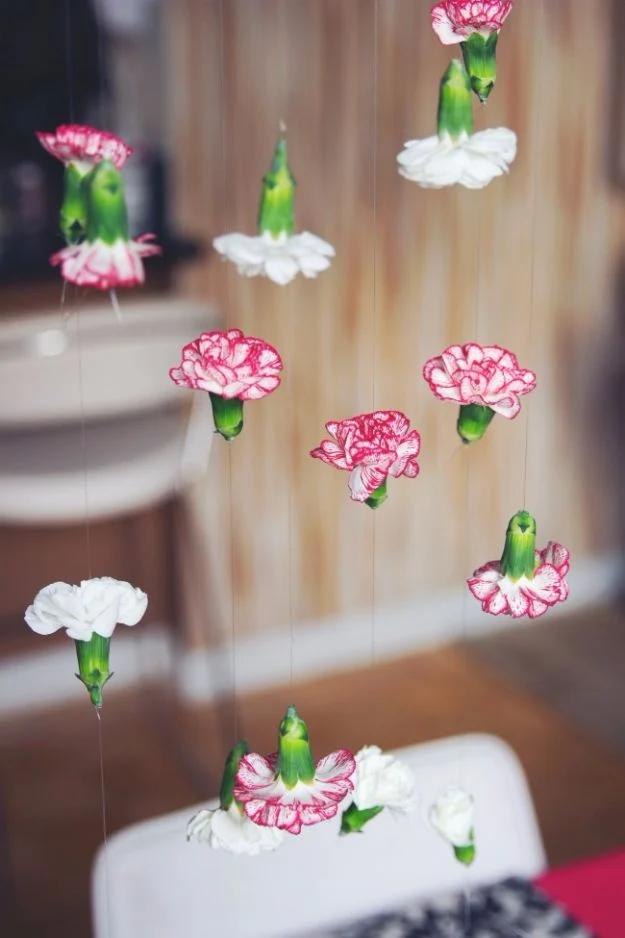
Flower heads trimmed off their stems and sewn onto fishing line with a needle, then hung in long strands over a chandelier so the whole thing rains carnations. The maker used twelve strands four feet long with about ten flowers on each, knotting a loop in the line between every flower to hold it in place. Fresh, dried or faux all work, and carnations are the sensible choice because they are the cheapest flower in any shop and they hold their shape once cut. Hang the middle of each strand over the fitting so both ends fall evenly.
Get the full tutorial at The Holiday Mama.
3. LED Mason Jar Lights
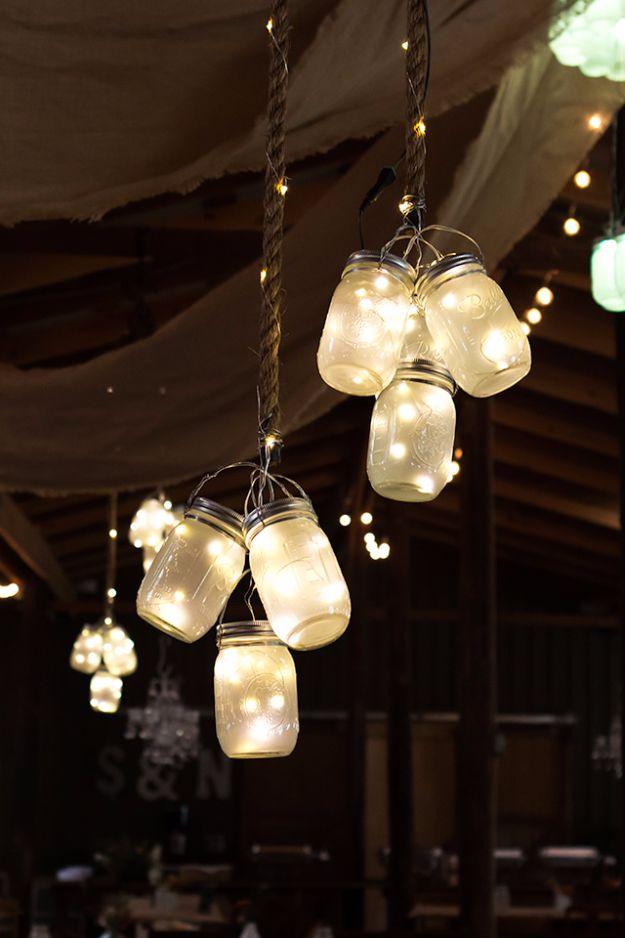
Mason jars sprayed inside with frosted glass spray and lit with LED tape, hung as a spiral chandelier over a barn reception. Sarah Hearts documents her brother’s build: pint jars in the chandelier itself and quart jars scattered down the reception tables, with a hole drilled in each lid so the lights could go in. The table jars ran on battery powered LEDs with the batteries stuck to the inside of the lid, which is the detail that matters, because it means no wires anywhere near a tablecloth. Frosting is what turns a hard little LED into warm light.
Get the full tutorial at Sarah Hearts.
4. DIY Paint Stir Stick Flower Box
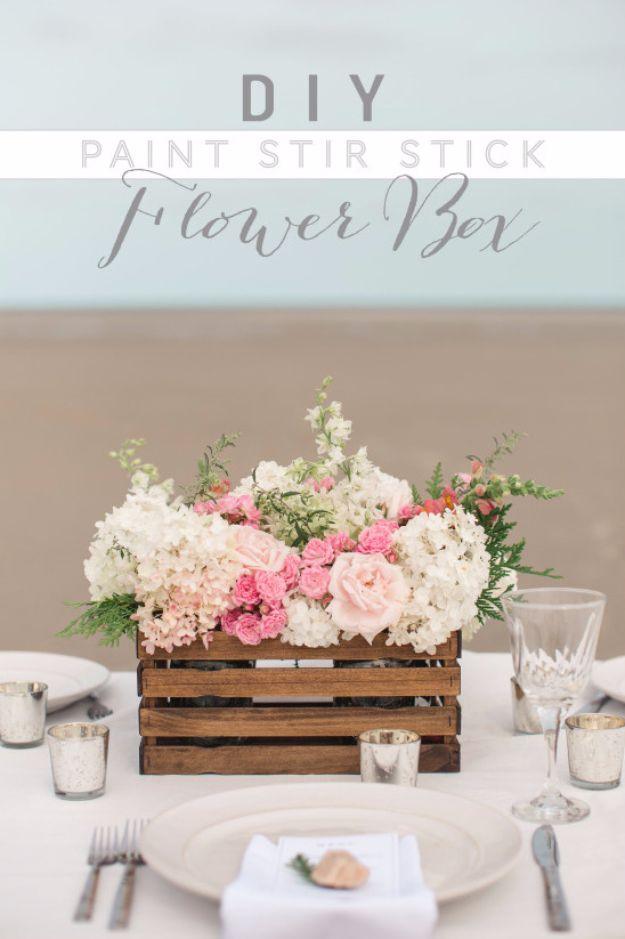
A shallow crate built out of paint stir sticks and filled tight with blush and white blooms, set down the middle of a laid table. Wedding Chicks cuts eight seven inch sticks, eight twelve inch and four at eleven and three quarters, stains them, then glues and staples them to half inch square dowels with a quarter inch gap between slats and the corners overlapped. Stir sticks are the material to know about on a budget: paint shops sell them for pennies and they already come uniform in width, which is most of the work of building anything slatted.
Get the full tutorial at Wedding Chicks.
5. Textured Heart Canvas
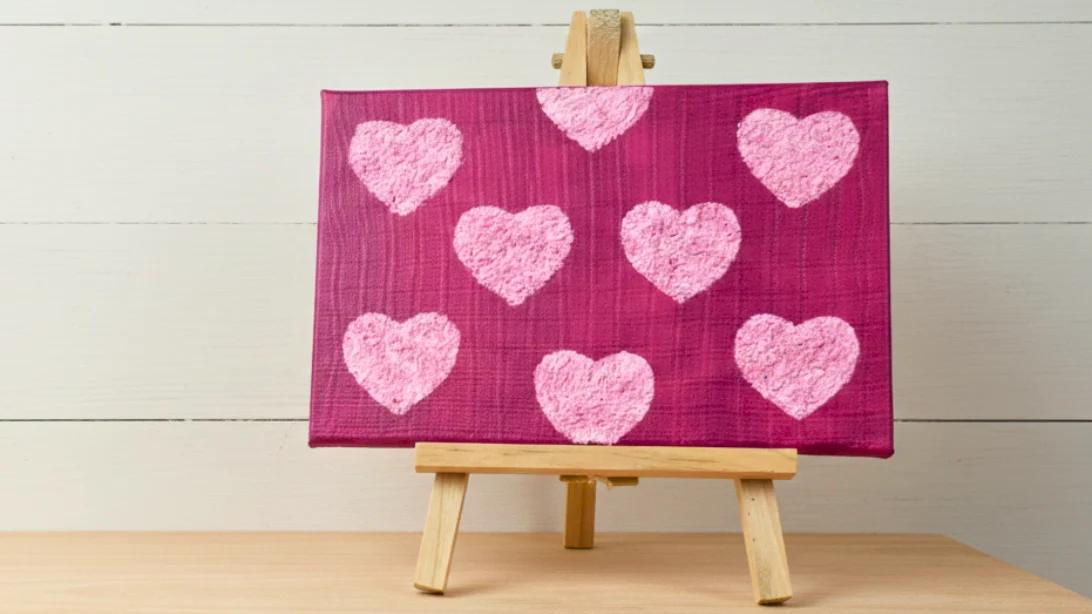
A canvas painted a flat color with raised, textured hearts built up on top of it out of tissue paper, glue and paint. The tissue is torn into small pieces, soaked in water, squeezed out and then mixed with glue and paint into a thick paste, which goes onto the drawn heart shapes in even layers and dries hard. It is a slow, quiet, oddly satisfying project and a very cheap one, and a row of three of them makes a gift table or a guest book table look considered. Let each layer dry properly before adding the next.
Get the full tutorial at Sueeye.
6. Burlap And Paper Wedding Banners
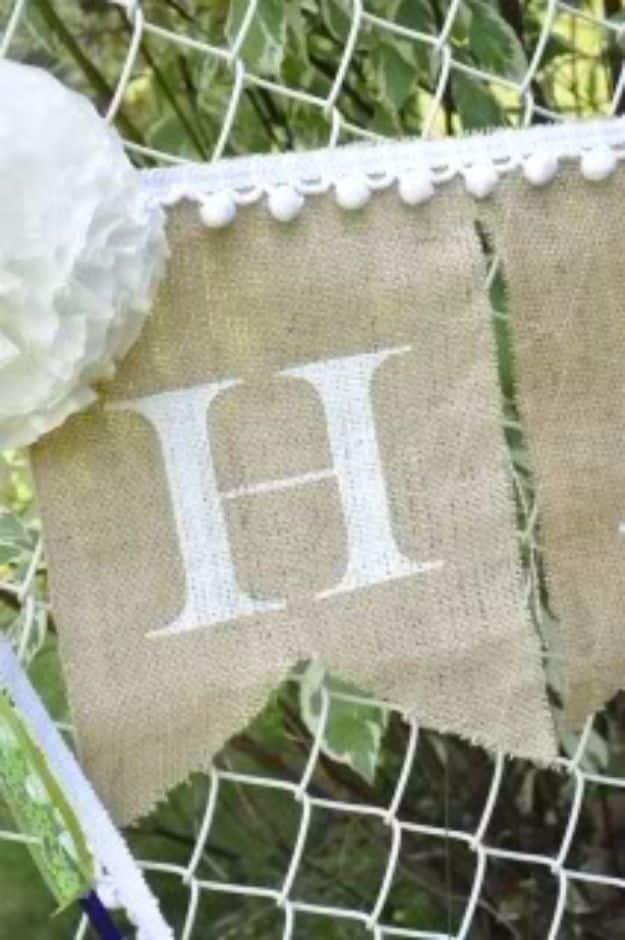
A burlap bunting with letters stenciled in white paint and coffee filter flowers strung between the words. Little Birdie Secrets used about two yards of burlap cut into pennants roughly ten inches wide by thirteen long, folding each one in half and cutting on a diagonal to make the point, then using the first as a template for the rest. The letters are freezer paper stencils ironed on at a low setting before painting, which is the step that gives a crisp edge on a fabric as loose as burlap. Measure your space before you cut anything.
Get the full tutorial at Little Birdie Secrets.
7. Dollar Store Table Chandelier
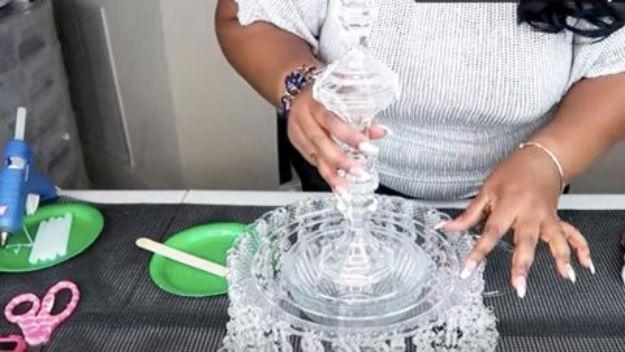
A table top chandelier assembled entirely from dollar store glassware, glued together into a tiered stand and hung or stood in the middle of a table. Cheap pressed glass is the whole trick, because candlesticks, bowls and lidded dishes from a discount shop all share the same fake crystal pattern and glue together into something that looks like one piece. It is the sort of centerpiece that gets picked up and examined. Build it well before the day, because adhesive on glass wants a long cure and there is no repairing one of these at a venue.
Get the full tutorial at Sueeye.
8. Rustic DIY Wedding Signs
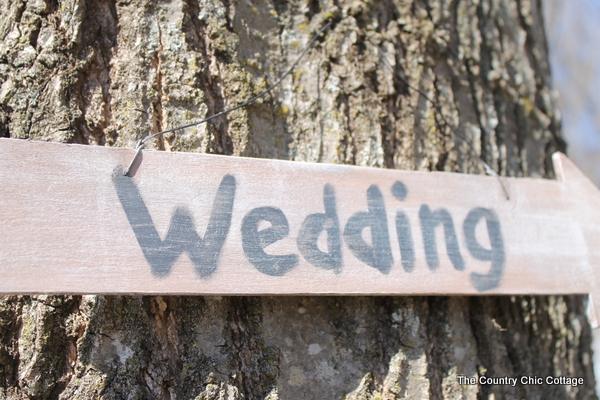
An unfinished wood plaque worked over with gel stain, white paint and sandpaper until it looks like it has been outside for twenty years, and the whole thing takes about fifteen minutes. The sequence is stain, dry brush white, stain again in patches, sand, then a thinned stain wash and a thinned white wash with each one wiped off immediately. That wipe is the important part, since it is what leaves color in the grain and nothing on the surface. Sand hardest over the painted areas, because worn paint is what sells the age.
Get the full tutorial at The Country Chic Cottage.
9. Paper Flower Garlands
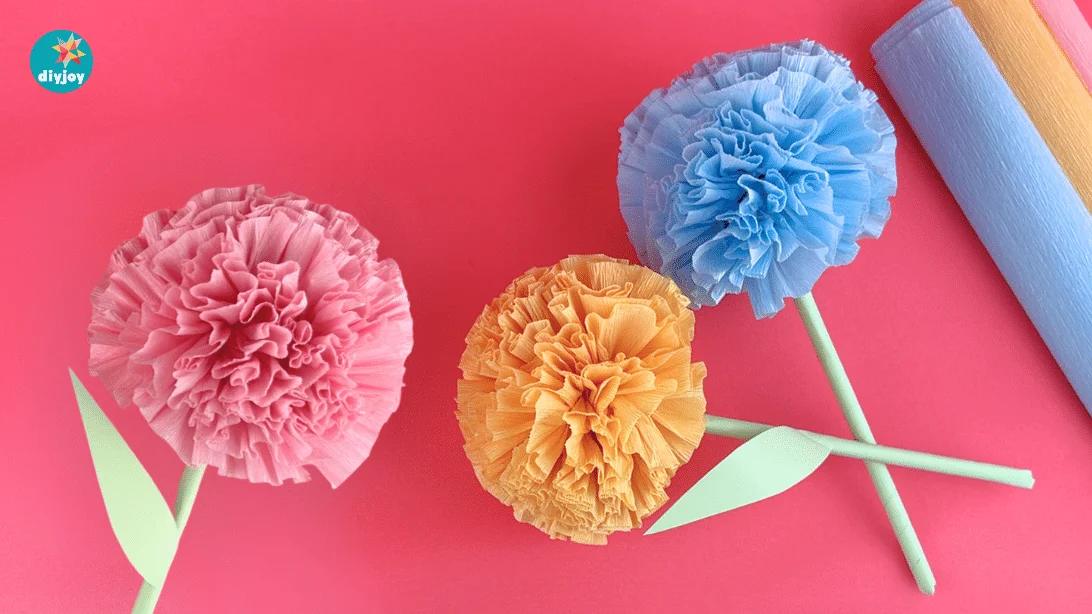
Round crepe paper flowers made by stacking rectangles, accordion folding them and binding the middle with floral wire, then separating the layers out into a full bloom. Twelve rectangles at about four inches by twelve go into each flower, stacked three at a time before folding, and the stems are green paper rolled on the diagonal. Crepe is worth the small extra cost over tissue because it stretches, so the petals hold a curve instead of going flat. Separate the layers slowly and from the middle outward or you will tear them.
Get the full tutorial at Sueeye.
10. DIY Ice Votives
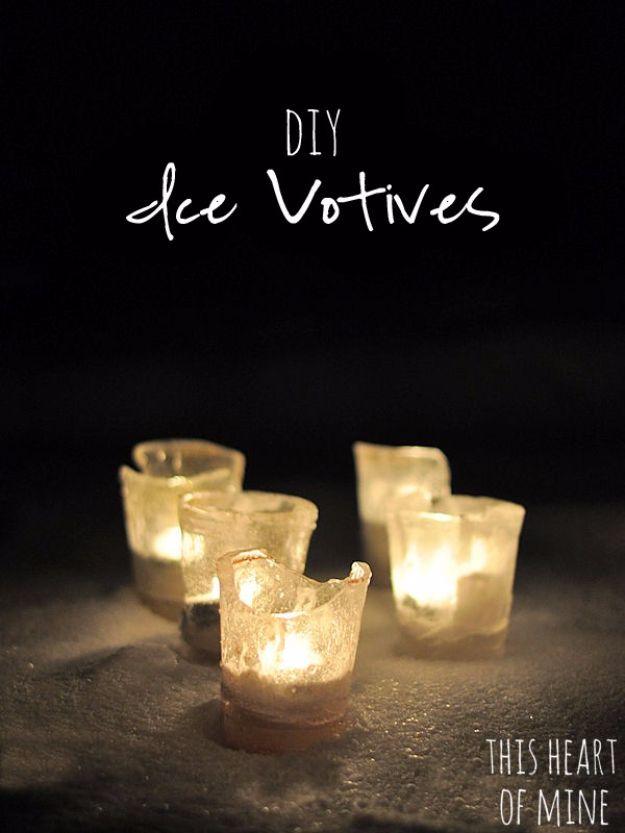
Candle holders frozen out of water and glitter in a pair of disposable cups, one inside the other, with the gap between them filled and frozen solid. This Heart of Mine mixes large flake glitter into the water, fills the outer cups partway, sets the smaller cup inside and weighs it down with something heavy, then tapes across the top to stop it drifting off center. Do not aim for perfect: the wonky ones catch light better. Plastic cups for both layers save you peeling wet paper off the finished votives.
Get the full tutorial at This Heart of Mine.
11. Mason Jar Fairy Lights
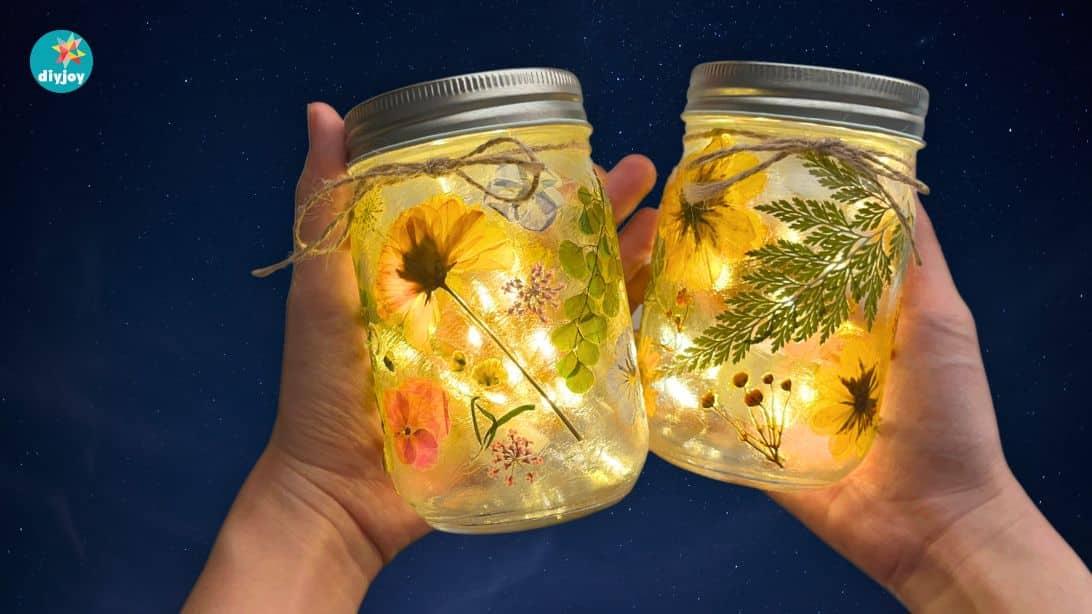
Pressed flowers glued onto the outside of a mason jar with Mod Podge and a string of fairy lights dropped inside, so the petals show as silhouettes once it is lit. Work in sections rather than coating the whole jar at once, trim any bulky stems flat, and seal over the top with a second coat once everything is stuck down. The one thing that decides whether it works is the flowers: thin, translucent petals and leaves let light through and sit flat, and thick ones do neither. Jute round the neck finishes it.
Get the full tutorial at Sueeye.
12. Bohemian Wedding Arch
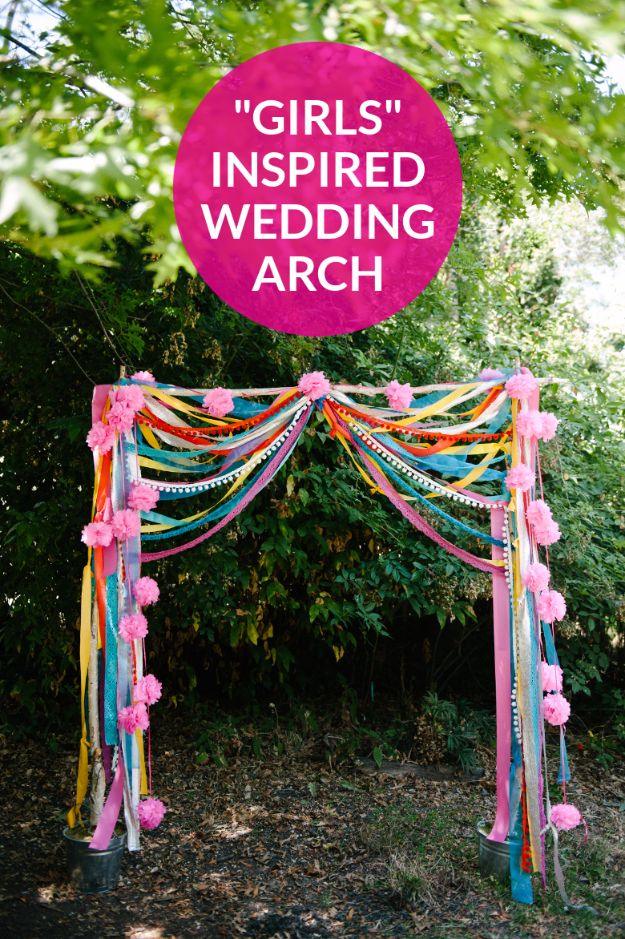
Three birch poles zip tied into an arch and hung with ribbon, trim and pom poms, which A Practical Wedding costed at somewhere south of five hundred dollars against a few thousand for the version that inspired it. The poles were six and a half feet high. The technique worth taking away is in the hanging: tie the middle of each length of fabric to the center of the arch, then tie the two ends down to the base at deliberately different heights, which is what gives you the uneven, draped look rather than a set of matching swags.
Get the full tutorial at A Practical Wedding.
13. Thrifty Hurricanes
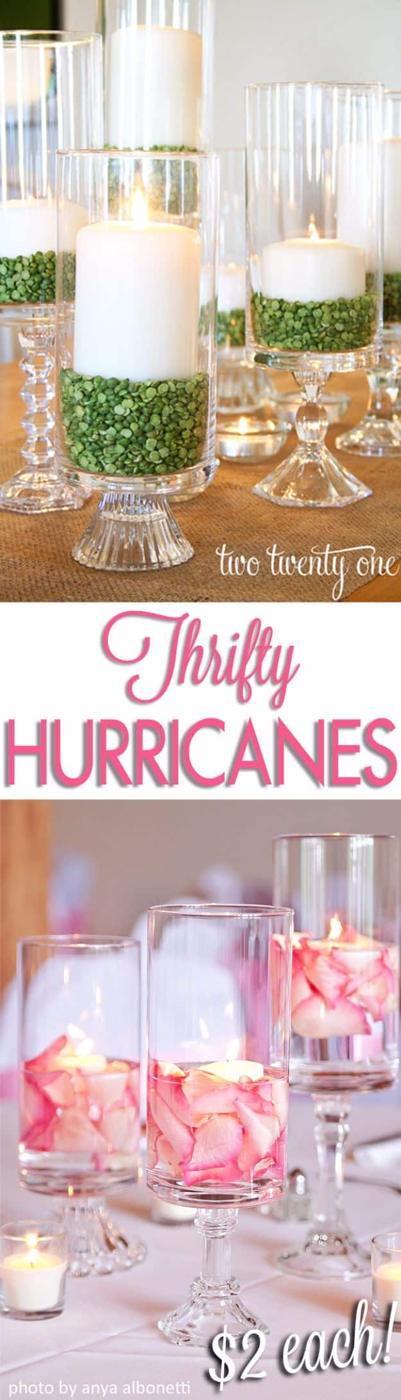
Glass vases glued onto thrift shop candlesticks to make footed hurricanes, at about two dollars each. Two Twenty One found the candlesticks at Goodwill for ninety nine cents each and already had the vases, then ran E6000 glue round the rim of each candlestick with a toothpick and pressed the vase on top. She eventually made six sets of three for her own reception, filled them with water and rose petals and floated a candle on top. The toothpick is not a fussy detail, it is how you get glue on a narrow rim without it squeezing out visibly.
Get the full tutorial at Two Twenty One.
14. How To Fold A Cloth Napkin Into A Rose
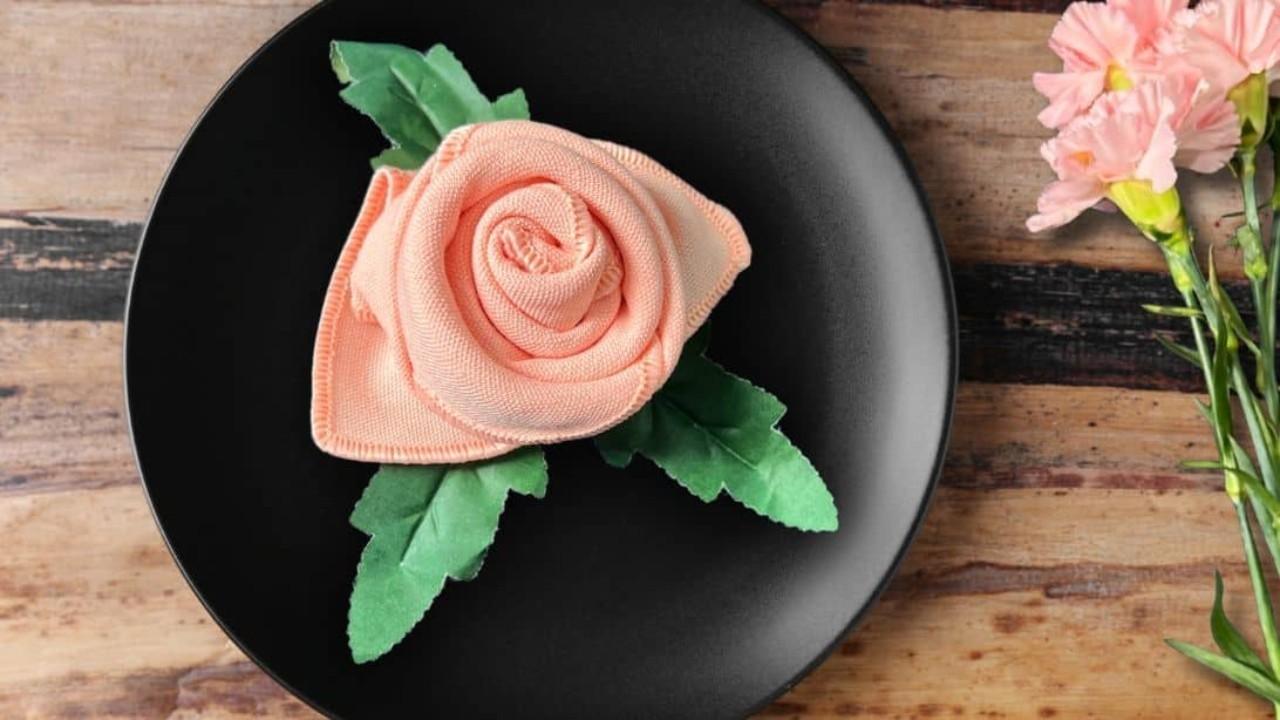
A square cloth napkin rolled and tucked into a rose, sitting on the plate at every place setting, and it costs the price of nothing at all if the napkins are already hired with the linen. Fold the napkin into a triangle, then roll from the long straight edge leaving about two and three quarter inches of fabric standing at the top, and keep rolling to the far end. Tuck the end into the fold, stand it up, then peel the layers at the top outward and downward until it opens into petals. Five of them and your hands know it.
Get the full tutorial at Sueeye.
15. DIY Photo Table Runner
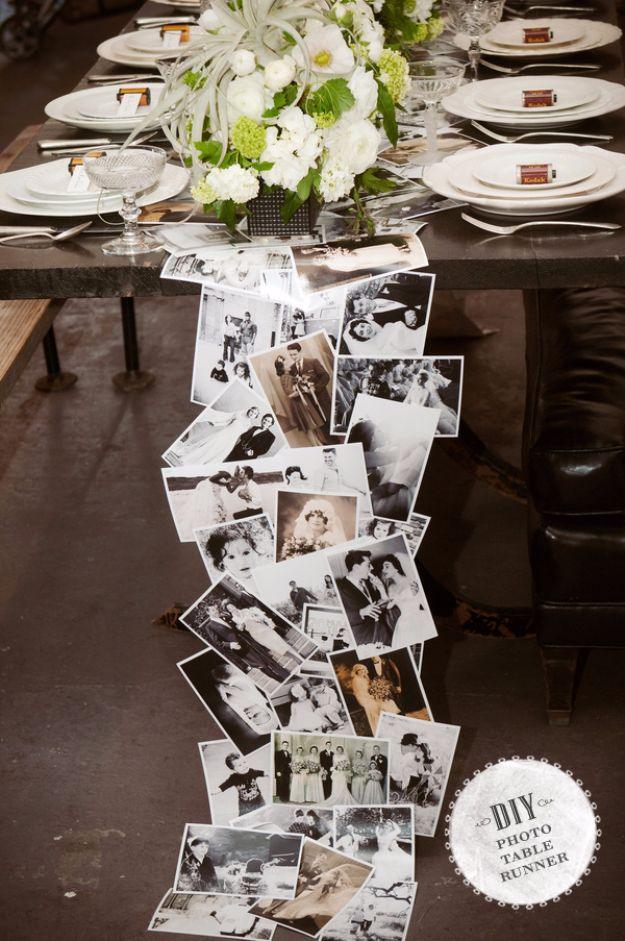
Photographs hot glued down a strip of muslin and run the length of a table, overlapping and spilling off the edges. Ruffled’s version was about nine feet long and took roughly a hundred and sixty photographs, made from sixty images with duplicates, which is the number worth knowing before you start printing. Cut the fabric a little narrower than you think you want it. Start gluing at one end, stop at the halfway point and start again from the other end so the two runs meet neatly in the middle rather than running out of space at the far end.
Get the full tutorial at Ruffled.
16. DIY Paper Heart Garland
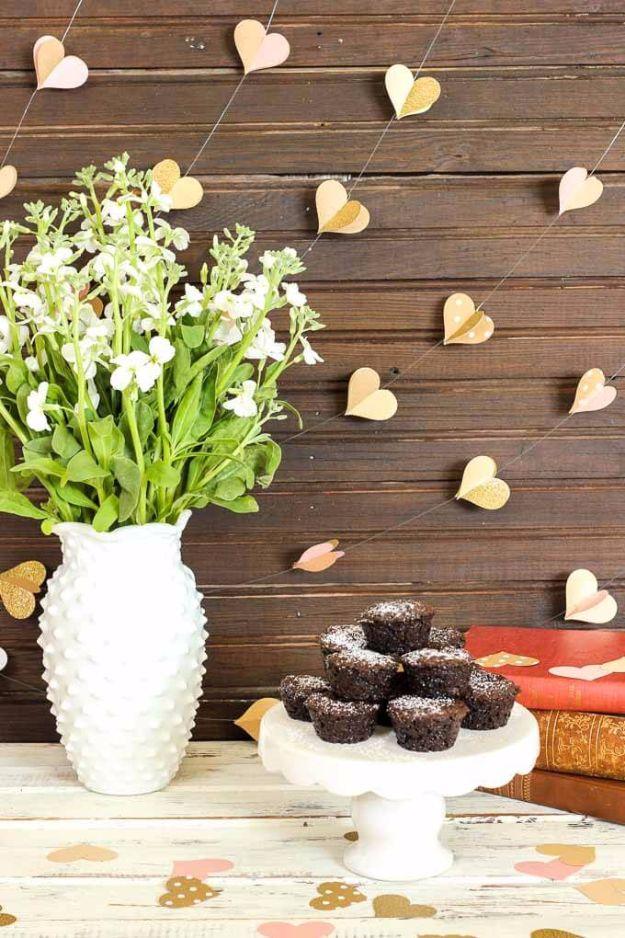
Small paper hearts strung at intervals along lengths of fishing line and hung flat against a wall, which is the decoration to make when you have a large bare wall, a small budget and a lot of willing hands. Make & Do Crew punches the hearts two at a time, slits one from the bottom to the middle and the other from the top, and slides the pair together into a three dimensional heart. A dab of tacky glue on the seam fixes each one to the line. The whole garland takes under an hour and nothing has to be perfect.
Get the full tutorial at Make & Do Crew.
17. DIY Giant Daisy Backdrop
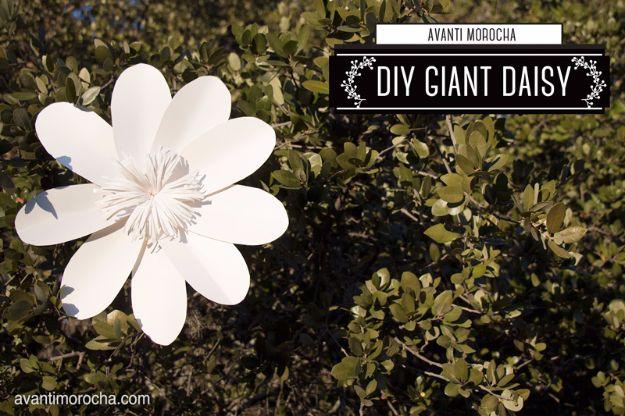
Oversized paper daisies made from cardstock and grouped into a flower wall, which is the backdrop everybody wants and almost nobody prices twice. Avanti Morocha points out that bought walls run about five hundred to seven hundred dollars for ten flowers, and having made them, says the price is fair because they are easy but genuinely laborious. That is the useful warning. She recommends a medium weight cardstock if the budget allows and draws her own templates. This daisy is the first in a series that also covers three kinds of giant rose and a second daisy.
Get the full tutorial at Avanti Morocha.
18. Mason Jar Centerpiece + Floating Candles
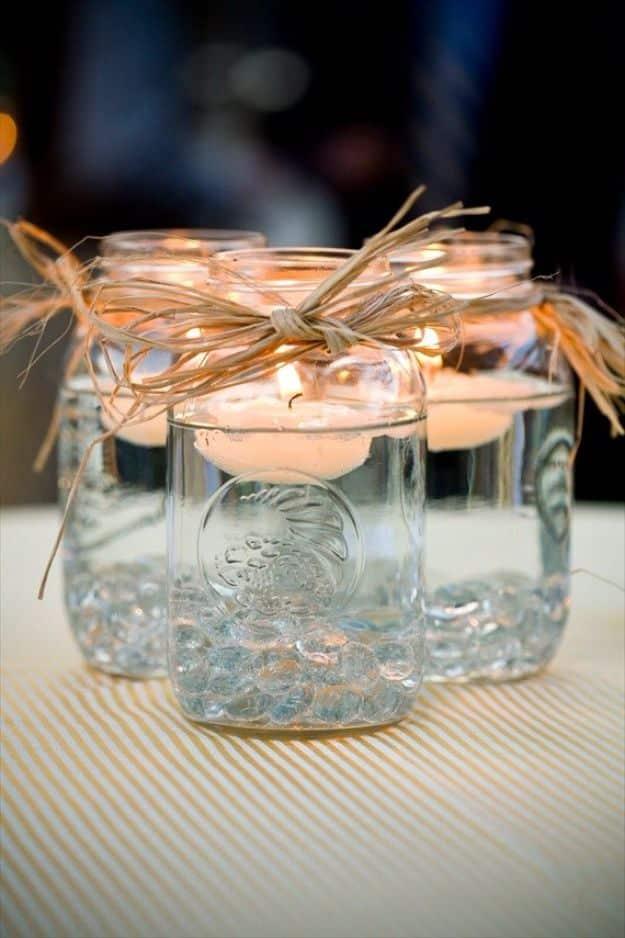
Mason jars filled with water, tied at the neck with raffia and finished with a floating candle, grouped three or four to a table. Emmaline Bride’s advice is to buy the jars in bulk, which is where the saving is, and the whole assembly is fill, tie, float and light. It is the centerpiece to choose if you are making a hundred of them, because nothing about it takes skill or time and the result still reads as considered. Glass pebbles or petals in the bottom of the jar cost almost nothing and stop it looking empty.
Get the full tutorial at Emmaline Bride.
19. DIY String Art Words
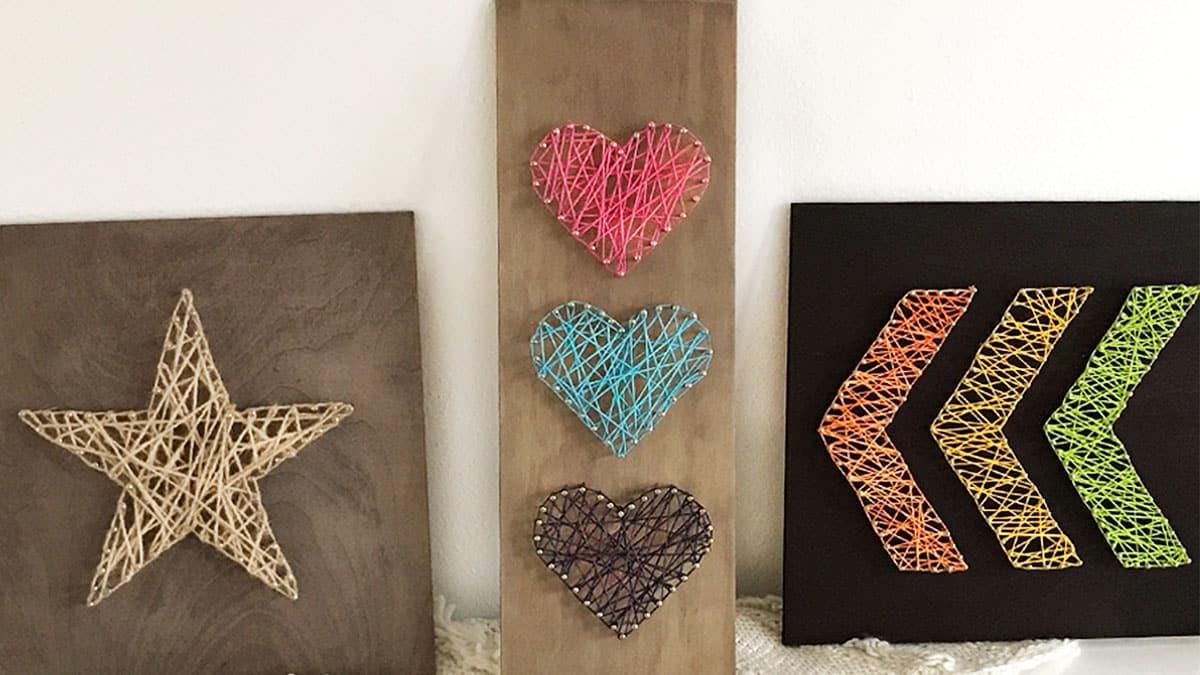
Nails hammered into a wood plank along a printed outline, then thread wound back and forth across them until the shape fills in. It is a forgiving project, which is the point: the design comes from the nail positions rather than from any skill with the string, so anybody can do the winding once the nails are in. Printed graphics laid over the board give you the pattern to follow. Small wire nails hold better than anything bigger, and a knot at the start is what stops the whole thing unravelling halfway through.
Get the full tutorial at Sueeye.
20. DIY Book Flowers
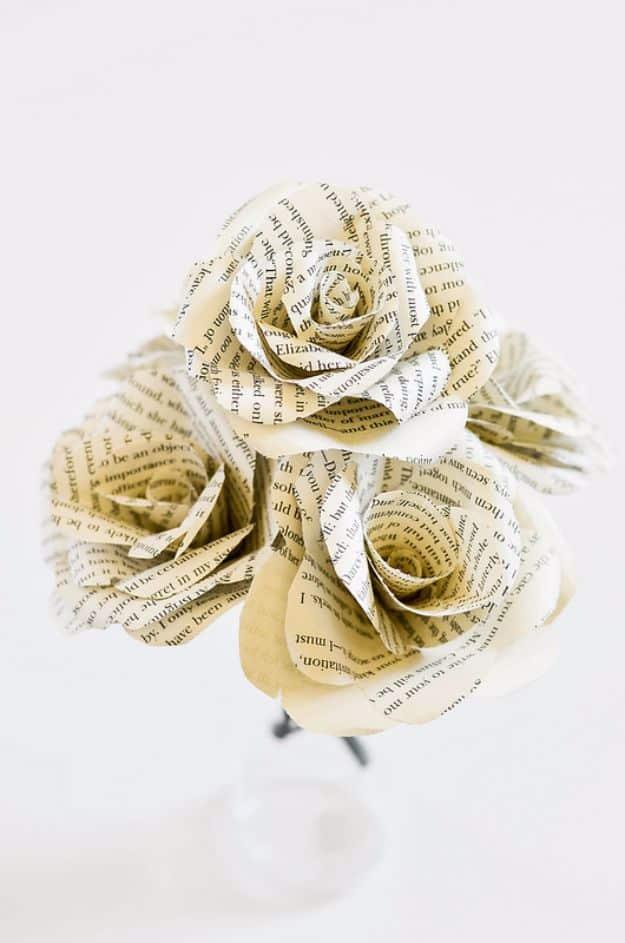
Roses folded rather than cut from old book pages, which is the difference between making one flower and making a hundred. cooking ala mel tried the cut and shape method first, found it so tedious she could not face a second one, and settled on a folding technique that forms most of the petals in a single move. She used Pride and Prejudice pages, which is a lovely touch at a wedding. Because the folding is done free hand, no two flowers match, and that is precisely what stops a bunch of them looking machine made.
Get the full tutorial at cooking ala mel.
21. DIY Candle Decor
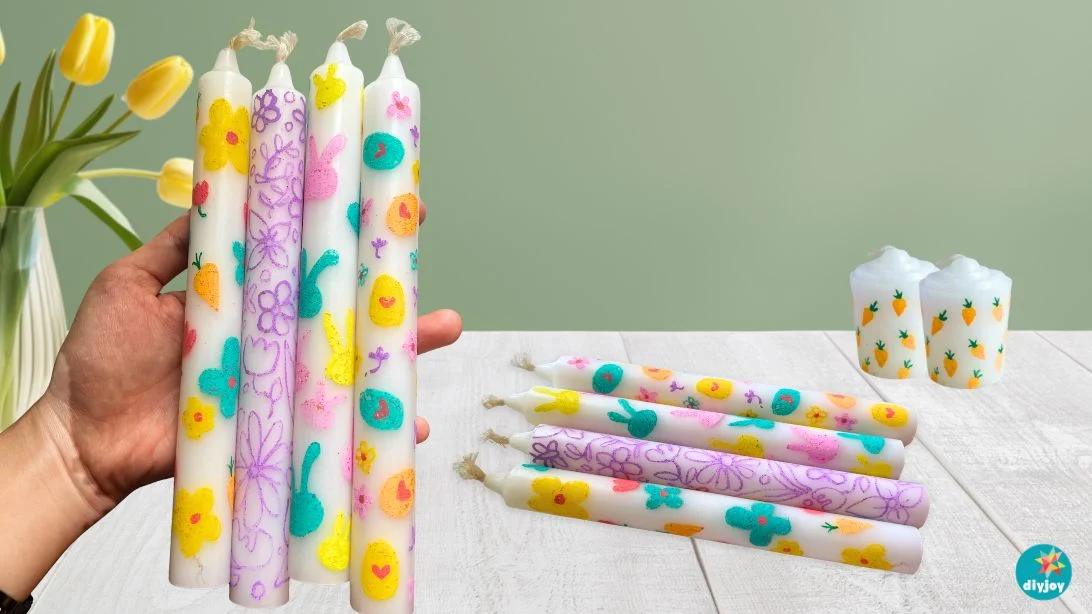
Plain candles drawn on with paint markers in small repeated shapes, which turns a supermarket taper into something that looks like it came from a boutique. Work one area at a time and let it dry before moving on, because paint marker on wax smudges under the side of your hand more readily than on paper. Outline first, then fill. The one thing to know before you start: these are decoration only and the post says plainly not to light them, so treat them as a table piece or a favor rather than a working candle.
Get the full tutorial at Sueeye.
22. DIY Fairy Jar Lanterns
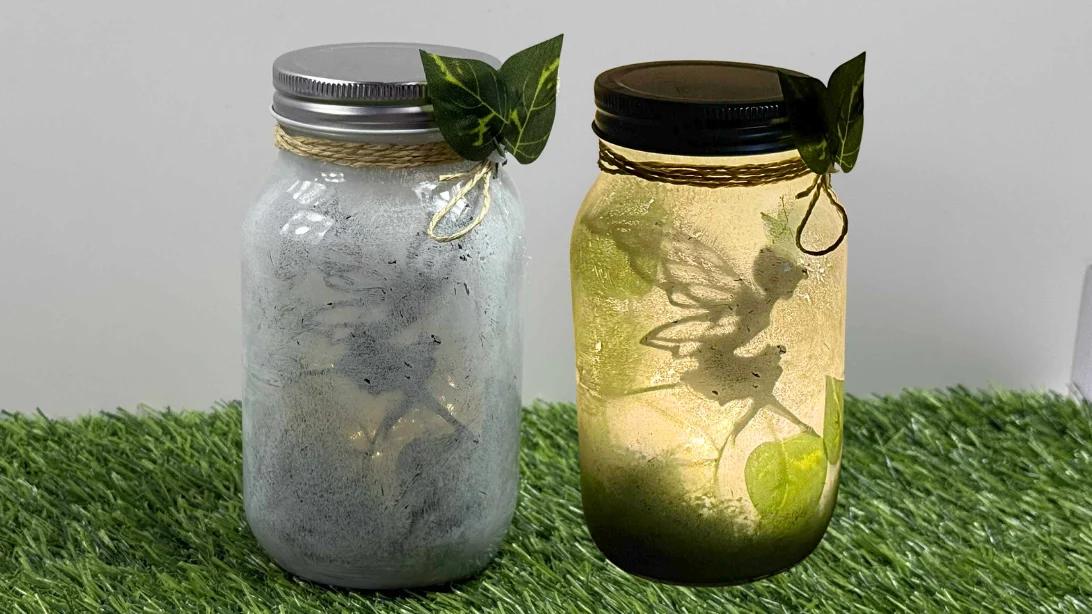
A glass jar painted white on the inside with a cut paper fairy silhouette glued in against the glass, so that a light behind it throws the shape into relief. Moss or crumpled tissue in the bottom hides the light source and gives the silhouette something to stand on. The white paint is what makes it work, because it diffuses the light into a soft even glow instead of a hot spot, and the silhouette reads clearly only against that. Twine round the neck with a leaf or two glued on finishes it.
Get the full tutorial at Sueeye.
23. DIY Coffee Filter Roses
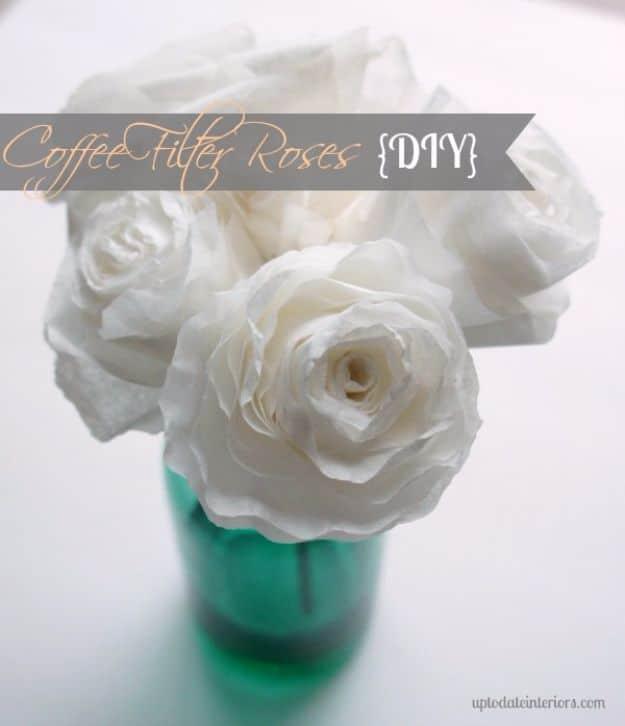
Paper roses made from coffee filters, in a post that compares three ways of doing it rather than picking one. Up To Date Interiors tried a template method with every petal traced and cut, which is the most detailed and by a distance the slowest; a layered method using whole round filters that builds a full flower in minutes; and her own free hand version cut without a template. The comparison is the value here, because which one you want depends entirely on whether you are making six flowers or two hundred.
Get the full tutorial at Up To Date Interiors.
24. Rustic Kissing Booth Sign
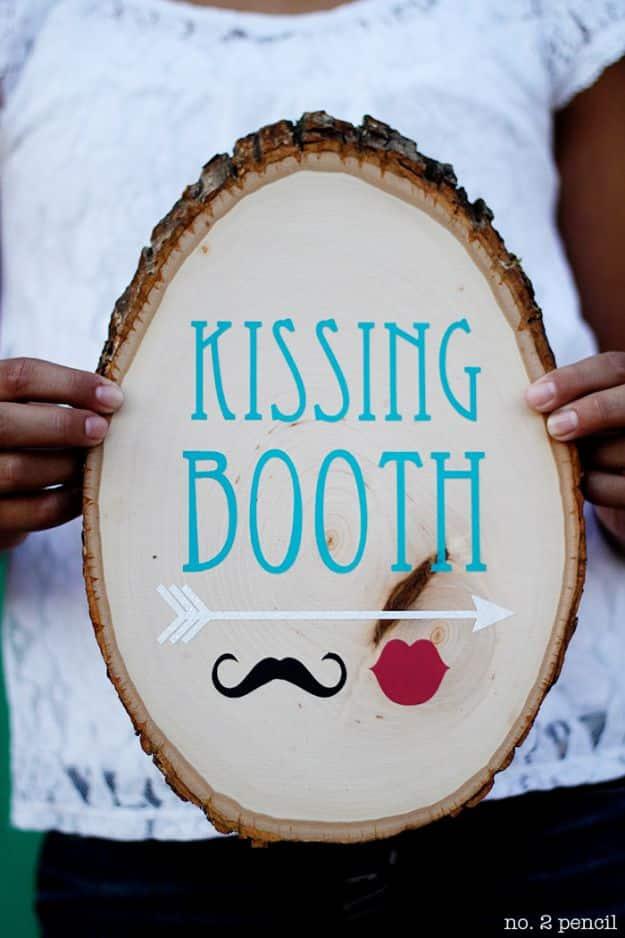
A bark edged wood slice stenciled with vinyl and painted, with glitter on the arrow. The technique worth stealing is step two: paint decoupage medium over the vinyl stencil before any color goes on, which seals the stencil edges so the paint cannot creep underneath, and it is the reason the lettering comes out sharp on a surface as uneven as a log slice. Use matte acrylics, and peel the stencil while the paint is still drying rather than after it sets hard. Wood slices come from craft shops in every size.
Get the full tutorial at No. 2 Pencil.
25. DIY String Chandeliers
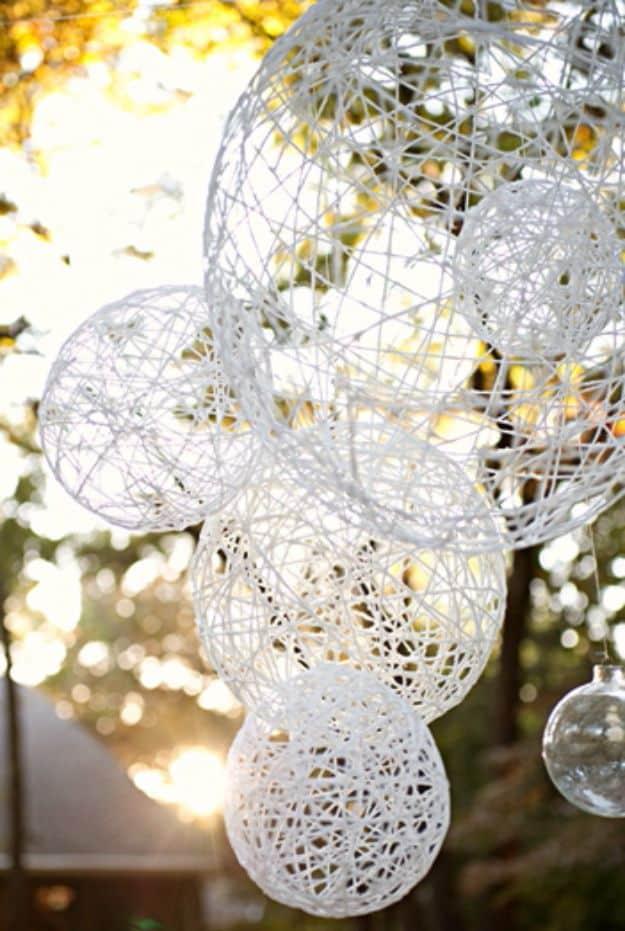
Cotton yarn soaked in a glue and cornstarch mixture, wound round a balloon and left to set hard, then the balloon is popped and pulled out through the hole. The mix is four ounces of white school glue, half a cup of cornstarch and a quarter cup of warm water, and the balloon gets coated in petroleum jelly first so the dried shell releases. Mark a circle round the knot before you start if a light fitting is going inside. Be warned that the source is blunt about the mess: do this outdoors or on a tarpaulin.
Get the full tutorial at Merry Brides.
26. Paper Flower Bouquet Using Cupcake Liners
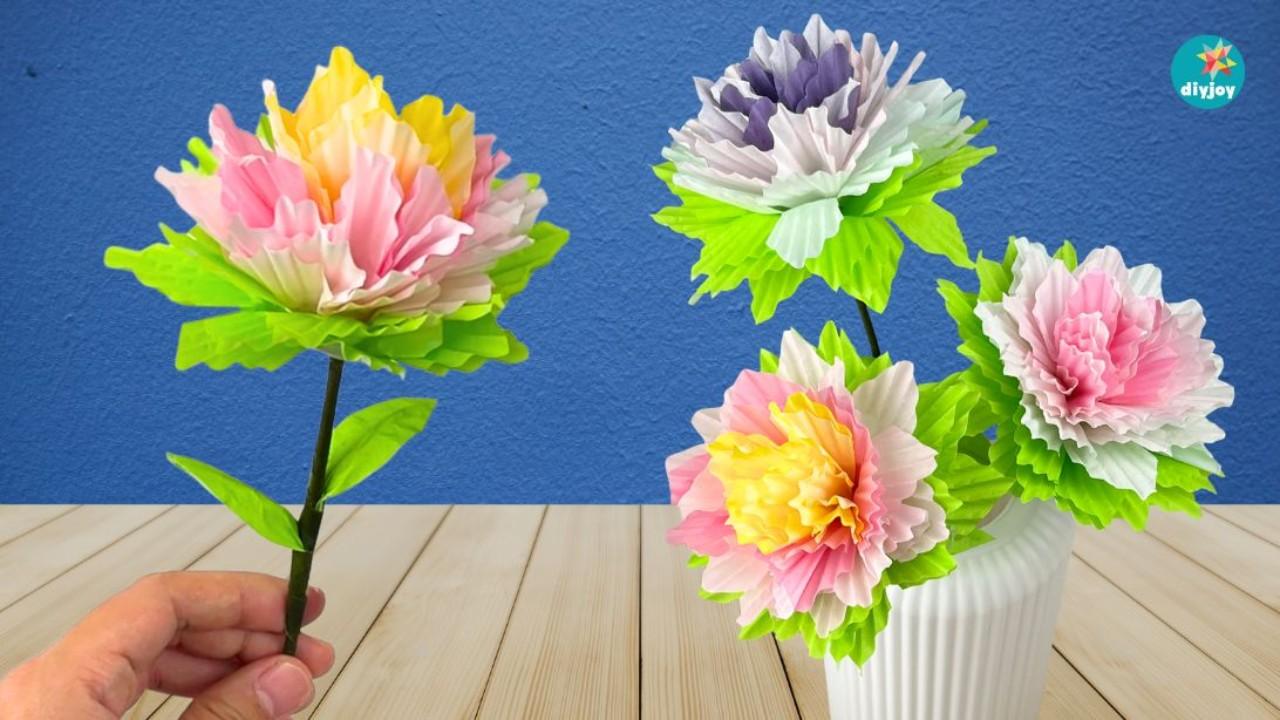
Full paper blooms built out of stacked cupcake liners, which is the cheapest flower on this page and arguably the prettiest. Nine liners are stacked, cut into eight sections and shaped into points, then threaded onto a skewer with hot glue and crumpled around it one section at a time to build up the petals. Leaves are folded and cut from more liners with floral wire glued inside so they bend and hold. Cupcake liners already come pleated and already come in a hundred colors, which is most of the work done before you start.
Get the full tutorial at Sueeye.