
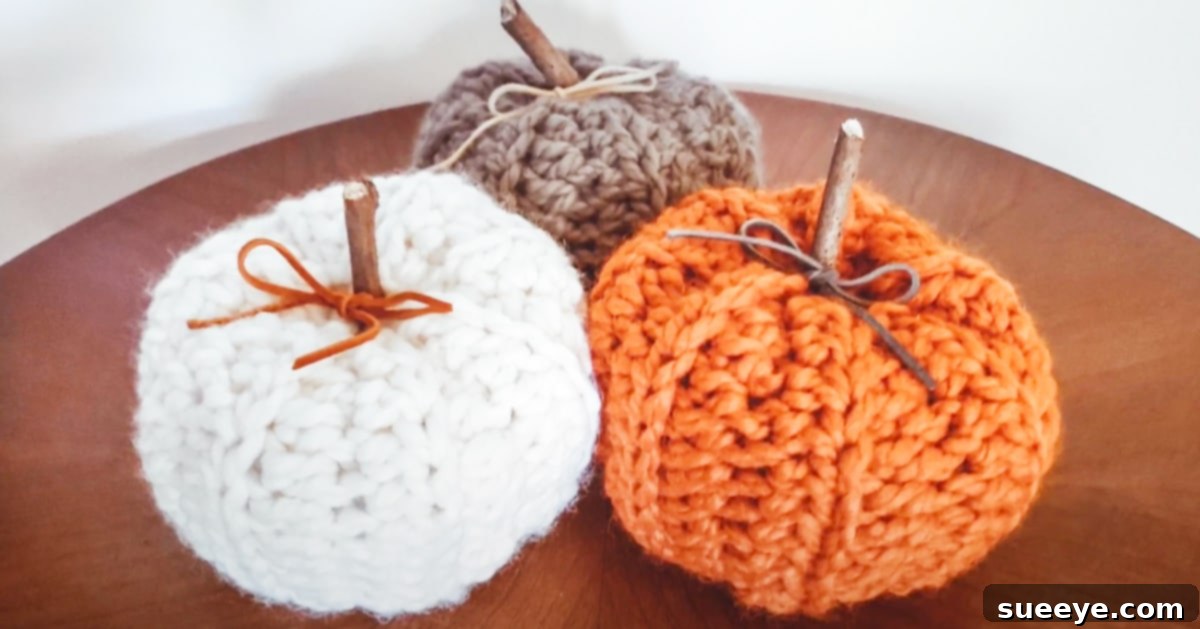
As the leaves begin to turn and a crispness fills the air, there’s an undeniable allure to transforming our homes into cozy, autumn sanctuaries. Few things capture the essence of fall quite like the humble pumpkin, and crafting them by hand adds an extra layer of warmth and personal touch to your seasonal decor. While commercial decorations abound, there’s a unique satisfaction in creating something beautiful and functional with your own hands. This guide will walk you through the delightful process of making adorable, rustic crochet pumpkins, perfect for infusing your space with that sought-after farmhouse charm.
Inspired by the simplicity and beauty of Heather Corrine’s rustic pumpkin tutorial on YouTube, we’ll delve into a detailed exploration of creating these charming pieces. While Heather’s video offers a quick and effective method, this expanded guide aims to provide a more comprehensive understanding, especially for those new to the world of yarn crafts. You’ll find that these handmade pumpkins are not only a joy to create but also a versatile addition to any fall decorating scheme, from a cozy mantelpiece to an inviting tablescape.
Crochet projects, in general, offer a wonderfully meditative and rewarding experience. For this particular endeavor, a foundational understanding of basic crochet stitches is beneficial. If you’re completely new to crocheting, don’t fret! There are countless excellent online resources and tutorials available to help you master the fundamental techniques – such as the slip knot, chain stitch, and basic single crochet – before you embark on this pumpkin adventure. Learning these core stitches will equip you with the confidence to tackle this pattern and many more. However, if you have a friend or family member who wields a crochet hook like a wizard, consider sharing this project with them; it’s a wonderful way to collaborate on creating beautiful fall accents. The rich, earthy tones often used for these rustic pumpkins naturally lend themselves to a classic farmhouse decor style, making them an instant hit for autumn aesthetics.
Why Crochet Your Own Fall Pumpkins?
Beyond the simple act of crafting, there are numerous reasons to choose handmade crochet pumpkins for your seasonal decorations. Firstly, they offer an unparalleled level of personalization. You can select yarn colors that perfectly match your existing decor, whether you prefer traditional oranges and browns, sophisticated neutrals, or even unexpected pops of teal or plum. Secondly, handmade items carry a unique story and character that mass-produced decorations simply can’t replicate. Each stitch is a testament to your effort and creativity, making your decor truly one-of-a-kind. Lastly, crocheting can be a incredibly relaxing and mindful activity, providing a creative outlet and a sense of accomplishment as you watch your project come to life.
Essential Materials for Your Rustic Crochet Pumpkin Project
Gathering your materials is the first exciting step in any craft project. For these rustic crochet pumpkins, you’ll find that the supplies are relatively simple and accessible, allowing you to focus on the creative process. Choosing the right materials is key to achieving that desirable chunky, rustic aesthetic.
- Lion Brand Thick and Quick Yarn: This super bulky (category 6) yarn is an excellent choice for these pumpkins. Its thickness allows for quick work and creates a wonderfully plump and textured result. Available in a wide array of colors, from classic pumpkin oranges and deep burgundies to muted creams, greys, and forest greens, you can easily find shades that complement your fall palette. Consider the “wooly” versions for an even more authentic, natural look, or opt for acrylic blends for easy care and a softer feel.
- Size N Crochet Hook (9MM): A hook of this size is perfectly suited for working with bulky yarn like Lion Brand Thick and Quick. Using the correct hook size is crucial for achieving the desired stitch definition and overall fabric consistency. It ensures your stitches aren’t too tight (making the fabric stiff) or too loose (making it flimsy).
- Scissors: A basic but indispensable tool for cutting yarn tails and finishing your project. Keep a sharp pair handy for clean cuts.
- Tapestry Needle / Yarn Needle: This needle, with its blunt tip and large eye, is essential for weaving in loose ends discreetly and for seaming your pumpkin sections together. Its blunt tip prevents splitting the yarn fibers, ensuring a neat finish.
- Stuffing: Polyester fiberfill (often labeled as poly-fil) is the most common and ideal choice for stuffing crochet projects. It’s soft, hypoallergenic, washable, and holds its shape well. The amount you’ll need depends on the size and desired firmness of your pumpkin. For a truly plump look, don’t be shy with the stuffing!
- Stick from Outside for the Stem: This is where the “rustic” element truly shines! A small twig or branch gathered from your yard or a park makes for an authentic and charming pumpkin stem. Look for pieces that are dry, sturdy, and proportionate to your pumpkin’s size. As an aromatic alternative, a cinnamon stick not only looks great but will also infuse your home with a wonderful, spicy scent – a true sensory delight for autumn!
- Leather String for Bow: To add a final touch of farmhouse elegance, a small bow made from leather string is perfect. However, feel free to customize this detail! Jute twine, natural raffia, rustic ribbon, or even a thin strip of flannel fabric would also create a beautiful effect, allowing you to tailor the embellishment to your personal style.
Pro Tip for Material Selection:
When choosing your yarn colors, think about where you’ll display your pumpkins. Traditional fall colors like burnt orange, deep red, golden yellow, and forest green are timeless. For a more modern farmhouse look, consider neutrals like cream, grey, taupe, or even a soft blush. Don’t be afraid to mix textures by combining different types of yarn for embellishments or even for striped pumpkins!
Getting Started: Essential Crochet Skills
Before diving into the full tutorial, it’s worth reviewing the basic crochet skills that will be helpful for this project. The rustic pumpkin pattern primarily relies on fundamental stitches and techniques, making it accessible for determined beginners. You should ideally be comfortable with:
- Slip Knot: The very first step to start any crochet project.
- Chain Stitch (ch): The foundation of almost all crochet pieces.
- Single Crochet (sc) or Half Double Crochet (hdc): While the video might specify, typically a simple, dense stitch is used to create the pumpkin fabric. These stitches provide good texture and firmness for stuffing.
- Slip Stitch (sl st): Used for joining pieces together invisibly and often for creating a smooth finish.
- Working in Rows: Understanding how to turn your work and continue stitching across previous rows.
If these terms are new to you, take a moment to watch a few beginner crochet videos. Mastering these basics will make following Heather Corrine’s tutorial much smoother and more enjoyable.
Step-by-Step Directions to Crochet Your Rustic Pumpkin
Now that your materials are ready and your basic skills are sharp, let’s outline the process of crafting your rustic crochet pumpkin. Remember, the rustic pumpkin tutorial by Heather Corrine on YouTube provides a full visual guide, which is highly recommended for clarity on specific stitch placement and techniques. This written guide offers a detailed overview to complement the video instructions.
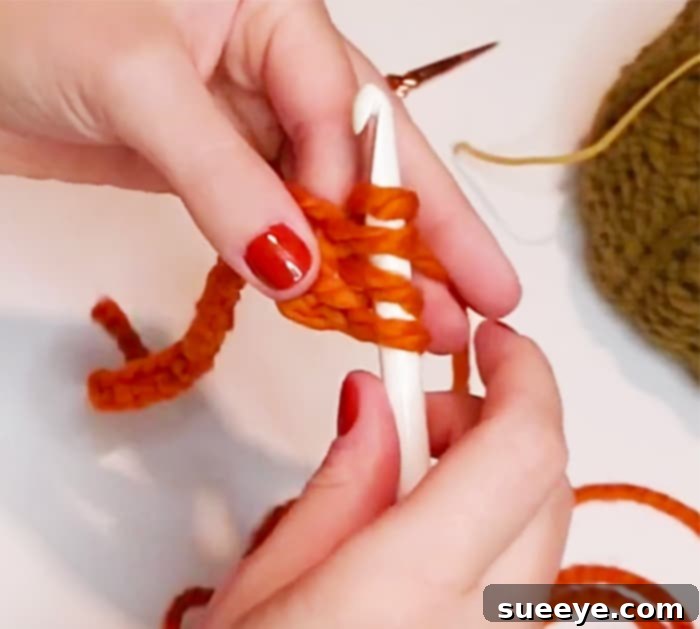
1. Starting the Foundation Chain
To begin, create a slip knot on your hook. Then, carefully chain 17 stitches. This chain will determine the height of your finished pumpkin. If you wish to make a taller pumpkin, simply chain more stitches. For a shorter pumpkin, chain fewer. Ensure your chains are not too tight, as you will be working into them in the next step.
2. Creating the Pumpkin Fabric (Rows)
Once your foundation chain of 17 is complete, you will begin working back and forth in rows to create the rectangular fabric that will form your pumpkin. The video tutorial will guide you on the specific stitch to use (likely single crochet or half-double crochet) and where to place your hook for each stitch. You will continue to work rows until you have completed 15 rows in total. As you work, try to maintain an even tension throughout your stitches. Consistent tension is key to a uniform and attractive fabric. This rectangular piece will eventually be transformed into the pumpkin’s round body.
3. Forming the Pumpkin Shape: Seaming the Edges
After completing your 15 rows, you will have a flat, rectangular piece of crocheted fabric. The next step is to transform this rectangle into a tube, which will become the body of your pumpkin. To do this, bring the very first row (your foundation chain) and the last row you just finished together, aligning their edges. Using slip stitches, you will now join these two edges all the way across. This effectively creates a seam, forming a seamless cylindrical shape. The goal is to make this seam as neat and invisible as possible for a polished finish. Once you reach the end of the seam, chain one to secure your work, and then trim off your yarn, leaving a long tail (at least 12-18 inches) – this tail will be crucial for the next steps.
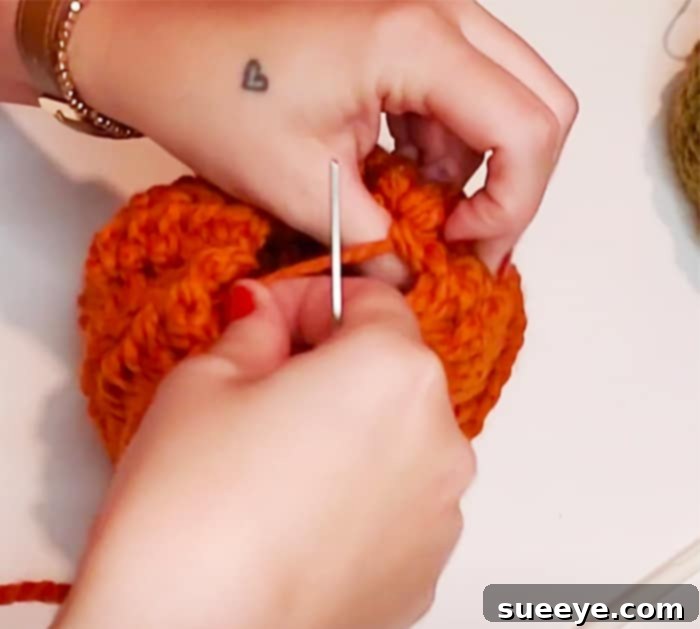
4. Gathering and Stuffing Your Pumpkin
Now you have a crochet tube. Thread the long yarn tail you left earlier onto your tapestry needle. You will use this tail to gather and close one end of the tube. Weave the needle in and out along the raw edge of one opening, creating a running stitch. Once you’ve gone all the way around, pull the yarn tail tightly to cinch the opening closed, forming the bottom of your pumpkin. Secure it with a few stitches to ensure it stays closed. Next, it’s time to stuff your pumpkin! Begin inserting the polyester fiberfill into the open end. Stuff firmly and evenly, shaping the pumpkin as you go. You want it to be plump and hold its shape well, but not so much that the stitches stretch open. Once adequately stuffed, use the remaining yarn tail (or a new one if necessary) and your tapestry needle to gather and close the top opening of the pumpkin, leaving a small opening in the center where the stem will be inserted.
5. Adding the Stem and Final Embellishments
With your pumpkin stuffed and mostly closed, it’s time for the finishing touches. Carefully insert your chosen stem (a natural twig or cinnamon stick) into the small opening at the top of the pumpkin. Push it in gently but firmly until it feels secure. You can use a bit of hot glue on the inside if you want extra stability, though often the tight crochet fabric holds it well. Finally, tie your leather string (or jute, twine, etc.) into a simple bow around the base of the stem. This adds a charming, rustic flourish and completes the farmhouse aesthetic. Adjust the bow as needed to sit perfectly.
This entire process, while requiring attention to detail, is incredibly rewarding. If you are already proficient in crochet, simply following along with the video will be a breeze. The end results are truly worth the effort, and you’ll love how these handmade pumpkins add a beautiful rustic touch to your home decor. The idea of using an outdoor stick for the stem is brilliant, making good use of natural, readily available materials. These pumpkins are also highly customizable in size; you would simply adjust the number of initial chains (for height) and the number of rows (for circumference) to create smaller or larger versions.
Tips for Success and Customization
To ensure your crochet pumpkins turn out beautifully and to encourage your creative spirit, consider these additional tips:
- Check Your Gauge: While not critical for decor items, if you want your pumpkins to be a specific size, ensure your stitch count and row count per inch match the pattern’s suggested gauge.
- Experiment with Yarn Weights: While bulky yarn is recommended for speed and texture, you could use worsted weight yarn with a smaller hook for a denser, smaller pumpkin, though it will take more rows.
- Color Combinations: Don’t limit yourself to solid colors! Consider creating striped pumpkins by changing yarn colors every few rows. Ombré or variegated yarns also produce stunning effects.
- Different Textures: If you’re comfortable with more advanced stitches, explore using stitches like the half-double crochet in the third loop, or front/back post double crochets to create ribbed textures for a more defined pumpkin look.
- Embellishment Ideas: Beyond a simple bow, you can hot glue small faux leaves, buttons, beads, or even tiny crochet flowers to your pumpkins for added visual interest.
- Weighted Base: For taller or more slender pumpkins that might tip, consider placing a small bag of rice or poly pellets at the bottom before adding the fiberfill stuffing.
Care and Display of Your Crochet Pumpkins
Taking care of your handmade crochet pumpkins is straightforward. For most yarns, spot cleaning with a damp cloth and mild soap is sufficient for small marks. If a more thorough cleaning is needed, check the yarn label for washing instructions. Often, a gentle hand wash and air dry will work best. Avoid harsh scrubbing or machine washing, which can distort the shape or texture.
When it comes to display, the possibilities are endless! Arrange a cluster of varying sizes and colors on your mantelpiece, create a charming centerpiece for your dining table, or place them on tiered trays alongside other autumn elements like candles, pinecones, and fall foliage. They look delightful on an entryway console, welcoming guests with handmade warmth. These rustic pumpkins also make thoughtful, personalized gifts for hosts, friends, or family during the fall season.
Conclusion: Embrace the Joy of Handmade Fall Decor
Crafting your own rustic crochet pumpkins is more than just a seasonal project; it’s an opportunity to infuse your home with warmth, personality, and the undeniable charm of handmade decor. With simple materials and basic crochet skills, you can create a collection of these adorable pumpkins that perfectly capture the essence of autumn and the cozy farmhouse aesthetic. Whether you’re a seasoned crocheter or a keen beginner, the journey of creating something beautiful with your own hands is incredibly rewarding.
So grab your hook, choose your favorite fall-colored yarn, and let the creativity flow. Follow Heather Corrine’s excellent video tutorial, complemented by this detailed guide, and soon you’ll have a delightful display of rustic crochet pumpkins gracing your home. Share your creations, experiment with different styles, and most importantly, enjoy the process of bringing a touch of handmade magic to your fall celebrations. Happy crocheting!