
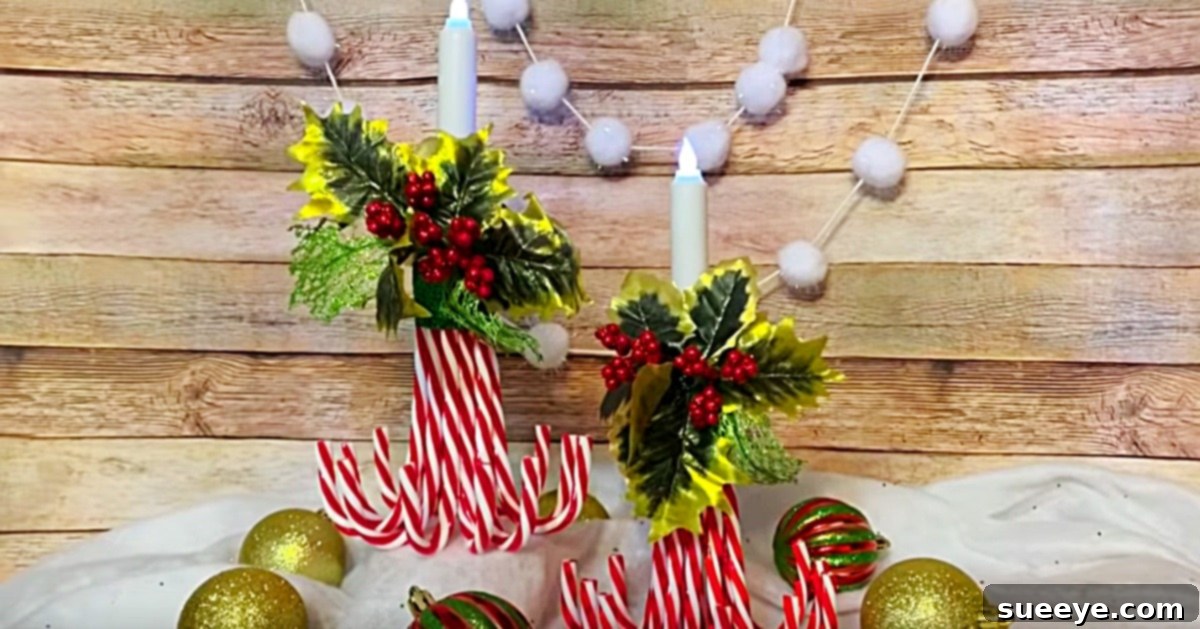
DIY Candy Cane Luminaries: Affordable & Festive Christmas Decor with Dollar Tree Finds
As the holiday season draws near, the festive charm of Christmas decorations becomes a highlight in every home. Among the myriad of beloved symbols, the candy cane stands out as an iconic staple, instantly evoking warmth and holiday cheer. This year, why not bring a touch of that classic candy cane magic into your home with a stunning, yet incredibly budget-friendly, DIY project? We’re talking about crafting beautiful Candy Cane Luminaries that not only illuminate your space with a soft, inviting glow but also serve as a spectacular centerpiece, perfect for any holiday gathering, from an intimate family dinner to a festive office party.
The secret to this project’s affordability and longevity lies in a brilliant discovery: plastic candy canes, readily available at your local Dollar Tree. Unlike their edible counterparts, these durable plastic versions ensure your decorations last for seasons to come, year after year, without the worry of melting or stickiness. Paired with Dollar Tree’s emergency battery-operated candles, you’ll create elegant luminaries that appear far more expensive than their humble origins. Imagine the delightful gasps and compliments from your guests when they learn these charming pieces were handcrafted by you, all for just a few dollars!
Why Choose DIY Christmas Decor This Holiday Season?
Embracing the spirit of DIY for your holiday decorations offers a wealth of benefits beyond just saving money. Crafting your own decor allows for a personal touch that mass-produced items simply can’t replicate. Each piece tells a story, imbued with your creativity and effort. It’s an opportunity to create unique, custom items that perfectly match your home’s aesthetic and your personal style. Moreover, engaging in DIY projects can be a wonderfully relaxing and rewarding experience, a perfect way to de-stress during the often-hectic holiday period. It can also be a fantastic activity to share with family and friends, creating cherished memories as you craft together.
For environmentally conscious decorators, choosing reusable materials like plastic candy canes contributes to sustainability, reducing waste associated with single-use decorations. The satisfaction of transforming inexpensive items into something beautiful and meaningful is truly unmatched. This Candy Cane Luminary project exemplifies all these advantages, proving that stunning holiday decor doesn’t require a hefty budget or extensive crafting experience.
The Enduring Appeal of Candy Canes in Holiday Decor
The candy cane, with its distinctive red and white stripes and peppermint flavor, has a rich history as a Christmas symbol. Originating in Germany in the late 17th century, its shape is often said to represent a shepherd’s crook, while the white symbolizes purity and the red the sacrifice of Christ. Regardless of its exact origins, its iconic appearance has made it an indispensable part of holiday traditions worldwide. From hanging on Christmas trees to adorning festive treats, candy canes are synonymous with the magic of the season.
Utilizing plastic candy canes in your DIY projects unlocks a new dimension of creative possibilities. They offer durability and flexibility, allowing you to craft decorations that would be impossible with real candy. For this luminary project, their uniform size and vibrant colors make them an ideal building block, creating a visually striking and instantly recognizable holiday theme. By incorporating these readily available items, we’re not just making a decoration; we’re celebrating a timeless holiday icon in a new, exciting, and practical way.
Materials You’ll Need for Your DIY Candy Cane Luminaries
One of the most appealing aspects of this project is how few and how affordable the materials are, especially when sourced from Dollar Tree. Here’s a comprehensive list of what you’ll need to gather:
- Plastic Candy Canes: You’ll need enough to circle the base of your battery-operated candle. Depending on the size of your candle and the candy canes, aim for approximately 10-15 candy canes per luminary. Dollar Tree often sells these in packs, making them incredibly cost-effective. These are the star of our project, providing the structure and the festive aesthetic.
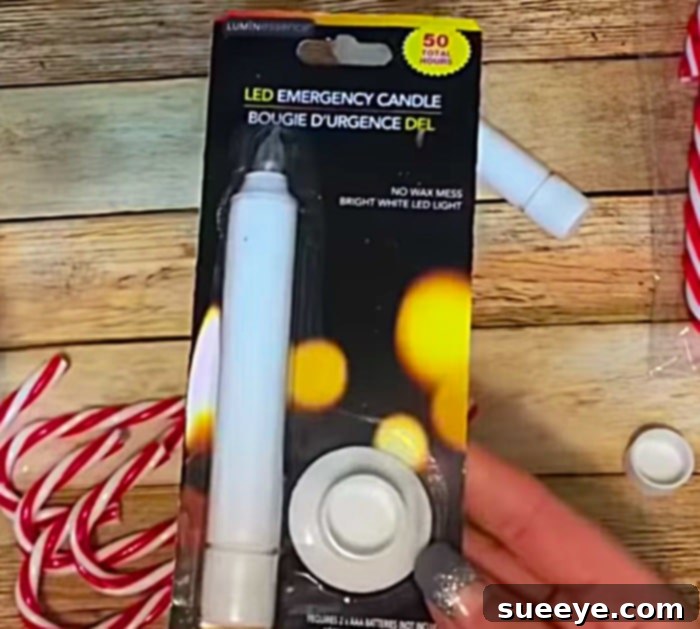
- Battery-Operated Emergency Candles or LED Tea Lights: This is a crucial safety component. Dollar Tree offers various styles, from small tea lights to slightly larger emergency candles. The key is that they are battery-powered and emit light without a flame.
- Strong Adhesive: A hot glue gun with plenty of glue sticks is highly recommended for its quick drying time and strong bond. Alternatively, a super-strong craft glue suitable for plastic will also work, but allow for ample drying time.
- Christmas Greenery Sprigs: Look for small, artificial pine sprigs, holly leaves, or other festive greenery. These can often be found on larger Dollar Tree holiday picks or garlands, which you can easily snip apart.
- Decorative Ribbon: A festive ribbon, such as a green glitter ribbon, red velvet, or gold metallic, will add a beautiful finishing touch and help tie the design together. Choose a width that complements the size of your luminaries, typically 0.5 to 1 inch wide.
- Scissors or Wire Cutters: For trimming greenery and ribbon.
Remember, the beauty of DIY is the ability to customize. Feel free to explore other small embellishments like miniature berries, tiny bows, or even a light dusting of glitter spray for extra sparkle, all of which can often be found on a budget at craft stores or dollar stores.
Step-by-Step Tutorial: Crafting Your Festive Candy Cane Luminaries
Now that you have all your materials, let’s dive into creating these delightful Candy Cane Luminaries. The process is straightforward and fun, making it an ideal craft for all skill levels.
Step 1: Preparing Your Base and Battery-Operated Candle
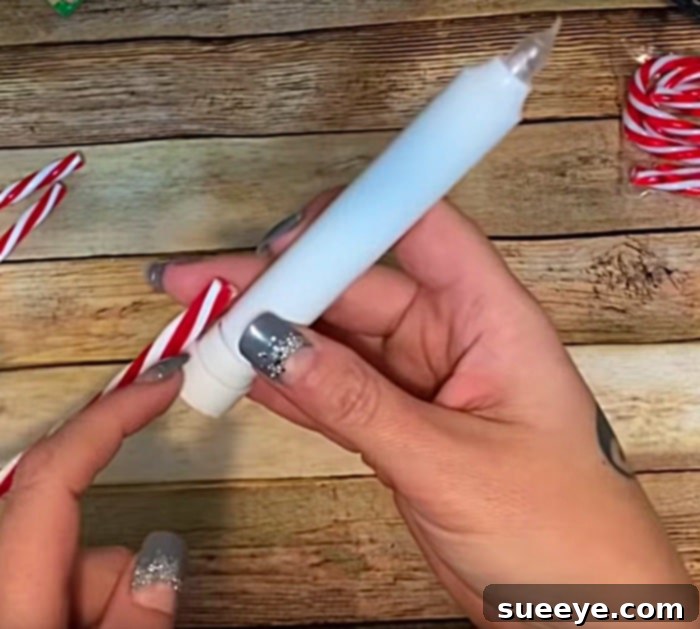
The foundation of your luminary is the battery-operated candle. Many of the emergency candles from Dollar Tree come with a small plastic platform or base that extends outwards. For this project, you’ll want a flat, even surface to glue your candy canes around. Carefully chip off or trim any protruding plastic platforms around the base of your emergency battery-operated candle. You might use a utility knife or strong scissors for this, exercising caution to avoid injury. The goal is to create a more cylindrical shape or at least ensure the base of the candy canes can sit flush against the candle’s perimeter.
A Crucial Safety Note: I must reiterate, for the safety of your home and loved ones, this project is STRICTLY designed for battery-operated candles or LED tea lights only. Under no circumstances should you use real candles with an open flame. The plastic candy canes are highly flammable, and combining them with a real candle poses a severe fire hazard. Please prioritize safety above all else.
Once your candle base is prepared, you’re ready to start building the luminary’s structure.
Step 2: Attaching the Plastic Candy Canes
With your battery-operated candle ready, it’s time to bring in the festive candy canes. Begin by applying a generous line of hot glue (or your chosen strong adhesive) along the side of one plastic candy cane. Press this candy cane firmly against the side of your candle, ensuring it stands upright. Hold it in place for a few seconds until the glue sets. Repeat this process, carefully gluing additional candy canes all around the circumference of the candle’s base. Work your way around, placing each candy cane snugly next to the last, until the entire candle is encircled by the red and white stripes.
The goal is to create a sturdy, decorative “fence” or cylinder of candy canes around the candle. Ensure the candy canes are evenly spaced and stand at a consistent height for the best aesthetic. You might find it helpful to place the candle on a flat surface while gluing to help keep everything level. Once all candy canes are attached, allow the glue to fully cure and dry before moving on, especially if you’re using a craft glue that requires longer setting times than hot glue.
Step 3: Concealing the Top Edges with Christmas Greenery
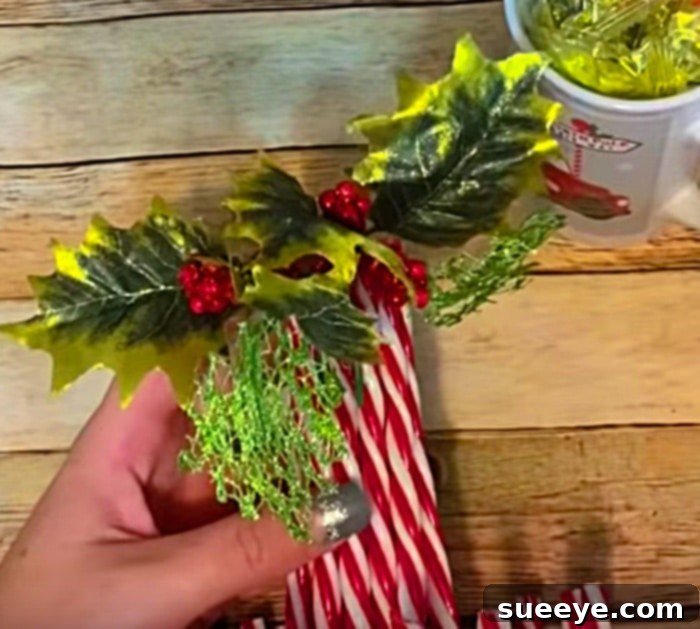
Now that your candy cane cylinder is formed, you might notice that the tops of the candy canes can appear a little jagged or uneven, and the glue might be visible. This is where the Christmas greenery comes into play! Select a sprig of artificial Christmas greenery from your Dollar Tree finds. You may need to snip a piece off a larger garland or pick using scissors or wire cutters. The size of the sprig should be sufficient to wrap around the top edge of your candy canes.
Apply a thin line of hot glue along the top rim of your candy cane structure, carefully pressing the greenery sprig onto it. This step not only hides any imperfections but also adds a beautiful, naturalistic touch, complementing the classic Christmas colors of the candy canes. You can choose a simple pine sprig, a piece of holly with small red berries, or even a frosted branch to match your desired aesthetic. This addition instantly elevates the luminary’s appearance, making it look professionally crafted.
Step 4: Adding the Finishing Touch with Decorative Ribbon
To pull the entire design together and add a touch of elegance, wrap a festive ribbon around the middle or top portion of your candy cane luminary. The original project used a green glitter ribbon, which beautifully complements the red and white candy canes and the green foliage. Measure out a length of ribbon that can wrap comfortably around the luminary with some overlap for gluing.
Secure one end of the ribbon to the back of the luminary with a small dot of hot glue. Then, carefully wrap the ribbon around the entire structure, ensuring it’s straight and taut. Once you meet the starting point, trim the ribbon and secure the other end with another small dot of hot glue, creating a seamless band. You can even tie a small bow if you wish to add extra flair. This final step adds cohesion and a polished look, transforming your individual components into a unified, stunning piece of holiday decor.
Tips for Success and Customization
While the basic steps are simple, a few extra tips can help you achieve the best results and encourage you to unleash your creativity:
- Adhesive Control: When using hot glue, work quickly as it dries fast. For a cleaner look, try to keep the glue hidden on the inside of the candy canes or where it will be covered by greenery and ribbon.
- Candle Variations: Experiment with different types of battery-operated LED candles. Some offer flickering effects, simulating real flame, while others might change colors, adding a dynamic touch to your luminaries.
- Candy Cane Colors: While red and white are traditional, some stores might offer candy canes in other festive colors like green, blue, or even iridescent white. Mixing and matching can create unique themes.
- Greenery Alternatives: If pine sprigs aren’t your preference, consider using artificial holly leaves, frosted branches, or even small fabric flowers in holiday colors.
- Ribbon Creativity: Don’t limit yourself to glitter ribbon. Velvet, satin, burlap, or even patterned ribbons can create entirely different looks, from rustic chic to sophisticated elegance.
- Enhancing Stability: If your luminary feels a bit wobbly, you can glue the entire candy cane-encircled candle onto a small, flat wooden disc or a sturdy cardboard cutout to create a more stable base.
- Theme Adaptations: These luminaries can be adapted for other winter themes. For a “winter wonderland” feel, use all white or frosted plastic candy canes and silver ribbon.
Displaying Your Beautiful Candy Cane Luminaries
Once your DIY Candy Cane Luminaries are complete, the fun continues with deciding where to showcase them! These versatile decorations are perfect for a variety of settings:
- Christmas Centerpiece: As the author discovered, these luminaries make an absolutely stunning centerpiece for any holiday table – whether it’s for a formal dinner, a casual brunch, or a festive office party. Their soft glow creates an inviting ambiance.
- Mantle Decoration: Line a few luminaries along your fireplace mantle, perhaps interspersed with garlands and other festive accents, for a cozy and enchanting display.
- Window Sills: Place them on window sills to spread holiday cheer both inside and out, offering a welcoming glow to passersby.
- Entryway Table: Greet guests with a warm and festive welcome by placing one or two luminaries on your entryway table, perhaps alongside a bowl of potpourri or other holiday elements.
- Bedside Tables: Add a subtle touch of holiday magic to bedrooms, creating a serene and festive atmosphere.
- Gift Ideas: These handmade luminaries make incredibly thoughtful and unique gifts for friends, family, teachers, or coworkers. Personalize them with their favorite colors or small charms.
- Shelves and Bookcases: Brighten up any corner of your home by placing these charming luminaries on shelves or bookcases, adding a touch of festive warmth.
Remember that because they use battery-operated candles, they are safe to place in areas where open flames would be a hazard, expanding your decorating possibilities considerably.
The Joy of Sharing Your Creation
There’s a unique satisfaction that comes from creating something beautiful with your own hands and sharing it with others. The author’s experience at the office party, witnessing the gasps of admiration from coworkers, is a testament to the impact of handmade decor. These luminaries didn’t just look beautiful; they sparked conversation, admiration, and a desire in others to learn the craft. This is the true spirit of DIY – inspiring creativity and connection.
So, as you craft your own Candy Cane Luminaries, remember that you’re not just making a decoration; you’re creating a piece of art that carries your personal touch and contributes to the festive atmosphere. Be prepared for compliments and inquiries about your crafting secrets! Share your experience, inspire others, and enjoy the beautiful conversations that your handmade creations will undoubtedly ignite.
Conclusion: Light Up Your Holidays with DIY Charm
In conclusion, creating your own DIY Candy Cane Luminaries from Dollar Tree finds is a fantastic way to infuse your home with festive charm without breaking the bank. This project is a perfect blend of affordability, simplicity, and stunning visual impact. From preparing the battery-operated candle base to adorning it with iconic plastic candy canes, evergreen sprigs, and a touch of glittering ribbon, each step brings you closer to a beautiful, handcrafted piece of holiday decor.
As the author discovered, these luminaries exceeded all expectations, becoming a focal point that garnered admiration and sparked joy. They provide not just hours of conversation but also a warm, inviting glow that perfectly encapsulates the spirit of the Christmas season. So, gather your Dollar Tree treasures, unleash your inner crafter, and illuminate your holidays with these delightful, safe, and truly unique DIY Candy Cane Luminaries. Your home will thank you, and your guests will be enchanted!