
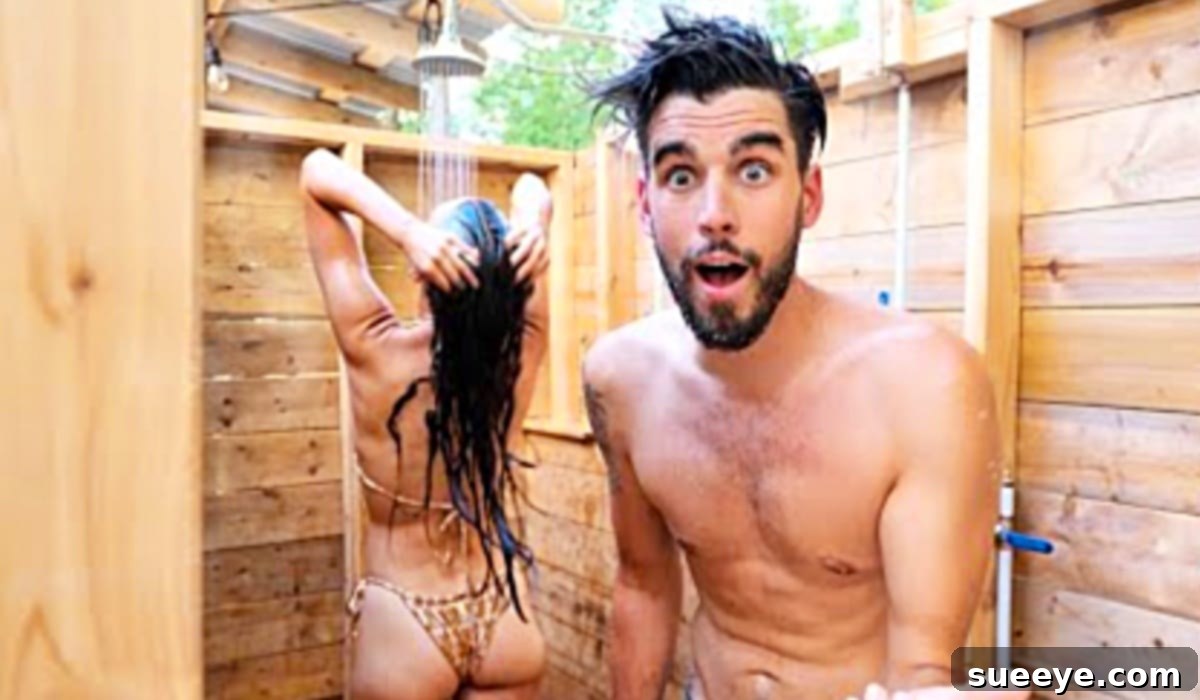
Transform Your Backyard: The Ultimate Guide to Building a DIY Outdoor Shower Oasis
Imagine stepping out into your garden after a long day, whether it’s been spent taming flower beds, enjoying the sun-drenched beach, or simply embracing the great outdoors. Instead of tracking dirt and sand indoors, you can rinse off under the open sky in your very own outdoor shower. This summer, my partner and I have been dreaming up grand plans, from adventurous road trips to blissful, lazy days soaking up the sun on the Rockport, Texas beaches. The vision of an outdoor shower became a central theme, promising to elevate our home-life and outdoor adventures alike.
My excitement truly soared when I discovered an incredible outdoor shower design by Eamon & Bec on YouTube. Their use of beautiful, natural wood to create a simple yet stunning outdoor shower instantly captivated me. The idea that such a fabulous addition to the yard could be constructed in a mere 72 hours felt both achievable and incredibly appealing. We even have leftover wood from our recent deck-building project, making this a sustainable and cost-effective upgrade that perfectly aligns with our home’s existing aesthetic. This charming shower isn’t just a luxury; it’s a practical solution for washing off soil after gardening, rinsing salty skin after a beach day, or even giving our active pup a refreshing wash after a full day of outdoor play.
Why Embrace an Outdoor Shower? More Than Just a Rinse
An outdoor shower is far more than just a place to get clean; it’s an extension of your living space, an enhancement to your lifestyle, and a gateway to a deeper connection with nature. Integrating one into your backyard offers a myriad of benefits that extend beyond simple utility, transforming everyday routines into moments of pure bliss and convenience.
Unmatched Convenience and Hygiene
Consider the sheer convenience of an outdoor shower. After a muddy gardening session, a quick rinse outdoors means no more tracking dirt through the house. For families with children or pets, it’s a game-changer. Kids can wash off chlorine after swimming, sand after a trip to the beach, or mud from playful adventures before stepping foot inside. Similarly, pets can be easily hosed down, keeping their indoor living spaces cleaner and more hygienic. It’s also perfect for quickly cooling down on a hot day or taking a refreshing shower under the stars.
Aesthetic Charm and a Touch of Luxury
Beyond its functional advantages, an outdoor shower significantly enhances the aesthetic appeal of your backyard. Crafted from beautiful wood, like the design from Eamon & Bec, it adds a touch of rustic elegance or modern simplicity, blending seamlessly with your garden landscape. It can become a focal point, evoking the feeling of a spa retreat or a secluded natural spring. The sensory experience of showering outdoors – feeling the breeze, hearing birdsong, and being surrounded by greenery – is inherently luxurious and deeply relaxing, offering a unique escape right in your own backyard.
Sustainable Living and Resourcefulness
Building an outdoor shower, especially one that utilizes leftover materials as we plan to do with our deck wood, speaks to a commitment to sustainable living. Reusing wood reduces waste and adds character to your project. Furthermore, if thoughtfully planned, an outdoor shower can reduce indoor water consumption, particularly for quick rinses. With proper drainage, the water can even be directed towards thirsty plants (using biodegradable soaps, of course), contributing to a more eco-conscious lifestyle.
Planning Your Dream Outdoor Shower: Key Considerations
Before diving into construction, careful planning is paramount to ensure your outdoor shower is not only beautiful but also highly functional, private, and compliant with local regulations. A well-thought-out plan will save you time, effort, and potential headaches down the line.
Choosing the Perfect Location
The placement of your outdoor shower is critical. First, consider **privacy**. You’ll want to ensure it’s not directly overlooked by neighbors or high-traffic areas. Natural foliage, privacy screens, or strategically built walls can help achieve this. Second, think about **drainage**. Water needs to run off somewhere. A sloped area, a gravel bed, or even a connection to an existing drainage system are options. You must prevent water from pooling, which can damage the structure and attract insects. Third, assess your **water source and sun exposure**. Will you connect to an existing hose bib for cold water only, or do you plan for a hot water line? Sunlight can naturally warm the water in exposed pipes, and also helps the shower area dry faster, preventing mildew. Finally, consider its **proximity** to your house, pool, or garden. Easy access makes it more likely to be used regularly.
Design and Style Elements
The beauty of a DIY project lies in its customizability. You can design your outdoor shower to perfectly match your aesthetic preferences, whether you envision a rustic charm, a modern minimalist look, or something in between. The choice of wood is foundational; cedar and redwood are naturally rot-resistant and beautiful, while pressure-treated pine is a durable and economical option. You’ll also need to consider:
- **Enclosure options:** Will it be fully enclosed with privacy walls, partially screened, or an open design?
- **Flooring:** Wood slats provide a warm, natural feel and good drainage. Stone pavers or a gravel base can offer a more earthy, spa-like experience.
- **Showerhead types:** From large rain-style heads for a luxurious soak to simple handheld sprayers for targeted rinsing or pet washing, select one that suits your needs.
- **Accessories:** Don’t forget practical additions like hooks for towels and clothes, shelves for soap and shampoo, and perhaps even a small bench for comfort.
Navigating Permits and Local Regulations
It’s crucial to check with your local municipality regarding any building codes, zoning laws, or plumbing regulations that might apply to outdoor structures. While a simple, temporary shower connected to a garden hose might not require permits, a permanent structure with dedicated plumbing could. Understanding these requirements beforehand will ensure your project proceeds smoothly and legally, avoiding any costly rework or fines.
Essential Materials and Tools for Your DIY Project
Having all your materials and tools ready before you start is key to an efficient and enjoyable building process. This comprehensive list expands on the basic requirements, ensuring you have everything you need to construct a durable and beautiful outdoor shower.
Materials List:
- Wood: For the main frame (e.g., 4×4 or 2×4 pressure-treated lumber for posts), decking (e.g., 1×6 pressure-treated, cedar, or redwood planks), and privacy panels (e.g., 1×4 or 1×6 cedar, redwood, or treated pine slats). Ensure all wood is suitable for outdoor exposure.
- Plumbing Components:
- Showerhead and faucet assembly (outdoor rated).
- Pipes: PEX, PVC, or copper tubing (PEX is often easiest for DIYers).
- Fittings: Elbows, tees, connectors appropriate for your chosen pipe type.
- Shut-off valve: Essential for winterizing and maintenance.
- Hose bib adapter or connection to existing water line.
- Optional: Hot water line, mixing valve.
- Fasteners: Stainless steel deck screws (resistant to rust), nails (for temporary bracing), bolts, and concrete anchors (if securing posts to concrete).
- Drainage Solutions: Gravel, sand, landscape fabric (to prevent weed growth), and potentially a drain pipe or French drain components.
- Finishing Materials: Outdoor-grade wood sealant or stain to protect and enhance the wood, and silicone caulk for sealing plumbing connections.
- Optional Accessories: Hooks for towels, a small shelf for toiletries, a soap dish, and a small wooden bench or stool.
Tools You’ll Need:
- Power Drill/Driver: With various drill bits and driver bits for screws.
- Saws: A circular saw for cutting planks, a miter saw for precise angle cuts, and possibly a jigsaw for any curved cuts.
- Measuring Tools: Tape measure, speed square, carpenter’s pencil.
- Level: A long level (4ft or 6ft) for ensuring vertical and horizontal accuracy.
- Plumbing Tools: Adjustable wrenches, pipe cutter (for PEX, PVC, or copper), and a PEX crimper if using PEX tubing.
- Safety Gear: Safety glasses, work gloves, and ear protection.
- Site Preparation Tools: Shovel, rake, and wheelbarrow for excavation and moving materials for your foundation/drainage.
Step-by-Step Guide to Building Your Outdoor Shower
Building your own outdoor shower is a rewarding project that can be completed over a dedicated weekend or a few evenings. Drawing inspiration from the efficient and elegant design by Eamon & Bec on YouTube, which showcases how to create a stunning wood shower in just 72 hours, here’s a detailed breakdown of how you can construct your own beautiful outdoor shower. This project is perfect for integrating gorgeous wood elements, whether complementing existing deck structures or standing as a natural accent in your garden.
Step 1: Site Preparation and Foundation
Begin by meticulously clearing the chosen area of any debris, rocks, or vegetation. Use stakes and string to mark out the exact dimensions of your shower, ensuring it aligns with your design plans. Level the ground thoroughly; this is crucial for the stability of your entire structure. If your drainage plan involves a gravel bed, excavate the marked area to a depth of 6-8 inches. Lay down landscape fabric to prevent weed growth, and then fill the trench with several inches of gravel, compacting it firmly. This provides a stable, well-draining base for your shower.
Step 2: Constructing the Decking or Base
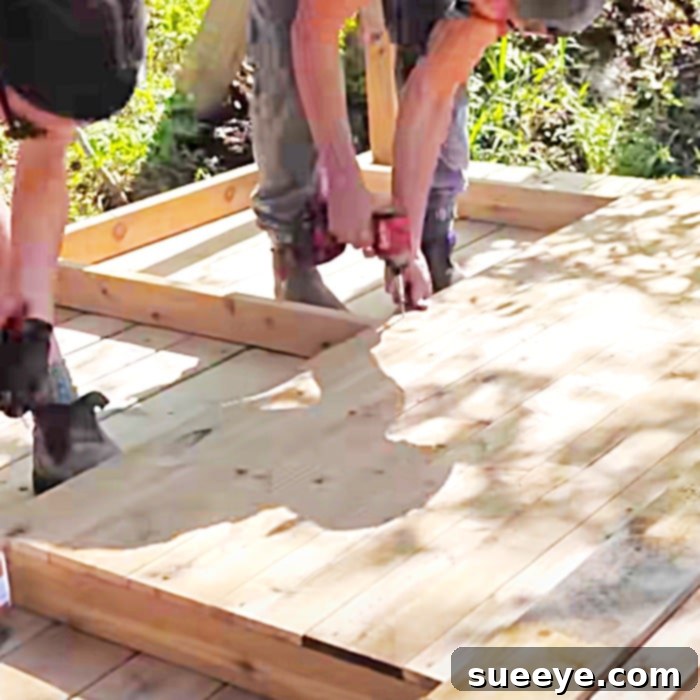
This forms the floor of your outdoor shower and is a critical step for both stability and drainage. Build a sturdy sub-frame using pressure-treated lumber (e.g., 2x4s or 2x6s), ensuring it is level and square. This frame can rest on concrete footings, pavers, or directly on your compacted gravel bed, depending on your foundation choice and local codes. Once the frame is secure, attach your chosen decking planks—whether pressure-treated, cedar, or redwood—to the sub-frame. Leave small, consistent gaps between the planks (e.g., 1/8 to 1/4 inch) to allow water to drain efficiently. This step provides a clean, stable, and visually appealing surface for showering.
Step 3: Framing the Structure and Privacy Walls
Next, you’ll erect the main structural frame. Secure vertical posts (e.g., 4x4s or 2x4s) at each corner of your decking, fastening them securely to the base. Use a level to ensure they are perfectly plumb. Add horizontal support beams between the posts at appropriate heights. Once the frame is solid, begin attaching your chosen privacy panels or slats. You can opt for a full enclosure for maximum privacy, or a partial screen to maintain an open feel while still offering modesty. Consider the spacing of the slats to allow for airflow and light while ensuring adequate coverage. This step transforms your base into a functional and private showering space.
Step 4: Installing the Plumbing Fixtures
This is where your outdoor shower truly comes to life. Carefully plan the route for your plumbing pipes, typically running them vertically up one of the frame posts. If you’re using a simple garden hose connection, ensure the adapter is securely attached. For a more permanent installation, connect to an existing cold water line, or integrate a hot water line if desired (which will require professional assistance for safety). Install the shower valve at a comfortable height, followed by the showerhead itself. If including a handheld sprayer or foot wash, install their respective connections. Use appropriate fittings and ensure all connections are watertight. Test the plumbing thoroughly for any leaks before proceeding to the next steps.
Step 5: Establishing the Drainage System
Proper drainage is paramount for the longevity of your shower and the health of your garden. If you opted for a simple gravel bed in Step 1, ensure it’s sufficient to disperse water without pooling. For a more robust solution, you might install a French drain system underneath the shower, directing runoff away from the structure and into a suitable area of your yard. Alternatively, if your local codes allow and you use biodegradable soaps, you could direct the greywater to a designated garden area for irrigation. This step is critical for environmental responsibility and preventing water damage.
Step 6: The Finishing Touches
With the main structure and plumbing in place, it’s time to add the elements that make your shower truly comfortable and inviting. Install hooks for hanging towels and robes, a small shelf for shampoo, soap, and other toiletries, and perhaps a small wooden bench or stool for added convenience. Finally, apply a high-quality outdoor-grade wood sealant or stain to all wooden surfaces. This not only enhances the natural beauty of the wood but also provides crucial protection against moisture, UV rays, and mildew, ensuring your outdoor shower remains beautiful for years to come. Perform a final test of the shower, making sure everything works perfectly, and then step in to enjoy your new backyard oasis!
Maintaining Your Outdoor Oasis for Lasting Enjoyment
To ensure your DIY outdoor shower remains a beautiful and functional addition to your backyard for many seasons, regular maintenance is essential. A little care goes a long way in preserving its appearance and preventing costly repairs.
Regular Cleaning and Inspection
Periodically clean the wooden surfaces to remove any soap scum, mildew, or dirt. A simple scrub with a mild, eco-friendly soap and water, followed by a rinse, is usually sufficient. While cleaning, take the opportunity to inspect the entire structure. Check for any loose screws, nails, or deteriorating wood. Tighten fittings on the plumbing to prevent leaks, and look for any signs of wear or damage to the showerhead or faucet.
Wood Care and Protection
The wood used in your outdoor shower is constantly exposed to the elements. Reapply a wood sealant or stain annually, or as recommended by the product manufacturer, to maintain its protective barrier against moisture, UV radiation, and insect damage. This will help prevent warping, cracking, and fading, keeping your shower looking fresh and new. Address any signs of rot or insect infestation immediately to prevent further damage.
Winterizing Your Outdoor Shower
If you live in a region with freezing temperatures, winterizing your outdoor shower is crucial to prevent pipes from bursting. Before the first hard freeze, turn off the water supply to the shower. Open all faucets and valves to drain all water from the pipes. If possible, use an air compressor to blow out any remaining water. Disconnect the showerhead and store it indoors. Covering the wooden structure with a breathable tarp can also offer additional protection from heavy snow and ice, ensuring it’s ready for enjoyment when warmer weather returns.
Embrace the Outdoor Lifestyle with Your New Shower
Creating your own outdoor shower is more than just a home improvement project; it’s an investment in your lifestyle and well-being. From the practical benefits of keeping your home cleaner after outdoor activities to the sheer joy of showering under the open sky, this addition promises to enhance your daily routines and moments of relaxation. The satisfaction of building something so beautiful and functional with your own hands is truly immense. We can’t wait to install our gorgeous wooden shower, especially knowing we’re utilizing materials we already have, making it an even more rewarding endeavor.
So, whether you’re rinsing off beach sand, gardening soil, or simply enjoying a refreshing moment in nature, your DIY outdoor shower will become a cherished feature of your backyard oasis. We encourage you to embark on this fantastic project, draw inspiration from creative minds like Eamon & Bec, and transform your outdoor space into a haven of convenience and tranquility. Share your creations and inspire others to embrace the simple luxury of an outdoor shower!