
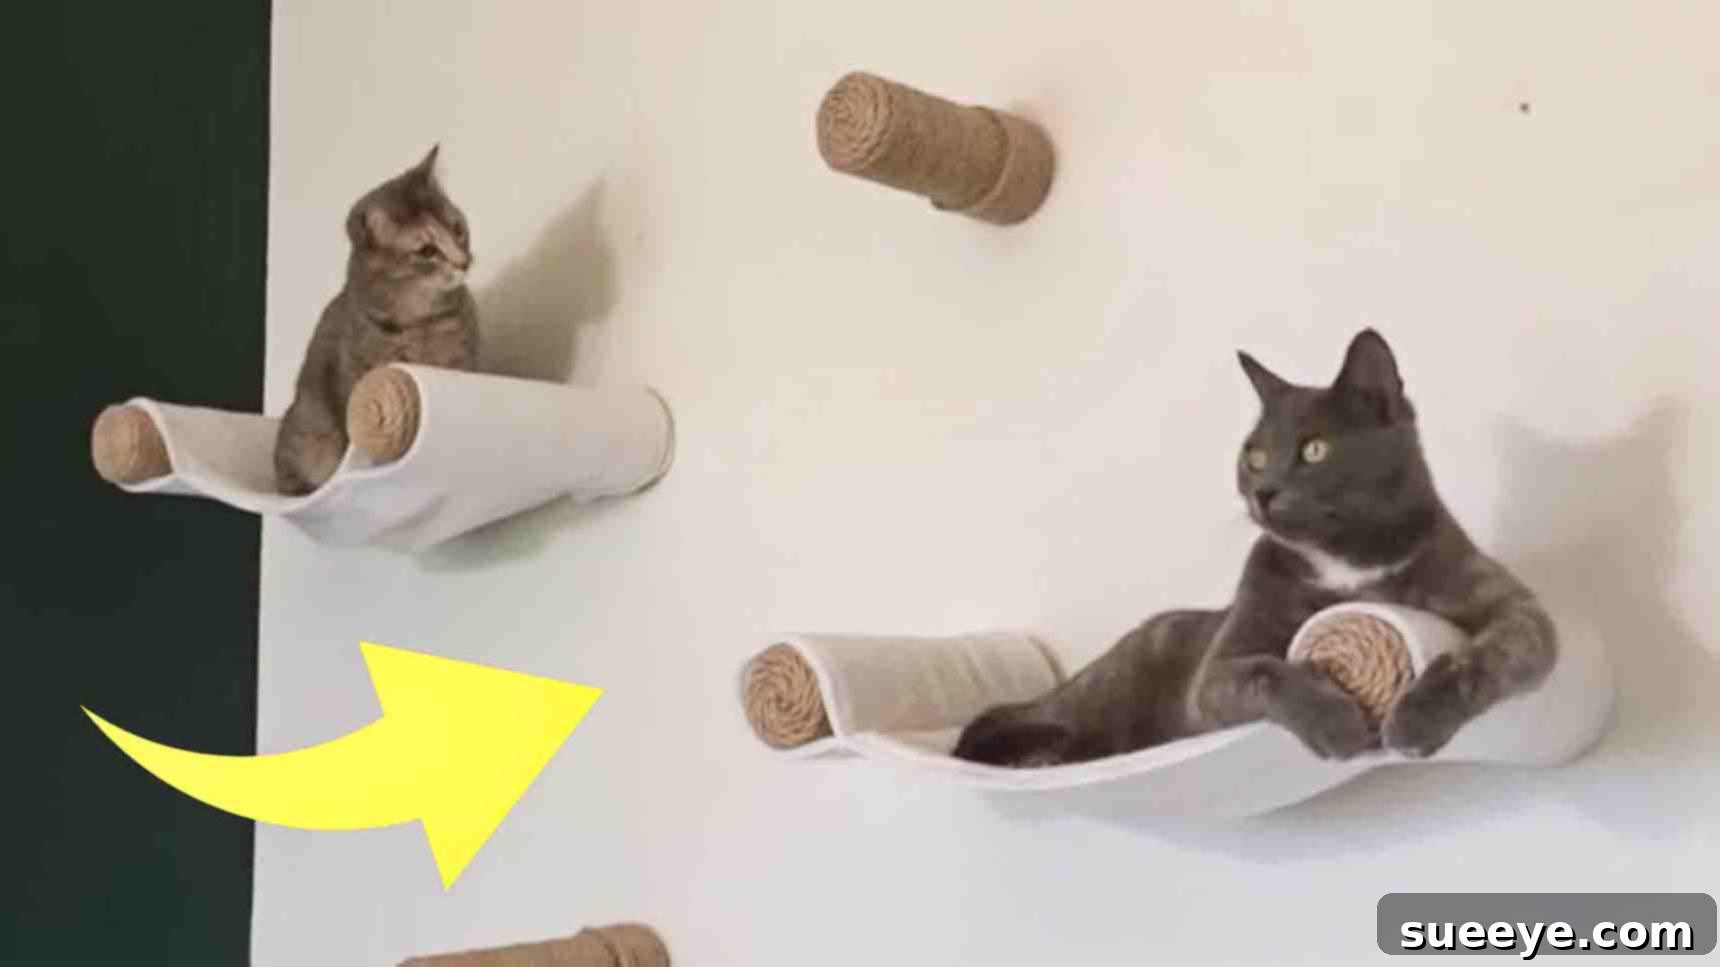
Ultimate DIY Cat Wall Hammock: Create a Cozy Haven for Your Feline Friends
If you’re a devoted cat parent looking to enrich your felines’ lives and maximize your living space, a DIY cat wall hammock is an exceptional project. Cats inherently love high vantage points, and providing them with comfortable, elevated lounging spots can significantly reduce stress, promote exercise, and offer a sense of security. This comprehensive guide, inspired by the ingenious design from Aaron Fixes Stuff on Youtube, will walk you through creating a stylish, sturdy, and budget-friendly cat hammock that your furry friends will adore. It’s an easy, fun, and cost-effective way to give your cats their own personalized hangout spot, combining functionality with aesthetic appeal.
Why Your Cat Needs a Wall Hammock
Cats are natural climbers and observers. A wall-mounted hammock offers numerous benefits for their physical and mental well-being:
- Vertical Space Utilization: In smaller homes or apartments, floor space can be limited. Wall hammocks free up valuable floor area while providing enriching vertical territory for your cats.
- Enhanced Comfort and Security: Cats often seek elevated spots where they can observe their surroundings without feeling threatened. A soft hammock offers a cozy, secure retreat for napping and relaxing.
- Physical and Mental Stimulation: Climbing to and from the hammock provides gentle exercise. The sisal-wrapped PVC pipe doubles as a scratching post, satisfying your cat’s natural urge to scratch and helping to maintain healthy claws.
- Reduced Stress and Conflict: In multi-cat households, providing multiple elevated spaces can help reduce territorial disputes and promote harmony among your feline companions.
- Durability and Customization: Unlike some store-bought options, a DIY hammock allows you to choose robust materials and tailor the design to match your home’s decor and your cats’ specific needs.
Materials You’ll Need
Gathering all your materials and tools before starting will ensure a smooth and efficient building process. Here’s a detailed list:
- 2″ PVC Pipe Caps: These will serve as the mounting points for your hammock structure, attaching securely to the wall.
- PVC Pipe (e.g., 2″ diameter): This forms the core structure of your hammock and will be wrapped with sisal rope.
- 1/4 x 2″ Lag Screws: Essential for securely mounting the PVC caps into wall studs, ensuring stability and safety.
- 1/4″ Sisal Rope: Not only does this provide excellent grip and a rustic aesthetic, but it also functions as an irresistible scratching surface for your cats.
- Hot Glue and Hot Glue Gun: Crucial for securing the sisal rope, especially at the beginning and end points, and for attaching internal components.
- Cardboard (or thin plywood): A small piece, about the same diameter as your PVC pipe, used as an anchoring point for the sisal rope inside the pipe.
Essential Tools:
- Stud Finder: Absolutely critical for locating wall studs, which are necessary for safe and secure mounting.
- Power Drill: For drilling pilot holes into walls, PVC caps, and PVC pipes.
- Drill Bits: Various sizes, including one appropriate for pilot holes for lag screws and another for drilling holes in the PVC caps and pipe for screws.
- Hacksaw or PVC Pipe Cutter: For cleanly cutting the PVC pipe to your desired lengths.
- Measuring Tape: For accurate measurements of pipe lengths and wall placement.
- Pencil or Marker: For marking cut lines and drill points.
- Screwdriver (or drill bit attachment): To tighten lag screws and other fasteners.
- Safety Glasses and Gloves: Always recommended when working with power tools and sharp objects.
Step-by-Step Directions: Building Your Cat’s Dream Hammock
Step 1: Planning, Preparation, and Mounting the Base
The first stage involves careful planning, cutting your PVC, and securely mounting the foundational caps to your wall. This attention to detail ensures the hammock will be robust and safe for your cats.
1.1. Plan Your Hammock Layout and Cut PVC Pipes
Before making any cuts, visualize where your hammock will go. Consider the best height for your cat (easy access, but high enough to feel secure) and whether you want a single hammock or multiple levels. Once your design is clear, measure and mark your PVC pipe. The tutorial suggests lengths like 6 inches and 12 inches, but feel free to customize. For a more spacious lounging area, a longer piece (e.g., 18-24 inches) might be ideal. Use a hacksaw or PVC pipe cutter to make clean, straight cuts. After cutting, lightly sand any rough edges to prevent injury to your cats or snagging of the rope.
1.2. Prepare the PVC Caps for Mounting
Take your 2-inch PVC pipe caps. Using your power drill, carefully drill a hole directly into the center of each cap. This hole will accommodate the lag screw that secures the cap to the wall. Ensure the hole is large enough for the lag screw to pass through but not so large that the screw head pulls through the cap. Repeat this process for all the caps you intend to use for your hammock structure.
1.3. Locate Wall Studs and Drill Pilot Holes
Security is paramount when mounting anything to a wall for your pets. Use a stud finder to locate the wooden studs within your wall where you plan to install the hammock. Mounting directly into studs provides maximum strength and stability, preventing the hammock from pulling away from the drywall. Once you’ve marked the stud locations, use your power drill to create a pilot hole. The pilot hole should be slightly smaller than the diameter of your lag screw to ensure a tight, secure fit without splitting the wood.
1.4. Secure the PVC Cap to the Wall
Now, align the drilled hole in your PVC cap with the pilot hole you just made in the wall stud. Insert a lag screw through the cap and into the wall. Using a drill or screwdriver, tighten the lag screw firmly until the cap is snug against the wall. Do not overtighten, as this could crack the PVC cap. This cap will serve as the base, providing a solid anchor for your hammock structure.
1.5. Prepare the Sisal Rope Anchor
To ensure the sisal rope remains tightly wrapped around the PVC pipe without unraveling, create an internal anchor. Cut a small piece of cardboard (or thin, sturdy plastic/plywood) into a circular shape, roughly the same diameter as the inside of your PVC pipe. Drill a small hole in the center of this cardboard disc. Take the end of your 1/4-inch sisal rope, apply a generous amount of hot glue to its tip to prevent fraying, and thread it through the hole in the cardboard disc. Allow the glue to dry completely, forming a secure knot or stopper on one side of the cardboard. This will lock the rope in place.
1.6. Attach the Cardboard Anchor and Begin Rope Wrapping
Apply hot glue around the inner perimeter of one end of your PVC pipe. Carefully insert the cardboard disc (with the rope threaded through it) into the pipe, pressing it firmly into the glued area. Ensure the glued side of the rope is flush against the cardboard. Once dry, you can begin wrapping the sisal rope around the exterior of the PVC pipe. Start by applying a thin line of hot glue around the very edge of the pipe where the rope begins. Tightly wrap the sisal rope, ensuring each coil is pressed firmly against the previous one. To maintain tightness and prevent unraveling, apply small dabs of hot glue in every half-circle or full rotation of the rope, especially on the outer layers where tension is highest. This creates a durable scratching surface and an attractive finish.
Step 2: Completing the Rope Wrap and Assembling the Hammock Structure
This phase focuses on finishing the rope wrapping, securely attaching the pipe to the wall cap, and finally adding the hammock fabric.
2.1. Continue and Complete the Rope Wrapping
Once the initial, glued layers of rope are secure, you can continue wrapping the sisal rope along the entire length of the PVC pipe. For the main body of the pipe, you might not need to use glue with every rotation if your wrapping technique is very tight and consistent. However, for added durability and to prevent any potential slackening over time, it’s advisable to apply a thin bead of hot glue intermittently, perhaps every few inches, especially if your cat is an enthusiastic scratcher. Ensure the rope is always taut and snugly fitted against itself, creating a uniform, continuous scratching surface. When you reach the end of the pipe, cut the rope, apply a generous amount of hot glue to the end, and press it firmly against the pipe to secure it.
2.2. Attach the Wrapped PVC Pipe to the Wall Cap
Now, take your fully wrapped PVC pipe and align it with the cap that is already securely attached to the wall. Insert the end of the PVC pipe into the open end of the wall-mounted cap. To ensure a completely secure connection, drill two small pilot holes through the sides of the PVC cap and directly into the PVC pipe itself. These holes should be on opposite sides for maximum stability. Insert screws through these pilot holes and tighten them, effectively bolting the pipe and cap together. This step is crucial for preventing any rotation or detachment of the pipe from the wall.
2.3. Conceal Screws and Finish the Cap Wrap
To enhance the aesthetic appeal and provide an additional scratching surface, you can wrap sisal rope around the PVC cap as well. Begin by applying a small dab of hot glue near the base of the cap and start tightly wrapping the rope upwards. As you wrap, ensure the rope covers the exposed screw heads that connect the pipe and cap. This not only makes the hammock look cleaner but also adds another textured surface for your cat. Once the entire cap is covered, cut the rope, apply hot glue to the end, and press it firmly into place.
2.4. Choose and Attach the Hammock Fabric
With the structural elements in place, it’s time to add the soft, comfortable hammock fabric. You’ll need a piece of sturdy fabric, such as fleece, canvas, denim, or even an old blanket, cut to the desired size. Consider how you want to attach it:
- Loops: Sew loops onto each end of the fabric, which can then slide over the PVC pipe.
- Pockets: Sew pockets on the ends to slide the PVC pipe through, creating a snug fit.
- Grommets/Eyelets: Install grommets along the edges of the fabric and use small carabiners, S-hooks, or strong rope to attach them to the PVC structure. This method makes the fabric easily removable for washing.
Ensure the fabric is taut enough to support your cat’s weight comfortably without sagging excessively, but loose enough to create a cozy dip. Securely attach the fabric to the wrapped PVC pipes using your chosen method. Test the hammock’s stability and fabric attachment by gently pressing down on it before introducing your cat.
Customization and Enhancement Ideas
One of the greatest advantages of a DIY project is the ability to tailor it to your specific needs and preferences.
- Multi-Level Systems: Instead of just one hammock, create a series of interconnected hammocks, perches, and scratching posts to build an entire cat wall playground.
- Different Fabrics: Experiment with various fabric textures and colors to match your home decor or provide different tactile experiences for your cat. Consider removable covers for easy washing.
- Integrated Toys: Attach dangling toys, feathers, or small bells to the PVC structure or underneath the hammock for added playtime.
- Decorative Touches: Paint the PVC pipes before wrapping them, or add small decorative elements (ensuring they are cat-safe and securely attached).
- Wider or Longer Hammocks: Adjust the PVC pipe lengths and fabric dimensions to accommodate larger cats or multiple cats lounging together.
Safety and Maintenance Tips
To ensure your DIY cat hammock remains a safe and enjoyable space for your feline friends:
- Regular Inspections: Periodically check all screws, glue points, and rope wraps for any signs of loosening or wear. Tighten screws and re-glue rope ends if necessary.
- Wall Mounting: Always, always mount into wall studs. Never rely solely on drywall anchors for a cat hammock, as the weight of your cat can easily pull them out, causing injury.
- Fabric Cleaning: If you’ve chosen a removable fabric, wash it regularly to keep it fresh and hygienic. If it’s permanently attached, spot clean or use a handheld vacuum.
- Rope Wear: If the sisal rope becomes heavily frayed or starts unraveling significantly, consider replacing that section or re-wrapping it to maintain its integrity as a scratching surface and a structural element.
- Cat’s Weight: Ensure the materials and mounting method chosen can safely support the full weight of your cat(s).
DIY Cat Wall Hammock Tutorial: Your Feline’s New Favorite Spot!
Building a DIY cat wall hammock is a rewarding project that provides a unique blend of enrichment, comfort, and entertainment for your beloved pets. By following these detailed instructions, you can create a durable, attractive, and highly functional piece of cat furniture that saves space and brings immense joy to your feline companions. Not only will you have the satisfaction of a handmade project, but you’ll also offer your cats a secure and stimulating environment they’ll cherish. So, gather your materials, follow the steps carefully, and get ready to see your cats happily lounging in their brand-new, elevated retreat!