
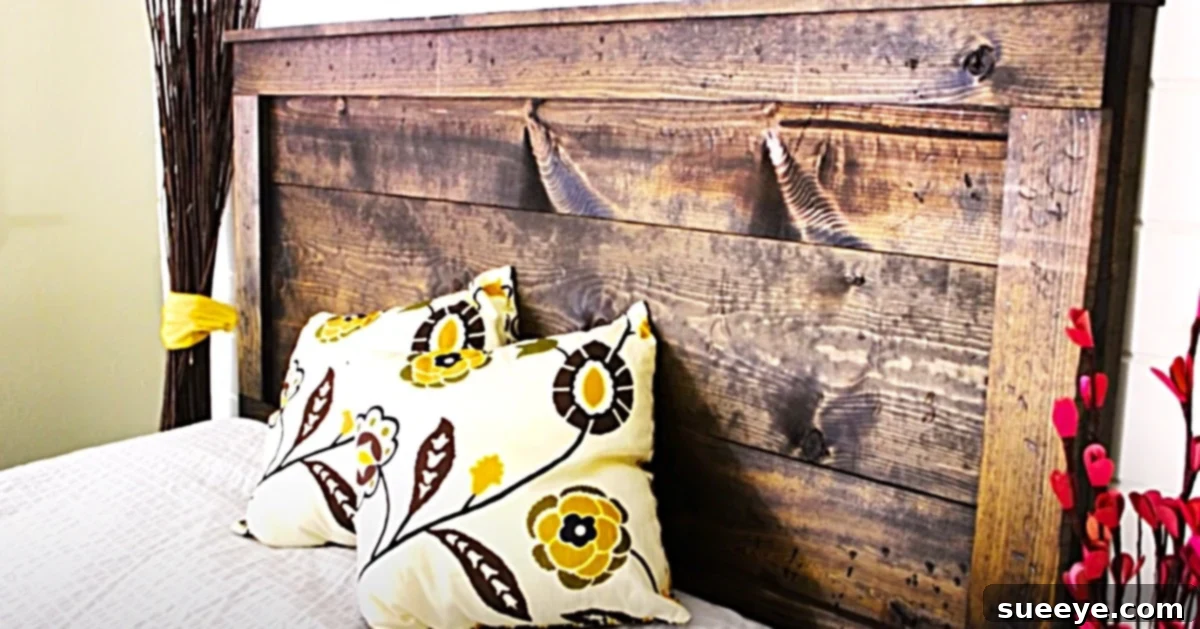
Transform Your Bedroom: How to Build a Stunning Rustic Farmhouse Headboard for Under $20
Dreaming of a bedroom makeover that won’t break the bank? Imagine a gorgeous, custom-made focal point that exudes warmth, character, and timeless style. Today, we’re diving into an incredibly rewarding DIY project: crafting a stunning rustic farmhouse headboard for an astonishingly low cost, potentially under $20! This isn’t just about saving money; it’s about adding a personal touch and achieving that coveted shabby chic farmhouse aesthetic with your own two hands.
Inspired by ingenious creators like The Rehab Life on Youtube, whose brilliant rustic farmhouse headboard idea captivated us, we’ll guide you through making a piece that perfectly complements any bedroom undergoing a stylish transition. This project isn’t just budget-friendly; it’s incredibly fulfilling. We sourced our raw materials from local hardware stores like Home Depot, where many even offer complimentary wood cutting services, simplifying the initial steps of your build. Get ready to transform your sleeping space with a unique, handcrafted masterpiece!
Why Choose a DIY Headboard? The Benefits of Crafting Your Own
Opting to build your own headboard offers a multitude of advantages beyond just cost savings. In a world of mass-produced furniture, a DIY approach allows you to inject genuine character and uniqueness into your home decor. Here’s why tackling this project is a fantastic idea:
Cost Savings: Unbeatable Value
The most compelling reason for many is the incredible affordability. Retail headboards, especially those with a desirable aesthetic like rustic farmhouse, can easily cost hundreds, if not thousands, of dollars. By utilizing readily available lumber and a few basic tools, you can achieve a high-end look for a fraction of the price. This project demonstrates that stunning bedroom upgrades don’t require a hefty investment.
Personalization: Tailored to Your Taste
When you build it yourself, every detail can be customized. From the type of wood and its finish to the specific dimensions and any additional decorative elements, you have complete creative control. Want a slightly distressed look? Prefer a specific shade of stain or chalk paint? The choice is yours, ensuring the finished piece perfectly reflects your personal style and existing bedroom decor.
Sense of Accomplishment: Pride in Your Craft
There’s immense satisfaction in stepping back and admiring something beautiful you’ve created with your own hands. A DIY headboard isn’t just furniture; it’s a testament to your creativity, resourcefulness, and skill. It becomes a conversation starter and a source of pride every time you enter your bedroom.
Sustainable & Resourceful: Eco-Friendly Decor
By building rather than buying new, you’re often making a more sustainable choice. You can consciously select your materials, perhaps even repurposing wood, and reduce the environmental footprint associated with manufacturing and transportation. It’s a resourceful way to furnish your home, adding to the authentic, lived-in feel of farmhouse style.
The Allure of Rustic Farmhouse Style for Your Bedroom
The rustic farmhouse style has captivated interior design enthusiasts worldwide, offering a comforting blend of old-world charm and modern sensibility. It celebrates simplicity, natural materials, and a sense of history. For a headboard, this style typically features natural wood tones, often distressed or aged, simple lines, and an inviting, unpretentious feel. It’s a versatile aesthetic that can be adapted to feel cozy, elegant, or even minimalist, making it a perfect choice for a DIY project.
Integrating a rustic headboard instantly grounds your bedroom, creating a focal point that is both warm and stylish. It pairs beautifully with soft linens, vintage accents, and natural textures, transforming your bedroom into a serene sanctuary. This project allows you to bring that timeless appeal directly into your home without the premium price tag.
Materials You’ll Need for Your DIY Headboard
One of the beauties of this project is its reliance on readily available materials and basic tools. Before you begin, gather everything you’ll need. Planning ahead ensures a smooth and efficient build.
Essential Materials:
- Wood Boards: The primary material. Depending on your desired size and design, you’ll need various lengths of common lumber (e.g., 1x4s, 1x6s). Pine is a popular, affordable choice for rustic projects.
- Screws: Wood screws (e.g., 1 1/4 inch or 1 1/2 inch) are ideal for sturdy assembly.
- Wood Stain or Paint: To achieve your desired finish. Minwax offers excellent wood stains in a variety of shades. Chalk paint is a fantastic option for a soft, matte, or distressed look.
- Sanding Blocks or Sandpaper: For preparing the wood surface and smoothing edges. Different grits will be useful.
- Protective Finish (Optional): A polyurethane or clear coat if you want added durability and protection for your stain or paint.
Tools for the Job:
- Miter Saw: Essential for precise cuts, especially if you’re cutting the wood yourself. Many hardware stores offer cutting services if you don’t have one.
- A Drill and Impact Driver: For pre-drilling holes and securely fastening screws.
- A Tape Measure: For accurate measurements of your wood and bed frame.
- Safety Goggles: Always protect your eyes from sawdust and flying debris.
- Ear Protection: Crucial when operating power tools like a miter saw or impact driver.
- A Mask (Dust Mask/Respirator): To protect against inhaling sawdust during cutting and sanding, and fumes during staining/painting.
- Pencil: For marking cuts and drilling spots.
- Wood Glue (Optional but Recommended): For added strength in joints.
- Clamps: To hold pieces securely while assembling or gluing.
- Paint Brushes/Rollers or Stain Rags: For applying your chosen finish.
Safety First: Always prioritize safety when working with power tools and chemicals. Wear your safety goggles, ear protection, and a mask throughout the project. Ensure your workspace is well-ventilated, especially when staining or painting.
Step-by-Step Directions: Crafting Your Rustic Headboard
This wonderful video tutorial by The Rehab Life on Youtube provides excellent visual guidance for constructing this budget-friendly rustic headboard. We’ll elaborate on the key steps here to ensure you have a comprehensive guide.
Step 1: Planning Your Design and Measurements
Before any cutting, meticulous planning is key. First, measure your bed frame (twin, full, queen, king) to determine the ideal width of your headboard. Consider how high you want the headboard to extend above your mattress – standard heights range from 30 to 60 inches from the top of the mattress. Sketch out your design, deciding on the number of horizontal planks and the overall aesthetic. This particular design often features a solid frame with horizontal or vertical planks filling the interior.
Step 2: Gathering and Preparing Your Wood
Head to your local hardware store with your cut list. As mentioned, many stores like Home Depot offer cutting services, which can save you a significant amount of time and effort, especially if you don’t own a miter saw. If you’re cutting the wood yourself, carefully measure and mark each piece according to your plan before making precise cuts with your miter saw. Ensure all cuts are straight and clean.
Step 3: Assembling the Headboard Frame
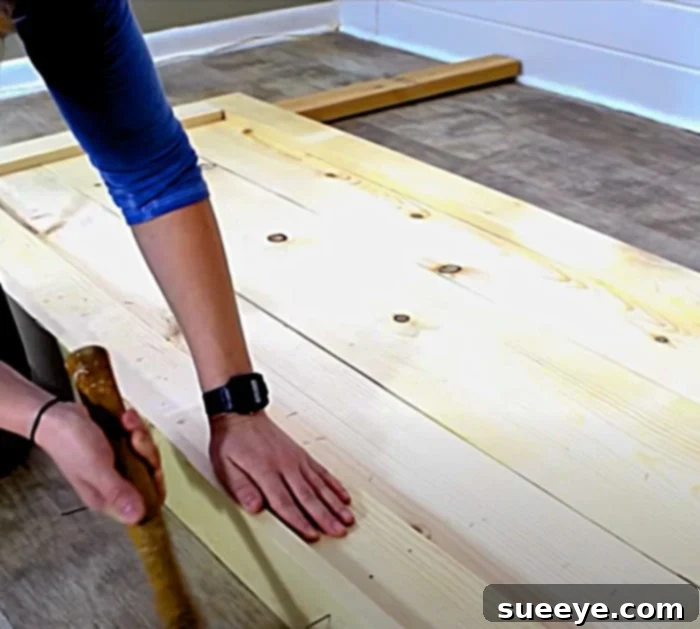
Lay out your cut pieces on a flat, stable surface. Typically, you’ll start by building a rectangular frame using longer vertical pieces and shorter horizontal supports. For a rustic look, you might then attach additional planks horizontally across the frame. Apply wood glue to the joints before screwing them together for extra durability. Pre-drilling pilot holes will prevent the wood from splitting, especially near the ends of the boards. Use your drill and impact driver to securely fasten all components. This is where you’ll essentially “nail your boards together as shown in the video tutorial,” but using screws for a stronger bond.
Step 4: The Art of Sanding for a Smooth Finish
Once your headboard is fully assembled, it’s time to sand. This step is crucial for achieving a professional finish and ensuring a smooth surface for staining or painting. Start with a coarser grit sandpaper (e.g., 80 or 100 grit) to remove any rough edges, splinters, or imperfections. Then, progress to a finer grit (e.g., 150 or 220 grit) for a silky-smooth finish. Always sand with the grain of the wood. After sanding, thoroughly wipe down the entire headboard with a tack cloth or a damp rag to remove all sawdust, ensuring a clean surface for your chosen finish.
Step 5: Staining or Painting Your Masterpiece
Now for the fun part – bringing your headboard to life with color and character! You have several options:
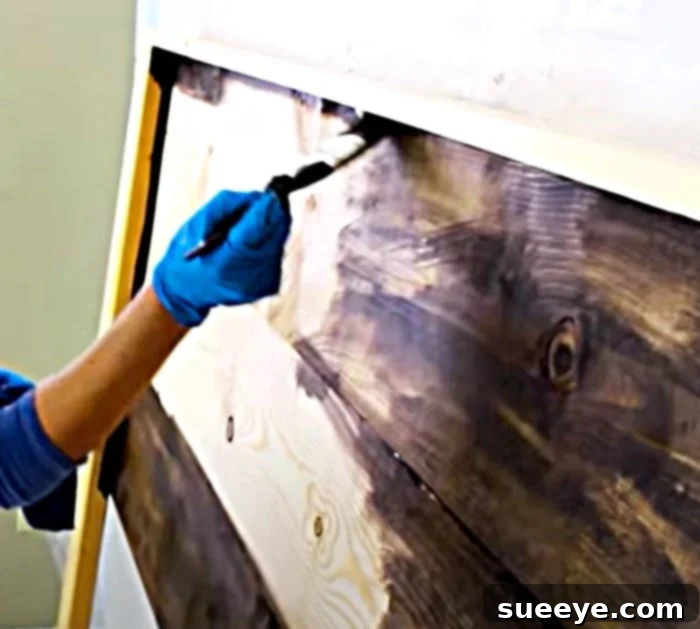
- Wood Stain: For a classic rustic look, a wood stain like Minwax is an excellent choice. Apply the stain evenly with a brush or rag, allowing it to penetrate the wood. Wipe off any excess after a few minutes, according to the product instructions. You can apply multiple coats to achieve a darker, richer hue. Always test your stain on a scrap piece of wood first to ensure you get the desired color.
- Chalk Paint: If you’re aiming for a shabby chic or more feminine aesthetic, chalk paint is a fantastic option. It provides a beautiful matte finish and is incredibly easy to distress for an aged look. Here is a link to a wonderful chalk paint recipe if you’d like to make your own. Apply chalk paint with a brush, and once dry, you can lightly sand certain areas (edges, raised parts) to expose the wood underneath, creating that sought-after distressed effect.
- Other Paints: Latex or acrylic paints can also be used, especially if you plan to seal them with a topcoat.
After your stain or paint has dried completely, consider applying a clear protective finish like polyurethane or a clear wax (especially for chalk paint). This will protect your headboard from wear and tear, making it more durable and easier to clean.
Step 6: Attaching Your Headboard (Optional)
There are several ways to attach your finished headboard:
- Wall Mounted: Use French cleat hangers or sturdy D-ring picture hangers screwed into wall studs for a floating effect. This is a popular choice for stability.
- Bed Frame Attached: Many headboards can be bolted directly to standard metal bed frames using pre-drilled holes. Ensure your headboard’s vertical supports align with your bed frame’s mounting points.
- Freestanding: For lighter headboards, you can simply lean it against the wall, behind your bed. Just ensure it’s stable and won’t tip over.
Customization Ideas for Your Farmhouse Headboard
The beauty of a DIY project lies in its endless possibilities for customization. Here are a few ideas to make your rustic farmhouse headboard truly unique:
- Different Wood Finishes: Experiment with various stain colors, from light grays and whites for a coastal farmhouse feel, to dark walnuts for a more traditional rustic look. Consider a two-tone finish, with a darker frame and lighter planks.
- Distressing Techniques: Beyond simple sanding, you can use chains, hammers, or wire brushes to create more pronounced “wear and tear” marks for an authentically aged appearance before staining or painting.
- Added Decorative Elements: Incorporate subtle metal accents like corner brackets or decorative nail heads for an industrial farmhouse touch. Small wooden appliques or stencils could also be added.
- Headboard Lighting: Integrate LED strip lights along the back or small reading sconces on either side for functionality and ambiance.
The Joy of a DIY Bedroom Upgrade
There’s something incredibly special about waking up to a bedroom that feels uniquely yours, especially when a significant piece like the headboard was crafted by your own hands. This headboard is even more gorgeous in person than you can ever imagine, and the compliments you’ll receive will be a testament to your hard work. My husband loves the one I made and is incredibly proud of the transformation it brought to our room. It’s a statement piece that speaks volumes about personal style, resourcefulness, and the satisfying journey of DIY home decor.
Embark on this project, and you’ll not only save a substantial amount of money but also gain a beautiful, custom headboard that perfectly fits your aesthetic vision. It’s an affordable way to infuse warmth, character, and farmhouse charm into your most personal space.
Frequently Asked Questions About Building a Rustic Headboard
Q: Can I use different types of wood for this project?
Absolutely! While pine is highly recommended for its affordability and ease of work, you could use other woods like cedar for a fragrant, rot-resistant option (though more expensive), or reclaimed wood for an even more authentic rustic feel. Just ensure the wood is structurally sound and free of severe warping.
Q: How long does this project typically take?
The actual building and assembly can often be completed in a single afternoon, especially if your wood is pre-cut. The longest part of the process is waiting for stain or paint to dry between coats. Depending on your chosen finish and the number of coats, the entire project could take anywhere from a weekend to a few days to fully complete, allowing for proper drying times.
Q: Is this DIY headboard durable enough for long-term use?
Yes, when constructed properly with quality wood, screws, and optional wood glue, a DIY headboard like this can be very durable. The key is to ensure all joints are secure and that the wood is protected with an appropriate finish. Regular cleaning and care will help it last for many years.
Q: What if I don’t have all the tools listed?
Don’t let a lack of tools deter you! As mentioned, many hardware stores offer wood cutting services. For drilling and driving screws, a basic cordless drill is usually sufficient. You might be able to borrow tools from friends or neighbors, or consider renting specialized tools for a day. The investment in a few basic hand tools is also worthwhile for future DIY projects.
Ready to transform your bedroom with a unique, handcrafted touch? Grab your materials, watch The Rehab Life’s tutorial, and start building your dream rustic farmhouse headboard today!