Organizing Ideas
21 DIY Home Repair Hacks to Try Today
Home repair hacks that actually work: patch drywall, paint a stained bathtub, fix a leaky faucet and free a sticking door with tools you already own.
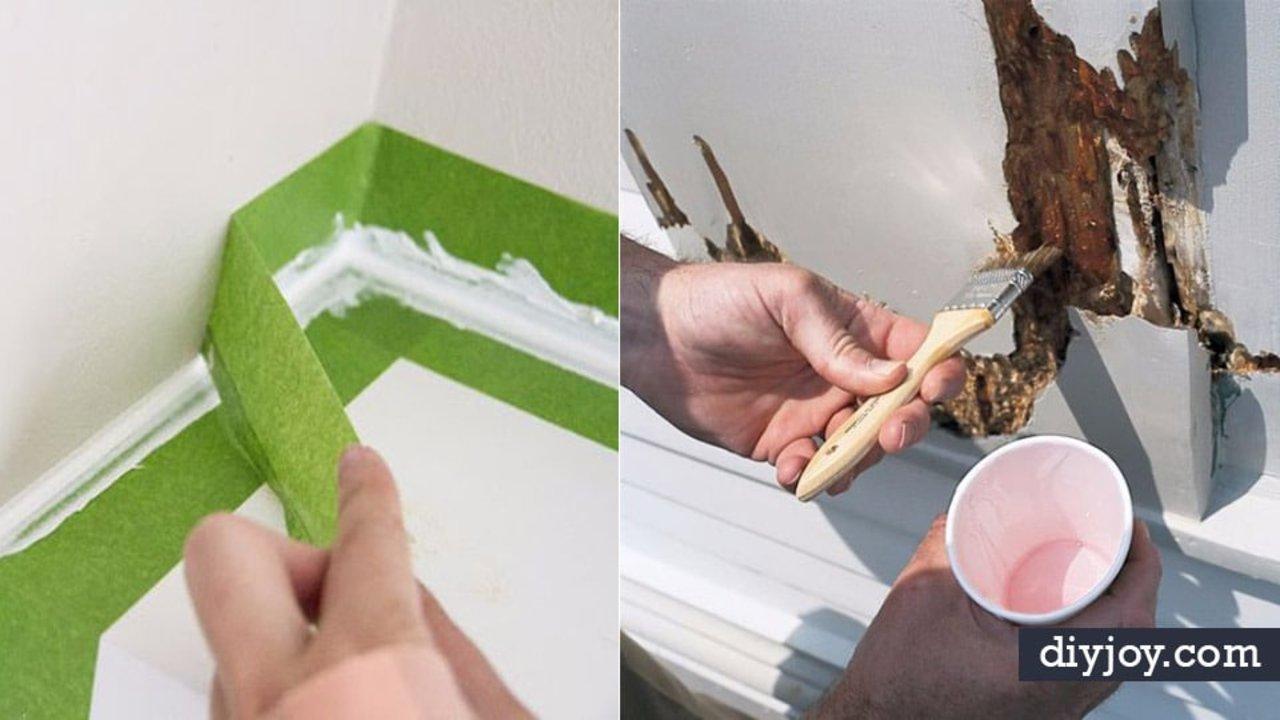
Half the things wrong with a house are ten-dollar problems that everybody quietly lives with for years. That is what these home repair hacks are for. There is a hollow door with a hole punched through it, a bathtub gone yellow, a sliding door that fights you every single time the dog wants out, a faucet that drips all night, and anchor holes the builder left behind a towel rod nobody needed. Most take an afternoon. Several take ten minutes and one trip to the hardware store. Two of them are ours, and every outside tutorial links straight back to the person who worked it out.
1. Patch A Hollow Door
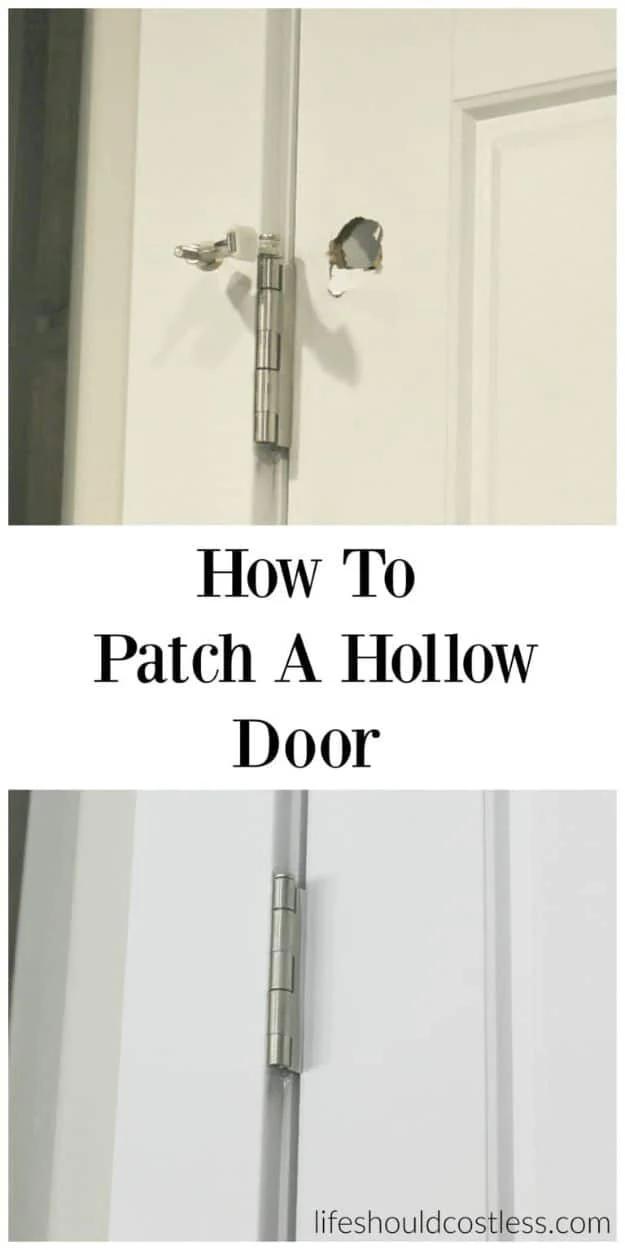
Cheap builder-grade interior doors are hollow, which means a doorstop or a rowdy kid can punch clean through the skin and leave a jagged crater beside the hinge. The fix is not one big step, it is a lot of small ones with drying time between, so you start it and walk away. Sand the torn edges smooth before anything else goes on. That single habit is the difference between a patch you can find later and one nobody ever notices. The finished door in the after shot reads as flat and new.
Get the full tutorial at Life Should Cost Less.
DIY Home Repair Ideas
2. Change An Outlet
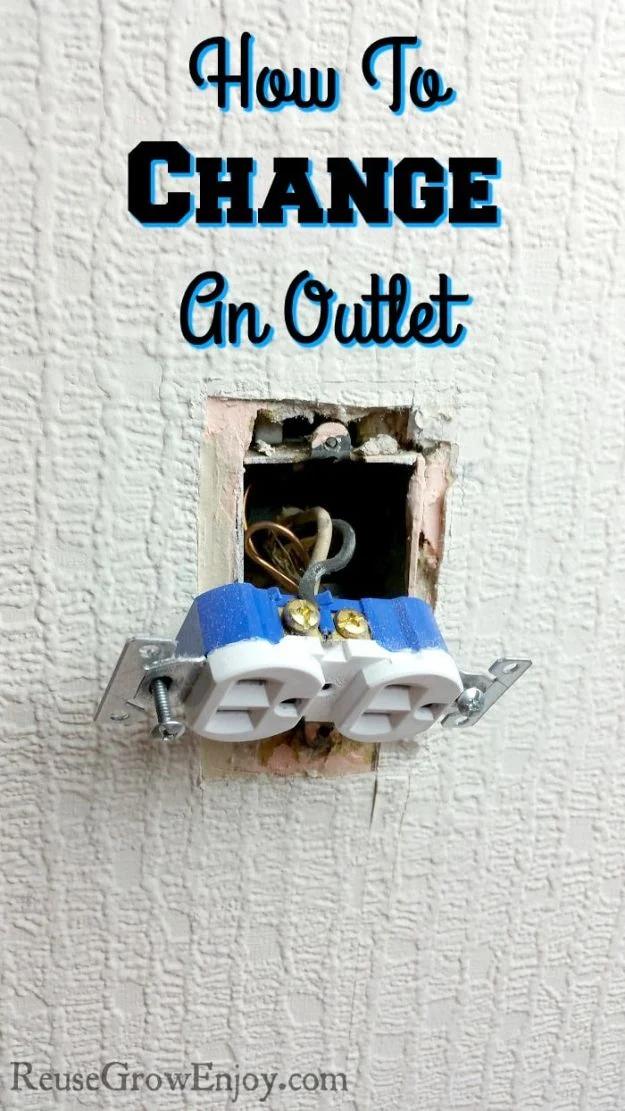
A worn outlet that will not hold a plug costs about a dollar to replace, and the whole job is four screws. Kill the power first and prove it is dead, not just flipped: plug in a radio, turn it up loud, and flip breakers until the music stops. Then take the cover off, loosen the screws top and bottom, and ease the outlet out to find the hot, neutral and ground wires. Wire the new one on the side screws, never the push-in holes in the back, because heat can back those connections out over time.
Get the full tutorial at Reuse Grow Enjoy.
3. Fix Sliding Glass Door
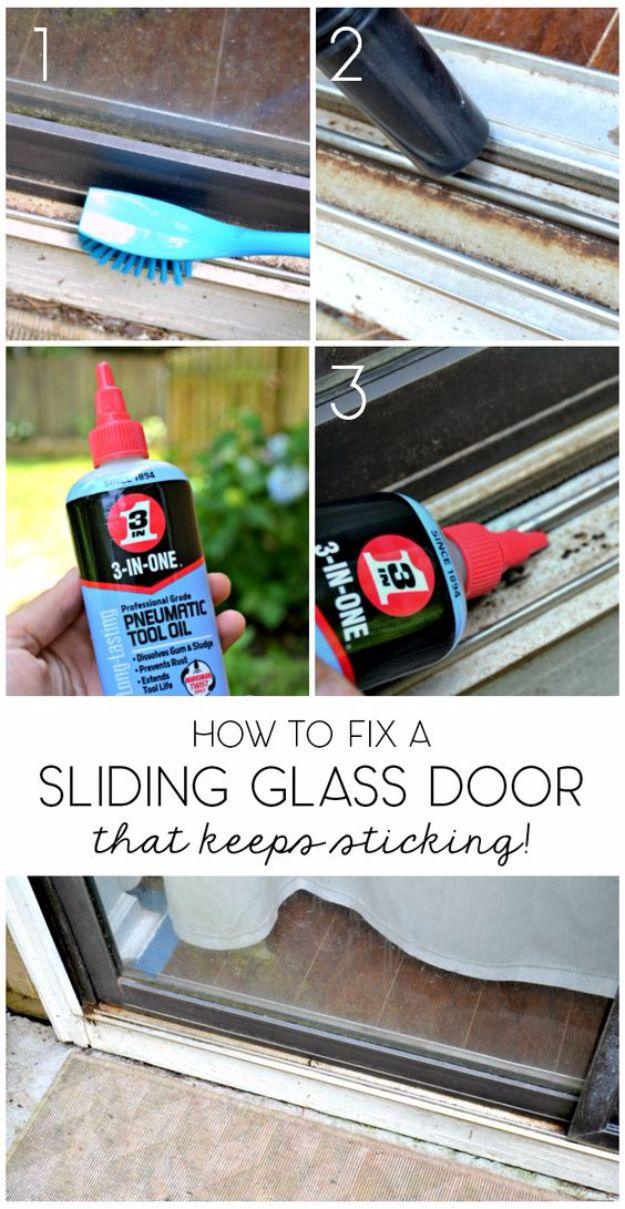
A patio door that sticks is almost never broken. The track is packed with dirt, sludge, pet hair and the occasional spider web, and yanking harder only pulls the door off its rollers. Scrub the track out with a cheap brush, vacuum the grit up with a shop vac, then run a bead of 3-in-ONE pneumatic tool oil down the channel. The whole thing is five minutes, which is genuinely insulting when you have been fighting the door for two years. Do it once a season and it never comes back.
Get the full tutorial at The Ugly Duckling House.
4. Paint A Bath Tub
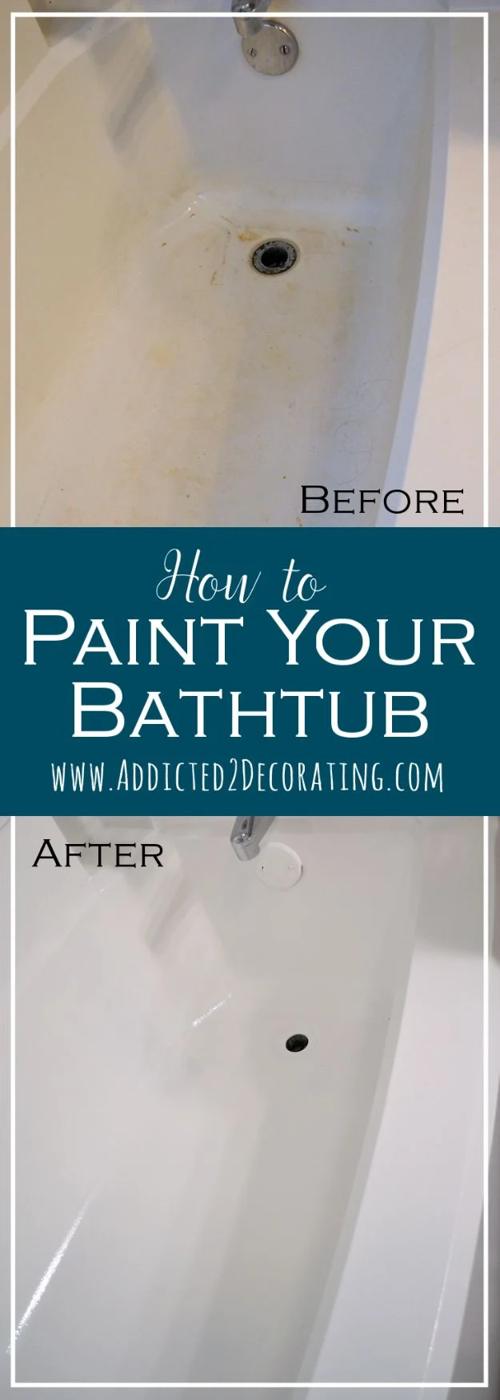
Yes, you can paint a bathtub, and a yellowed stained tub turns bright white for the price of a two-part epoxy kit instead of the price of a plumber. The prep is the real work, about an hour and fifteen minutes of it: bleach wash, Comet, Lime Away with a scouring pad, then 400 and 600 grit wet-dry sandpaper. Cut in the corners with a two inch brush and roll the big areas with a three-eighths inch nap roller, never foam. Working time runs about four and a half hours, eight from start to finish.
Get the full tutorial at Addicted 2 Decorating.
5. Fix a Leaky Faucet in 10 minutes

That drip is almost always a worn washer, and washers cost pennies. Shut the water off under the sink and run the faucet dry, pop the little cap on the handle, back out the screw, and lift the valve stem with pliers. Slip off the O-ring, pop the seat washer out of the base with a fingernail, then take both to the hardware store and match them exactly. Do not put this off: crank the handles tight enough for long enough and you damage the seat or the stem, and then it is a real repair.
Get the full tutorial at Pretty Handy Girl.
6. Drywall Patch Repair – The Easy Way
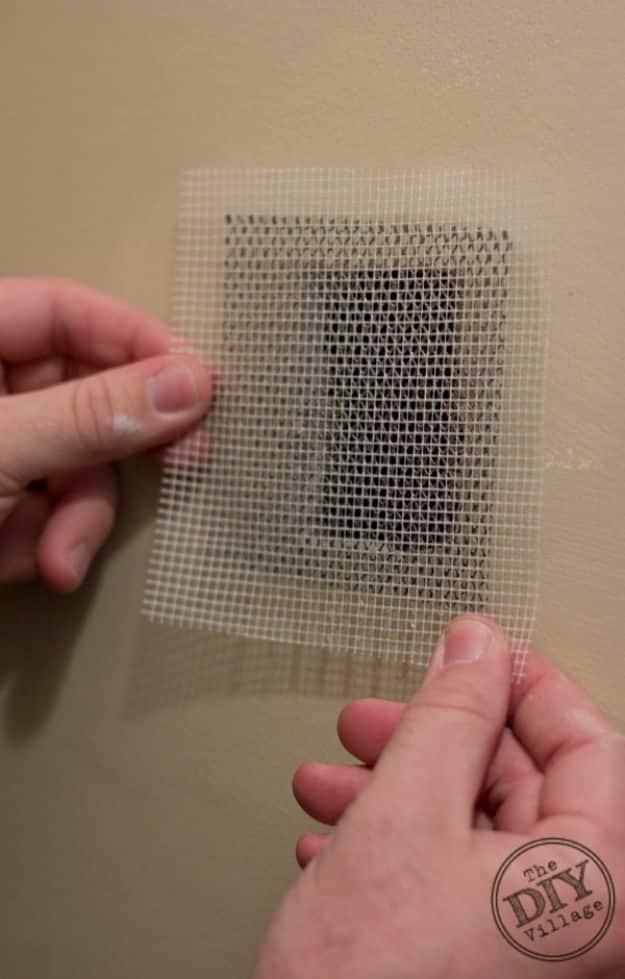
Every project in a house seems to end with a hole in a wall, and a self-adhesive mesh patch turns that into a twenty minute job. Peel the backing, center the patch over the hole and press it down firmly so it grabs. Then spread patching compound over it, working thinner and thinner as you move outward, which is the part called feathering and the part that decides whether anyone ever sees the repair. Give it about thirty minutes to dry, sand it smooth, and paint.
Get the full tutorial at The DIY Village.
7. Cover Up Laminate Countertops
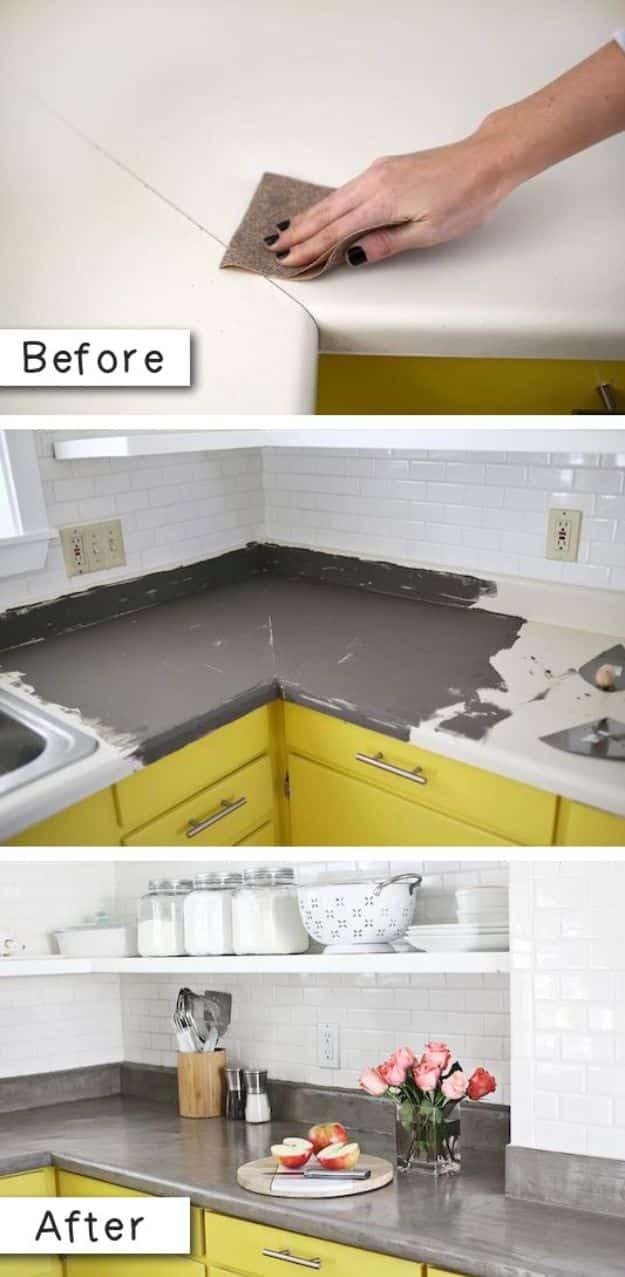
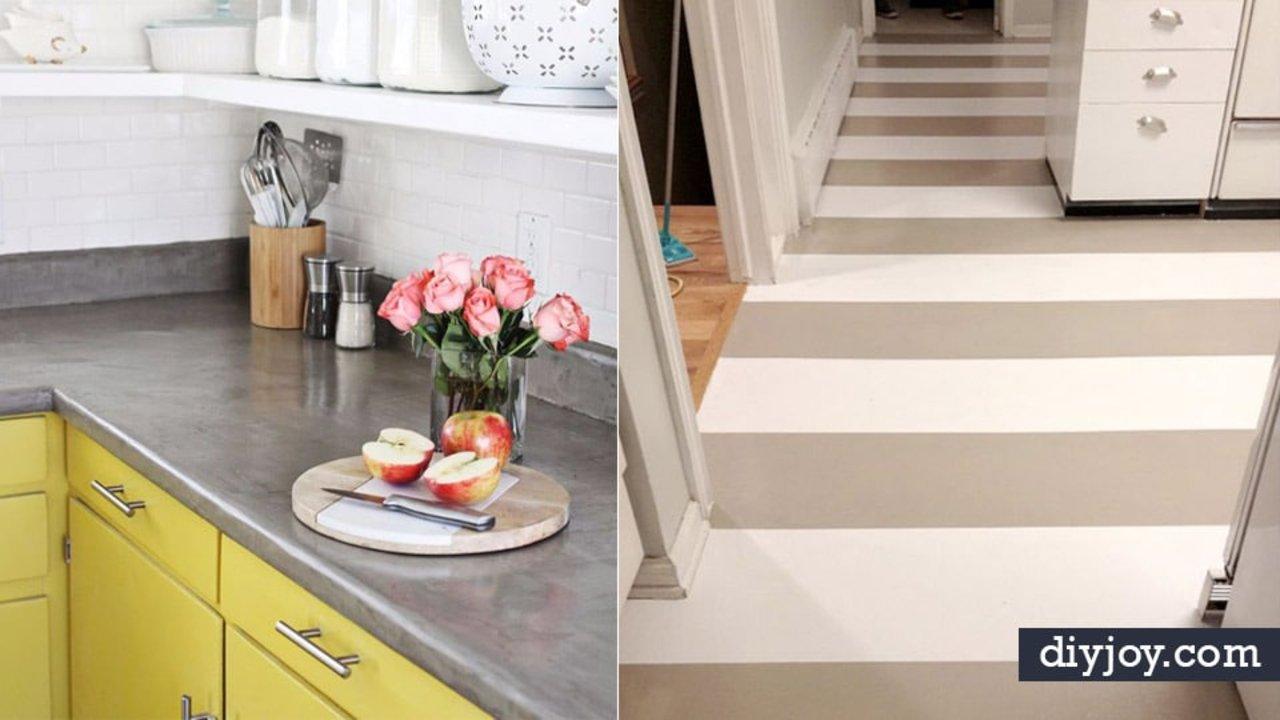
Dated laminate counters can be skimmed over with a concrete overlay, and the before and after in this photo set is one of the more startling on the page: sanded white laminate, then a grey skim coat going on with a trowel over yellow cabinets, then a finished kitchen that reads as poured concrete. It is a patient job rather than a hard one. The old formica is sanded coarse first so the cement has something to grip, and the feather finish is mixed a cup at a time, one part water to two parts dry, because a big batch hardens before it can be spread.
Get the full tutorial at A Beautiful Mess.
8. Perfect Caulk Edge With Painter's Tape
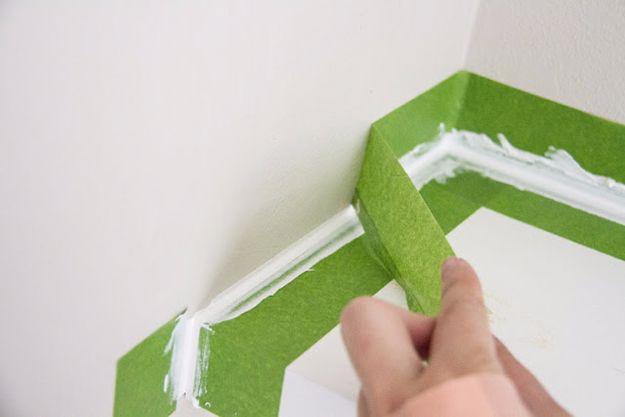
A clean caulk line is not a steady hand, it is tape. Run painter’s tape along both surfaces of the corner leaving an eighth to a quarter inch of gap between the strips, lay an even bead into the gap, and smooth it with a fingertip so the excess comes away. Then pull the tape immediately, while the caulk is still wet. Wait even a little too long and the tape tears the edge off with it and leaves a jagged line, which is the one mistake everybody makes exactly once.
Get the full tutorial at Swing N Cocoa.
9. Faux Thick Baseboard
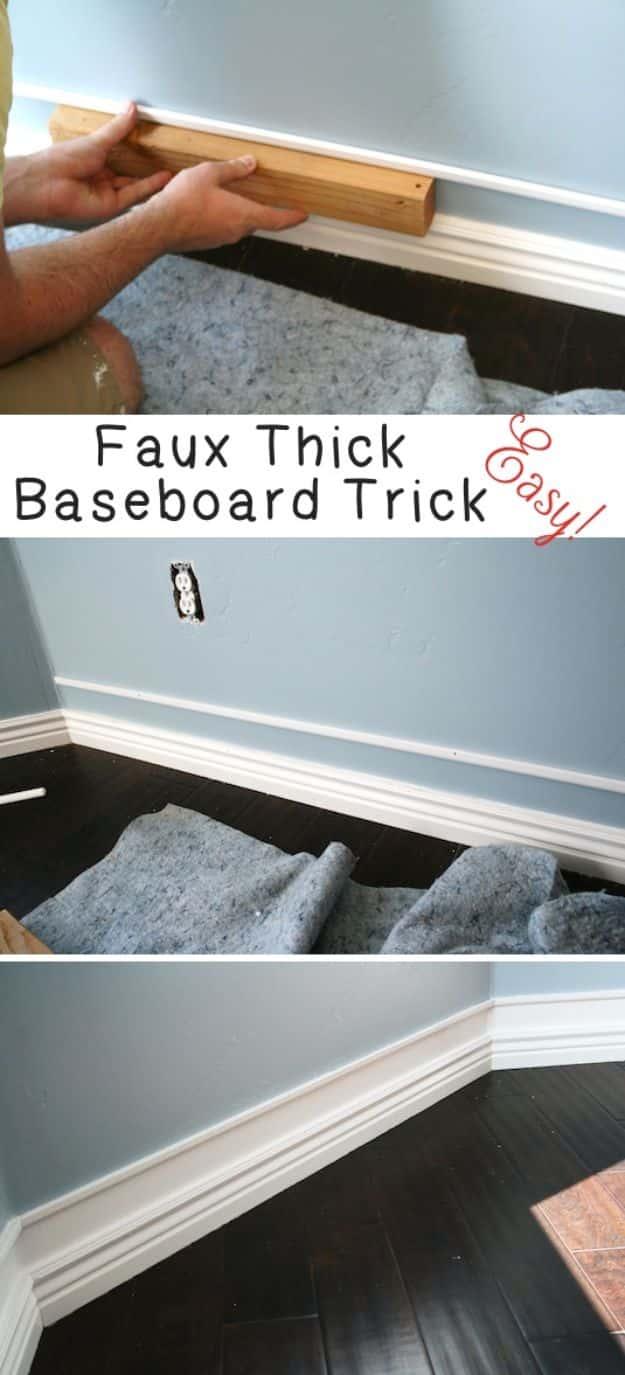
Chunky tall baseboards are a builder upgrade that costs almost nothing to fake. Run a second strip of trim along the wall a few inches above the existing baseboard, nail it up, then paint the wall between the two strips the same white so the eye reads one thick board. A scrap of wood cut to the gap makes a spacing guide and keeps the line dead level all the way around the room. Spackle the nail holes, two coats of semi-gloss, and a room changes character for about six dollars of molding.
Get the full tutorial at The House of Smiths.
10. Repair Wood Scratches
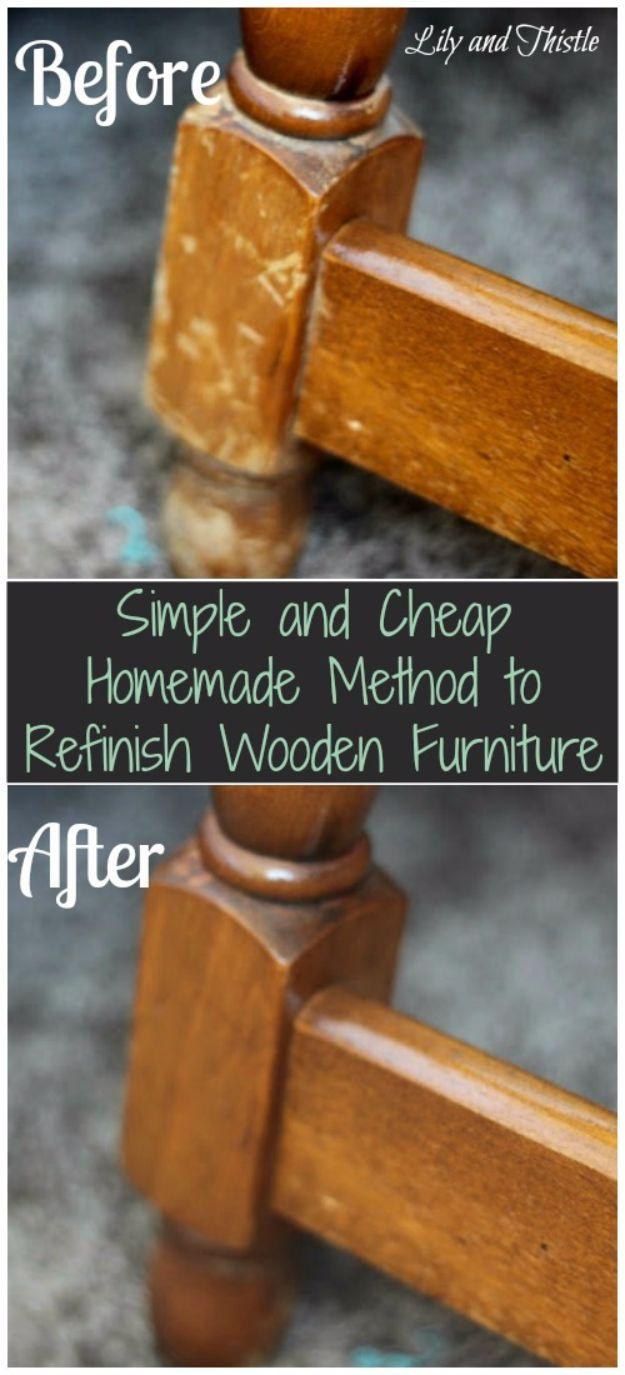
The yard-sale trick for a scratched-up table leg is three quarters of a cup of olive or vegetable oil mixed with a quarter cup of vinegar, wiped on with a rag. It darkens the pale nicks so they vanish into the grain, and the before and after is genuinely impressive. Be honest with yourself about what it is, though: professional refinishers in the comments on that post point out it masks rather than repairs, and vegetable oil never fully dries. Lovely for a flea-market find, wrong for an heirloom.
Get the full tutorial at DIY n Crafts.
11. Simple Air Conditioner Repair
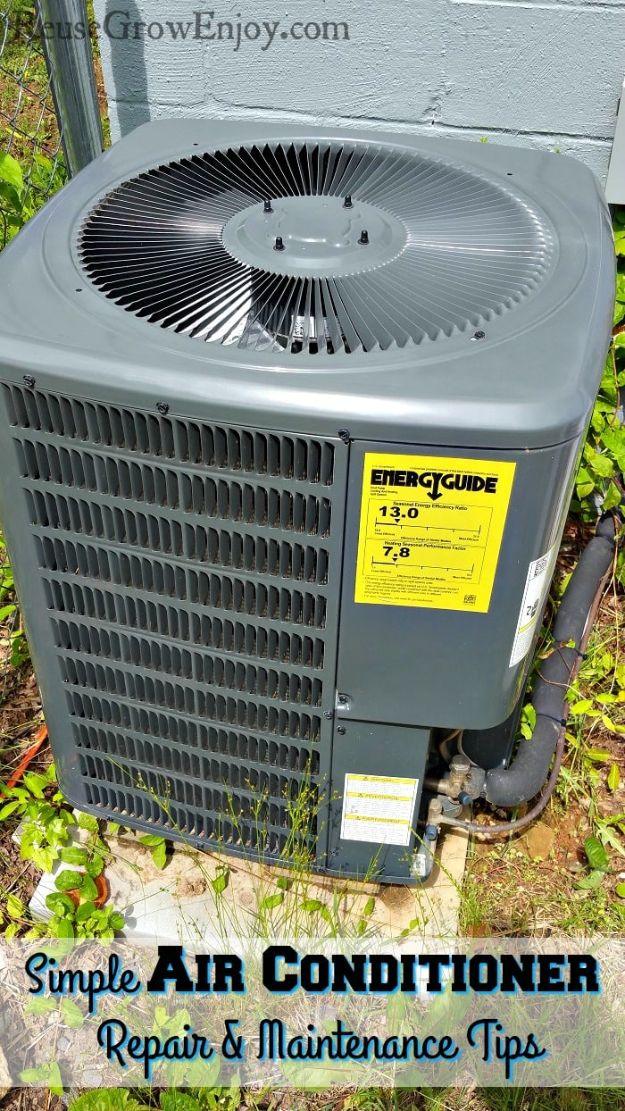
Most air conditioner trouble is not a repair, it is a filter nobody has looked at since the last heatwave. Pull the screen filter out of the front of a window unit, brush it or rinse it, and put it back. In a house with pets, check it every other week rather than waiting for the reminder light. A dry paintbrush clears the small openings in the front grille. Outside, keep grass and weeds cut back off the condenser, because vines growing into the coils make the whole system work far harder than it should.
Get the full tutorial at Reuse Grow Enjoy.
12. Repair Damaged Furnitures
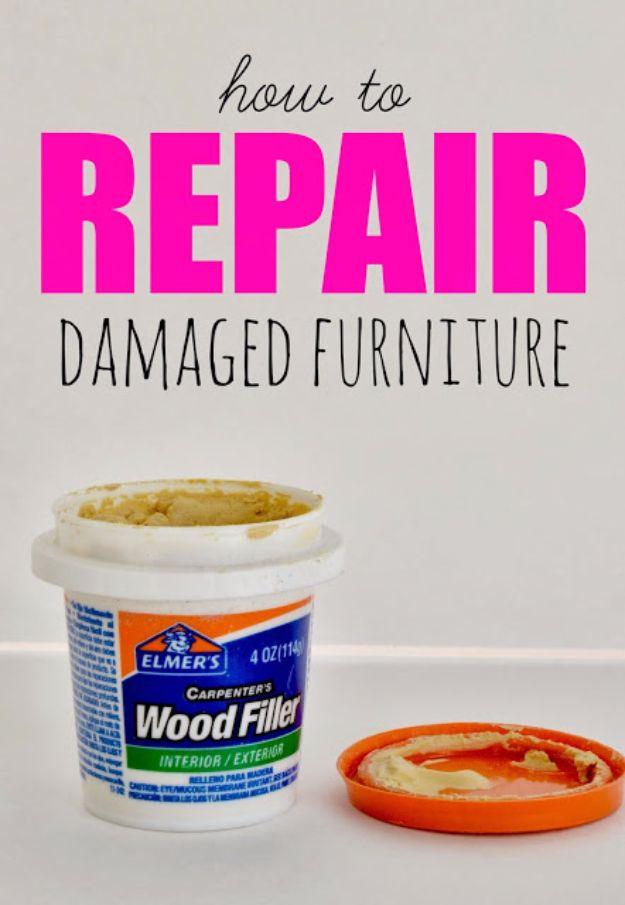
Before a thrifted dresser gets painted, fill every dent and gouge with wood filler and sand it back with fine grit paper. It is a five minute step people skip because they are eager to get to the color, and it is the entire difference between a piece that looks painted and a piece that looks refinished. Paint is a magnifying glass for damage, not a cover for it. A tub of Elmer’s carpenter’s filler costs a few dollars and one small tub outlasts several projects.
Get the full tutorial at LiveLoveDIY.
13. Easily Patch Dry Wall Holes
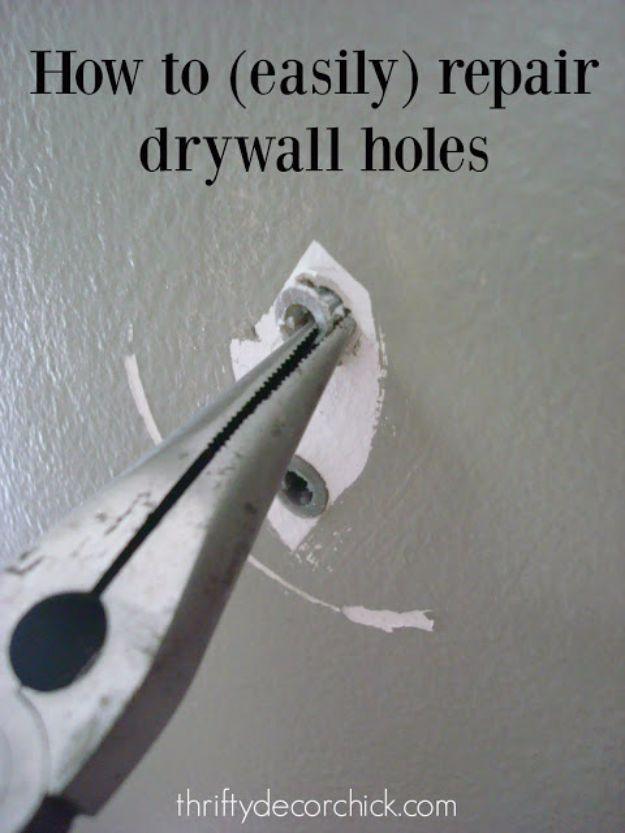
Anchor holes are worse than nail holes because the anchor pulls the drywall up around itself and leaves a crater. Grab the anchor with needle-nose pliers and pull, or pound it through the wall if it fights you. Then the good trick: tear up thick paper, a grocery bag works, and stuff the pieces into the hole so the spackle has something to sit on instead of falling into the cavity. Frost it on with a putty knife, sand, repeat if needed. Be choosy about where anchors go, because you will always faintly see them.
Get the full tutorial at Thrifty Decor Chick.
14. Fireplace Makeover
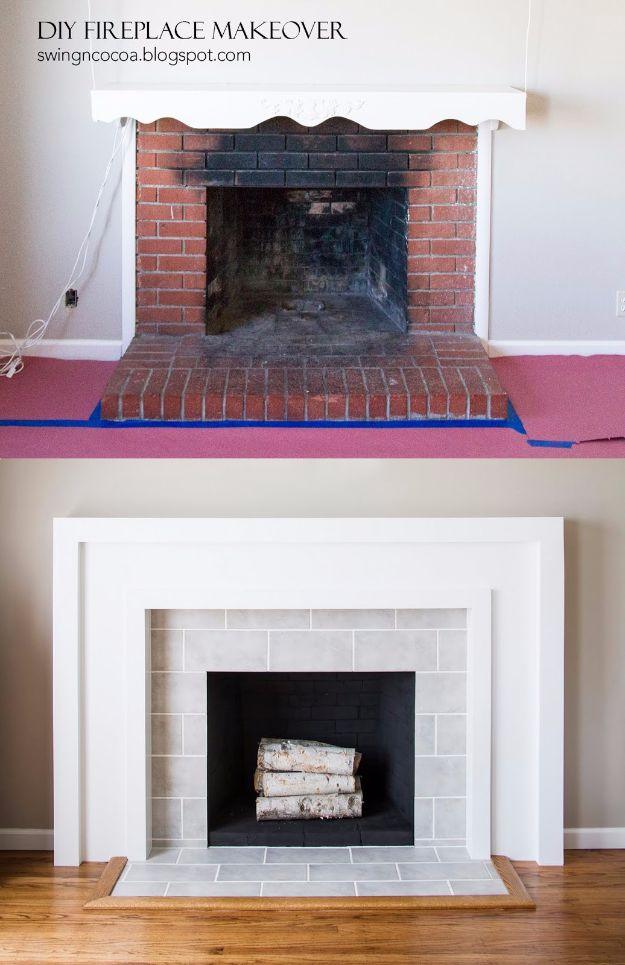
A red brick fireplace becomes a clean white surround with a new mantel, tile and a stained hearth trim, and the last ten percent is what sells it. Tape the edges before caulking the seams so the line stays sharp. The hearth trim gets three coats of Minwax Golden Oak and two coats of semi-gloss Polycrylic before it goes anywhere near the floor. Glue it down with Liquid Nails, weigh it with whatever heavy books are handy, and leave it a full twenty four hours before you touch it.
Get the full tutorial at Swing N Cocoa.
15. Paint An Old Sink
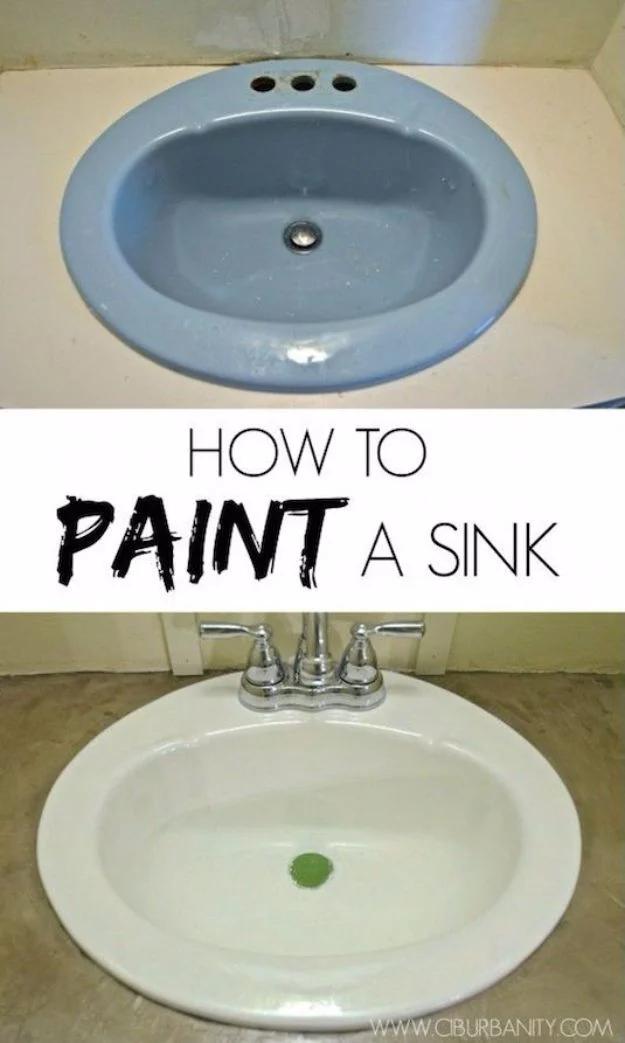
A turquoise builder sink from another decade turns crisp white with a thirty-six dollar epoxy kit, which is a lot for paint and nothing at all for a sink. Clean it hard first, alternating the kit cleaner with fine steel wool until the surface has tooth. Then one light coat with a good brush, not a roller and not foam. The epoxy self-levels so brush strokes disappear on their own, but watch for drips. The second coat goes on at three hours, and if you drift past four you are waiting seventy two.
Get the full tutorial at At Charlotte's House.
16. Fix A Hole In Your Ceiling Dry Wall
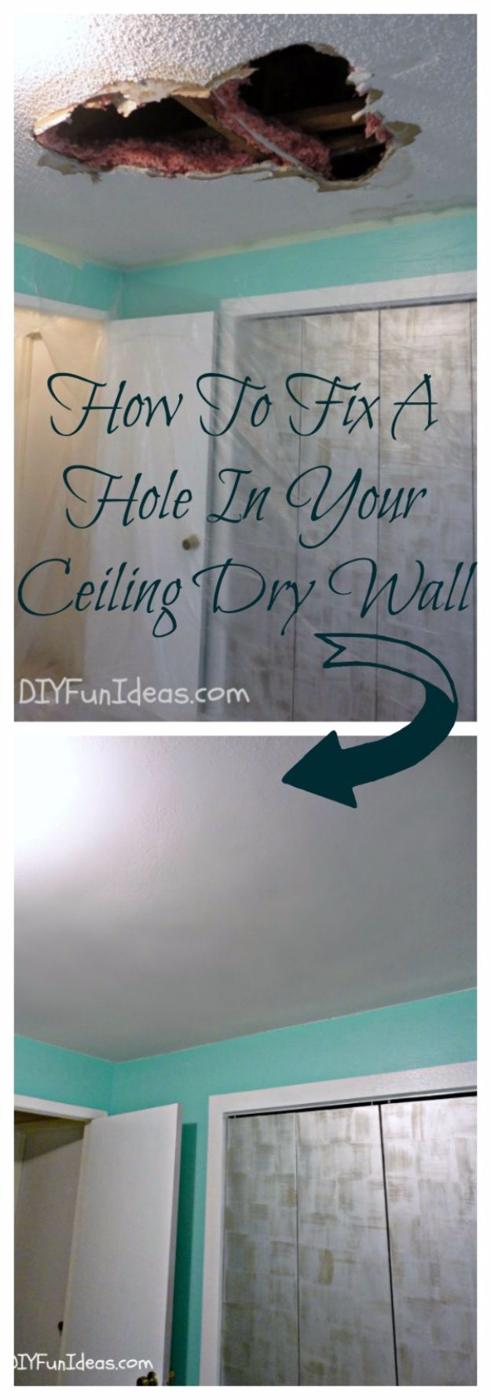
A leak brings a ceiling down in pieces, and the repair is the same as a wall repair with more neck strain. Cut the ragged hole back to a clean square, back it, fit a patch, then tape the joints and coat them with quick-setting joint compound. Mesh tape or paper tape both work. Honest note on this one: the photographed repair was covered by a home warranty and done by the crew who came out, but it was shot step by step so you can see exactly what a professional square-patch looks like.
Get the full tutorial at DIY Fun Ideas.
17. Patch A Hole In Sheetrock
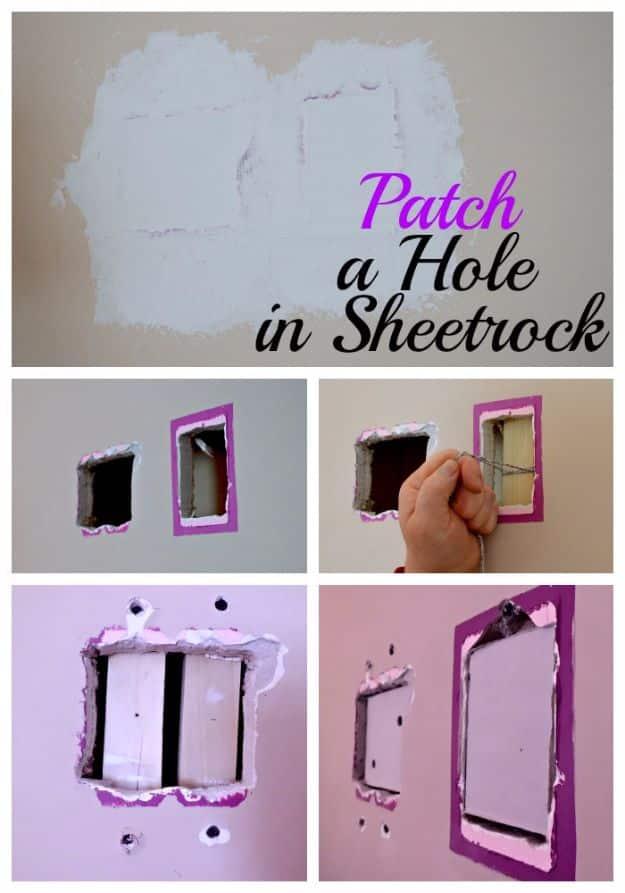
Moving an outlet leaves a hole too big for spackle, and the fix is a real patch with real backing. Cut three eight-inch lengths of poplar, which splits less easily than pine, glob caulk on the ends and screw them behind the drywall with a string tied round the middle so they do not drop into the wall cavity. Fit a scrap of sheetrock so it sits just below the surface, notch the edge about an eighth of an inch so the tape sits low, and use joint compound rather than spackle on anything this size.
Get the full tutorial at Chatfield Court.
18. Repair Fan
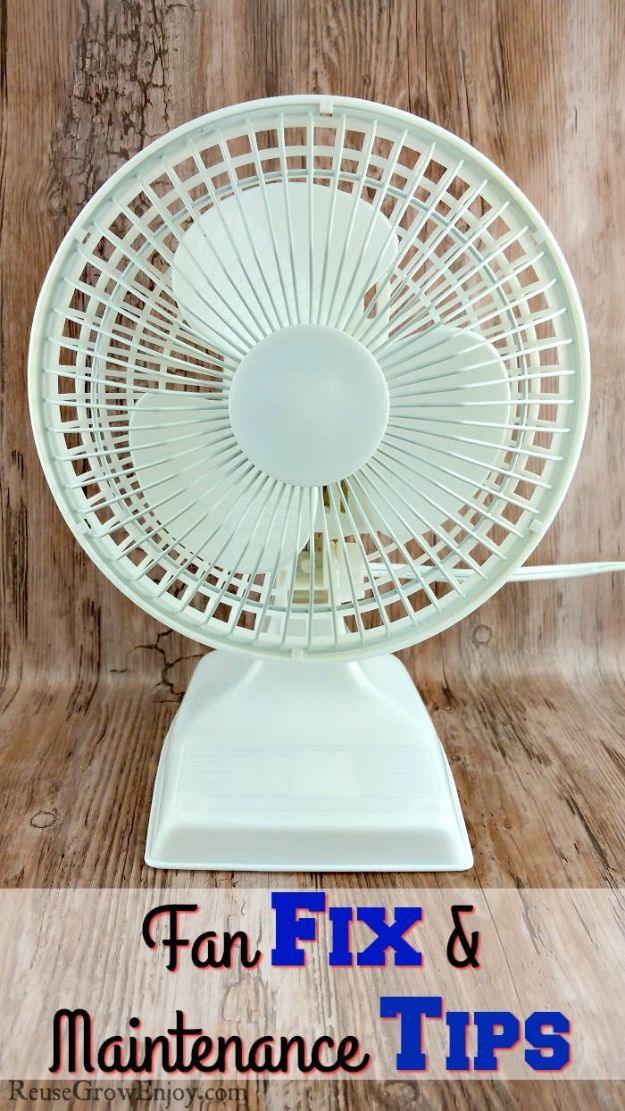
A box fan that has slowed to a wheeze usually has two problems, and both take five minutes. Dust packed into the guards strangles the airflow far more than it looks like it should, and the same dust in the back makes the motor run hot and die early. Take it outside, switch it on, and brush the guards out. Then unplug it, take the guard off with a phillips, and put three or four drops of three-in-one oil on the end of the fan shaft. Spin the blade and watch it soak in.
Get the full tutorial at Reuse Grow Enjoy.
19. Replace A Shower Head

Swapping a shower head is the cheapest bathroom upgrade there is and needs exactly two things, an adjustable wrench and a roll of white Teflon tape. Unscrew the old head, strip off the tired grey tape underneath, then wrap new tape clockwise four or five times around the threads, stopping before the tape runs past them and into the opening. Screw the new head on and tighten it gently. If you are fitting a handheld, the washers that come in the box go in both ends of the hose.
Get the full tutorial at Artsy Fartsy Mama.
20. Easy Hack to Fix a Frozen Pipe
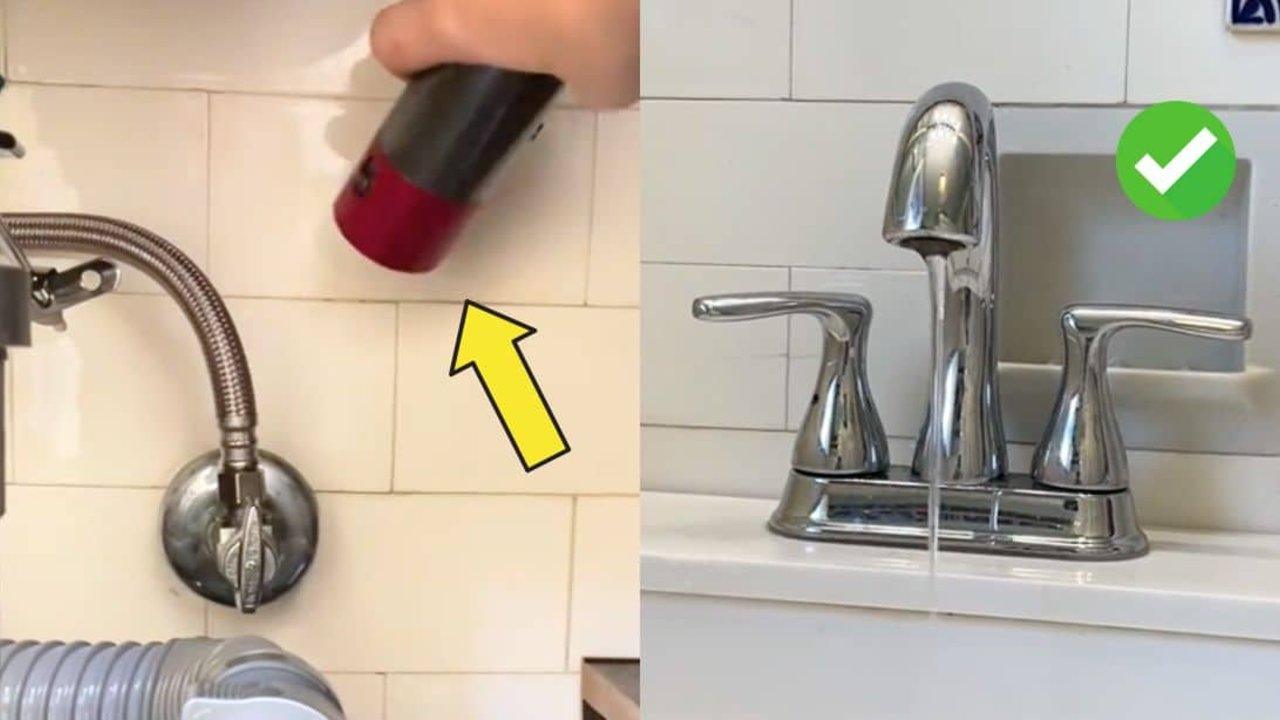
Water expands when it freezes, which is why a frozen pipe is not an inconvenience but a countdown to a burst one and a flooded room. Shut the water off at the main first, then open the tap the frozen section feeds so there is somewhere for melt to go. Warm the pipe with a hair dryer or a portable space heater, working from the tap end back toward the blockage so the thaw has an exit. If the frozen stretch is somewhere you cannot reach, that is the moment to call a plumber rather than improvise.
Get the full tutorial at Sueeye.
21. How To Repair And Paint Baseboards
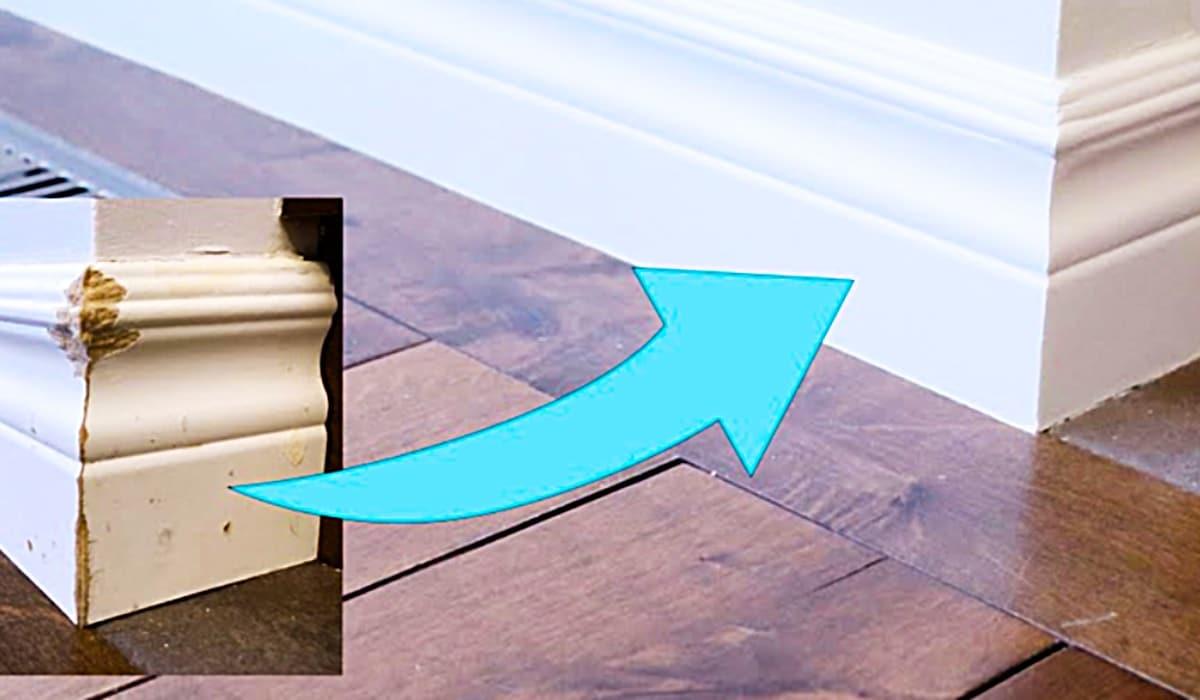
Baseboards are punishing to paint because every mistake sits at eye level when you sit down. Fill scratches and small gashes with a lightweight spackle and bigger ones with wood filler, then sand the whole run with fine grit or a sanding block before any paint goes on. Use a good brush, because a cheap one lays paint on unevenly no matter how careful you are. Frog Tape gives a cleaner line than blue painter’s tape, and a floating additive stirred into the paint helps it level out flat.
Get the full tutorial at Sueeye.