Life Hacks
23 Baking Hacks That Make Every Bake Easier
Baking hacks for better cakes, cookies and pies: flat top cake strips, floured chocolate chips, dental floss slices and a paper plate splatter shield.
html PUBLIC "-//W3C//DTD HTML 4.0 Transitional//EN" ""
Some baking hacks are so small it stings to learn them late. Tongs crimp a prettier pie edge than a fork. A tablespoon of flour tossed over chocolate chips keeps every one of them suspended instead of sunk in a chocolate layer at the bottom. A length of unflavoured dental floss cuts a cheesecake more cleanly than any knife in the drawer. None of these are recipes, they are the small moves that sit between a bake that works and a bake that looks like somebody knew what they were doing: how to line a round pan with parchment in six folds, how to fill a piping bag without wearing it, how to stop a cake doming, how to get a cookie crisp outside and chewy in the middle. Most cost nothing and take seconds. Each one links to the baker who explained it properly.
1. Bake The Perfect Cupcake
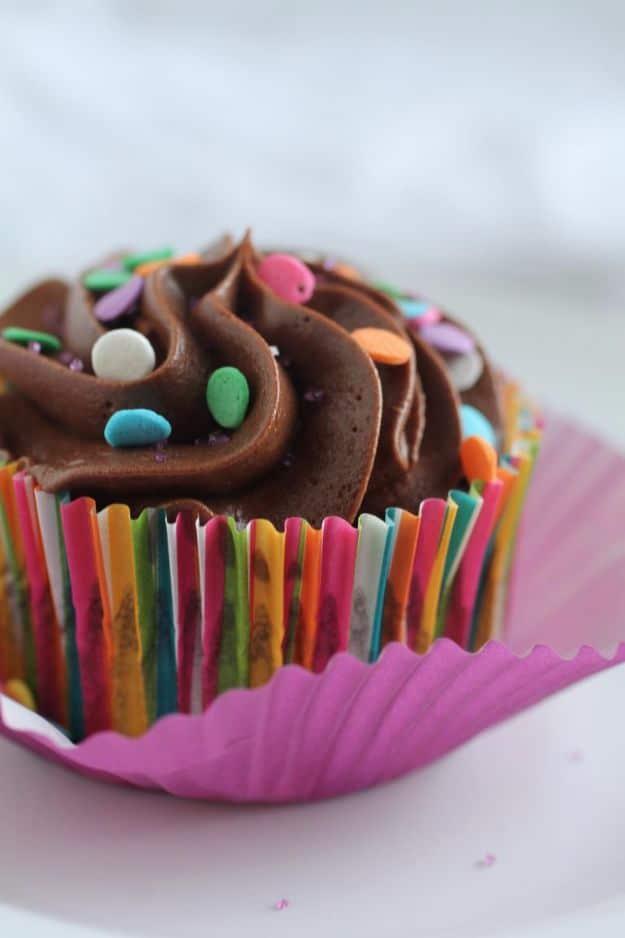
Ten fundamentals rather than one trick, and three of them do most of the work. Eggs and milk need an hour on the counter to come to room temperature, because cold ingredients make a grainy, clumpy batter. Stop mixing the moment the dry flour disappears, since anything past that develops gluten and gives you dense cupcakes with tunnels through them. Fill the liners about two thirds full with a scoop rather than a spoon, which keeps every cupcake the same size. And do not open that door until two thirds of the baking time has gone.
Get the full tutorial at Life as a Strawberry.
2. Flat Top Cakes
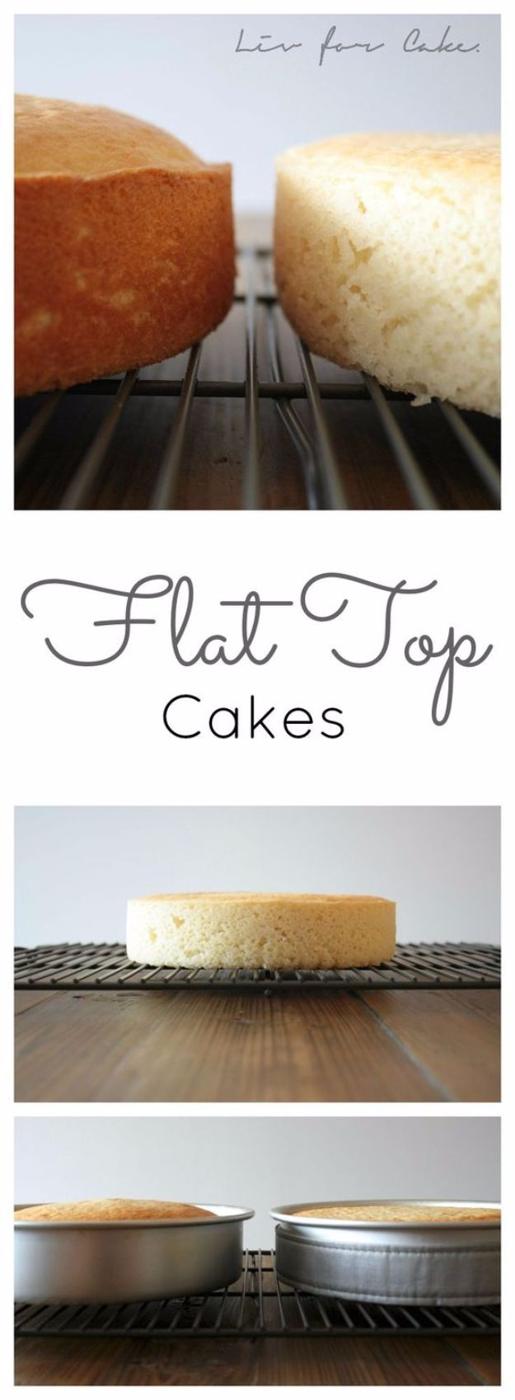
Domed cake layers get levelled off with a knife and thrown away, which is a waste of cake and of time. Cake strips stop the dome forming at all. Damp fabric strips wrap around the outside of the pan, insulating it and keeping the sides cooler so the whole layer rises evenly instead of racing up the middle. Liv for Cake dampens them fully, squeezes out the excess so the cake is not soggy, and bakes at 350 degrees, noting that strips slow the bake so it takes a little longer. Homemade tea towel strips should not go above 350.
Get the full tutorial at Liv for Cake.
Baking Tips and Tricks
3. Make A Pie Crust In A Food Processor
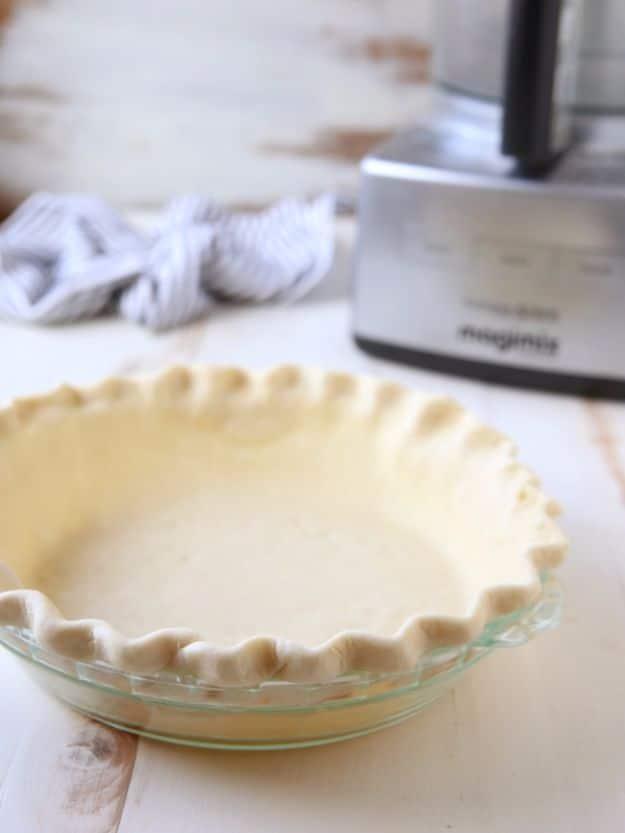
The argument for making pastry in a food processor is heat: warm hands soften butter, and soft butter gives a tough crust instead of a flaky one. Completely Delicious pulses flour, salt and an optional spoon of sugar to combine, then adds cubed cold butter and pulses only three to five times, stopping while the smallest pieces are still the size of large peas. That is the whole discipline of it. Those pea sized lumps are what melt into steam and lift the layers apart in the oven.
Get the full tutorial at Completely Delicious.
4. Stop Chocolate Chips From Sinking
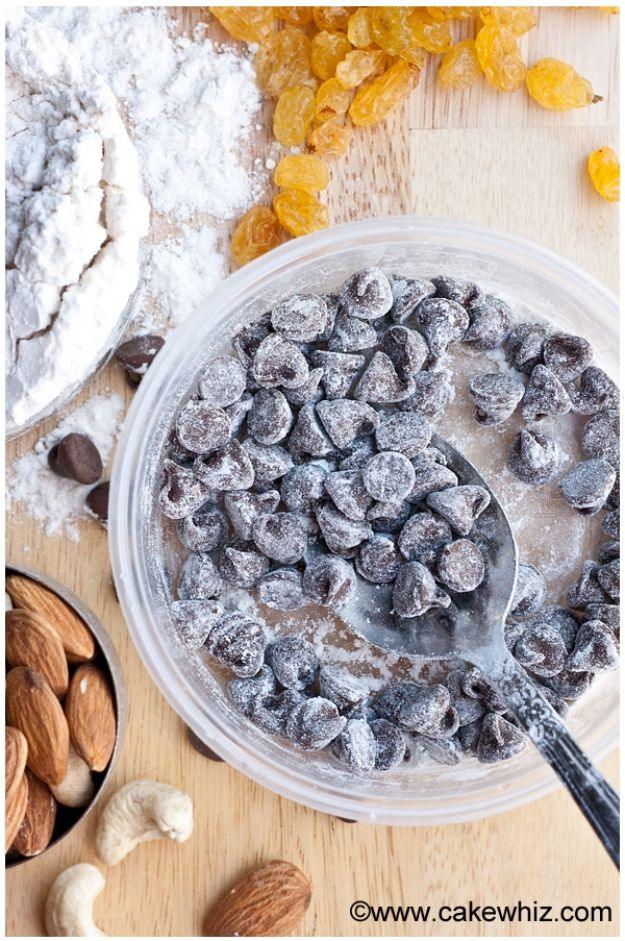
Chocolate chips sink because they are heavier than the batter around them, and a thin coat of flour is enough to stop it. Cake Whiz tosses a cup of add ins with one to two tablespoons of plain flour in a small bowl until everything is lightly coated, then folds them into the finished batter without beating it about. Dry add ins like chips want about a tablespoon; wet ones like fruit want two. Nuts need chopping smaller before they are coated, because weight is the problem and a whole walnut is simply too heavy.
Get the full tutorial at Cake Whiz.
5. Frost Cupcakes With Less Mess
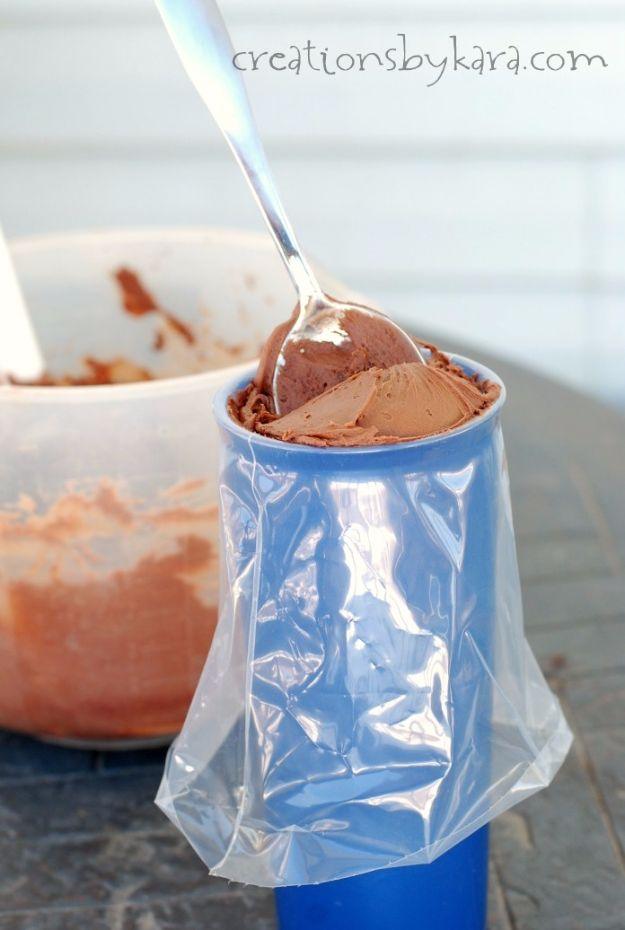
Holding a slack piping bag in one hand and spooning frosting in with the other is how frosting ends up on the counter, the bag and the baker. Stand the bag in a tall narrow glass instead and fold the sides down over the rim, and suddenly both hands are free. Creations by Kara spoons the frosting in against the glass wall, pushing it down as she goes so no pockets of air are trapped, then lifts the bag out and twists the top. The top of the bag stays clean, which is the part that usually does not.
Get the full tutorial at Creations by Kara.
6. Line Any Size Cake Pan With Parchment Paper Perfectly
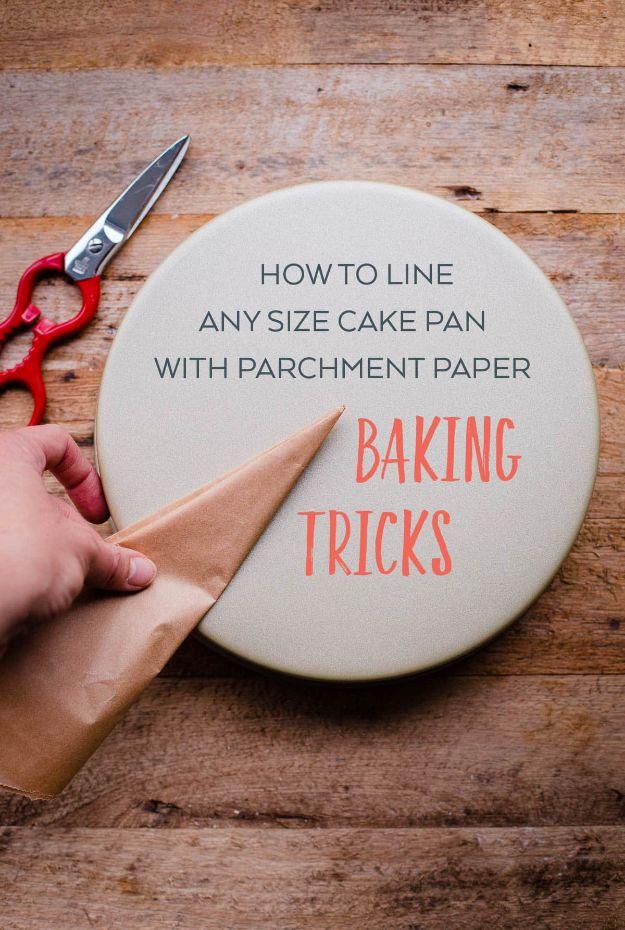
Six folds and one cut, and it fits any round pan in the cupboard with no tracing and no shop bought liners. Take a sheet a little larger than the pan, fold it in half, in half again, then into a triangle, then fold that triangle in half twice more. Turn the pan upside down, line the point of the triangle up with the middle of the base, hold it there and cut along the curve of the rim. Unfold it and it is a circle. Grease and flour the pan after the liner goes in.
Get the full tutorial at A Beautiful Plate.
7. Blind Bake Pie Crust With Weights
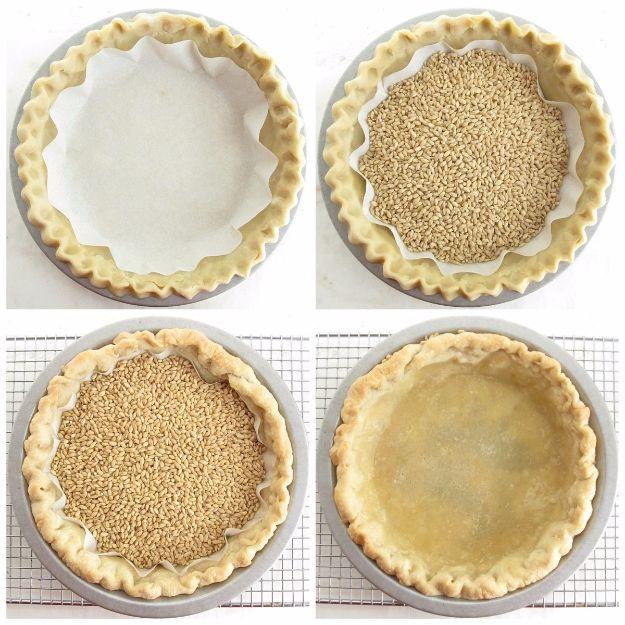
Blind baking is what stops a pumpkin or custard pie sitting on raw pastry, and the two details that decide whether it works are chilling and weight. Line the shaped crust with parchment, fill it with pie weights, dried rice or beans, and chill the whole thing for thirty minutes so the fat sets firm and the sides cannot slump. Bake at 375 degrees for twenty minutes, lift the weights out, prick the base with a fork so it cannot bubble, and give it another fifteen to twenty minutes until it is golden.
Get the full tutorial at King Arthur Baking.
8. Create Cinnamon Roll Waffles In Minutes

A tin of refrigerated cinnamon rolls and a waffle iron, and breakfast is done in the time the iron takes to heat. The rolls go straight into the plates, unbaked, and come out with crisp caramelised ridges that a bake in the oven cannot give them. The icing that comes in the tin goes on while they are still hot so it melts down into the grooves. It is the sort of shortcut that feels like cheating and gets asked for every weekend afterwards, especially by anyone under ten.
Get the full tutorial at Sueeye.
9. Learn To Make Buttercream Rope
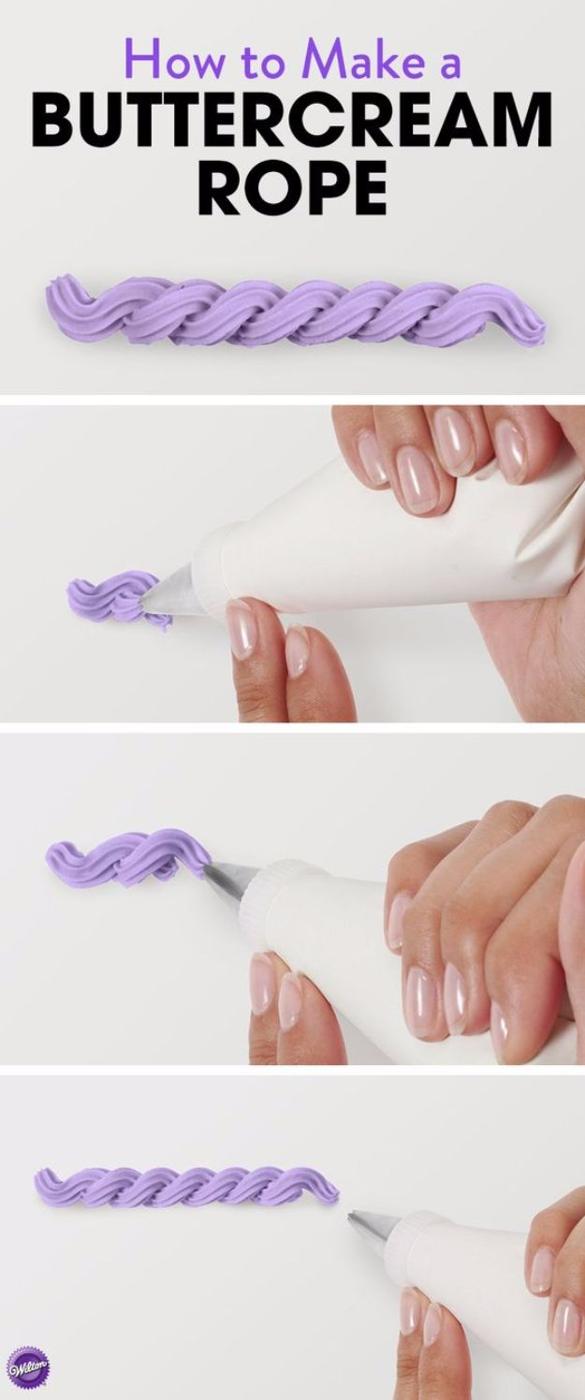
A piped rope border looks like a professional flourish and turns out to be one repeated squiggle. Wilton uses star tip 18 with medium consistency icing, holding the bag at 45 degrees pointing to 4:30, or 7:30 for anyone left handed. Squeeze while moving the tip in a gentle sideways S curve, then tuck the tip underneath the bottom curve of that S and squeeze again, lifting into a hook. Repeat all the way round. The tucking is the whole trick, because it is what makes the separate S shapes read as one continuous twist.
Get the full tutorial at Wilton.
10. Baking Tip For Layer Cakes
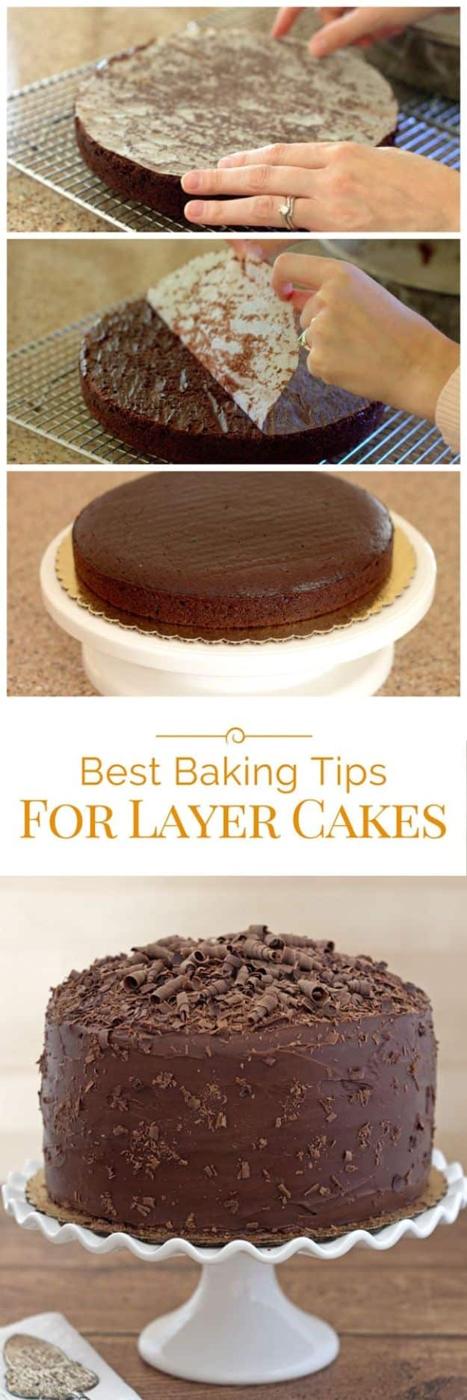
Layer cakes fall apart at four predictable points and Barbara Bakes covers all of them. Spray the pan bottom and sides before the parchment circle goes in. Level the domes with a long serrated knife held flat. Cool on a rack about ten minutes, loosen the edges with a butter knife, then flip and peel the parchment away. Freeze the layers uncovered until solid before wrapping, and they keep two to three weeks. Most frostings go straight onto frozen layers, but buttercream is the exception, because it cracks as the cake thaws and expands.
Get the full tutorial at Barbara Bakes.
11. Toothpick Guide When Writing On A Cake
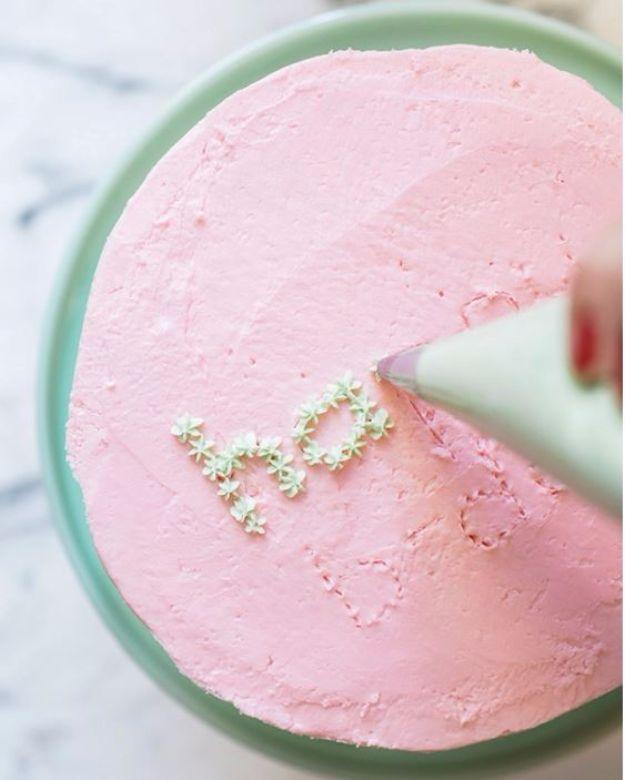
Writing on a cake goes wrong because there is no undo, and this removes that problem entirely. Map the lettering out first by pricking dots into the icing with a toothpick, which shows you the spacing and can be smoothed over and redone as often as you like. Then pipe little dots of icing over the toothpick marks and follow them round until the word is finished. Lauren Conrad’s team pipes two handed, one hand guiding the tip and one squeezing. Any wobble in the outline disappears under the icing dots.
Get the full tutorial at Lauren Conrad.
12. Pie Making Do's And Dont's
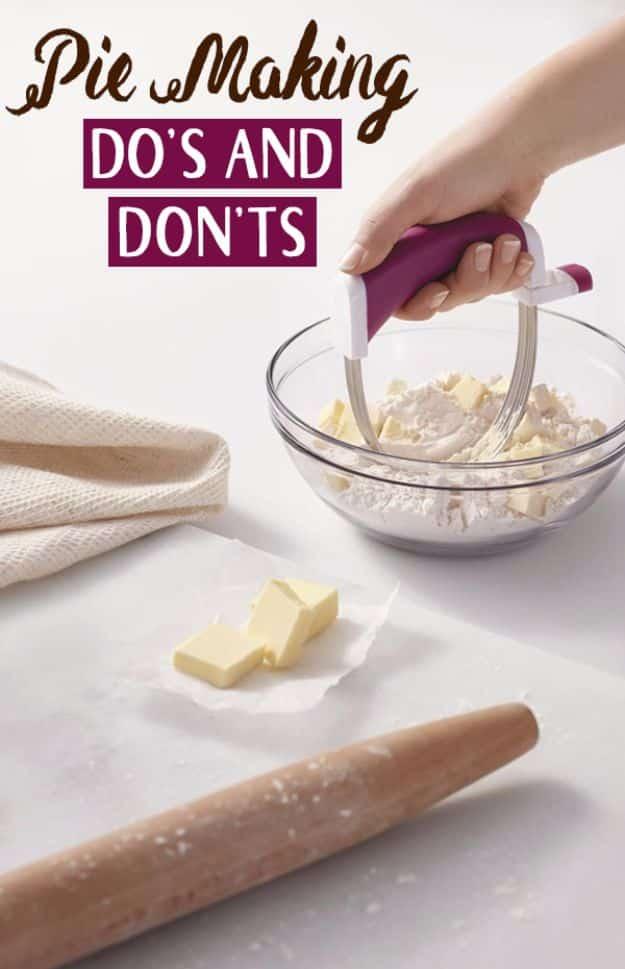
Cubes of cold butter, a bowl of flour and a pastry blender, which is the whole lesson in one picture. Wilton is firm that both fats belong in the fridge until the moment they go in, because the small cold pieces melt as the crust bakes and leave the air pockets that make it flaky. Cut them in with a pastry blender or a fork only until the mixture looks like cornmeal. Then ice water, a tablespoon at a time, until a squeezed handful holds its shape instead of crumbling.
Get the full tutorial at Wilton.
13. Avoid Batter Splatter
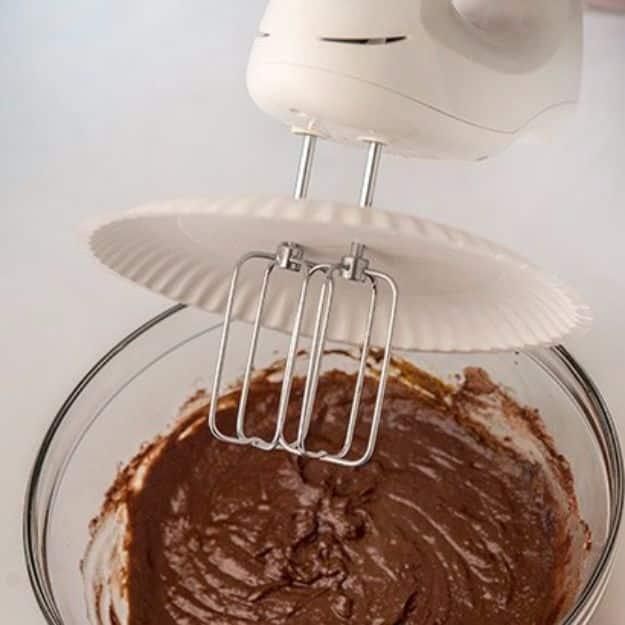
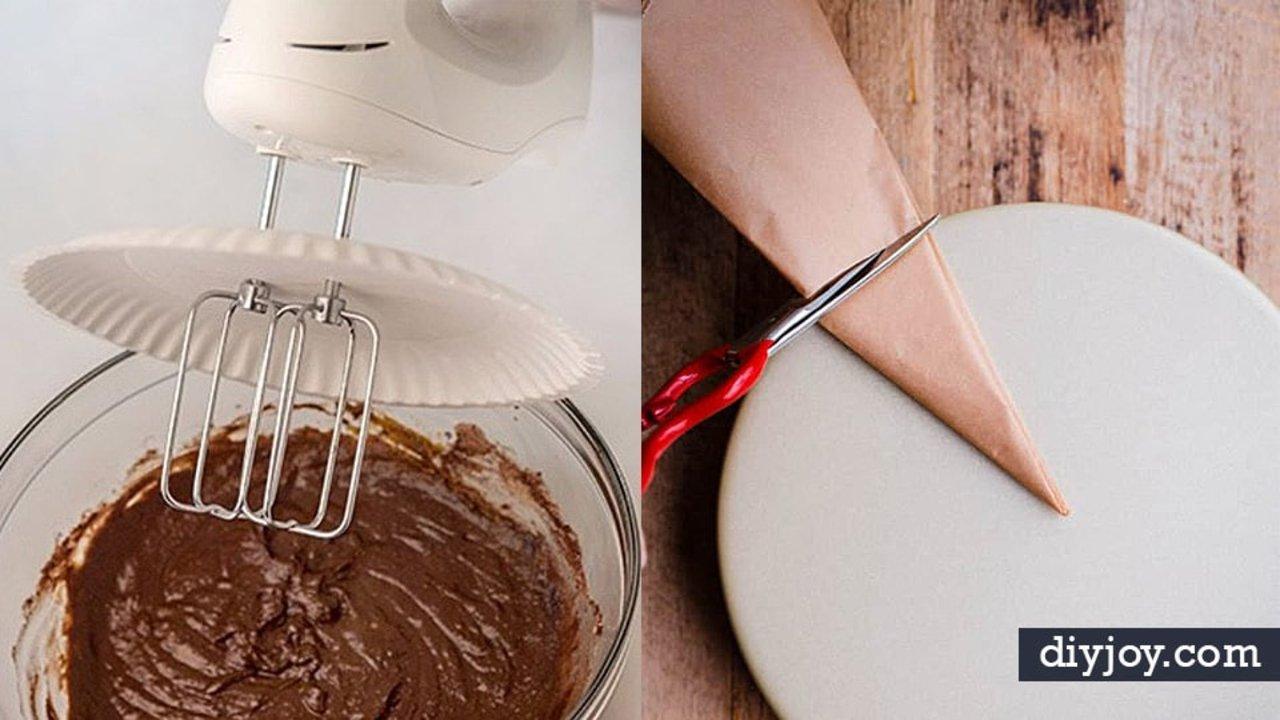
A paper plate becomes a splash guard for a hand mixer, and it takes about four seconds to fit. Poke the ends of the beaters through the middle of the plate before you clip them into the mixer, and the plate sits between the bowl and everything else in the kitchen. It catches the spray that otherwise lands on the tiles, the cupboard doors and whoever is standing nearby, and when the mixing is done the plate goes in the bin with the mess still on it.
Get the full tutorial at Self.
14. Use Unflavored Dental Floss To Cut Cheesecakes
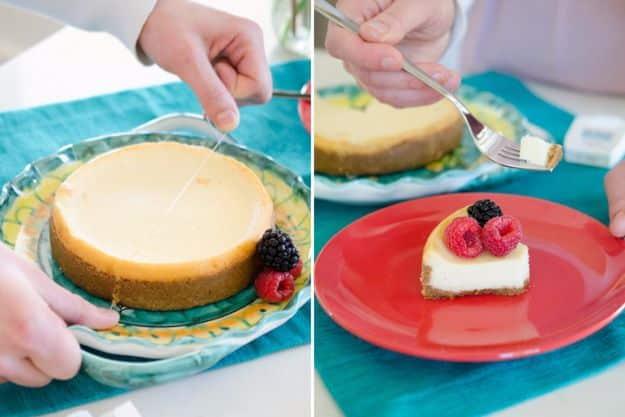
A knife drags cheesecake and layered cake across the cut and leaves a smeared face on every slice. A length of unflavoured dental floss does not. Position it where the slice should be and press it straight down through the cake in one movement, and the surfaces come apart clean. Unflavoured matters, because mint floss will flavour the edge of every piece. It works just as well on soft layer cakes and on anything sticky enough to cling to a blade, and there is no washing up afterwards.
Get the full tutorial at The Krazy Coupon Lady.
15. Tong Crimping
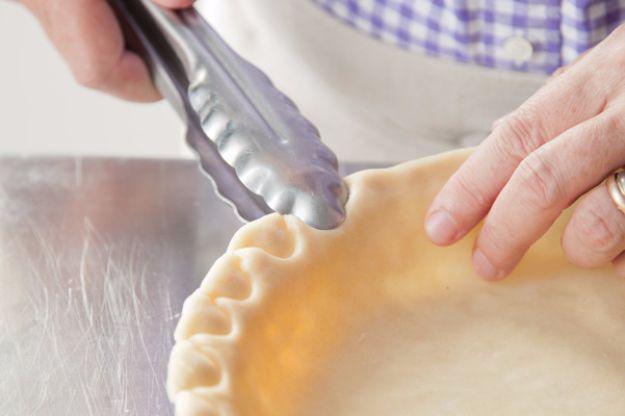
The tip that started this whole collection, and it comes with a size. For a nine inch pie plate Bakepedia rolls the dough to a twelve inch circle an eighth of an inch thick, drapes it over the plate and turns the overhang under to build a thicker rim, then pinches a pattern all the way round with the tip of a pair of tongs. The thicker rim is what gives the tongs something to bite. Every technique on that page needs a well chilled crust, because warm pastry squashes flat.
Get the full tutorial at Bakepedia.
16. Filling An Icing Bag
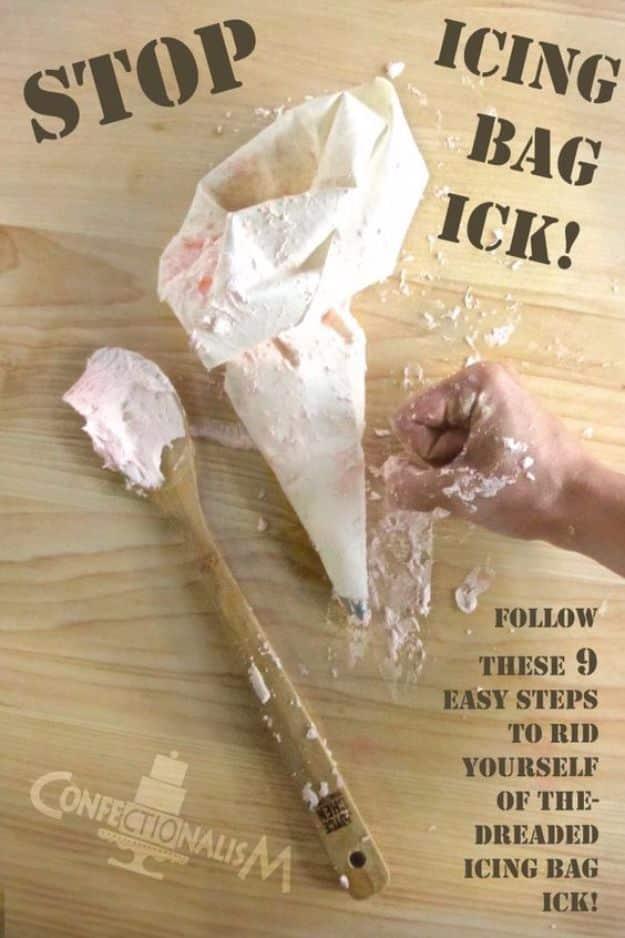
A second take on the same problem as item eight, with two extra steps worth having. Stand the bag in a glass, fold the sides over the rim, spoon the icing in, then lift it free. Now use a bench scraper to push the icing right down to the tip so none leaks back out of the open end, twist the top closed, and squeeze gently over the icing tub until you hear the air pop out. That last one matters, because a trapped bubble releases mid pipe and puts a blob in the middle of a finished cake.
Get the full tutorial at Confectionalism.
17. Become a Pastry Rock Star With This Herringbone Lattice Pie
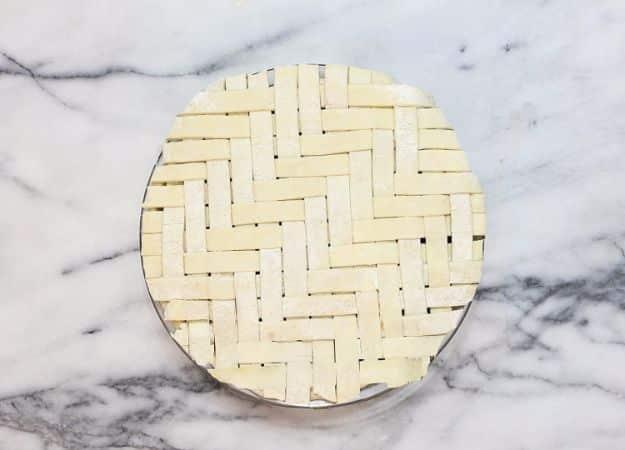
An ordinary over and under lattice is a grid. This one is a herringbone, and the trick is that it is not really woven at all. Serious Eats lays vertical columns of dough across the pie, folds every other column back, drops a horizontal row into the gap and resets the columns over it, so the row looks threaded through. Herringbone runs the same system in multiples of three, offsetting each row in turn. Keep the dough cold, because warm pastry will not hold a pattern this tight.
Get the full tutorial at Serious Eats.
18. Coat Measuring Cups And Spoons With Cooking Spray
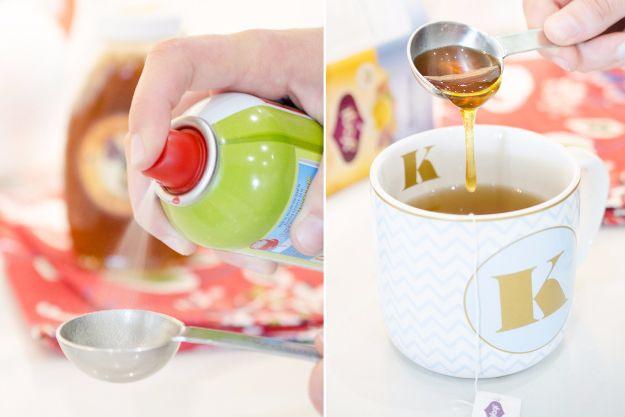
Honey, golden syrup and molasses all cling to a measuring spoon and stay there, which means the recipe gets less than it asked for and the washing up gets worse. A quick shot of nonstick cooking spray in the cup or spoon first puts a barrier between the metal and the sticky ingredient, and the whole measure slides straight out. The Krazy Coupon Lady lists it as one of twenty three hacks, and the picture shows exactly that: a spray going into a measuring spoon, then honey pouring cleanly into a cup of tea.
Get the full tutorial at The Krazy Coupon Lady.
19. Smoothing Ganache
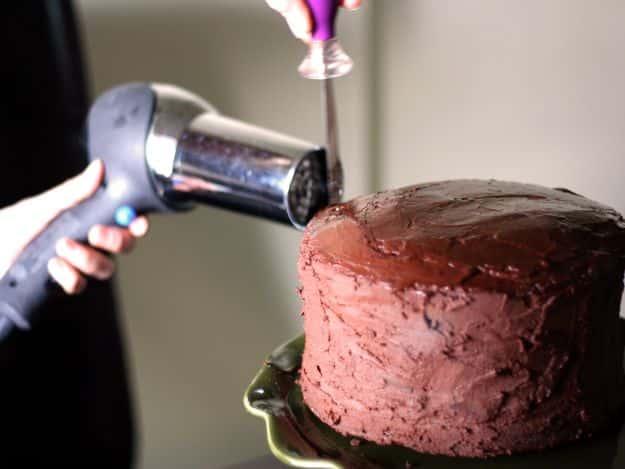
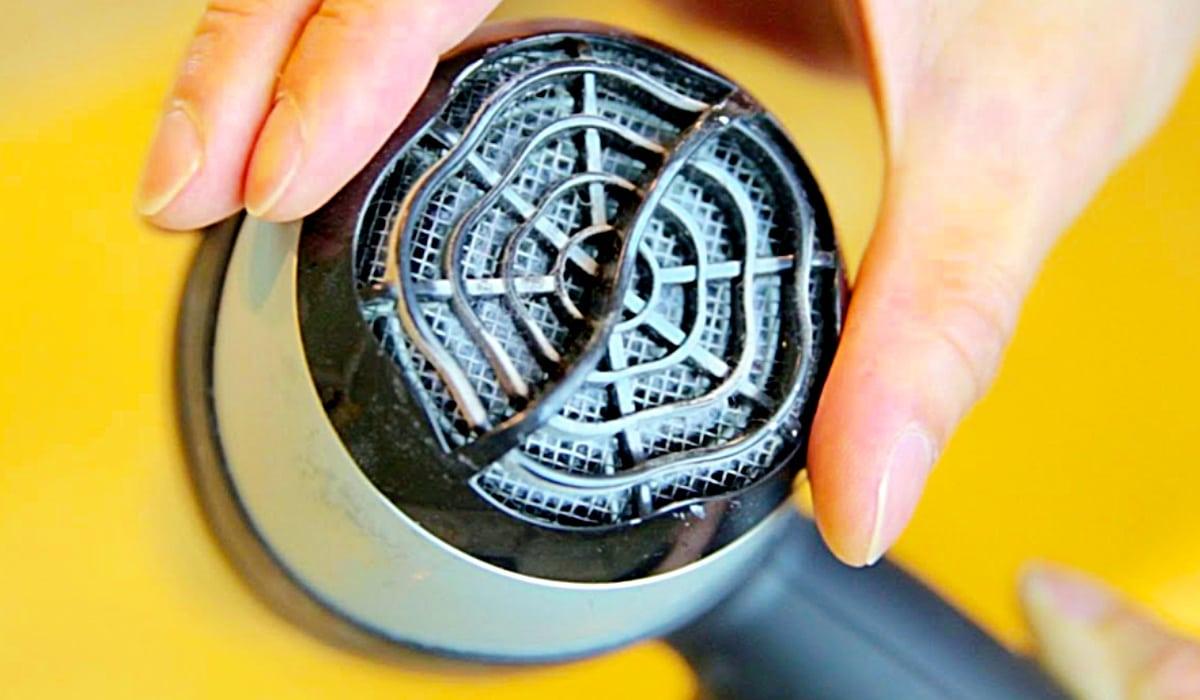
Ganache sets with the spatula marks still in it, and chasing them with a warm palette knife usually makes things worse. A hairdryer does not. This Week for Dinner turns the heat up and the fan speed down, then blow dries the cake while smoothing it with a cake spreader at the same time, so the surface is softening exactly where the tool is working. Doing both at once is the whole tip. Heat alone only melts the ridges into a slump, and the spreader alone drags.
Get the full tutorial at This Week for Dinner.
20. Protect Pie Edges
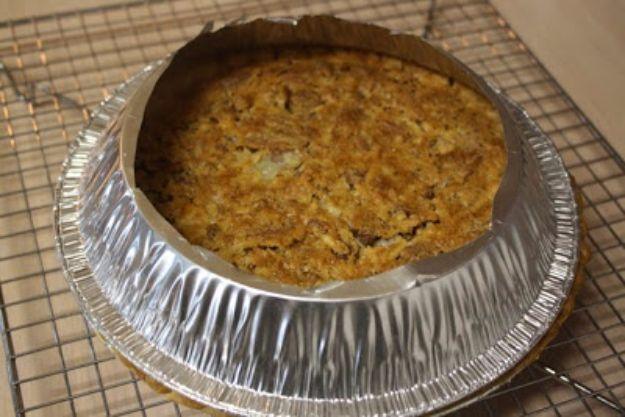
A pie shield made from a disposable foil pie plate, which is better than the foil most people fight with. Mommy’s Kitchen cuts the middle out of a spare aluminium pan and inverts the remaining ring over the pie once the edge is browning. The filling and the top keep baking normally through the hole while only the rim is shaded, and unlike loose foil it sits still instead of blowing about and needing tucked back down every ten minutes. The pans that come free under shop bought crusts are exactly the raw material.
Get the full tutorial at Mommy's Kitchen.
21. Create Edible Cookie Bowls
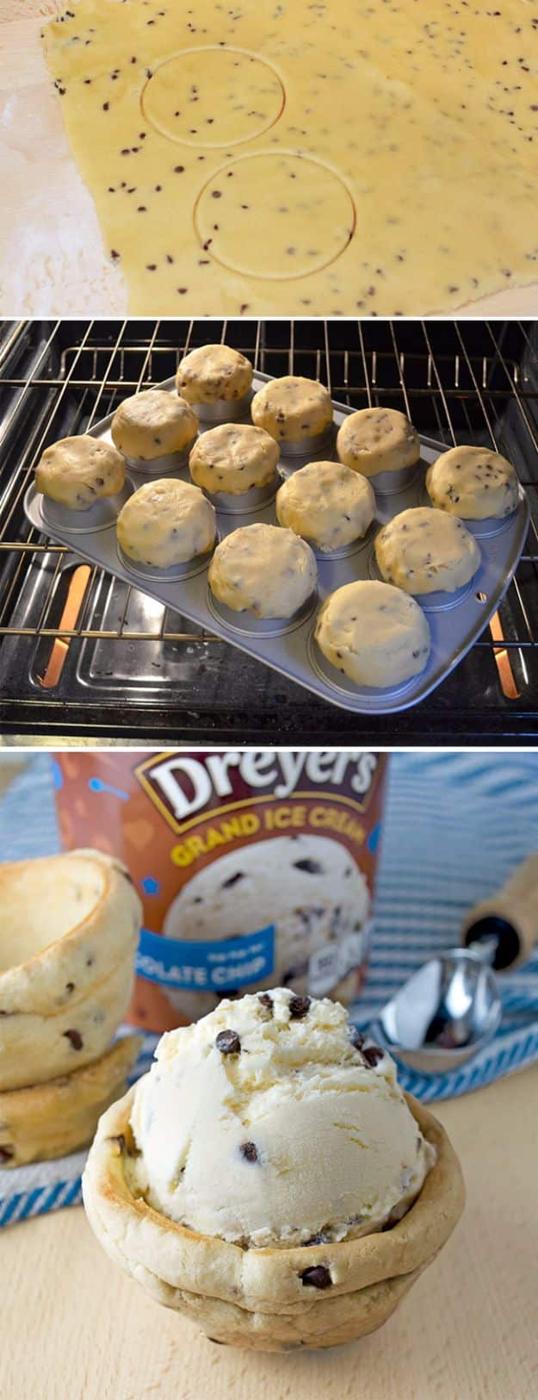
Ice cream served in a bowl you can eat, built on the outside of an upturned muffin tin. Roll part of the cookie dough into small balls and sit one on top of each inverted cup, then wrap a flattened circle of dough around it so the dough takes the shape of the cup. Bake to your own cookie recipe’s instructions and let them cool completely on the tin before lifting them off, because a warm cookie bowl will simply collapse. Any chocolate chip dough works, shop bought or homemade.
Get the full tutorial at Dreyer's.
22. Trick to a Perfect Cookie
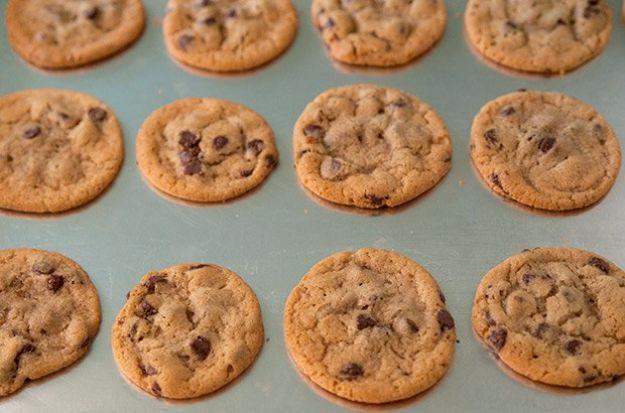
Crisp at the edge and chewy in the middle comes down to two moves, one before baking and one after. Chill the dough for at least an hour and up to overnight, which firms the fat so the cookies spread slowly instead of running flat. Then, the moment the tray comes out of the oven, hold it about a foot above the counter and drop it. Self is not joking about that: the impact knocks the cookies down to the right thickness and helps them settle rather than staying puffed.
Get the full tutorial at Self.
23. Make Frozen Dough Rise Quickly with an Electric Heating Pad
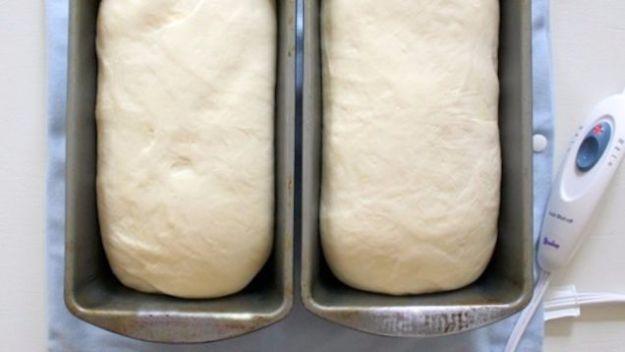
Frozen bread dough takes hours to thaw and rise on a cold counter, and an electric heating pad cuts that right down. Set the dough into its loaf tin, rest the tin on the heating pad, and the gentle steady warmth from underneath gets the yeast working far sooner than a kitchen in February ever will. Lifehacker credits the idea to the blog The Pink Peony of Le Jardin. It is the same principle as a proving drawer, using something already in the house, and it works on any dough that needs coaxing.
Get the full tutorial at Lifehacker.