
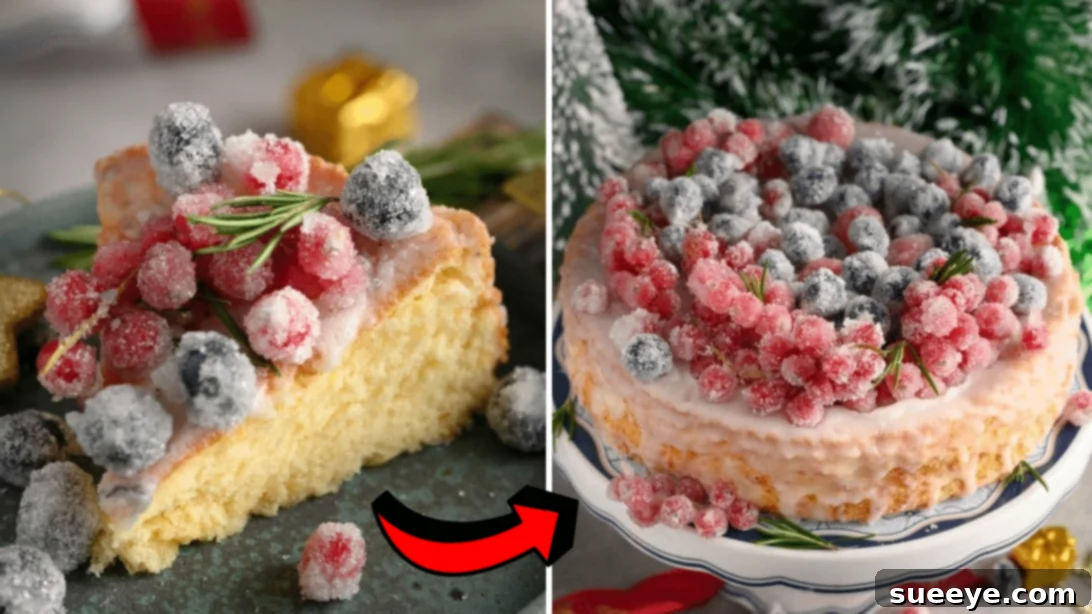
Bake the Perfect Very Berry Christmas Cake: Your Ultimate Holiday Dessert
The holiday season is synonymous with warmth, joy, and, of course, delightful food. As we gather with loved ones to celebrate, the culinary spread often takes center stage, and no Christmas feast is truly complete without a show-stopping dessert. While many traditional holiday treats have their charm, there’s something truly magical about a beautifully crafted cake that captures the spirit of the season. This year, elevate your Christmas table with an exquisite Very Berry Christmas Cake – a recipe that promises not only incredible flavor but also a stunning visual appeal that will leave your guests utterly impressed.
Imagine a light, airy cake adorned with luscious, glistening berries, enveloped in a smooth, sweet icing. It’s a dessert that perfectly embodies festive elegance without being overly complicated. We’ve sourced this fantastic recipe inspiration from the creative minds at Kitchen Fun With My 3 Sons on YouTube, known for their approachable and enjoyable baking ideas. Follow their lead, and you’re guaranteed to receive a chorus of compliments for both the delightful taste and the breathtaking presentation of this Very Berry Christmas Cake.
RELATED: For another classic holiday treat, try our Easy Christmas Fruit Cake Recipe.
This cake isn’t just a dessert; it’s an experience. It brings together the simple joys of home baking with the sophisticated touch of festive embellishment. Whether you’re a seasoned baker or just starting your holiday culinary adventures, this recipe is designed to guide you through each step, ensuring a successful and delicious outcome. Let’s dive into the ingredients and preparation for what will surely become a new holiday tradition in your home.
Essential Ingredients for Your Very Berry Christmas Cake
Crafting a cake that is both light and flavorful requires precise measurements and quality ingredients. This recipe is divided into three main components: the cake itself, the simple yet delicious icing, and the sparkling sugar-coated berries that truly make it a “very berry” masterpiece. Gather your ingredients, and let’s get ready to bake!
For the Light and Fluffy Cake Base:
- 6 large eggs, separated (ensure they are cold for easier separation)
- ¾ cup of cake flour (sifted for optimal lightness)
- 1 tsp of baking powder (for perfect rise)
- ⅛ tsp of salt (to balance the sweetness and enhance flavor)
- ¾ cup of granulated white sugar, divided (for both yolks and meringue)
- ½ tsp of cream of tartar (the secret to stable, voluminous meringue)
- 2 tsp of vanilla extract (for that essential warm, inviting flavor)
- 2 tbsp of water (adds moisture and helps the batter come together)
For the Smooth and Sweet Icing:
- 1 cup of powdered sugar (also known as confectioners’ sugar, sifted)
- ¼ cup of heavy cream (or milk, for desired consistency)
For the Dazzling Sugar-Coated Berries:
- 2 cups of fresh berries (a mix of cranberries, raspberries, and blueberries works beautifully)
- 1 egg white (for creating the sugary crust on the berries)
- 1 cup of granulated white sugar (for coating the berries)
Step-by-Step Guide to Baking Your Very Berry Christmas Cake
Making this festive cake is a delightful process, broken down into manageable steps. Pay attention to the details, and you’ll achieve a cake that looks and tastes like it came from a professional bakery. Remember, patience is key, especially when dealing with delicate components like egg whites and cooling cakes.
Step 1: Preparing the Dry Ingredients and Egg Yolks
Begin by preheating your oven to 350°F (175°C). This ensures the oven is at the correct temperature when your batter is ready, crucial for an even bake. In a large mixing bowl, combine your cake flour, baking powder, and salt. Use a whisk to thoroughly mix these dry ingredients until they are uniformly distributed. This step prevents lumps and ensures the leavening agent is evenly spread. Next, separate your eggs while they are still cold; this makes the yolks less likely to break. Place the egg yolks in a separate large bowl. Add ¼ cup of the granulated sugar to the yolks and beat them over high speed. Continue beating until the mixture thickens and achieves a pale yellow color, resembling a light custard. This aeration process is vital for the cake’s tender crumb.
Step 2: Crafting the Meringue and Combining Wet Ingredients
To the beaten egg yolks, incorporate the vanilla extract and water. Stir these ingredients gently until they are well combined. Set this mixture aside. Now, for the meringue: in the impeccably clean bowl of a stand mixer (any grease can prevent the whites from whipping), add the egg whites and cream of tartar. Cream of tartar is an acidic salt that helps stabilize the egg whites, allowing them to hold more air and create a more robust meringue. Whip the egg whites over medium speed for approximately 1 minute, until they become foamy. Then, gradually add the remaining granulated sugar, a tablespoon at a time, while continuously whipping. Increase the speed to medium-high and continue whipping until the meringue is shiny and forms stiff peaks. When you lift the whisk, the peaks should hold their shape firmly without drooping. This step is critical for the cake’s airy texture.
Step 3: Gently Folding the Batter and Baking
The art of folding is essential for this chiffon-style cake. First, gently fold about ⅓ of the prepared flour mixture into the egg yolk mixture. This lightens the yolk mixture, making it easier to incorporate into the delicate meringue. Then, carefully add the egg yolk mixture and the remaining flour into the stiff egg whites. Using a large spatula, fold them together just until incorporated. Be extremely careful not to overmix, as this will deflate the egg whites and result in a dense cake. The goal is to retain as much air as possible. Once combined, transfer the batter to your prepared baking pan (lightly greased and floured or lined with parchment paper, depending on your preference for chiffon). Spread the batter out smoothly and place it in your preheated oven. Bake for approximately 30 to 32 minutes, or until a toothpick inserted into the center of the cake comes out completely clean. An overbaked cake will be dry, while an underbaked one will collapse.
Step 4: Cooling the Cake and Preparing the Icing
Once baked, remove the cake from the oven and allow it to cool completely in the pan before attempting to remove it. Cooling is paramount; a warm cake will crumble or melt your icing. While the cake is cooling, prepare your simple yet elegant icing. In a medium bowl, whisk together the powdered sugar and heavy cream until the mixture is smooth and free of lumps. You can adjust the consistency by adding a tiny bit more cream for a thinner glaze or more powdered sugar for a thicker one. Once the cake is fully cooled, carefully invert it onto a serving platter or wire rack. Pour the prepared icing over the cooled cake, allowing it to drip attractively down the sides. Let the iced cake sit for about 40 to 60 minutes, allowing the icing to set slightly and absorb into the cake, creating a delicious moist layer.
Step 5: Creating Sugar-Coated Berries and Final Assembly
Now for the sparkling touch! In a small, clean bowl, whisk the remaining egg white until it’s no longer stringy but still liquid. This creates a thin, adhesive layer for the sugar. Dip your fresh berries (cranberries, raspberries, or a mix works wonderfully) into the whisked egg white, ensuring they are lightly coated. Then, roll or toss them gently in a bowl of granulated white sugar until they are beautifully coated. Transfer these glistening berries to a baking sheet lined with parchment paper. Allow them to dry for approximately 25 to 30 minutes at room temperature. This drying time ensures the sugar coating hardens and stays crisp. Once dry, artfully arrange these sparkling berries on top of your iced cake. Your magnificent Very Berry Christmas Cake is now ready to be served and enjoyed! The combination of the light cake, sweet icing, and tart, sugary berries is simply irresistible.
Tips for a Flawless Very Berry Christmas Cake
Achieving bakery-quality results at home is easier than you think with a few expert tips:
- Room Temperature Ingredients: While eggs are easier to separate cold, allowing the separated yolks and whites to come to room temperature before beating can result in more volume and a smoother batter.
- Accurate Measurements: Baking is a science. Use kitchen scales for dry ingredients where possible, and level off your measuring cups precisely.
- Don’t Overmix: This is crucial for a light cake. Overmixing develops gluten, leading to a tough, dense texture. Fold gently until just combined.
- Clean Bowl for Meringue: Ensure your mixing bowl and whisk attachments are completely free of any grease or oil when whipping egg whites. Even a tiny speck can prevent them from reaching stiff peaks.
- Cool Completely: Resist the urge to rush the cooling process. A fully cooled cake is easier to handle, less prone to breaking, and prevents the icing from melting.
- Fresh Berries: For the best visual appeal and flavor, use fresh, firm berries for coating. Frozen berries will release too much water when thawing.
- Adjust Icing Consistency: Depending on humidity and your preference, you might need to adjust the amount of heavy cream in the icing slightly to achieve the perfect pourable yet thick consistency.
Variations and Serving Suggestions
While this cake is perfect as is, you can always customize it to your taste or for different occasions:
- Citrus Zest: Add a teaspoon of lemon or orange zest to the cake batter or the icing for a bright, refreshing flavor note that pairs beautifully with berries.
- Spiced Cake: For a more traditional Christmas feel, incorporate a pinch of cinnamon, nutmeg, or mixed spice into the cake flour mixture.
- Different Icing: Instead of a simple powdered sugar glaze, consider a cream cheese frosting for a tangy contrast or a light whipped cream frosting for an even lighter feel.
- Garnish Galore: Beyond the sugared berries, you can add a sprig of fresh mint, a dusting of powdered sugar over the berries, or even some edible glitter for extra holiday sparkle.
- Alongside Beverages: Serve slices of this cake with a warm cup of coffee, a comforting hot chocolate, or a festive mulled wine for an ultimate holiday treat.
- With Ice Cream: A small scoop of vanilla bean ice cream or a tart berry sorbet can beautifully complement the cake.
Storing Your Very Berry Christmas Cake
To keep your beautiful Very Berry Christmas Cake fresh and delicious:
- Airtight Container: Store any leftover cake in an airtight container at room temperature for up to 2-3 days. If your kitchen is particularly warm, or if your icing contains fresh dairy (like cream cheese frosting), refrigeration is best.
- Refrigeration: If refrigerated, the cake will stay fresh for up to 5 days. Be sure to bring it to room temperature for about 30 minutes before serving to ensure the best texture and flavor.
- Freezing: You can freeze unfrosted cake layers wrapped tightly in plastic wrap and then foil for up to 2-3 months. Thaw in the refrigerator overnight before frosting and decorating. Frosted cake can also be frozen, though the icing and berries might lose some of their original texture upon thawing.
This Very Berry Christmas Cake is more than just a recipe; it’s an invitation to create lasting memories in your kitchen and at your holiday table. Its vibrant colors and delightful flavors truly capture the essence of Christmas. We encourage you to try this recipe and make it a cherished part of your holiday traditions for years to come. Enjoy the baking process, and savor every delicious bite!
*All image credit belongs to Kitchen Fun With My 3 Sons via YouTube. Follow and subscribe to their channel for more inspiring and delicious recipes!