
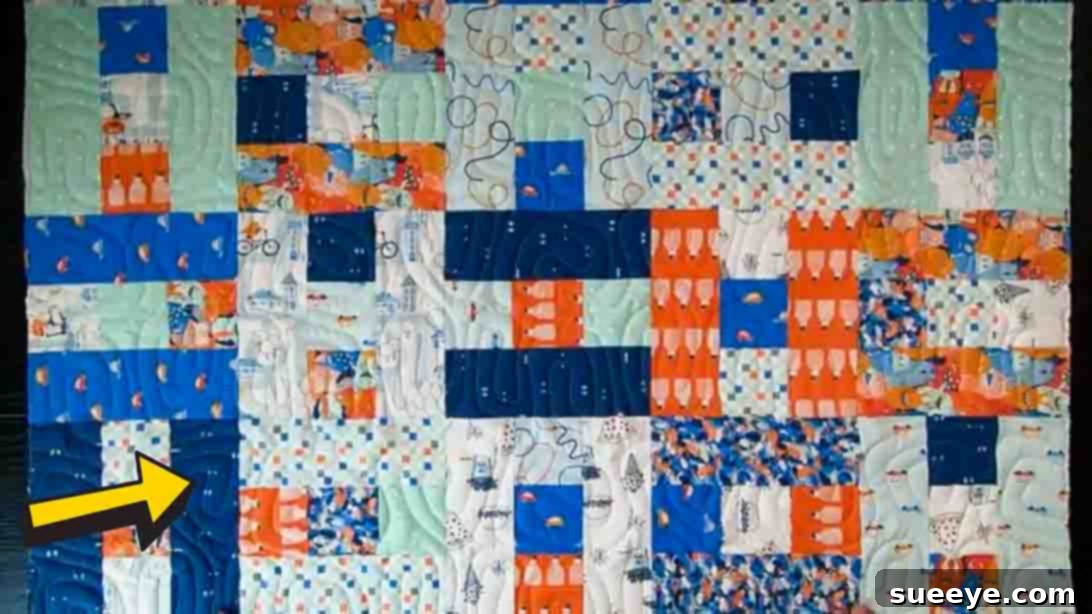
Embarking on your first quilting journey can be an incredibly rewarding experience, offering a unique blend of creativity, patience, and the satisfaction of crafting something beautiful with your own hands. For those new to the art of quilting, selecting a simple, beginner-friendly pattern is absolutely essential. It’s the foundational step to building confidence, mastering basic techniques, and ultimately, ensuring a positive introduction to this wonderful craft. Among the myriad of patterns available, the Block Tower Quilt stands out as an exemplary choice, particularly this delightful design from Moonkin Stitchery on YouTube. This quilt project strikes a perfect balance between simplicity and striking visual appeal, making it an ideal first endeavor for anyone eager to complete a whole quilt from start to finish. Its straightforward construction is designed to guide you smoothly through the process, transforming what might seem daunting into an accessible and enjoyable creative pursuit.
RELATED: Easy Sawtooth 16-Patch Block Quilt Tutorial
The Block Tower Quilt is celebrated for its distinctive stacked block design, which masterfully creates a captivating geometric effect. This pattern manages to feel both refreshingly modern and timelessly classic, making it a versatile addition to any home decor. Its inherent repetitive nature is a significant advantage for beginners; by repeating the same steps, you solidify your understanding of essential techniques like cutting, piecing, and pressing, without being overwhelmed by complex instructions. Beyond its structural simplicity, this quilt offers an expansive canvas for personal expression. Fabric selection and color placement become powerful tools, allowing you to infuse your unique style and aesthetic preferences into every stitch. Whether your goal is to create a cozy throw to drape over a sofa, a snuggly baby quilt for a new arrival, or a heartfelt handmade gift for a loved one, the Block Tower Quilt provides the perfect framework to bring your vision to life. It’s more than just a quilt; it’s a tangible representation of your newfound skill and creative spirit.
Why the Block Tower Quilt is Perfect for Beginners
The quilting world can sometimes feel overwhelming with its vast array of patterns and techniques. However, the Block Tower Quilt simplifies the process, making it an excellent starting point. Here’s why:
- Simple Cuts: The pattern relies on basic rectangular and square cuts, minimizing complex angles or tricky measurements. This allows beginners to focus on mastering rotary cutting accuracy.
- Repetitive Piecing: The core block is constructed using a repetitive sequence of sewing. This repetition builds muscle memory and confidence in using your sewing machine for consistent seam allowances.
- Visual Impact with Ease: Despite its simple construction, the rotating block layout creates a sophisticated optical illusion, making the finished quilt look much more complex than it actually is. This provides a huge sense of accomplishment for new quilters.
- Layer Cake Friendly: Starting with a layer cake (pre-cut 10-inch squares) eliminates the need for extensive fabric cutting, allowing you to jump straight into piecing and color play.
- Skill Building Foundation: This project teaches fundamental quilting skills that are transferable to almost any other quilt pattern, including accurate cutting, consistent seam allowances, precise pressing, and block assembly.
Essential Materials for Your Block Tower Quilt
Having the right tools is half the battle when it comes to any craft, and quilting is no exception. For your Block Tower Quilt, you’ll need a few key items to ensure precision and ease in your crafting process. Let’s delve into why each material is essential:
- Layer Cake: This is a quilter’s best friend, especially for beginners! A layer cake consists of 42 pre-cut 10-inch by 10-inch fabric squares, typically from a single fabric collection. This ensures a coordinated color palette and print variety, saving you valuable time on initial fabric cutting and decision-making. For a quilt of this size, one layer cake is usually sufficient, offering a delightful mix of prints to create visual interest.
- Rotary Cutter: A rotary cutter is a game-changer for quilters, offering unparalleled speed and precision compared to scissors. It allows you to cut multiple layers of fabric cleanly and accurately. Invest in a good quality cutter with a sharp blade (45mm or 60mm are common sizes). Always use it with caution and keep fingers clear of the blade path.
- Cutting Mat: An indispensable companion to your rotary cutter. A self-healing cutting mat protects your work surface and prolongs the life of your rotary blades. Choose a mat large enough to comfortably accommodate your fabric pieces (a 24″ x 36″ mat is a popular and versatile size).
- Quilting Rulers: Clear acrylic rulers are crucial for precise measurements and straight cuts. You’ll primarily need a large rectangular ruler (e.g., 6″ x 24″ or 8.5″ x 24″) for cutting long strips and smaller square rulers (e.g., 6.5″ x 6.5″ or 12.5″ x 12.5″) for squaring up blocks. Ensure your rulers have clear markings for accurate measuring.
- Iron, for Pressing: A good iron is not just for wrinkles; it’s vital for achieving flat, precise seams in quilting. Proper pressing is as important as accurate sewing. It sets your stitches and ensures your blocks lie flat, which is critical for smooth quilt assembly. A steam iron is often preferred for its ability to relax fabric fibers.
- Sewing Machine (with a 1/4-inch foot): While not explicitly listed, a sewing machine is fundamental. A 1/4-inch presser foot is highly recommended as it helps maintain a consistent seam allowance, a cornerstone of successful quilting.
- Matching Thread: Choose a high-quality 100% cotton thread that matches or blends with your fabrics.
- Pins or Fabric Clips: For holding fabric pieces together before sewing, ensuring they don’t shift.
- Seam Ripper: Every quilter needs one! Mistakes happen, and a seam ripper allows you to undo stitches cleanly without damaging your fabric.
Step-by-Step Directions: Crafting Your Block Tower Quilt
Now that you have your materials ready, let’s dive into the creative process of constructing your beautiful Block Tower Quilt. Remember, precision in cutting and pressing will make a significant difference in your finished product.
Step 1: Precise Cutting and Initial Assembly of Quilt Blocks
This is where your layer cake squares begin their transformation. Take each 10-inch layer cake square and carefully make your cuts. From each 10-inch square, you will need to cut:
- Two (2) rectangles measuring 3 1/4 inches by 8 3/4 inches.
- Three (3) squares measuring 3 1/4 inches by 3 1/4 inches.
Utilize your rotary cutter and quilting rulers for these cuts, ensuring they are as accurate as possible. Precision here translates directly to a neatly pieced quilt block. Once all your squares and rectangles are cut from your layer cakes, the fun of arrangement begins. Lay out your pieces, rotating the smaller 3 1/4″ squares around to create an appealing mix of prints and colors. The larger 3 1/4″ x 8 3/4″ rectangles, which will form the “sides” of your tower, should ideally remain in the same print or a coordinating solid to maintain the structural integrity of the block’s design. This thoughtful arrangement allows for visual variety while still defining the unique tower shape. After you’re satisfied with your layout, it’s time to sew! First, sew the three 3 1/4-inch squares together to form a central row. Use a consistent 1/4-inch seam allowance. Press your seams carefully – you can press them open or to one side, but consistency is key. Then, attach the two 3 1/4″ x 8 3/4″ rectangles to the sides of this central square row, completing your first quilt block. Again, maintain that precise 1/4-inch seam allowance and press diligently after each seam.
Step 2: Assembling the Quilt Top – From Blocks to a Beautiful Layout
Upon completing Step 1, you will have successfully created a single 8 3/4-inch square quilt block. This block is the fundamental unit of your Block Tower Quilt. Now, the process becomes wonderfully repetitive and satisfying. Repeat the cutting and piecing steps outlined in Step 1 until you have a total of 42 individual quilt blocks. This number is typically perfect for creating a lap-sized quilt, but you can adjust it to make your quilt larger or smaller by making more or fewer blocks. As you create each block, ensure they all measure consistently at 8 3/4 inches square. Any slight variations can be trimmed down (“squared up”) using your large square quilting ruler before proceeding.
Once you have all 42 blocks ready, the magic of the Block Tower design truly comes to life in the layout phase. Arrange your blocks side by side on a large flat surface – a design wall, the floor, or a large table works perfectly. For this specific pattern, you will create a grid of 6 blocks across and 7 blocks down, forming a 6 x 7 block layout. The key to achieving the distinctive “tower” effect is to rotate every other block 90 degrees. This rotation is what creates the visual illusion of stacked towers or steps, giving the quilt its dynamic and engaging appearance. Take your time during this layout stage, stepping back frequently to view the arrangement from a distance. Experiment with different rotations and color placements until you are delighted with the overall design. Once satisfied, carefully sew the blocks together to form rows, maintaining your consistent 1/4-inch seam allowance. Press the seams within each row, often alternating the direction of the seam allowance for adjacent rows (e.g., press seams to the right in row 1, to the left in row 2) to allow for “nesting” when joining rows. Finally, sew these completed rows together, matching your seams as precisely as possible, to complete the magnificent quilt top. This careful attention to detail will result in a beautifully flat and cohesive quilt top.
Beyond the Quilt Top: Completing Your Masterpiece
Congratulations! You’ve successfully pieced together your Block Tower Quilt top, a significant accomplishment for any quilter, especially a beginner. However, a quilt top is just the beginning. To transform it into a functional and cozy quilt, you need to add three more layers: batting, backing, and binding. This process is often referred to as “sandwiching” and “finishing” your quilt.
Batting: The Heart of Your Quilt
The batting is the middle layer that provides warmth, loft, and that characteristic “quilted” texture. Batting comes in various materials (cotton, polyester, wool, bamboo blends) and lofts (thicknesses). For a beginner, a mid-loft 100% cotton batting is an excellent choice as it’s easy to work with and drapes beautifully. Cut your batting a few inches larger than your quilt top on all sides.
Backing: The Underside Beauty
The backing fabric is the layer that sits against the batting, making up the bottom of your quilt. This is another opportunity to express your style. You can use a single wide-back fabric (typically 108 inches wide) or piece together standard quilting cottons to achieve the desired size. Just like the batting, cut your backing fabric a few inches larger than your quilt top on all sides.
Basting: Holding it All Together
Basting is the crucial step of temporarily securing the three layers (backing, batting, and quilt top) together so they don’t shift during the quilting process. There are several methods:
- Pin Basting: Using special curved safety pins to secure the layers every few inches.
- Spray Basting: Using a temporary fabric adhesive spray to glue the layers together.
- Thread Basting: Hand-stitching long, loose stitches to hold the layers.
Choose the method you find most comfortable and efficient. Ensure your layers are smooth and free of wrinkles before basting.
Quilting: Adding Texture and Durability
Quilting is the process of stitching through all three layers to secure them permanently and add decorative texture. As a beginner, you might opt for simple, straightforward methods:
- Straight-Line Quilting: Using your sewing machine to stitch parallel lines, either horizontally, vertically, or diagonally across the quilt. A walking foot attachment can be very helpful here.
- Stitching in the Ditch: Sewing directly into the “ditches” (the valleys where seams meet) of your pieced blocks. This method is discreet and helps define the piecing.
Start with simple designs and gradually challenge yourself as your confidence grows. The goal is to keep the layers from shifting and to add a pleasing texture.
Binding: The Finishing Touch
The binding is the fabric strip that encases the raw edges of your quilt, providing a clean, durable, and decorative finish. Typically, binding strips are cut 2.5 inches wide, joined together to create one long strip, pressed in half lengthwise, and then machine-stitched to the front of the quilt before being hand-stitched or machine-stitched to the back. This step not only protects the edges from fraying but also frames your beautiful quilt top.
Essential Tips for Quilting Success
As you work through your Block Tower Quilt, keep these tips in mind to enhance your experience and the quality of your finished project:
- Read Through All Instructions: Before making your first cut, read the entire tutorial from beginning to end. This helps you understand the flow of the project and anticipate upcoming steps.
- Accurate Seam Allowance: A consistent 1/4-inch seam allowance is paramount in quilting. Practice on scraps to ensure your machine’s setting and your eye are calibrated correctly. Even a slight variation can lead to misaligned blocks.
- Pressing is Your Friend: Don’t underestimate the power of a good press. Pressing after each seam helps your blocks lie flat and square, leading to much easier assembly of the quilt top.
- Square Up Your Blocks: After piecing each block, use your square ruler to trim it to the exact specified dimension (8 3/4 inches in this case). This ensures all blocks are uniform and fit together perfectly.
- Chain Piecing: To save time, especially when sewing many identical units, try chain piecing. Sew one seam, feed the next unit under the needle without cutting the thread, and continue. This saves thread and time.
- Take Breaks: Quilting can be intense, especially for beginners. If you feel frustrated or tired, step away for a bit. Fresh eyes can often spot errors or solutions more easily.
- Embrace Imperfection: Your first quilt doesn’t have to be perfect. Every stitch is a learning experience. Embrace any minor imperfections as character and proof of your handmade effort.
- Watch Tutorials: Visual learners will benefit immensely from watching video tutorials. Moonkin Stitchery’s original video is a great resource, and there are countless others covering basic techniques like rotary cutting, pressing, and seam allowance.
Customization Ideas for Your Block Tower Quilt
While the basic Block Tower Quilt pattern is fantastic, there’s always room to personalize and expand on your design. Here are a few ideas to make your quilt truly unique:
- Size Adjustments: To make a larger quilt, simply create more blocks and adjust your grid layout (e.g., 8×9 blocks). For a smaller project like a table runner or placemats, make fewer blocks or adjust the initial cutting dimensions proportionally.
- Color Palette Variations: Experiment with different color schemes. Use high-contrast fabrics for a dramatic look, or subtle variations of a single color family for a more serene feel. Consider a rainbow theme, seasonal colors, or even a scrappy look using fabric scraps from your stash.
- Sashing and Borders: Add sashing (strips of fabric between blocks or rows) to give your blocks breathing room and define the pattern. A simple border around the entire quilt top can also add visual weight and an opportunity for another coordinating fabric.
- Alternating Blocks: Instead of rotating every other block by 90 degrees, try rotating every block 180 degrees, or create a completely random rotation for a more dynamic, chaotic tower effect.
- Experiment with Prints: Play with different scales of prints. Combine large florals with tiny geometrics, or solids with bold patterns to create new visual interest within each tower block.
Your Journey to a Beautiful Block Tower Quilt
The Block Tower Quilt is more than just a beginner-friendly project; it’s a gateway to the fulfilling world of quilting. By following these detailed steps and embracing the learning process, you will not only create a stunning and functional quilt but also gain invaluable skills and confidence. This quilt, with its deceptively simple construction and striking visual appeal, will serve as a proud testament to your creativity and perseverance. So, gather your materials, set up your sewing space, and prepare to embark on a truly rewarding creative adventure. Happy quilting!